ECU CHEVROLET MALIBU 2009 7.G Owner's Guide
[x] Cancel search | Manufacturer: CHEVROLET, Model Year: 2009, Model line: MALIBU, Model: CHEVROLET MALIBU 2009 7.GPages: 420, PDF Size: 2.27 MB
Page 90 of 420
Rear Door Security Locks
The vehicle has rear door security locks to prevent
passengers from opening the rear doors from the inside.
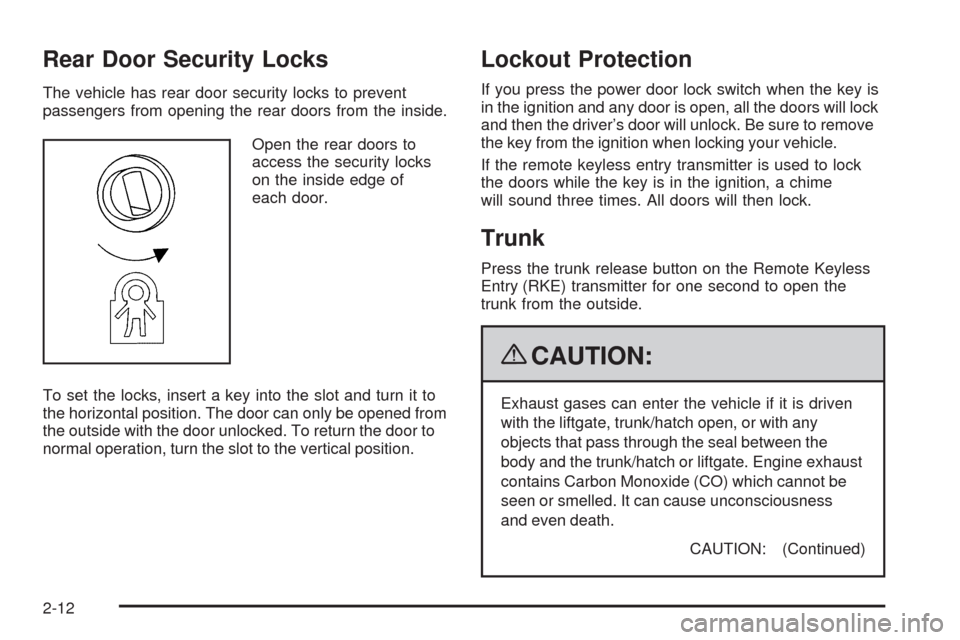
Open the rear doors to
access the security locks
on the inside edge of
each door.
To set the locks, insert a key into the slot and turn it to
the horizontal position. The door can only be opened from
the outside with the door unlocked. To return the door to
normal operation, turn the slot to the vertical position.
Lockout Protection
If you press the power door lock switch when the key is
in the ignition and any door is open, all the doors will lock
and then the driver’s door will unlock. Be sure to remove
the key from the ignition when locking your vehicle.
If the remote keyless entry transmitter is used to lock
the doors while the key is in the ignition, a chime
will sound three times. All doors will then lock.
Trunk
Press the trunk release button on the Remote Keyless
Entry (RKE) transmitter for one second to open the
trunk from the outside.
{CAUTION:
Exhaust gases can enter the vehicle if it is driven
with the liftgate, trunk/hatch open, or with any
objects that pass through the seal between the
body and the trunk/hatch or liftgate. Engine exhaust
contains Carbon Monoxide (CO) which cannot be
seen or smelled. It can cause unconsciousness
and even death.
CAUTION: (Continued)
2-12
Page 92 of 420
Trunk Assist Handle
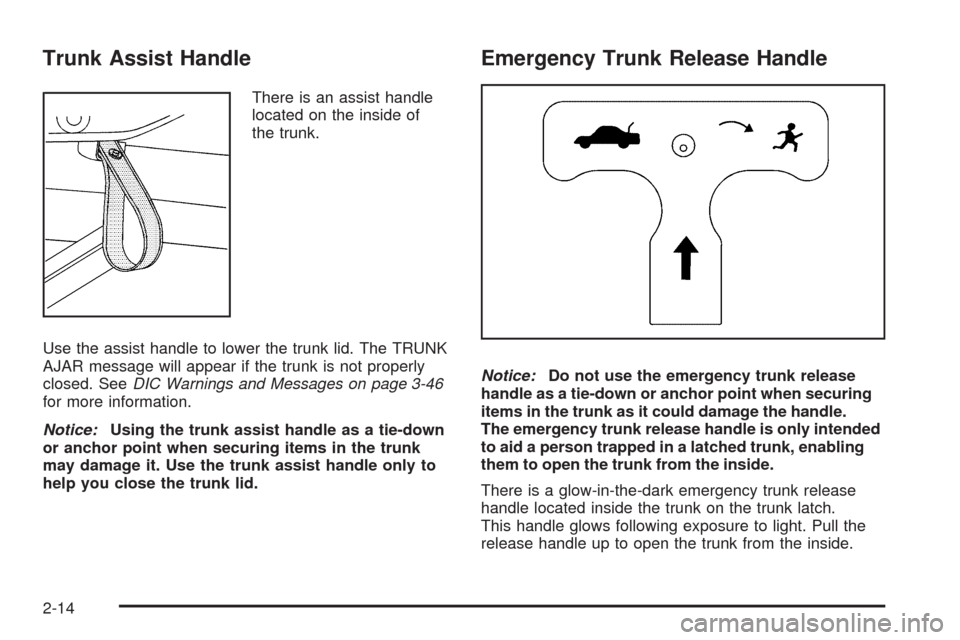
There is an assist handle
located on the inside of
the trunk.
Use the assist handle to lower the trunk lid. The TRUNK
AJAR message will appear if the trunk is not properly
closed. SeeDIC Warnings and Messages on page 3-46
for more information.
Notice:Using the trunk assist handle as a tie-down
or anchor point when securing items in the trunk
may damage it. Use the trunk assist handle only to
help you close the trunk lid.
Emergency Trunk Release Handle
Notice:Do not use the emergency trunk release
handle as a tie-down or anchor point when securing
items in the trunk as it could damage the handle.
The emergency trunk release handle is only intended
to aid a person trapped in a latched trunk, enabling
them to open the trunk from the inside.
There is a glow-in-the-dark emergency trunk release
handle located inside the trunk on the trunk latch.
This handle glows following exposure to light. Pull the
release handle up to open the trunk from the inside.
2-14
Page 96 of 420
Theft-Deterrent Systems
Vehicle theft is big business, especially in some cities.
This vehicle has theft-deterrent features, however,
they do not make it impossible to steal.
Content Theft-Deterrent
Your vehicle may have a
content theft-deterrent
alarm system.
Arming the System
With the ignition off, press the Remote Keyless
Entry (RKE) transmitter lock button to arm the system.
The system will arm 30 seconds after all the doors
are closed, or 60 seconds with any door open.
If you press the lock button on the transmitter a second
time while all the doors are closed, the system will arm
immediately. The system will still arm in 60 seconds if a
door is open. When the open door is closed, the system
will arm.The security light, located on the instrument panel
cluster, comes on to indicate that arming has been
initiated. Once the system is armed, the security light
ashes once every three seconds.
If the security light is ashing twice per second, this
means that a door is open.
If the system is armed and the key is used to unlock the
vehicle, the alarm will be activated.
If you do not want to arm the content theft system,
lock the vehicle with the manual lock knob on the doors
or with the inside power door lock switches.
The alarm will sound and the exterior lights will ash if
any door is opened while armed.
Disarming the System
To disarm the system, do one of the following:
Press the RKE transmitter unlock button.
Turn the ignition to ON/RUN.
Once the system is disarmed, the security light will stop
ashing.
2-18
Page 97 of 420
How the System Alarm is Activated
To activate the system if it is armed:
Open the driver’s door or trunk. A ten second
pre-alarm chirp will sound followed by a
thirty second full alarm of horn and lights.
Open any other door. A full alarm of horn and lights
will immediately sound for thirty seconds.
Open the hood. If the vehicle has the remote start
feature, it will activate the full alarm.
When an alarm event has nished, the system will
re-arm itself automatically.
How to Turn Off the System Alarm
To turn off the system alarm:
Press the lock button on the RKE transmitter.
The system will then re-arm itself.
Press the unlock button on the RKE transmitter.
This will also disarm the system.
Insert the key in the ignition and turn it on.
This will also disarm the system.
How to Detect a Tamper Condition
If three chirps are heard when the unlock or lock button
is pressed on the RKE transmitter, it means that the
content theft security system alarm was previously
triggered.
PASS-Key®III+ Electronic
Immobilizer
The PASS-Key III+ system operates on a radio
frequency subject to Federal Communications
Commission (FCC) Rules and with Industry Canada.
This device complies with Part 15 of the FCC Rules.
Operation is subject to the following two conditions:
1. This device may not cause harmful interference.
2. This device must accept any interference received,
including interference that may cause undesired
operation.
This device complies with RSS-210 of Industry Canada.
Operation is subject to the following two conditions:
1. This device may not cause interference.
2. This device must accept any interference received,
including interference that may cause undesired
operation of the device.
Changes or modications to this system by other than
an authorized service facility could void authorization to
use this equipment.
PASS-Key III+ uses a radio frequency transponder in
the key that matches a decoder in the vehicle.
2-19
Page 98 of 420
PASS-Key®III+ Electronic
Immobilizer Operation
Your vehicle has PASS-Key®III+ (Personalized
Automotive Security System) theft-deterrent system.
PASS-Key
®III+ is a passive theft-deterrent system.
The system is automatically armed when the key
is removed from the ignition.
You do not have to manually arm or disarm the system.
The security light will come on if there is a problem
with arming or disarming the theft-deterrent system.
When the PASS-Key
®III+ system senses that someone
is using the wrong key, it prevents the vehicle from
starting. Anyone using a trial-and-error method to start
the vehicle will be discouraged because of the high
number of electrical key codes.
When trying to start the vehicle if the engine does not
start and the security light on the instrument panel
cluster comes on, there may be a problem with your
theft-deterrent system. Turn the ignition off and try again.If the engine still does not start, and the key appears
to be not damaged, try another ignition key. At this time,
you may also want to check the fuse. SeeFuses on
page 5-99. If the engine still does not start with the other
key, your vehicle needs service. If your vehicle does start,
the rst key may be faulty. See your dealer/retailer who
can service the PASS-Key
®III+ to have a new key made.
In an emergency, contact Roadside Assistance.
SeeRoadside Assistance Program on page 7-7.
It may be possible for the PASS-Key
®III+ decoder to
“learn” the transponder value of a new or replacement
key. Up to 10 keys may be programmed for the vehicle.
The following procedure is for programming additional
keys only. If all the currently programmed keys are lost
or do not operate, you must see your dealer/retailer or a
locksmith who can service PASS-Key
®III+ to have keys
made and programmed to the system.
See your dealer/retailer or a locksmith who can service
PASS-Key
®III+ to get a new key blank that is cut
exactly as the ignition key that operates the system.
2-20
Page 99 of 420
To program the new key:
1. Verify that the new key has a
1stamped on it.
2. Insert the already programmed key in the ignition
and start the engine. If the engine will not start,
see your dealer/retailer for service.
3. After the engine has started, turn the key to
LOCK/OFF, and remove the key.
4. Insert the key to be programmed and turn it to the
ON/RUN position within ve seconds of the original
key being turned to the LOCK/OFF position.
The security light will turn off once the key has
been programmed.
5. Repeat Steps 1 through 4 if additional keys are to
be programmed.
If you are ever driving and the security light comes on
and stays on, you may be able to restart your engine if
you turn it off. Your PASS-Key
®III+ system, however,
is not working properly and must be serviced by your
dealer/retailer. Your vehicle is not protected by the
PASS-Key
®III+ system at this time.
If the PASS-Key
®III+ key is lost or damaged, see
your dealer/retailer or a locksmith who can service
PASS-Key
®III+ to have a new key made.
Do not leave the key or device that disarms or
deactivates the theft deterrent system in the vehicle.
Starting and Operating Your
Vehicle
New Vehicle Break-In
Notice:The vehicle does not need an elaborate
break-in. But it will perform better in the long run if
you follow these guidelines:
Do not drive at any one constant speed, fast
or slow, for the rst 500 miles (805 km).
Do not make full-throttle starts. Avoid
downshifting to brake or slow the vehicle.
Avoid making hard stops for the rst 200 miles
(322 km) or so. During this time the new brake
linings are not yet broken in. Hard stops with
new linings can mean premature wear and earlier
replacement. Follow this breaking-in guideline
every time you get new brake linings.
Do not tow a trailer during break-in. SeeTowing
a Trailer on page 4-29for the trailer towing
capabilities of your vehicle and more
information.
Following break-in, engine speed and load can be
gradually increased.
2-21
Page 118 of 420
Outside Heated Mirrors
For vehicles with heated mirrors:
<(Rear Defogger):Press to heat the mirrors.
See “Rear Window Defogger” underAutomatic Climate
Control System on page 3-24for more information.
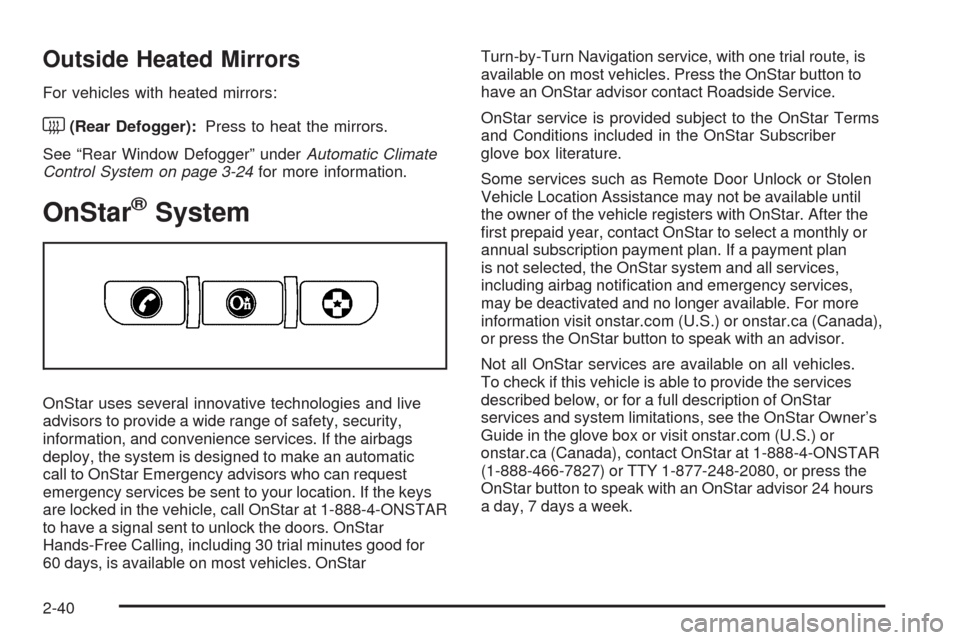
OnStar®System
OnStar uses several innovative technologies and live
advisors to provide a wide range of safety, security,
information, and convenience services. If the airbags
deploy, the system is designed to make an automatic
call to OnStar Emergency advisors who can request
emergency services be sent to your location. If the keys
are locked in the vehicle, call OnStar at 1-888-4-ONSTAR
to have a signal sent to unlock the doors. OnStar
Hands-Free Calling, including 30 trial minutes good for
60 days, is available on most vehicles. OnStarTurn-by-Turn Navigation service, with one trial route, is
available on most vehicles. Press the OnStar button to
have an OnStar advisor contact Roadside Service.
OnStar service is provided subject to the OnStar Terms
and Conditions included in the OnStar Subscriber
glove box literature.
Some services such as Remote Door Unlock or Stolen
Vehicle Location Assistance may not be available until
the owner of the vehicle registers with OnStar. After the
rst prepaid year, contact OnStar to select a monthly or
annual subscription payment plan. If a payment plan
is not selected, the OnStar system and all services,
including airbag notication and emergency services,
may be deactivated and no longer available. For more
information visit onstar.com (U.S.) or onstar.ca (Canada),
or press the OnStar button to speak with an advisor.
Not all OnStar services are available on all vehicles.
To check if this vehicle is able to provide the services
described below, or for a full description of OnStar
services and system limitations, see the OnStar Owner’s
Guide in the glove box or visit onstar.com (U.S.) or
onstar.ca (Canada), contact OnStar at 1-888-4-ONSTAR
(1-888-466-7827) or TTY 1-877-248-2080, or press the
OnStar button to speak with an OnStar advisor 24 hours
a day, 7 days a week.
2-40
Page 121 of 420
Location information about the vehicle is only available
if the GPS satellite signals are unobstructed and
available.
The vehicle must have a working electrical system,
including adequate battery power, for the OnStar
equipment to operate. There are other problems OnStar
cannot control that may prevent OnStar from providing
OnStar service at any particular time or place. Some
examples are damage to important parts of the vehicle
in a crash, hills, tall buildings, tunnels, weather or
wireless phone network congestion.
Your Responsibility
Increase the volume of the radio if the OnStar advisor
cannot be heard. If the light next to the OnStar buttons is
red, the system may not be functioning properly. Press
the OnStar button and request a vehicle diagnostic. If the
light appears clear (no light is appearing), your OnStar
subscription has expired and all services have been
deactivated. Press the OnStar button to conrm that the
OnStar equipment is active.
Universal Home Remote
System
The Universal Home Remote System provides a way to
replace up to three hand-held Radio-Frequency (RF)
transmitters used to activate devices such as garage
door openers, security systems, and home lighting.
This device complies with Part 15 of the FCC Rules.
Operation is subject to the following two conditions:
1. This device may not cause harmful interference.
2. This device must accept any interference received,
including interference that may cause undesired
operation.
This device complies with RSS-210 of Industry Canada.
Operation is subject to the following two conditions:
1. This device may not cause interference.
2. This device must accept any interference received,
including interference that may cause undesired
operation of the device.
Changes or modications to this system by other than
an authorized service facility could void authorization to
use this equipment.
2-43
Page 122 of 420
Universal Home Remote System
Operation (With Three Round LED)
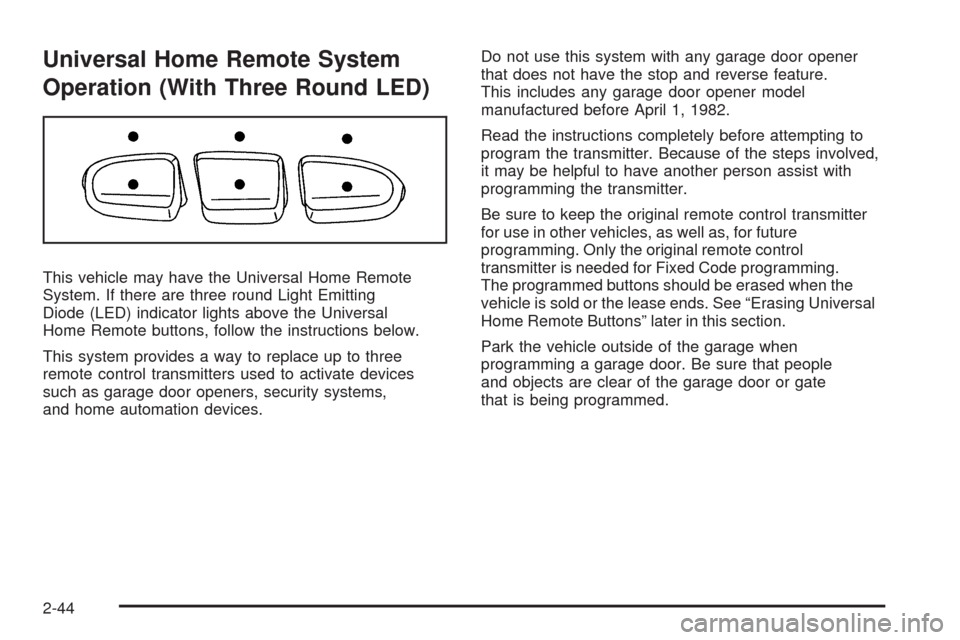
This vehicle may have the Universal Home Remote
System. If there are three round Light Emitting
Diode (LED) indicator lights above the Universal
Home Remote buttons, follow the instructions below.
This system provides a way to replace up to three
remote control transmitters used to activate devices
such as garage door openers, security systems,
and home automation devices.Do not use this system with any garage door opener
that does not have the stop and reverse feature.
This includes any garage door opener model
manufactured before April 1, 1982.
Read the instructions completely before attempting to
program the transmitter. Because of the steps involved,
it may be helpful to have another person assist with
programming the transmitter.
Be sure to keep the original remote control transmitter
for use in other vehicles, as well as, for future
programming. Only the original remote control
transmitter is needed for Fixed Code programming.
The programmed buttons should be erased when the
vehicle is sold or the lease ends. See “Erasing Universal
Home Remote Buttons” later in this section.
Park the vehicle outside of the garage when
programming a garage door. Be sure that people
and objects are clear of the garage door or gate
that is being programmed.
2-44
Page 124 of 420
4. Immediately, within one second, release the button
when the garage door moves. The indicator light
will blink rapidly until programming is complete.
5. Press and release the same button again.
The garage door should move, conrming
that programming is successful and complete.
To program another Rolling Code device such as an
additional garage door opener, a security device,
or home automation device, repeat Steps 1 through 5,
choosing a different function button in Step 3 than
what was used for the garage door opener.
If these instructions do not work, the garage door
opener is probably a Fixed Code unit. Follow the
Programming instructions that follow for a Fixed Code
garage door opener.
Programming Universal Home
Remote — Fixed Code
For questions or help programming the Universal
Home Remote System, call 1-866-572-2728 or go to
learcar2u.com.
Most garage door openers sold before 1996 are Fixed
Code units.
Programming a garage door opener involves
time-sensitive actions, so read the entire procedure
before starting. Otherwise, the device will time out
and the procedure will have to be repeated.To program up to three devices:
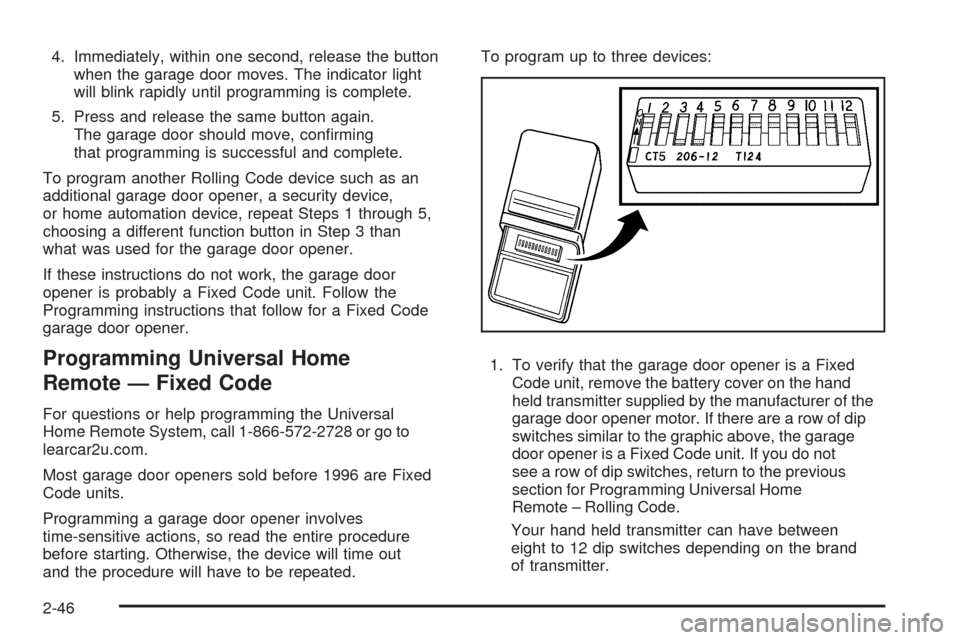
1. To verify that the garage door opener is a Fixed
Code unit, remove the battery cover on the hand
held transmitter supplied by the manufacturer of the
garage door opener motor. If there are a row of dip
switches similar to the graphic above, the garage
door opener is a Fixed Code unit. If you do not
see a row of dip switches, return to the previous
section for Programming Universal Home
Remote – Rolling Code.
Your hand held transmitter can have between
eight to 12 dip switches depending on the brand
of transmitter.
2-46