change time CHEVROLET MALIBU 2009 7.G Owners Manual
[x] Cancel search | Manufacturer: CHEVROLET, Model Year: 2009, Model line: MALIBU, Model: CHEVROLET MALIBU 2009 7.GPages: 420, PDF Size: 2.27 MB
Page 2 of 420
GENERAL MOTORS, GM, the GM Emblem,
CHEVROLET, the CHEVROLET Emblem, the MALIBU
Emblem, and the name MALIBU are registered
trademarks of General Motors Corporation.
This manual includes the latest information at the time it
was printed. GM reserves the right to make changes
after that time without further notice. For vehicles
�rst sold in Canada, substitute the name “General
Motors of Canada Limited” for Chevrolet Motor Division
wherever it appears in this manual.
This manual describes features that may or may not be
on your speci�c vehicle.
Read this manual from beginning to end to learn about
the vehicle’s features and controls. Pictures, symbols,
and words work together to explain vehicle operation.
Keep this manual in the vehicle for quick reference.
Canadian Owners
A French language copy of this manual can be obtained
from your dealer/retailer or from:
Helm, Incorporated
P.O. Box 07130
Detroit, MI 48207
1-800-551-4123
www.helminc.com
Propriétaires Canadiens
On peut obtenir un exemplaire de ce guide en français
auprès de concessionnaire ou à l’adresse suivante:
Helm, Incorporated
P.O. Box 07130
Detroit, MI 48207
1-800-551-4123
www.helminc.com
Index
To quickly locate information about the vehicle, use the
index in the back of the manual. It is an alphabetical list of
what is in the manual and the page number where it can
be found.
Litho in U.S.A.
Part No. 15898474 B Second Printing
©2008 General Motors Corporation. All Rights Reserved.
ii
Page 39 of 420
Infants and Young Children
Everyone in a vehicle needs protection! This includes
infants and all other children. Neither the distance
traveled nor the age and size of the traveler changes
the need, for everyone, to use safety restraints. In fact,
the law in every state in the United States and in
every Canadian province says children up to some age
must be restrained while in a vehicle.
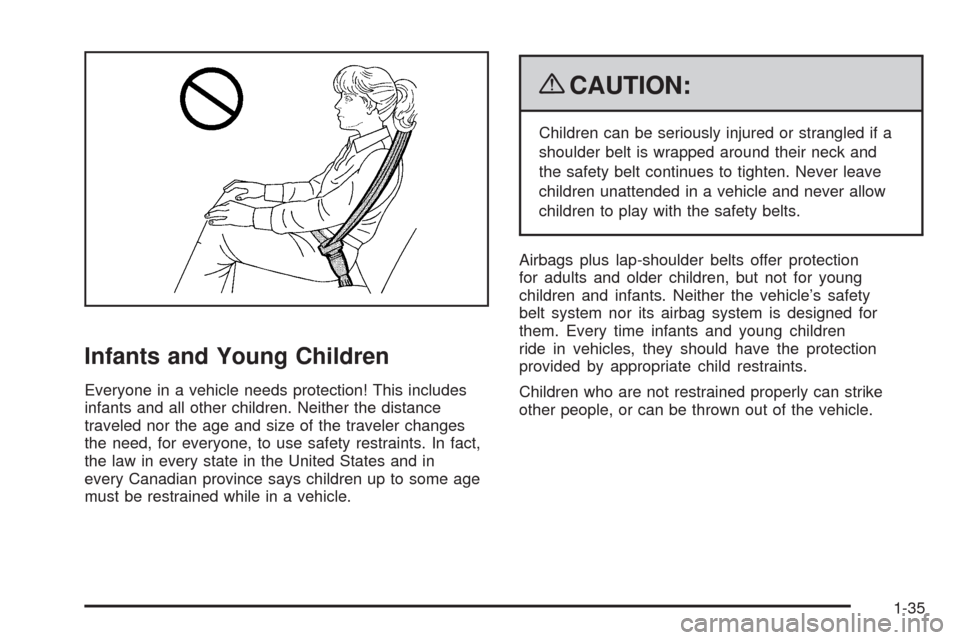
{CAUTION:
Children can be seriously injured or strangled if a
shoulder belt is wrapped around their neck and
the safety belt continues to tighten. Never leave
children unattended in a vehicle and never allow
children to play with the safety belts.
Airbags plus lap-shoulder belts offer protection
for adults and older children, but not for young
children and infants. Neither the vehicle’s safety
belt system nor its airbag system is designed for
them. Every time infants and young children
ride in vehicles, they should have the protection
provided by appropriate child restraints.
Children who are not restrained properly can strike
other people, or can be thrown out of the vehicle.
1-35
Page 103 of 420
Notice:The engine is designed to work with the
electronics in the vehicle. If you add electrical parts
or accessories, you could change the way the engine
operates. Before adding electrical equipment, check
with your dealer/retailer. If you do not, the engine
might not perform properly. Any resulting damage
would not be covered by the vehicle warranty.
Engine Coolant Heater
The engine coolant heater can provide easier starting
and better fuel economy during engine warm-up in cold
weather conditions at or below 0°F (−18°C). Vehicles
with an engine coolant heater should be plugged in at
least four hours before starting the vehicle. An internal
thermostat in the plug-end of the cord may exist which will
prevent engine coolant heater operation at temperatures
above 0°F (−18°C).
To Use the Engine Coolant Heater
1. Turn off the engine.
2. Open the hood and unwrap the electrical cord.
On the 2.4L engine, the engine coolant heater cord
is located near the air cleaner box on the passenger
side of the engine compartment. On the 3.5L and
3.6L V6 engines, the engine coolant heater cord is
located on the driver side around the battery box.
SeeEngine Compartment Overview on page 5-16
for more information on location.
{CAUTION:
Plugging the cord into an ungrounded outlet could
cause an electrical shock. Also, the wrong kind of
extension cord could overheat and cause a �re.
You could be seriously injured. Plug the cord into a
properly grounded three-prong 110-volt AC outlet.
If the cord will not reach, use a heavy-duty
three-prong extension cord rated for at least
15 amps.
3. Plug the cord into a normal, grounded 110-volt AC
outlet.
4. Before starting the engine, be sure to unplug and
store the cord as it was before to keep it away
from moving engine parts and prevent damage.
The length of time the heater should remain plugged in
depends on several factors. Ask a dealer/retailer in the
area where you will be parking the vehicle for the best
advice on this.
2-25
Page 121 of 420
Location information about the vehicle is only available
if the GPS satellite signals are unobstructed and
available.
The vehicle must have a working electrical system,
including adequate battery power, for the OnStar
equipment to operate. There are other problems OnStar
cannot control that may prevent OnStar from providing
OnStar service at any particular time or place. Some
examples are damage to important parts of the vehicle
in a crash, hills, tall buildings, tunnels, weather or
wireless phone network congestion.
Your Responsibility
Increase the volume of the radio if the OnStar advisor
cannot be heard. If the light next to the OnStar buttons is
red, the system may not be functioning properly. Press
the OnStar button and request a vehicle diagnostic. If the
light appears clear (no light is appearing), your OnStar
subscription has expired and all services have been
deactivated. Press the OnStar button to con�rm that the
OnStar equipment is active.
Universal Home Remote
System
The Universal Home Remote System provides a way to
replace up to three hand-held Radio-Frequency (RF)
transmitters used to activate devices such as garage
door openers, security systems, and home lighting.
This device complies with Part 15 of the FCC Rules.
Operation is subject to the following two conditions:
1. This device may not cause harmful interference.
2. This device must accept any interference received,
including interference that may cause undesired
operation.
This device complies with RSS-210 of Industry Canada.
Operation is subject to the following two conditions:
1. This device may not cause interference.
2. This device must accept any interference received,
including interference that may cause undesired
operation of the device.
Changes or modi�cations to this system by other than
an authorized service facility could void authorization to
use this equipment.
2-43
Page 131 of 420
Instrument Panel Overview...............................3-4
Hazard Warning Flashers................................3-6
Horn .............................................................3-6
Tilt and Telescopic Steering Wheel...................3-6
Turn Signal/Multifunction Lever.........................3-7
Turn and Lane-Change Signals........................3-7
Headlamp High/Low-Beam Changer..................3-8
Flash-to-Pass.................................................3-8
Windshield Wipers..........................................3-8
Windshield Washer.........................................3-9
Cruise Control..............................................3-10
Headlamps..................................................3-13
Headlamps on Reminder................................3-14
Headlamps Off in Park..................................3-14
Delayed Headlamps......................................3-14
Daytime Running Lamps (DRL).......................3-14
Automatic Headlamp System..........................3-15
Fog Lamps ..................................................3-15
Instrument Panel Brightness...........................3-16
Dome Lamps ...............................................3-16
Entry/Exit Lighting.........................................3-16
Parade Dimming...........................................3-16
Reading Lamps............................................3-16Electric Power Management...........................3-17
Battery Run-Down Protection..........................3-18
Accessory Power Outlet(s).............................3-18
Power Outlet 115 Volt Alternating Current........3-19
Climate Controls............................................3-20
Climate Control System.................................3-20
Automatic Climate Control System...................3-24
Outlet Adjustment.........................................3-27
Warning Lights, Gages, and Indicators............3-28
Instrument Panel Cluster................................3-29
Speedometer and Odometer...........................3-30
Trip Odometer.............................................
.3-30
Tachometer.................................................3-30
Safety Belt Reminders...................................3-30
Airbag Readiness Light..................................3-31
Passenger Airbag Status Indicator...................3-32
Charging System Light..................................3-33
Brake System Warning Light..........................3-34
Antilock Brake System (ABS) Warning Light.....3-35
Electronic Stability Control (ESC)/Traction
Control System (TCS) Indicator/Warning
Light........................................................3-35
Section 3 Instrument Panel
3-1
Page 138 of 420
Headlamp High/Low-Beam Changer
To change the headlamps from low beam to high beam,
push the turn signal/multifunction lever away from you.
This instrument panel cluster light
3comes on if the
high beam lamps are turned on while the ignition
is in ON/RUN.
To change the headlamps from high beam to low beam,
pull the turn signal lever toward you.
Flash-to-Pass
This feature lets the high-beam headlamps be used to
signal a driver in front of you that you want to pass.
Pull the turn signal/multifunction lever toward you until
the high-beam headlamps come on, then release
the lever to turn them off.
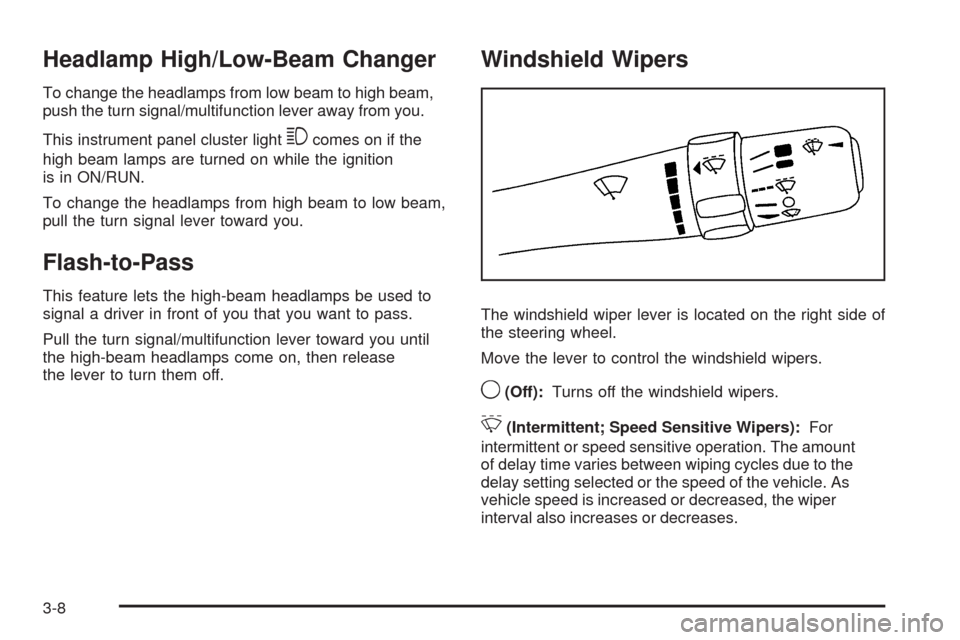
Windshield Wipers
The windshield wiper lever is located on the right side of
the steering wheel.
Move the lever to control the windshield wipers.
9(Off):Turns off the windshield wipers.
&(Intermittent; Speed Sensitive Wipers):For
intermittent or speed sensitive operation. The amount
of delay time varies between wiping cycles due to the
delay setting selected or the speed of the vehicle. As
vehicle speed is increased or decreased, the wiper
interval also increases or decreases.
3-8
Page 145 of 420
Automatic Headlamp System
When it is dark enough outside, the automatic headlamp
system turns on the headlamps at the normal brightness
along with other lamps such as the taillamps, sidemarker,
parking lamps, and the instrument panel lights. The radio
lights will also be dim.
The vehicle has a light sensor on top of the instrument
panel that controls the automatic headlamp system.
Do not cover the sensor or the automatic headlamp
system will turn on when it is not needed.
There is a delay in the transition between the daytime
and nighttime operation of the DRL and the automatic
headlamp systems so that driving under bridges or
bright overhead street lights does not affect the system.
The DRL and automatic headlamp systems will only be
affected when the light sensor sees a change in lighting
lasting longer than this delay.
If vehicle is started in a dark garage, the automatic
headlamp system comes on immediately. Once the
vehicle leaves the garage, it takes about one minute for
the automatic headlamp system to change to DRL if it is
light outside. During that delay, the instrument panel
cluster may not be as bright as usual. Make sure the
instrument panel brightness control is in the full bright
position. SeeInstrument Panel Brightness on page 3-16.To idle the vehicle with the automatic headlamp system
off, turn the ignition on and set the exterior light switch to
the off/on position. For vehicles �rst sold in Canada, the
transmission must stay in P (Park) for this function.
The regular headlamps should be used when needed.
Fog Lamps
For vehicles with fog lamps, the button for this feature is
located on the instrument panel, to the left of the
steering wheel.
The ignition must be on for the fog lamps to work.
#:Press to turn the fog lamps on or off. An indicator
light comes on when the fog lamps are on.
The parking lamps automatically turn on and off when
the fog lamps are turned on and off.
The fog lamps turn off while the high-beam headlamps
are turned on.
Some localities have laws that require the headlamps to
be on along with the fog lamps.
3-15
Page 155 of 420
Do not to cover the sensor located on the top of the
instrument panel near the windshield. This sensor
regulates air temperature based on the intensity
of the sun.
Also do not cover the sensor grille on the lower
right side of the climate control faceplate, as
this regulates the inside temperature.
To avoid blowing cold air at engine start-up in cold
weather, the system delays turning on the fan until
warm air is available. The length of delay depends on
the engine coolant temperature. Turning the fan knob
overrides this delay and changes the fan to the
selected speed.
Manual Operation
9(Off):Select this position on the fan knob to turn off
the entire climate control system. Outside air still enters
the vehicle. The air�ow direction and temperature can be
adjusted.
x/wTemperature Control:Press the arrows to
increase or decrease the temperature inside the vehicle.
9(Fan Control):Turn clockwise or counterclockwise
to increase or decrease the fan speed.
Air Delivery Mode Control:Turn clockwise or
counterclockwise to change the direction of the air�ow
in the vehicle.Select from the following:
H(Vent):Air is directed to the instrument panel
outlets.
)(Bi-Level):Air is divided between the instrument
panel outlets and the �oor outlets.
6(Floor):Air is directed to the �oor outlets with some
air directed to the side window outlets.
-(Defog):This mode clears the windows of fog or
moisture. Air is directed to the �oor and windshield
outlets.
0(Defrost):This mode clears the windows of fog or
frost more quickly. The system automatically controls
the fan speed if defrost is selected from the AUTO mode.
If the outside temperature is 40°F (4°C) or warmer, the
air conditioning compressor automatically runs to help
dehumidify the air and dry the windshield. The air
conditioning indicator light blinks three times if the
compressor is turned off while in this mode.
#(Air Conditioning):Press turn the air conditioning
on and off. An indicator light turns on to show the
air conditioning is on.
When air conditioning is selected or is in AUTO mode,
the system runs the air conditioning automatically to
cool and dehumidify the air entering the vehicle.
3-25
Page 157 of 420
Rear Window Defogger
The rear window defogger uses a warming grid to
remove fog from the rear window.
<(Rear):Press to turn the rear window defogger on
or off. An indicator light comes on to show that the
rear window defogger is on.
If driving below 50 mph (80 km/h), the rear window
defogger turns off about 15 minutes after the button is
pressed. If additional warming time is needed, press the
button again.
If the vehicle’s speed is maintained above 50 mph
(80 km/h), the rear window defogger remains on once
the button is pressed.
For vehicles with heated outside mirrors, the surface of
the outside mirrors will also heat when the rear window
defogger is activated. SeeOutside Power Mirrors on
page 2-39.
Notice:Do not use a razor blade or sharp object to
clear the inside rear window. Do not adhere anything
to the defogger grid lines in the rear glass. These
actions may damage the rear defogger. Repairs
would not be covered by your warranty.
Remote Start Climate Control Operation
For vehicles with remote start, when it is activated the
climate control system heats and cools the inside of the
vehicle using the previous system settings before the
vehicle was turned off. The climate control knobs will
remain active during a remote start. However, the climate
control buttons will be inactive until the ignition is turned
on by the key. If the fan is off, the climate control system
will not operate during remote start.
With the automatic climate control system, the
climate control displays “RS” in place of the temperature
to indicate that remote start is activated. For best
performance, turn both the fan and mode knobs to AUTO.
If the temperature is cold enough and the mode knob is
set to AUTO, the system begins in defrost to clear the
windows. SeeRemote Keyless Entry (RKE) System
Operation on page 2-5.
Outlet Adjustment
Use the lever located in the center of each outlet by
moving it either up and down or side-to-side, to change
the direction and amount of air�ow in the vehicle.
3-27
Page 174 of 420
DIC Operation and Displays
The DIC comes on when the ignition is on. The DIC has
different modes which can be accessed by pressing the
DIC buttons. The button functions are detailed in the
following.
Information Modes
INFO (Information):Press this button to scroll through
the following vehicle information modes:
Outside Air Temperature
The outside air temperature will be displayed at the
same time as the Odometer and the Trip Odometer. The
temperature outside of the vehicle will be displayed in
either degrees Fahrenheit (°F) or degrees Celsius (°C).
The outside air temperature appears on the left side of
the DIC display and the odometer, or trip odometer,
appears on the right side of the display.
Odometer
Press the information button until the outside air
temperature and the odometer displays. This mode
shows the total distance the vehicle has been driven
in either miles (mi) or kilometers (km).
To change the DIC display to English or metric units,
see “UNITS” underDIC Vehicle Personalization on
page 3-50.
Trip Odometer
Press the information button until the outside air
temperature along with A or B displays. These modes
show the current distance traveled since the last
reset for each trip odometer in either miles (mi) or
kilometers (km). Both odometers can be used at
the same time.
To reset the trip odometer to zero, press and hold the
reset button for a few seconds while the desired
trip odometer is displayed.
FUEL RANGE
Press the information button until FUEL RANGE displays.
This mode shows the remaining distance you can drive
without refueling in either miles (mi) or kilometers (km).
It is based on fuel economy and the fuel remaining in
the tank.
When the fuel level is low, FUEL RANGE LOW displays.
The fuel economy data used to determine fuel range
is an average of recent driving conditions. As your
driving conditions change, this data is gradually updated.
The FUEL RANGE mode cannot be reset.
3-44