CHEVROLET MALIBU 2011 7.G Owners Manual
Manufacturer: CHEVROLET, Model Year: 2011, Model line: MALIBU, Model: CHEVROLET MALIBU 2011 7.GPages: 382, PDF Size: 5.81 MB
Page 111 of 382
Black plate (1,1)Chevrolet Malibu Owner Manual - 2011
Instruments and Controls 5-1
Instruments and
Controls
Controls
Steering Wheel Adjustment . . . 5-2
Steering Wheel Controls . . . . . . 5-2
Horn . . . . . . . . . . . . . . . . . . . . . . . . . . 5-3
Windshield Wiper/Washer . . . . . 5-4
Compass . . . . . . . . . . . . . . . . . . . . . 5-5
Clock . . . . . . . . . . . . . . . . . . . . . . . . . 5-6
Power Outlets . . . . . . . . . . . . . . . . . 5-7
Warning Lights, Gauges, and
Indicators
Warning Lights, Gauges, andIndicators . . . . . . . . . . . . . . . . . . . . 5-9
Instrument Cluster . . . . . . . . . . . 5-10
Speedometer . . . . . . . . . . . . . . . . 5-11
Odometer . . . . . . . . . . . . . . . . . . . . 5-11
Trip Odometer . . . . . . . . . . . . . . . 5-11
Tachometer . . . . . . . . . . . . . . . . . . 5-11
Fuel Gauge . . . . . . . . . . . . . . . . . . 5-11
Engine Coolant Temperature Gauge . . . . . . . . . . . . . . . . . . . . . . 5-12 Safety Belt Reminders . . . . . . . 5-13
Airbag Readiness Light . . . . . . 5-14
Passenger Airbag Status
Indicator . . . . . . . . . . . . . . . . . . . . 5-14
Charging System Light . . . . . . 5-15
Malfunction
Indicator Lamp . . . . . . . . . . . . . 5-16
Brake System Warning Light . . . . . . . . . . . . . . . . . . . . . . . 5-18
Antilock Brake System (ABS) Warning Light . . . . . . . . . . . . . . 5-19
Electronic Stability Control (ESC)/Traction Control
System (TCS) Indicator/
Warning Light . . . . . . . . . . . . . . 5-20
Engine Coolant Temperature Warning Light . . . . . . . . . . . . . . 5-20
Tire Pressure Light . . . . . . . . . . 5-21
Engine Oil Pressure Light . . . . 5-22
Security Light . . . . . . . . . . . . . . . . 5-22
High-Beam on Light . . . . . . . . . 5-23
Cruise Control Light . . . . . . . . . 5-23
Information Displays
Driver Information Center (DIC) . . . . . . . . . . . . . . . 5-23
Vehicle Messages
Vehicle Messages . . . . . . . . . . . 5-26
Brake System Messages . . . . 5-27
Cruise Control Messages . . . . 5-27
Door Ajar Messages . . . . . . . . . 5-27
Engine Oil Messages . . . . . . . . 5-27
Engine Power Messages . . . . 5-27
Fuel System Messages . . . . . . 5-28
Key and Lock Messages . . . . . 5-28
Lamp Messages . . . . . . . . . . . . . 5-28
Ride Control SystemMessages . . . . . . . . . . . . . . . . . . 5-28
Airbag System Messages . . . . 5-30
Service Vehicle Messages . . . 5-30
Tire Messages . . . . . . . . . . . . . . . 5-30
Vehicle Reminder Messages . . . . . . . . . . . . . . . . . . 5-31
Washer Fluid Messages . . . . . 5-31
Vehicle Personalization
Vehicle Personalization . . . . . . 5-31
Page 112 of 382
Black plate (2,1)Chevrolet Malibu Owner Manual - 2011
5-2 Instruments and Controls
Controls
Steering Wheel
Adjustment
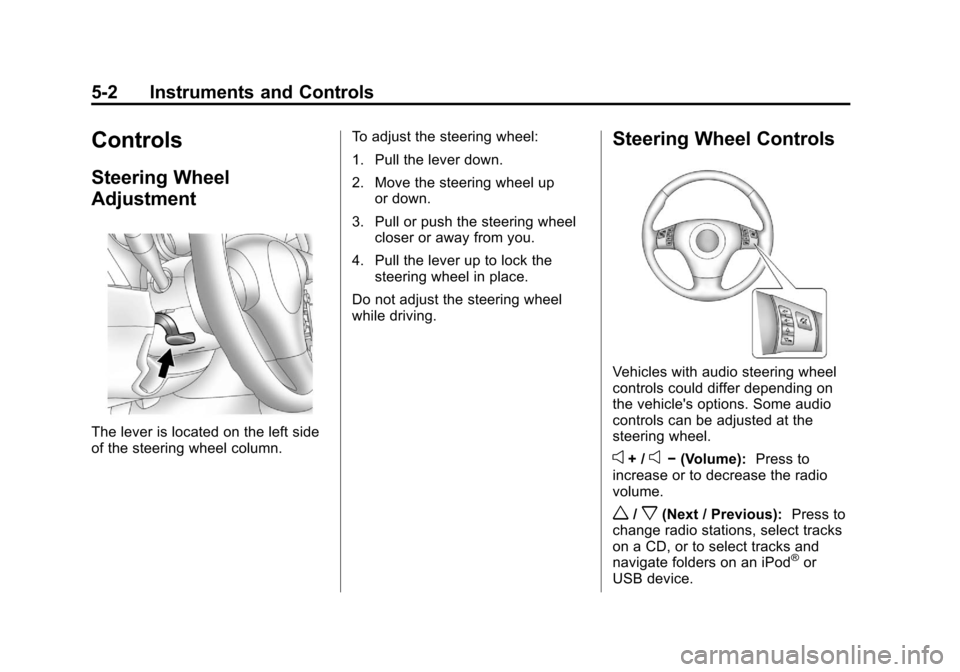
The lever is located on the left side
of the steering wheel column.To adjust the steering wheel:
1. Pull the lever down.
2. Move the steering wheel up
or down.
3. Pull or push the steering wheel closer or away from you.
4. Pull the lever up to lock the steering wheel in place.
Do not adjust the steering wheel
while driving.
Steering Wheel Controls
Vehicles with audio steering wheel
controls could differ depending on
the vehicle's options. Some audio
controls can be adjusted at the
steering wheel.
e+ /e− (Volume): Press to
increase or to decrease the radio
volume.
w/x(Next / Previous): Press to
change radio stations, select tracks
on a CD, or to select tracks and
navigate folders on an iPod
®or
USB device.
Page 113 of 382
Black plate (3,1)Chevrolet Malibu Owner Manual - 2011
Instruments and Controls 5-3
To change radio stations:
.Press and releaseworxto go
to the next or previous radio
station stored as a preset.
.Press and holdworxto go to
the next or previous radio station
in the selected band with a
strong signal.
To select tracks on a CD:
Press and release
worxto go to
the next or previous track.
To select tracks on an iPod or USB
device:
1. Press and hold
worxwhile
listening to a song until the
contents of the current folder
display on the radio display.
2. Press and release
worxto
scroll up or down the list, then
press and hold
wto play the
highlighted track. To navigate folders on an iPod or
USB device:
1. Press and hold
worxwhile
listening to a song until the
contents of the current folder
display on the radio display.
2. Press and hold
xto go back to
the previous folder list.
3. Press and release
worxto
scroll up or down the list.
.To select a folder, press
and hold
wwhen the folder
is highlighted.
.To go back further in the
folder list, press and
hold
x.
c(End): Press to reject an
incoming call, or end a current call.
b g(Mute / Voice Recognition):
Press to silence the vehicle
speakers only. Press again to turn
the sound on.
For vehicles with Bluetooth
®or
OnStar®systems press and
hold
b gfor longer than
two seconds to interact with
those systems. See Bluetooth
on
page 7‑23and the OnStar
Owner's Guide for more
information.
Horn
Press near the horn symbols or
press on the steering wheel pad to
sound the horn.
Page 114 of 382
Black plate (4,1)Chevrolet Malibu Owner Manual - 2011
5-4 Instruments and Controls
Windshield Wiper/Washer
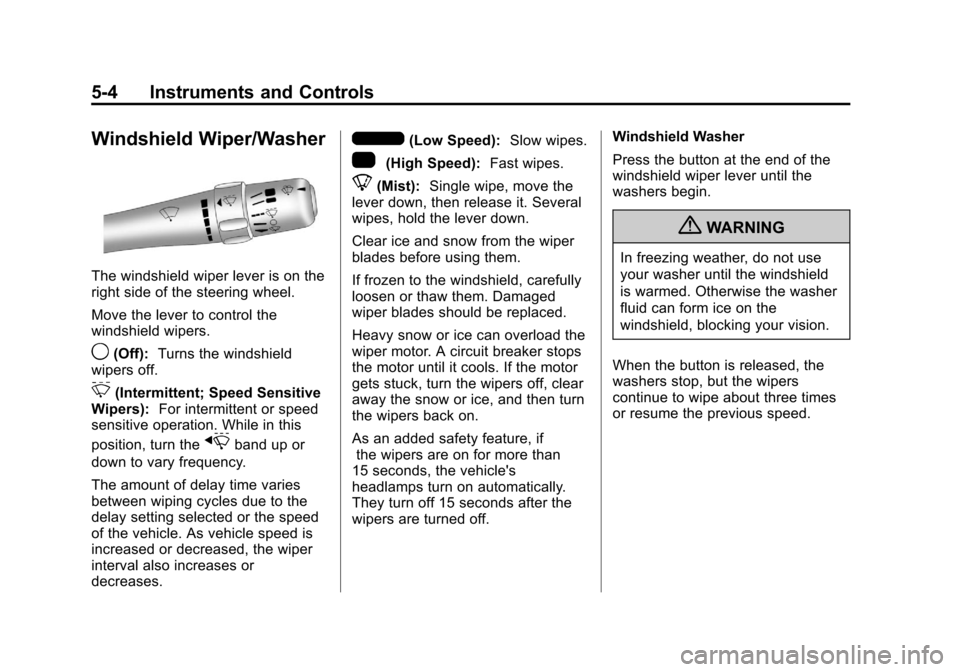
The windshield wiper lever is on the
right side of the steering wheel.
Move the lever to control the
windshield wipers.
9(Off):Turns the windshield
wipers off.
&(Intermittent; Speed Sensitive
Wipers): For intermittent or speed
sensitive operation. While in this
position, turn the
xband up or
down to vary frequency.
The amount of delay time varies
between wiping cycles due to the
delay setting selected or the speed
of the vehicle. As vehicle speed is
increased or decreased, the wiper
interval also increases or
decreases.
6(Low Speed): Slow wipes.
1(High Speed): Fast wipes.
8(Mist):Single wipe, move the
lever down, then release it. Several
wipes, hold the lever down.
Clear ice and snow from the wiper
blades before using them.
If frozen to the windshield, carefully
loosen or thaw them. Damaged
wiper blades should be replaced.
Heavy snow or ice can overload the
wiper motor. A circuit breaker stops
the motor until it cools. If the motor
gets stuck, turn the wipers off, clear
away the snow or ice, and then turn
the wipers back on.
As an added safety feature, if
the wipers are on for more than
15 seconds, the vehicle's
headlamps turn on automatically.
They turn off 15 seconds after the
wipers are turned off. Windshield Washer
Press the button at the end of the
windshield wiper lever until the
washers begin.
{WARNING
In freezing weather, do not use
your washer until the windshield
is warmed. Otherwise the washer
fluid can form ice on the
windshield, blocking your vision.
When the button is released, the
washers stop, but the wipers
continue to wipe about three times
or resume the previous speed.
Page 115 of 382
Black plate (5,1)Chevrolet Malibu Owner Manual - 2011
Instruments and Controls 5-5
Compass
Compass Operation
PressOon the rearview mirror to
turn the compass display on or off.
When the ignition and the compass
feature are on, the compass
displays the current compass
direction after a few seconds.
Compass Calibration
If after a few seconds the display
does not show a compass direction,
(N for North for example), there
may be a strong magnetic field
interfering with the compass.
Interference can be caused by a
magnetic antenna mount, note pad
holder, or similar object. If the
letter C appears in the compass
window, the compass may need
to be reset or calibrated. The mirror can be calibrated by
driving the vehicle very slowly, in
circles, until the display reads a
direction.
Compass Variance
The mirror is set in zone eight. It is
necessary to adjust the compass to
compensate for compass variance if
the vehicle is driven outside zone
eight. Under certain circumstances,
such as a long distance,
cross-country trip, it is necessary to
adjust the compass variance.
To adjust for compass variance:
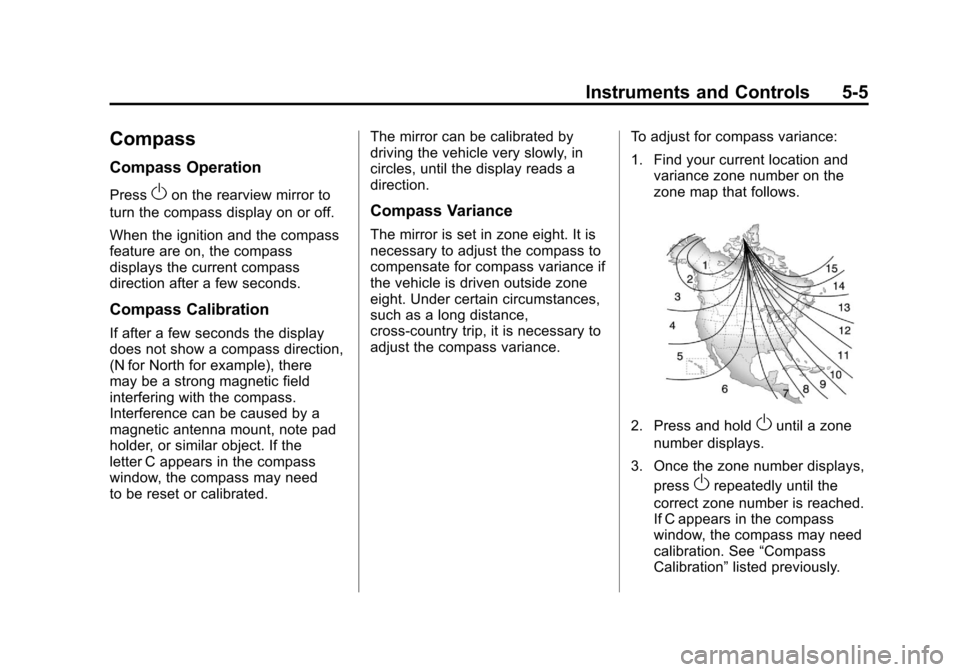
1. Find your current location and
variance zone number on the
zone map that follows.
2. Press and holdOuntil a zone
number displays.
3. Once the zone number displays, press
Orepeatedly until the
correct zone number is reached.
If C appears in the compass
window, the compass may need
calibration. See “Compass
Calibration” listed previously.
Page 116 of 382
Black plate (6,1)Chevrolet Malibu Owner Manual - 2011
5-6 Instruments and Controls
Clock
Without Date Display
AM/FM Base Radio with a Single
CD Player
To set the time:
1. Turn the ignition key to ACC/ACCESSORY or ON/RUN.
Press the
Oknob to turn the
radio on.
2. Press the
Hbutton until the hour
begins flashing on the display.
Press the
Hbutton a second
time and the minute begins
flashing on the display.
3. While either the hour or the minute numbers are flashing,
turn the
fknob to increase or
decrease the time. 4. Press the
Hbutton again until
the clock display stops flashing
to set the currently displayed
time; otherwise, the flashing
stops after five seconds and the
current time displayed is
automatically set.
To change the time default setting
from 12 hour to 24 hour, press the
Hbutton until 12H or 24H is
displayed. Once 12H or 24H is
displayed, turn the
fknob to the
desired option to select the setting.
Press the
Hbutton again to apply
the setting, or let the screen
time out.
With Date Display
Radio with CD (MP3) and USB
Port, and Radio with Single CD
(MP3) Player
To set the time and date:
1. Turn the ignition key to ACC/ ACCESSORY or ON/RUN.
Press the
Oknob to turn the
radio on.
2. Press the
Hbutton and the HR,
MIN, MM, DD, YYYY (hour,
minute, month, day, and year)
displays.
3. Press the softkey located below any one of the tabs that you
want to change.
Page 117 of 382
Black plate (7,1)Chevrolet Malibu Owner Manual - 2011
Instruments and Controls 5-7
4. To increase the time or date doone of the following:
.Press the softkey located
below the selected tab.
.Press the¨SEEK, or
\FWD button.
.Turn thefknob clockwise.
5. To decrease the time or date do one of the following:
.Press the©SEEK or
sREV button.
.Turn thefknob
counterclockwise.
The date does not automatically
display. To see the date press
Hwhile the radio is on. The date
with display times out after a few
seconds and goes back to the
normal radio and time display. To change the time default setting
from 12 hour to 24 hour or to
change the date default setting from
month/day/year to day/month/year:
1. Press the
Hbutton and then the
softkey located below the
forward arrow label. Once the
time 12H and 24H, and the date
MM/DD/YYYY (month, day, and
year) and DD/MM/YYYY (day,
month, and year) displays.
2. Press the softkey located below the desired option.
3. Press the
Hbutton again to
apply the selected default, or let
the screen time out.
Power Outlets
Accessory power outlets can be
used to plug in electrical equipment,
such as a cell phone or MP3 player.
There are two accessory power
outlets. One accessory power outlet
is located inside the storage bin below the climate controls and the
other outlet is on the rear of the
center storage console.
Remove the cover to access
and replace when not in use.
The accessory power outlet is
operational at all times.
{WARNING
Power is always supplied to the
outlets. Do not leave electrical
equipment plugged in when the
vehicle is not in use because the
vehicle could catch fire and cause
injury or death.
Notice: Leaving electrical
equipment plugged in for an
extended period of time while
the vehicle is off will drain the
battery. Always unplug electrical
equipment when not in use and
do not plug in equipment that
exceeds the maximum 20 ampere
rating.
Page 118 of 382
Black plate (8,1)Chevrolet Malibu Owner Manual - 2011
5-8 Instruments and Controls
Certain electrical accessories
may not be compatible with the
accessory power outlet and could
overload vehicle or adapter fuses.
If a problem is experienced, see
your dealer.
When adding electrical equipment,
be sure to follow the proper
installation instructions included
with the equipment. SeeAdd-On
Electrical Equipment on page 9‑48.
Notice: Hanging heavy
equipment from the power outlet
can cause damage not covered
by the vehicle warranty. The
power outlets are designed for
accessory power plugs only, such
as cell phone charge cords.Power Outlet 115 Volt
Alternating Current
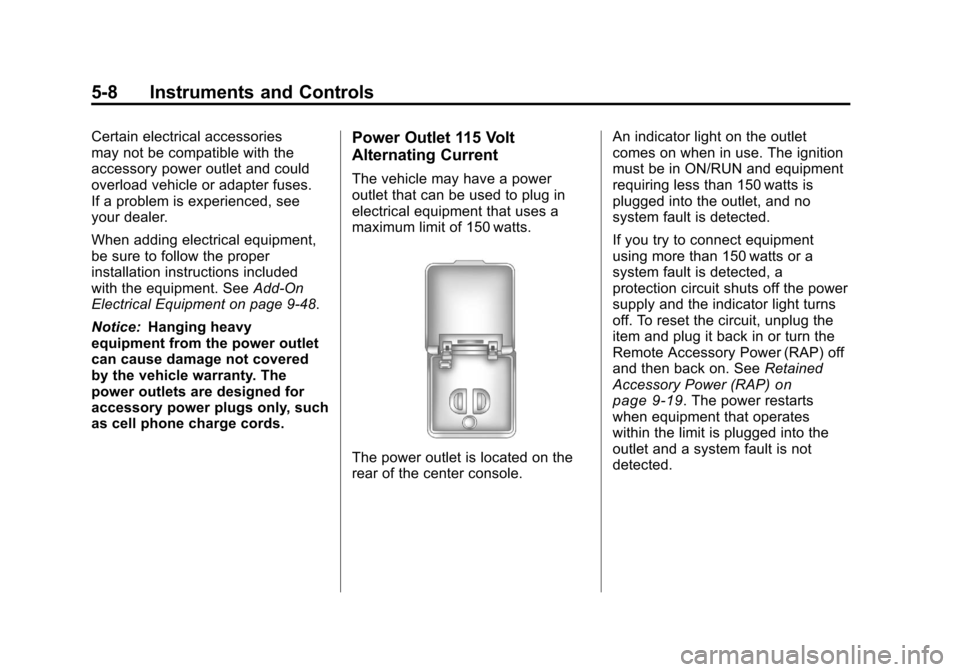
The vehicle may have a power
outlet that can be used to plug in
electrical equipment that uses a
maximum limit of 150 watts.
The power outlet is located on the
rear of the center console. An indicator light on the outlet
comes on when in use. The ignition
must be in ON/RUN and equipment
requiring less than 150 watts is
plugged into the outlet, and no
system fault is detected.
If you try to connect equipment
using more than 150 watts or a
system fault is detected, a
protection circuit shuts off the power
supply and the indicator light turns
off. To reset the circuit, unplug the
item and plug it back in or turn the
Remote Accessory Power (RAP) off
and then back on. See
Retained
Accessory Power (RAP)
on
page 9‑19. The power restarts
when equipment that operates
within the limit is plugged into the
outlet and a system fault is not
detected.
Page 119 of 382
Black plate (9,1)Chevrolet Malibu Owner Manual - 2011
Instruments and Controls 5-9
The power outlet is not designed for
and may not work properly if the
following are plugged in:
.Equipment with high initial peak
wattage such as:
compressor-driven refrigerators
and electric power tools.
.Other equipment requiring an
extremely stable power supply
such as:
microcomputer-controlled
electric blankets, touch sensor
lamps, etc.
Warning Lights,
Gauges, and
Indicators
Warning lights and gauges can
signal that something is wrong
before it becomes serious enough
to cause an expensive repair or
replacement. Paying attention to the
warning lights and gauges could
prevent injury.
Warning lights come on when there
could be a problem with a vehicle
function. Some warning lights come
on briefly when the engine is started
to indicate they are working.Gauges can indicate when there
could be a problem with a vehicle
function. Often gauges and warning
lights work together to indicate a
problem with the vehicle.
When one of the warning lights
comes on and stays on while
driving, or when one of the gauges
shows there may be a problem,
check the section that explains what
to do. Follow this manual's advice.
Waiting to do repairs can be costly
and even dangerous.
Page 120 of 382
Black plate (10,1)Chevrolet Malibu Owner Manual - 2011
5-10 Instruments and Controls
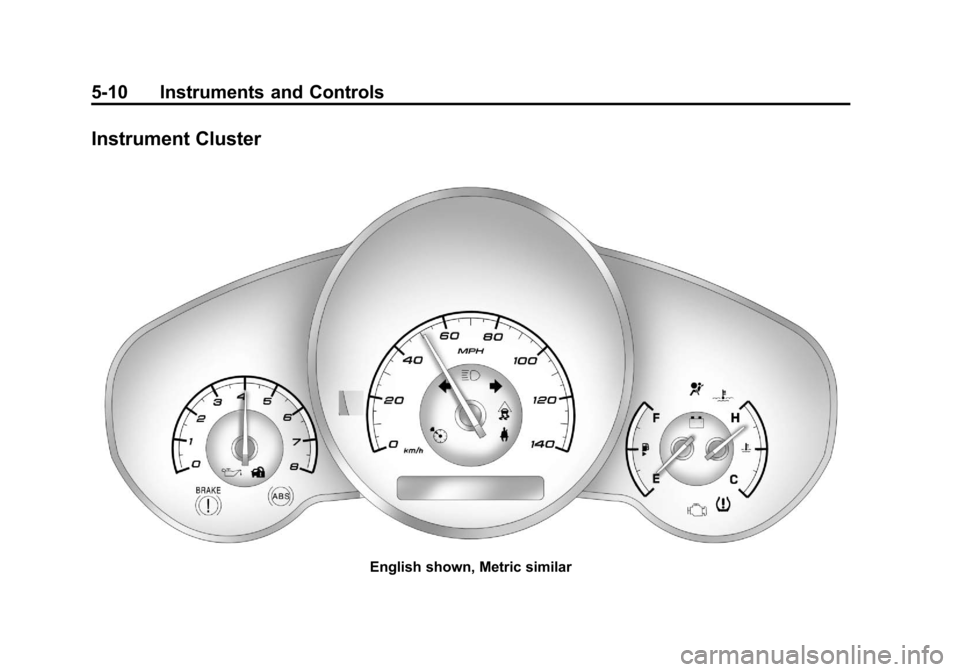
Instrument Cluster
English shown, Metric similar