tow CHEVROLET MALIBU 2011 7.G User Guide
[x] Cancel search | Manufacturer: CHEVROLET, Model Year: 2011, Model line: MALIBU, Model: CHEVROLET MALIBU 2011 7.GPages: 382, PDF Size: 5.81 MB
Page 99 of 382

Black plate (51,1)Chevrolet Malibu Owner Manual - 2011
Seats and Restraints 3-51
{WARNING
Children can be seriously injured
or strangled if a shoulder belt is
wrapped around their neck and
the safety belt continues to
tighten. Buckle any unused safety
belts behind the child restraint so
children cannot reach them. Pull
the shoulder belt all the way out
of the retractor to set the lock,
if your vehicle has one, after the
child restraint has been installed.
Notice: Do not let the LATCH
attachments rub against the
vehicle’ s safety belts. This may
damage these parts. If necessary,
move buckled safety belts to
avoid rubbing the LATCH
attachments. Do not fold the empty rear seat
with a safety belt buckled. This
could damage the safety belt or
the seat. Unbuckle and return the
safety belt to its stowed position,
before folding the seat.
If you need to secure more than one
child restraint in the rear seat, see
Where to Put the Restraint
on
page 3‑45. Depending on where
you place the child restraint, you
may not be able to access certain
safety belt assemblies or LATCH
anchors for additional passengers or
child restraints.
You cannot secure three child
restraints using the LATCH anchors
in the rear seat at the same time,
but you can install two of them.
If you want to do this, install one
LATCH child restraint in the
passenger-side position, and
install the other one either in the
driver-side position or in the center position. Refer to the following
illustration to learn which
anchors to use.
A. Passenger Side Rear Seat
Lower Anchors
B. Center Rear Seat Lower Anchors
C. Driver Side Rear Seat Lower Anchors
Make sure to attach the child
restraint at the proper anchor
location.
Page 104 of 382

Black plate (56,1)Chevrolet Malibu Owner Manual - 2011
3-56 Seats and Restraints
5. To tighten the belt, push downon the child restraint, pull the
shoulder portion of the belt to
tighten the lap portion of the belt,
and feed the shoulder belt back
into the retractor. When installing
a forward-facing child restraint, it
may be helpful to use your knee
to push down on the child
restraint as you tighten the belt. Try to pull the belt out of the
retractor to make sure the
retractor is locked. If the
retractor is not locked, repeat
Steps 4 and 5.
6. If the child restraint has a top tether, follow the child restraint
manufacturer's instructions
regarding the use of the top
tether. See Lower Anchors and
Tethers for Children (LATCH
System)on page 3‑47for more
information. 7. Before placing a child in the
child restraint, make sure it is
securely held in place. To check,
grasp the child restraint at the
safety belt path and attempt
to move it side‐to‐side and
back‐and‐forth. When the child
restraint is properly installed,
there should be no more than
2.5 cm (1 in) of movement.
To remove the child restraint,
unbuckle the vehicle safety belt and
let it return to the stowed position.
If the top tether is attached to a top
tether anchor, disconnect it.
Page 107 of 382

Black plate (59,1)Chevrolet Malibu Owner Manual - 2011
Seats and Restraints 3-59
5. Pull the shoulder belt all the wayout of the retractor to set the
lock. When the retractor lock is
set, the belt can be tightened but
not pulled out of the retractor.6. To tighten the belt, push downon the child restraint, pull the
shoulder portion of the belt to
tighten the lap portion of the belt,
and feed the shoulder belt back
into the retractor. When installing
a forward-facing child restraint, it
may be helpful to use your knee
to push down on the child
restraint as you tighten the belt.
Try to pull the belt out of the
retractor to make sure the
retractor is locked. If the
retractor is not locked, repeat
Steps 5 and 6. 7. Before placing a child in the
child restraint, make sure it is
securely held in place. To check,
grasp the child restraint at the
safety belt path and attempt
to move it side‐to‐side and
back‐and‐forth. When the child
restraint is properly installed,
there should be no more than
2.5 cm (1 in) of movement.
If the airbags are off, the off
indicator in the passenger airbag
status indicator will come on and
stay on when the vehicle is started.
If a child restraint has been installed
and the on indicator is lit, see “If
the On Indicator is Lit for a Child
Restraint ”under Passenger
Sensing System
on page 3‑31for
more information.
To remove the child restraint,
unbuckle the vehicle safety belt and
let it return to the stowed position.
Page 109 of 382

Black plate (1,1)Chevrolet Malibu Owner Manual - 2011
Storage 4-1
Storage
Storage Compartments
Instrument Panel Storage . . . . 4-1
Glove Box . . . . . . . . . . . . . . . . . . . . 4-1
Cupholders . . . . . . . . . . . . . . . . . . . 4-1
Front Storage . . . . . . . . . . . . . . . . . 4-2
Center Console Storage . . . . . . 4-2
Additional Storage Features
Convenience Net . . . . . . . . . . . . . 4-2
Storage
Compartments
Instrument Panel Storage
An instrument panel storage area,
with a removable liner, is located
above the radio. Slide the latch
toward the rear of the vehicle to
open the storage area.
Glove Box
Pull the handle up to open.
Cupholders
Removable cupholders are located
in front of the center console. See
“Center Console Storage Area”to
access them. Press and hold the
tab at the rear of the cupholders and
lift up and rearward to remove the
cupholders. This disengages the
two forward tabs.
To reinstall, place the two forward
tabs into the slots and push down
on the rear of the cupholder.
For vehicles with rear seat
cupholders, access them by
pulling down on the door at the
back of the center console.
Page 122 of 382
Black plate (12,1)Chevrolet Malibu Owner Manual - 2011
5-12 Instruments and Controls
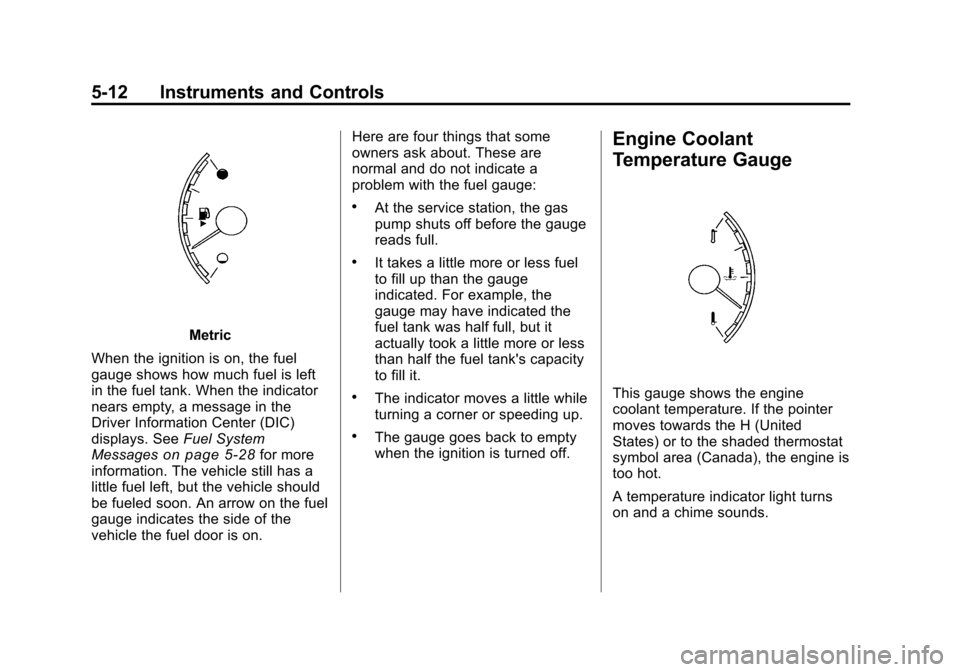
Metric
When the ignition is on, the fuel
gauge shows how much fuel is left
in the fuel tank. When the indicator
nears empty, a message in the
Driver Information Center (DIC)
displays. See Fuel System
Messages
on page 5‑28for more
information. The vehicle still has a
little fuel left, but the vehicle should
be fueled soon. An arrow on the fuel
gauge indicates the side of the
vehicle the fuel door is on. Here are four things that some
owners ask about. These are
normal and do not indicate a
problem with the fuel gauge:
.At the service station, the gas
pump shuts off before the gauge
reads full.
.It takes a little more or less fuel
to fill up than the gauge
indicated. For example, the
gauge may have indicated the
fuel tank was half full, but it
actually took a little more or less
than half the fuel tank's capacity
to fill it.
.The indicator moves a little while
turning a corner or speeding up.
.The gauge goes back to empty
when the ignition is turned off.
Engine Coolant
Temperature Gauge
This gauge shows the engine
coolant temperature. If the pointer
moves towards the H (United
States) or to the shaded thermostat
symbol area (Canada), the engine is
too hot.
A temperature indicator light turns
on and a chime sounds.
Page 127 of 382

Black plate (17,1)Chevrolet Malibu Owner Manual - 2011
Instruments and Controls 5-17
To prevent more serious damage to
the vehicle:
.Reduce vehicle speed.
.Avoid hard accelerations.
.Avoid steep uphill grades.
.If towing a trailer, reduce the
amount of cargo being hauled as
soon as it is possible.
If the light continues to flash, when
it is safe to do so, stop the vehicle.
Find a safe place to park the
vehicle. Turn the vehicle off, wait at
least 10 seconds, and restart the
engine. If the light is still flashing,
follow the previous steps and see
your dealer for service as soon as
possible.
Light On Steady: An emission
control system malfunction has
been detected on the vehicle.
Diagnosis and service might be
required. An emission system malfunction
might be corrected:
.Make sure the fuel cap is fully
installed. See
Filling the Tankon
page 9‑41. The diagnostic
system can determine if the fuel
cap has been left off or
improperly installed. A loose or
missing fuel cap allows fuel to
evaporate into the atmosphere.
A few driving trips with the cap
properly installed should turn the
light off.
.If the vehicle has been driven
through a deep puddle of water,
the vehicle's electrical system
might be wet. The condition is
usually corrected when the
electrical system dries out. A few
driving trips should turn the
light off.
.Make sure to fuel the vehicle
with quality fuel. Poor fuel quality
causes the engine not to run as
efficiently as designed and can
cause: stalling after start-up,
stalling when the vehicle is
changed into gear, misfiring,
hesitation on acceleration,
or stumbling on acceleration.
These conditions might go away
once the engine is warmed up.
If one or more of these
conditions occurs, change the
fuel brand used. It will require at
least one full tank of the proper
fuel to turn the light off.
See Recommended Fuel
on
page 9‑38.
If none of the above have made
the light turn off, your dealer can
check the vehicle. The dealer has
the proper test equipment and
diagnostic tools to fix any
mechanical or electrical problems
that might have developed.
Page 129 of 382
Black plate (19,1)Chevrolet Malibu Owner Manual - 2011
Instruments and Controls 5-19
When the ignition is on, the brake
system warning light also comes on
when the parking brake is set. The
light stays on if the parking brake
does not fully release. If it stays
on after the parking brake is fully
released, it means there is a brake
problem.
The Driver Information Center (DIC)
may display a BRAKE FLUID
message. SeeBrake System
Messages
on page 5‑27for more
information.
If the light comes on while driving,
pull off the road and carefully stop.
The brake pedal may be harder to
push or the pedal may go closer to
the floor. It may take longer to stop.
Try turning off and restarting the
vehicle one or two times, if the light
is still on, have the vehicle towed for
service. See Towing the Vehicle
on
page 10‑83
{WARNING
The brake system might not be
working properly if the brake
system warning light is on.
Driving with the brake system
warning light on can lead to a
crash. If the light is still on after
the vehicle has been pulled off
the road and carefully stopped,
have the vehicle towed for
service.
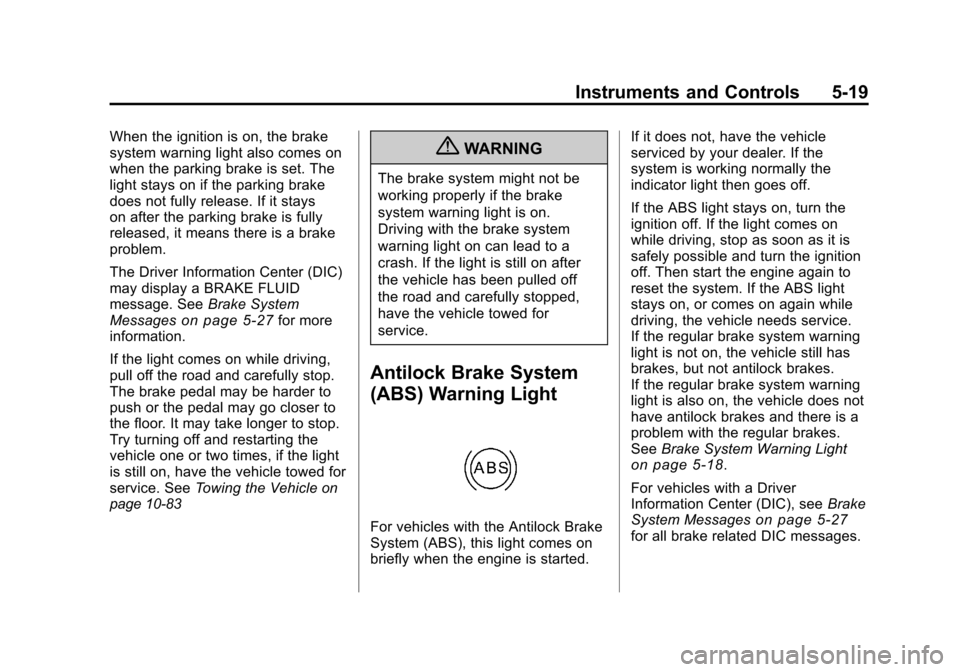
Antilock Brake System
(ABS) Warning Light
For vehicles with the Antilock Brake
System (ABS), this light comes on
briefly when the engine is started. If it does not, have the vehicle
serviced by your dealer. If the
system is working normally the
indicator light then goes off.
If the ABS light stays on, turn the
ignition off. If the light comes on
while driving, stop as soon as it is
safely possible and turn the ignition
off. Then start the engine again to
reset the system. If the ABS light
stays on, or comes on again while
driving, the vehicle needs service.
If the regular brake system warning
light is not on, the vehicle still has
brakes, but not antilock brakes.
If the regular brake system warning
light is also on, the vehicle does not
have antilock brakes and there is a
problem with the regular brakes.
See
Brake System Warning Light
on page 5‑18.
For vehicles with a Driver
Information Center (DIC), see Brake
System Messages
on page 5‑27for all brake related DIC messages.
Page 148 of 382
Black plate (2,1)Chevrolet Malibu Owner Manual - 2011
6-2 Lighting
The exterior lamp control has the
following four positions:
2(Headlamps):Turns on the
headlamps, parking lamps, and
taillamps.
;(Parking Lamps): Turns on the
parking lamps and taillamps only.
AUTO (Automatic Headlamp
System): Automatically turns on
the Daytime Running Lamps during
daytime, and the headlamps,
parking lamps, and taillamps at
night.
P(Off/On): Turn the band to this
position to turn on the Automatic
Headlamp System. In Canada, this
position only works when a vehicle
is in the P (Park) position.
To turn on the Automatic Headlamp
System, turn the switch to off/on.
To turn them off, turn the switch to
off/on again. This is a momentary
control switch that springs back
when released. The Automatic
Headlamp System always turns on
at the beginning of an ignition cycle.
Exterior Lamps Off
Reminder
If the drivers door is opened and the
ignition is turned off while leaving
the lamps on, a warning chime will
sound.
Headlamp High/
Low-Beam Changer
To change the headlamps from low
beam to high beam, push the turn
signal/multifunction lever away
from you.
This instrument panel cluster light
3comes on if the high beam
lamps are turned on while the
ignition is in ON/RUN.
To change the headlamps from high
beam to low beam, pull the turn
signal lever toward you.
Page 149 of 382
Black plate (3,1)Chevrolet Malibu Owner Manual - 2011
Lighting 6-3
Flash-to-Pass
This feature lets the high-beam
headlamps be used to signal a
driver in front of you that you want
to pass.
Pull the turn signal/multifunction
lever toward you until the high-beam
headlamps come on, then release
the lever to turn them off.
Daytime Running
Lamps (DRL)
Daytime Running Lamps (DRL) can
make it easier for others to see the
front of your vehicle during the day.
Fully functional DRL are required on
all vehicles first sold in Canada. The
vehicle has a light sensor on top of
the instrument panel that controls
the DRL. Do not cover this sensor
or the head lamps will be on when
they are not needed.The DRL system makes the
low-beam headlamps come on at a
reduced brightness when the
following conditions are met:
.The ignition is on.
.The exterior lamps control is
in AUTO.
.The exterior lamps control is in
the parking lamps only position
(This applies only to vehicles
that are first sold in Canada).
.The light sensor detects daytime
light.
.The parking brake is released or
the vehicle is not in P (Park).
When the DRL system is on, the
taillamps, sidemarker lamps,
parking lamps, and instrument panel
lights are not on unless you turn the
exterior lamps control to the parking
lamp position.
The regular headlamp system
should be turned on when they are
needed.
Automatic Headlamp
System
When it is dark enough outside, the
automatic headlamp system turns
on the headlamps at the normal
brightness along with other lamps
such as the taillamps, sidemarker,
parking lamps, and the instrument
panel lights. The radio lights will
also be dim.
The vehicle has a light sensor on
top of the instrument panel that
controls the automatic headlamp
system. Do not cover the sensor or
the automatic headlamp system will
turn on when it is not needed.
There is a delay in the transition
between the daytime and nighttime
operation of the DRL and the
automatic headlamp systems so
that driving under bridges or bright
overhead street lights does not
affect the system. The DRL and
automatic headlamp systems will
only be affected when the light
sensor sees a change in lighting
lasting longer than this delay.
Page 186 of 382
Black plate (2,1)Chevrolet Malibu Owner Manual - 2011
8-2 Climate Controls
Operation
Temperature Control:Turn
clockwise or counterclockwise
to increase or decrease the
temperature inside the vehicle.
When it is cold outside −18°C (0°F)
or lower, use the engine coolant
heater, if vehicle has one, to provide
warmer air faster to the vehicle. An
engine coolant heater warms the
coolant the engine uses that
provides heat to warm the inside of
the vehicle. For more information,
see Engine Heater on page 9‑21.
9(Fan Control): Turn clockwise
or counterclockwise to increase
or decrease the fan speed. The
fan must be on to run the
air-conditioning compressor.
Air Delivery Mode Control: Turn
clockwise or counterclockwise to
change the current airflow mode. Select from the following:
H(Vent):
Air is directed to
the instrument panel outlets.
)(Bi-Level): Air is divided
between the instrument panel and
floor outlets. Some air will be
directed toward the side windows.
6(Floor): Air is directed to the
floor outlets with some air directed
to the windshield and side window
outlets.
-(Defog): This mode clears the
windows of fog or moisture. Air is
directed to the windshield and floor
outlets, with some air directed to the
side windows. When this mode is
selected, the system automatically
turns off recirculation and runs the
air-conditioning compressor unless
the outside temperature is at or
below freezing. The air-conditioning
compressor operates although the
indicator light is not on. The
air-conditioning indicator light turns
off when defog is selected. If the air-conditioning button is pressed
while in defog mode, the indicator
light will turn on. If the button is
pressed again, the light will turn off.
The recirculation mode cannot be
selected while in the defog mode.
Do not drive the vehicle until all the
windows are clear.
1(Defrost):
This mode quickly
clears the windshield of fog or frost.
Air is directed to the windshield with
some air directed to the floor vents.
In this mode, outside air is pulled
into the vehicle. The air-conditioning
compressor will not run unless the
outside temperature is at or below
freezing. The air-conditioning
compressor operates although the
indicator light is not on. The
air-conditioning indicator light turns
off when defrost is selected. If the
air-conditioning button is pressed
while in defrost mode, the indicator
light turns on. If the button is
pressed again, the light turns off.
Recirculation cannot be selected
while in the defrost mode.