manual radio set CHEVROLET MALIBU 2016 8.G Infotainment Manual
[x] Cancel search | Manufacturer: CHEVROLET, Model Year: 2016, Model line: MALIBU, Model: CHEVROLET MALIBU 2016 8.GPages: 94, PDF Size: 1.05 MB
Page 6 of 94
Chevrolet Malibu Limited/Cruze Limited MyLink Infotainment System
(GMNA-Localizing-U.S./Canada-9282853) - 2016 - crc - 4/16/15
Introduction 5
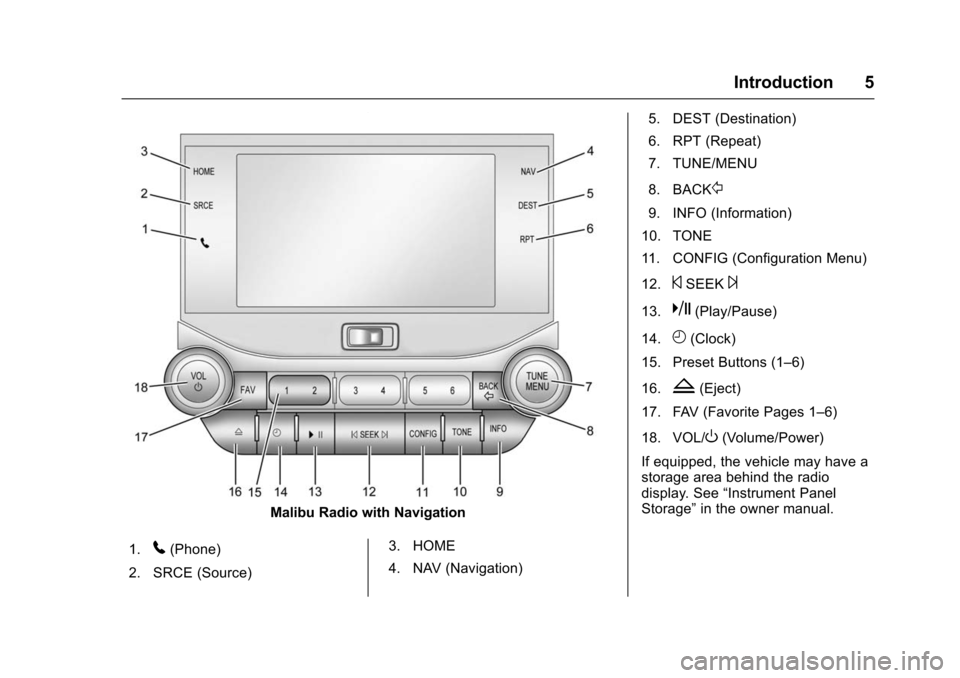
Malibu Radio with Navigation
1.
5(Phone)
2. SRCE (Source) 3. HOME
4. NAV (Navigation)5. DEST (Destination)
6. RPT (Repeat)
7. TUNE/MENU
8. BACK
/
9. INFO (Information)
10. TONE
11. CONFIG (Configuration Menu)
12.
©SEEK¨
13.k(Play/Pause)
14.
H(Clock)
15. Preset Buttons (1–6)
16.
Z(Eject)
17. FAV (Favorite Pages 1–6)
18. VOL/
O(Volume/Power)
If equipped, the vehicle may have a
storage area behind the radio
display. See “Instrument Panel
Storage” in the owner manual.
Page 8 of 94
Chevrolet Malibu Limited/Cruze Limited MyLink Infotainment System
(GMNA-Localizing-U.S./Canada-9282853) - 2016 - crc - 4/16/15
Introduction 7
5or5/>(Phone or
Phone/Mute):
. Press to enter the phone main
screen. See Bluetooth075 or
“OnStar” in the owner manual.
. Press and hold to mute or
unmute the infotainment system.
SRCE : Press to change the audio
source to AM, FM, XM (if equipped),
Pandora
®(if equipped), Stitcher®,
CD, USB/iPod, AUX, or Bluetooth
Audio.
TUNE/ MENU or MENU/ SEL:
. Press to enter the menu for the
current band or media.
. Turn to highlight a feature.
. Press to activate the highlighted
feature.
. Turn to manually change the
radio station.
BACK/
/: Press to return to the
previous screen in a menu.
INFO (Information) : Press to
toggle through an audio or
navigation information screen. CONFIG (Configuration Menu) :
Press to adjust features for
Languages, Time and Date, Radio
Settings, Phone Settings, Display
Settings, and Vehicle Settings.
NAV (Navigation):
.
Press to view the vehicle’s
current position on the map
screen.
. Continue pressing to cycle
through the full map and split
screens.
DEST(Destination):
. Press to enter a destination.
. If a destination has already been
entered, press to access the
Destination Menu. See
Destination 050.
gor©SEEK (Previous/
Reverse):
. CD, USB, Bluetooth Audio:
Press to seek to the beginning of
the current or previous track.
. CD, USB, Bluetooth Audio:
Press and hold to quickly
reverse through a track. Release
the button to return to playing speed. See
CD Player034,
USB 035, or Bluetooth Audio
0 42.
. AM, FM, XM (if equipped): Press
to seek to the previous strong
station.
RPT or RPT NAV (Repeat
Navigation) : Press to repeat the
last voice guidance prompt.
Oor VOL/O(Volume/Power):
. Press to turn the system on
and off.
. Turn to adjust the volume.
dor SEEK¨(Next/Forward):
. CD, USB, Bluetooth Audio:
Press to seek the next track.
. CD, USB, Bluetooth Audio:
Press and hold to fast forward
through a track. Release the
button to return to playing
speed. See CD Player034,
USB 035, or Bluetooth Audio
0 42.
. AM, FM, XM (if equipped): Press
to seek to the previous strong
station.
Page 16 of 94
Chevrolet Malibu Limited/Cruze Limited MyLink Infotainment System
(GMNA-Localizing-U.S./Canada-9282853) - 2016 - crc - 4/16/15
Radio 15
Radio
AM-FM Radio
Playing the Radio
OorVOL/O(Volume/Power):
. Press to turn the radio on or off.
. Turn to increase or decrease the
volume of the active source.
The steering wheel controls can
also be used to adjust the volume.
See Steering Wheel Controls 09.
Radio Operation
The radio will work when the ignition
is in ON/RUN or ACC/
ACCESSORY. When the ignition
changes from ON/RUN to LOCK/
OFF, the radio will continue to work
for 10 minutes or until the driver
door is opened.
The radio can be turned on by
pressing the power button on the
radio and will stay on for
10 minutes. Opening the driver door
will not turn the radio off when
pressing the power button. Some radios may stay on longer
and reset the time for 10 minutes if
there are any additional presses of
any radio button.
The radio can be turned off at any
time by pressing the power button.
Audio Source
Press SRCE on the faceplate or
SRC on the steering wheel controls
to display and scroll through the
available sources AM, FM, XM (if
equipped), Pandora (if equipped),
Stitcher, CD, USB, AUX, and
Bluetooth Audio.
Infotainment System Settings
Tone Settings
To access the tone settings, press
TONE on the faceplate or touch the
Tone Settings screen button on the
Home Page. Tone settings are
specific to each source.To adjust the settings:
.
Bass: Touch + or −to change
the level.
. Mid (Midrange): Touch + or −to
change the level.
. Treble: Touch + or −to change
the level.
. EQ: Press or turn the TUNE/
MENU or MENU/SEL knob to
cycle through the preset EQ
options. If the vehicle is
equipped with the Bose
®Energy
Efficient Series sound system,
EQ provides a choice of Manual
or Talk.
. Fade: Touch the F or R button
for more sound from the front or
rear speakers. The middle
position balances the sound
between the front and rear
speakers.
. Balance: Touch the L or R button
for more sound from the left or
right speakers. The middle
position balances the sound
between the left and right
speakers.
Page 34 of 94
Chevrolet Malibu Limited/Cruze Limited MyLink Infotainment System
(GMNA-Localizing-U.S./Canada-9282853) - 2016 - crc - 4/16/15
Radio 33
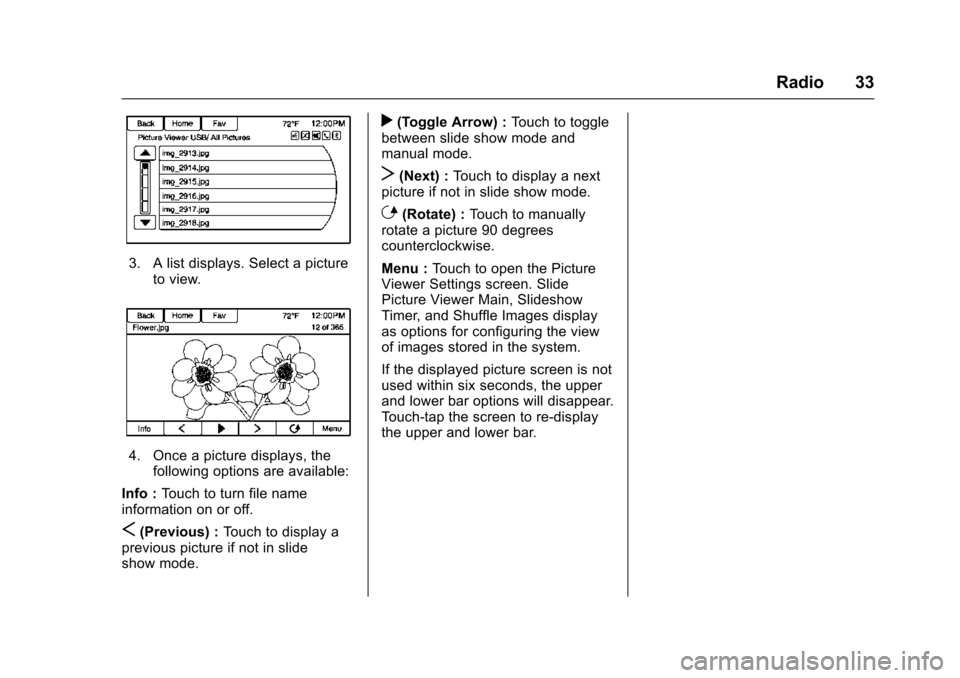
3. A list displays. Select a pictureto view.
4. Once a picture displays, thefollowing options are available:
Info : Touch to turn file name
information on or off.
S(Previous) : Touch to display a
previous picture if not in slide
show mode.
r(Toggle Arrow) : Touch to toggle
between slide show mode and
manual mode.
T(Next) : Touch to display a next
picture if not in slide show mode.
E(Rotate) : Touch to manually
rotate a picture 90 degrees
counterclockwise.
Menu : Touch to open the Picture
Viewer Settings screen. Slide
Picture Viewer Main, Slideshow
Timer, and Shuffle Images display
as options for configuring the view
of images stored in the system.
If the displayed picture screen is not
used within six seconds, the upper
and lower bar options will disappear.
Touch-tap the screen to re-display
the upper and lower bar.
Page 61 of 94
Chevrolet Malibu Limited/Cruze Limited MyLink Infotainment System
(GMNA-Localizing-U.S./Canada-9282853) - 2016 - crc - 4/16/15
60 Navigation
Show on Map :Touch to display
the Map Screen.
Save : Touch to save the
downloaded destination to the
address book.
Call : Touch to initiate a call with
Bluetooth Phone or OnStar
Hands-Free Calling (if available).
Save as Home : Touch to set an
address as a home destination.
Route Guidance Active
If an OnStar destination is
downloaded while route guidance is
already active, the system displays
a pop-up screen with the following
screen function:
. Touch Start Guidance; the
navigation system adds the
downloaded destination before
the next waypoint of the existing
route (closest to the current
vehicle position).
. All other buttons on the pop-up
screen operate as described
under “Route Guidance Not
Active.” Previous Destinations
Previously downloaded OnStar
destinations are saved under
Previous Destinations in the
navigation system, where they can
be accessed or saved to the
Address Book.
Configure Menu
The Configuration Menu is used to
adjust features and preferences,
such as Sound, Radio, Nav
(Navigation), Display, or Time
Settings.
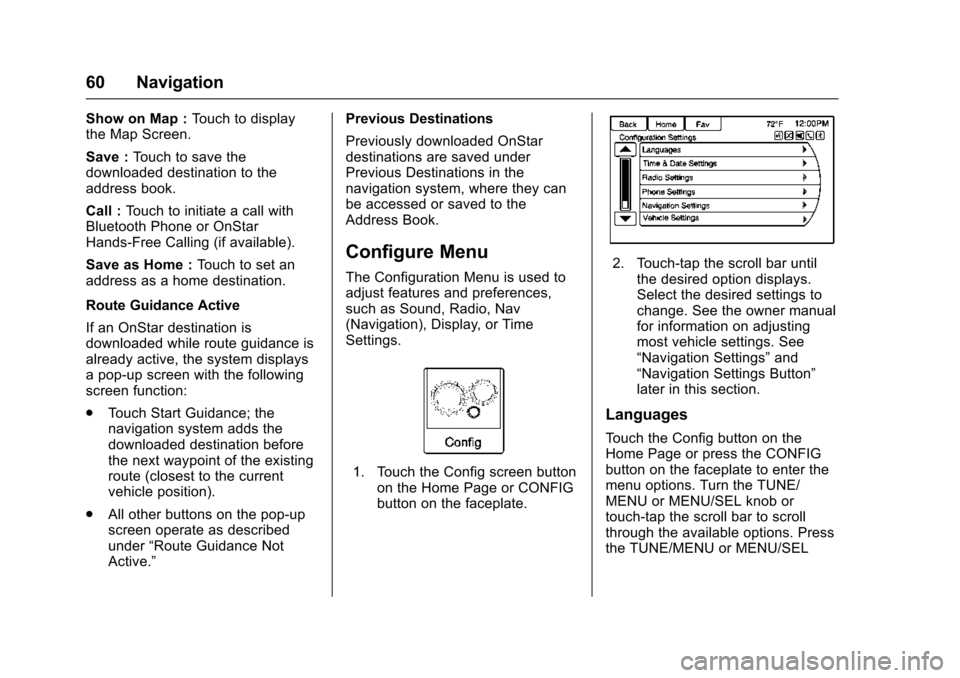
1. Touch the Config screen button
on the Home Page or CONFIG
button on the faceplate.
2. Touch-tap the scroll bar untilthe desired option displays.
Select the desired settings to
change. See the owner manual
for information on adjusting
most vehicle settings. See
“Navigation Settings” and
“Navigation Settings Button”
later in this section.
Languages
Touch the Config button on the
Home Page or press the CONFIG
button on the faceplate to enter the
menu options. Turn the TUNE/
MENU or MENU/SEL knob or
touch-tap the scroll bar to scroll
through the available options. Press
the TUNE/MENU or MENU/SEL
Page 66 of 94
Chevrolet Malibu Limited/Cruze Limited MyLink Infotainment System
(GMNA-Localizing-U.S./Canada-9282853) - 2016 - crc - 4/16/15
Navigation 65
Touch to enable the Guidance Alert
pop-up to be viewed on the map or
on the main screens such as audio,
weather, phone, etc. A checkmark
appears to indicate the guidance
alert mode is on.
Vehicle Settings
See“Vehicle Personalization” in the
owner manual.
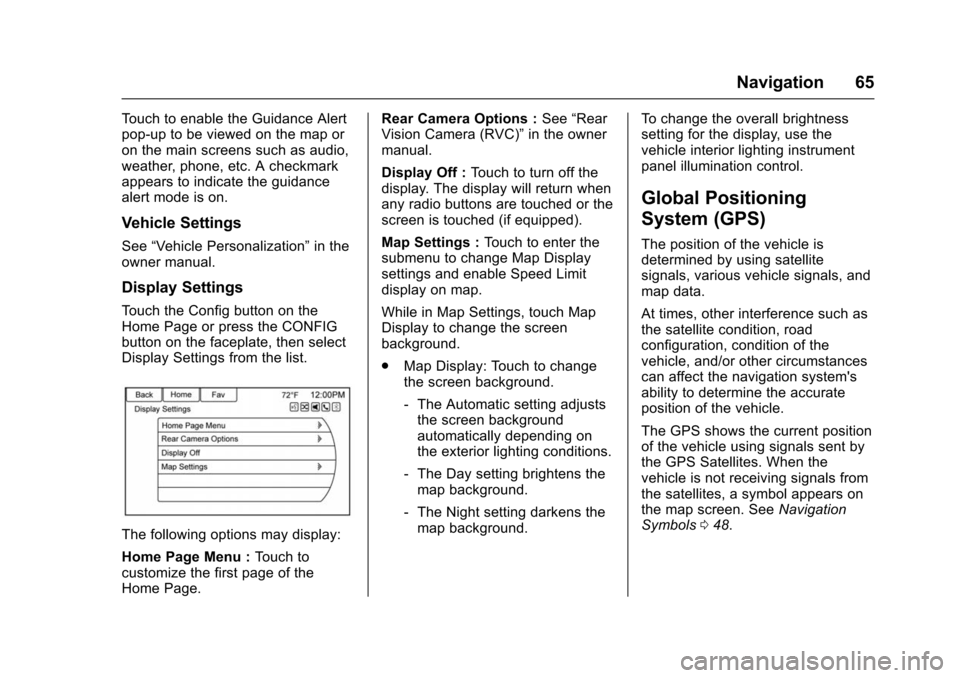
Display Settings
Touch the Config button on the
Home Page or press the CONFIG
button on the faceplate, then select
Display Settings from the list.
The following options may display:
Home Page Menu : Touch to
customize the first page of the
Home Page. Rear Camera Options :
See“Rear
Vision Camera (RVC)” in the owner
manual.
Display Off : Touch to turn off the
display. The display will return when
any radio buttons are touched or the
screen is touched (if equipped).
Map Settings : Touch to enter the
submenu to change Map Display
settings and enable Speed Limit
display on map.
While in Map Settings, touch Map
Display to change the screen
background.
. Map Display: Touch to change
the screen background.
‐The Automatic setting adjusts
the screen background
automatically depending on
the exterior lighting conditions.
‐ The Day setting brightens the
map background.
‐ The Night setting darkens the
map background. To change the overall brightness
setting for the display, use the
vehicle interior lighting instrument
panel illumination control.
Global Positioning
System (GPS)
The position of the vehicle is
determined by using satellite
signals, various vehicle signals, and
map data.
At times, other interference such as
the satellite condition, road
configuration, condition of the
vehicle, and/or other circumstances
can affect the navigation system's
ability to determine the accurate
position of the vehicle.
The GPS shows the current position
of the vehicle using signals sent by
the GPS Satellites. When the
vehicle is not receiving signals from
the satellites, a symbol appears on
the map screen. See
Navigation
Symbols 048.
Page 77 of 94
Chevrolet Malibu Limited/Cruze Limited MyLink Infotainment System
(GMNA-Localizing-U.S./Canada-9282853) - 2016 - crc - 4/16/15
76 Bluetooth Phone/Devices
SeeVoice Recognition 068.
Bluetooth Audio
See Bluetooth Audio 042.
Pairing with Infotainment
Controls
A Bluetooth-enabled cell phone
must be paired and then connected
to the vehicle before it can be used.
See your cell phone manufacturer's
user guide for Bluetooth functions
before pairing the cell phone. If a
Bluetooth phone is not connected,
calls will be made using OnStar
Hands-Free Calling, if available.
See “OnStar” in the owner manual.
Pairing Information
. A Bluetooth-enabled phone and
an audio playback device can be
paired to the system at the
same time.
. Up to five devices can be paired
to the Bluetooth system.
. The pairing process is disabled
when the vehicle is moving. .
Pairing only needs to be
completed once, unless the
pairing information on the cell
phone changes or the cell phone
is deleted from the system.
. Only one paired cell phone can
be connected to the Bluetooth
system at a time.
. If multiple paired cell phones are
within range of the system, the
radio will connect to the first
phone in the list or to the phone
that was previously connected.
Pairing a Phone/Device 1. Press the CONFIG button or
5.
2. Select Phone Settings.
3. Select Pair Device (Phone). The radio displays “Please
start Bluetooth search on your
phone. Confirm or enter
number:.” If the device
supports a four-digit Personal
Identification Number (PIN), it
will display. The PIN is used in
Step 5. 4. Start the pairing process on the
cell phone to be paired to the
vehicle. See the cell phone
manufacturer's user guide.
5. Locate and select the device named after the vehicle make
and model in the list on the cell
phone. Follow the instructions
on the cell phone to enter the
PIN provided in Step 3, or to
confirm the six-digit code
matches. The system
recognizes the new connected
phone after the pairing process
is complete.
6. If the phone prompts to accept connection or allow phone
book download, select always
accept and allow. The phone
book may not be available if
not accepted. Some phones
will put connection request or
phonebook request in a pull
down task bar at the top of the
screen. Drag down the task bar
and look for connection/
phonebook request and accept.
7. Repeat to pair additional phones.