tire pressure light off CHEVROLET MALIBU 2017 9.G Owners Manual
[x] Cancel search | Manufacturer: CHEVROLET, Model Year: 2017, Model line: MALIBU, Model: CHEVROLET MALIBU 2017 9.GPages: 419, PDF Size: 7.81 MB
Page 29 of 419
Chevrolet Malibu Owner Manual (GMNA-Localizing-U.S./Canada/Mexico-10122664) - 2017 - crc - 6/1/16
28 In Brief
.To t u r n o f f b o t h t r a c t i o n c o n t r o land StabiliTrak, press and
holdgon the center console,
untiliandgilluminate in the
instrument cluster.
.Press and releasegagain to
turn on both systems.
SeeTr a c t i o n C o n t r o l / E l e c t r o n i cStability Control0241.
Tire Pressure Monitor
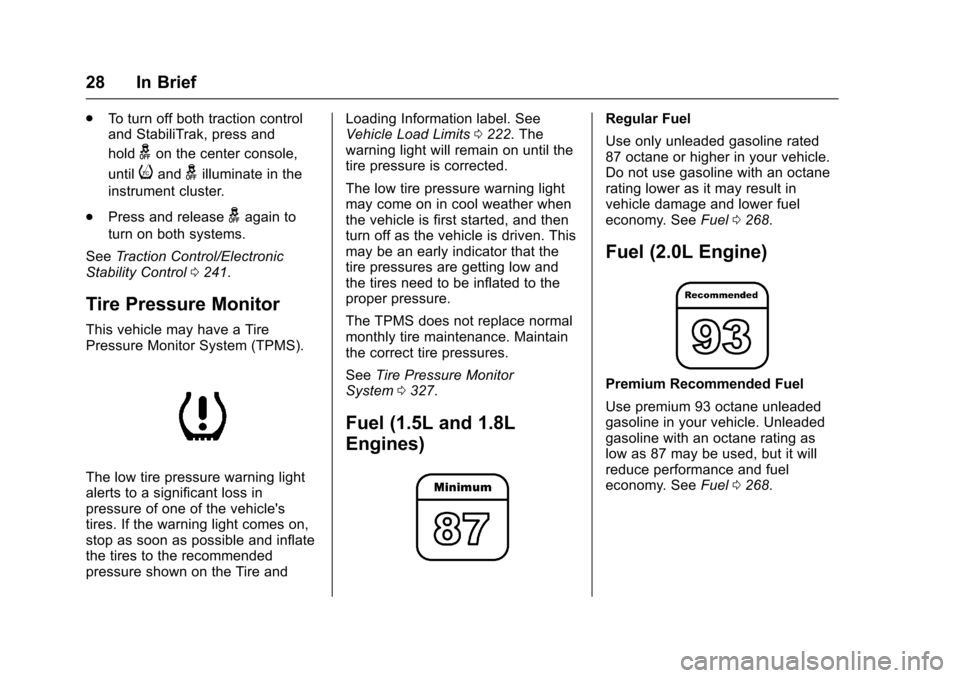
This vehicle may have a TirePressure Monitor System (TPMS).
The low tire pressure warning lightalerts to a significant loss inpressure of one of the vehicle'stires. If the warning light comes on,stop as soon as possible and inflatethe tires to the recommendedpressure shown on the Tire and
Loading Information label. SeeVehicle Load Limits0222.Thewarning light will remain on until thetire pressure is corrected.
The low tire pressure warning lightmay come on in cool weather whenthe vehicle is first started, and thenturn off as the vehicle is driven. Thismay be an early indicator that thetire pressures are getting low andthe tires need to be inflated to theproper pressure.
The TPMS does not replace normalmonthly tire maintenance. Maintainthe correct tire pressures.
SeeTire Pressure MonitorSystem0327.
Fuel (1.5L and 1.8L
Engines)
Regular Fuel
Use only unleaded gasoline rated87 octane or higher in your vehicle.Do not use gasoline with an octanerating lower as it may result invehicle damage and lower fueleconomy. SeeFuel0268.
Fuel (2.0L Engine)
Premium Recommended Fuel
Use premium 93 octane unleadedgasoline in your vehicle. Unleadedgasoline with an octane rating aslow as 87 may be used, but it willreduce performance and fueleconomy. SeeFuel0268.
Page 104 of 419
Chevrolet Malibu Owner Manual (GMNA-Localizing-U.S./Canada/Mexico-10122664) - 2017 - crc - 5/23/16
Instruments and Controls 103
Instruments and
Controls
Controls
Steering Wheel Adjustment . . . 104Steering Wheel Controls . . . . . . 104Heated Steering Wheel . . . . . . . 105Horn . . . . . . . . . . . . . . . . . . . . . . . . . . 105Windshield Wiper/Washer . . . . 105Compass . . . . . . . . . . . . . . . . . . . . . 106Clock . . . . . . . . . . . . . . . . . . . . . . . . . 107Power Outlets . . . . . . . . . . . . . . . . 108Wireless Charging . . . . . . . . . . . . 109
Warning Lights, Gauges, and
Indicators
Warning Lights, Gauges, andIndicators . . . . . . . . . . . . . . . . . . . . 111Instrument Cluster (BaseLevel) . . . . . . . . . . . . . . . . . . . . . . . 112Instrument Cluster(Uplevel) . . . . . . . . . . . . . . . . . . . . 114Speedometer . . . . . . . . . . . . . . . . . 117Odometer . . . . . . . . . . . . . . . . . . . . . 117Trip Odometer . . . . . . . . . . . . . . . . 117Ta c h o m e t e r ( N o n - H y b r i d ) . . . . . 11 7Fuel Gauge . . . . . . . . . . . . . . . . . . . 118Power Indicator Gauge(Hybrid) . . . . . . . . . . . . . . . . . . . . . 119
Engine Coolant TemperatureGauge . . . . . . . . . . . . . . . . . . . . . . 119Safety Belt Reminders . . . . . . . . 120Airbag Readiness Light . . . . . . . 120Passenger Airbag StatusIndicator . . . . . . . . . . . . . . . . . . . . 121Charging System Light . . . . . . . 122Malfunction Indicator Lamp(Check Engine Light) . . . . . . . . 122Brake System WarningLight . . . . . . . . . . . . . . . . . . . . . . . . 124Electric Parking BrakeLight . . . . . . . . . . . . . . . . . . . . . . . . 124Service Electric Parking BrakeLight . . . . . . . . . . . . . . . . . . . . . . . . 125Antilock Brake System (ABS)Warning Light . . . . . . . . . . . . . . . 125Lane Keep Assist (LKA)Light . . . . . . . . . . . . . . . . . . . . . . . . 125Vehicle Ahead Indicator . . . . . . 126Pedestrian Ahead Indicator . . . 126Traction Off Light . . . . . . . . . . . . . 126StabiliTrak®OFF Light . . . . . . . . 127Traction Control System (TCS)/StabiliTrak®Light . . . . . . . . . . . 127Tire Pressure Light . . . . . . . . . . . 127Engine Oil Pressure Light . . . . 128Low Fuel Warning Light(Uplevel) . . . . . . . . . . . . . . . . . . . . 128Low Fuel Warning Light (BaseLevel) . . . . . . . . . . . . . . . . . . . . . . . 129
Security Light . . . . . . . . . . . . . . . . . 129Vehicle Ready Light(Hybrid) . . . . . . . . . . . . . . . . . . . . . 129High-Beam On Light . . . . . . . . . . 129Lamps On Reminder . . . . . . . . . 130Cruise Control Light . . . . . . . . . . 130Door Ajar Light (Uplevel) . . . . . 130
Information Displays
Power Flows (Hybrid) . . . . . . . . . 131Energy Information(Hybrid) . . . . . . . . . . . . . . . . . . . . . 131Driver Information Center (DIC)(Base Level) . . . . . . . . . . . . . . . . 131Driver Information Center (DIC)(Uplevel) . . . . . . . . . . . . . . . . . . . . 134
Vehicle Messages
Vehicle Messages . . . . . . . . . . . . 138Battery Voltage and ChargingMessages . . . . . . . . . . . . . . . . . . . 138Brake System Messages . . . . . 138Compass Messages . . . . . . . . . . 139Cruise Control Messages . . . . . 139Door Ajar Messages . . . . . . . . . . 140Engine Cooling SystemMessages . . . . . . . . . . . . . . . . . . . 140Engine Oil Messages . . . . . . . . . 141Engine Power Messages . . . . . 141Fuel System Messages . . . . . . . 141Key and Lock Messages . . . . . 141
Page 128 of 419
Chevrolet Malibu Owner Manual (GMNA-Localizing-U.S./Canada/Mexico-10122664) - 2017 - crc - 5/23/16
Instruments and Controls 127
StabiliTrak®OFF Light
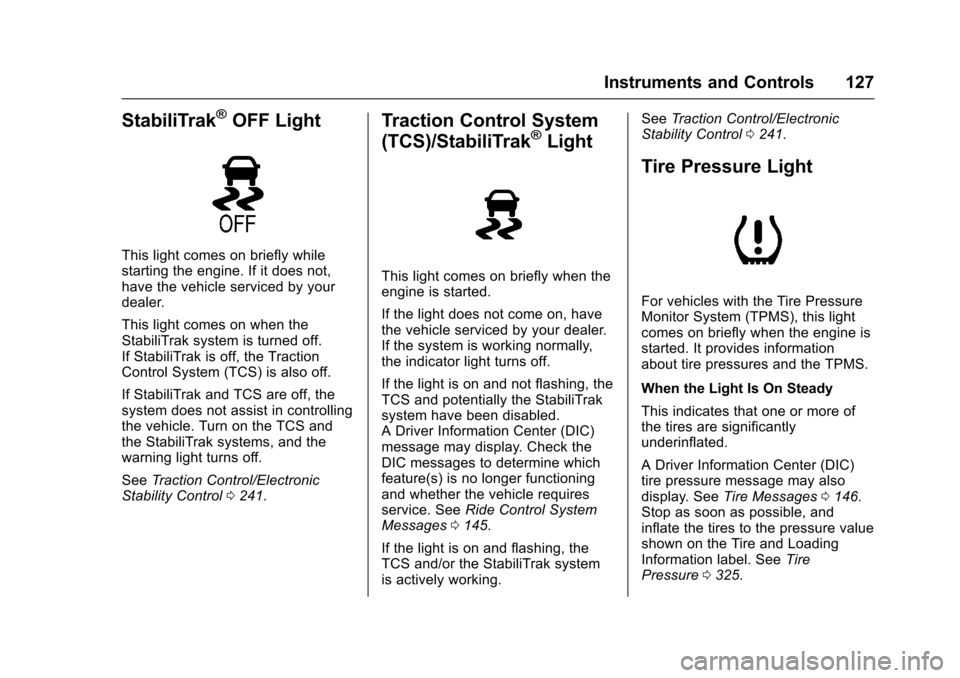
This light comes on briefly whilestarting the engine. If it does not,have the vehicle serviced by yourdealer.
This light comes on when theStabiliTrak system is turned off.If StabiliTrak is off, the TractionControl System (TCS) is also off.
If StabiliTrak and TCS are off, thesystem does not assist in controllingthe vehicle. Turn on the TCS andthe StabiliTrak systems, and thewarning light turns off.
SeeTr a c t i o n C o n t r o l / E l e c t r o n i cStability Control0241.
Traction Control System
(TCS)/StabiliTrak®Light
This light comes on briefly when theengine is started.
If the light does not come on, havethe vehicle serviced by your dealer.If the system is working normally,the indicator light turns off.
If the light is on and not flashing, theTCS and potentially the StabiliTraksystem have been disabled.ADriverInformationCenter(DIC)message may display. Check theDIC messages to determine whichfeature(s) is no longer functioningand whether the vehicle requiresservice. SeeRide Control SystemMessages0145.
If the light is on and flashing, theTCS and/or the StabiliTrak systemis actively working.
SeeTr a c t i o n C o n t r o l / E l e c t r o n i cStability Control0241.
Tire Pressure Light
For vehicles with the Tire PressureMonitor System (TPMS), this lightcomes on briefly when the engine isstarted. It provides informationabout tire pressures and the TPMS.
When the Light Is On Steady
This indicates that one or more ofthe tires are significantlyunderinflated.
ADriverInformationCenter(DIC)tire pressure message may alsodisplay. SeeTire Messages0146.Stop as soon as possible, andinflate the tires to the pressure valueshown on the Tire and LoadingInformation label. SeeTirePressure0325.
Page 129 of 419
Chevrolet Malibu Owner Manual (GMNA-Localizing-U.S./Canada/Mexico-10122664) - 2017 - crc - 5/23/16
128 Instruments and Controls
When the Light Flashes First andThen Is On Steady
If the light flashes for about a minuteand then stays on, there may be aproblem with the TPMS. If theproblem is not corrected, the lightwill come on at every ignition cycle.SeeTire Pressure MonitorOperation0328.
Engine Oil Pressure Light
Caution
Lack of proper engine oil
maintenance can damage the
engine. Driving with the engine oil
low can also damage the engine.
The repairs would not be covered
by the vehicle warranty. Check
the oil level as soon as possible.
Add oil if required, but if the oil
level is within the operating range
and the oil pressure is still low,
have the vehicle serviced. Always
follow the maintenance schedule
for changing engine oil.
This light should come on briefly asthe engine is started. If it does notcome on, have the vehicle servicedby your dealer.
If the light comes on and stays on, itmeans that oil is not flowing throughthe engine properly. The vehiclecould be low on oil and might havesome other system problem. Seeyour dealer.
Low Fuel Warning Light
(Uplevel)
This light is near the fuel gauge andcomes on briefly when the ignition isturned on as a check to show it isworking.
It also comes on when the fuel tankis low on fuel. The light turns offwhen fuel is added. If it does not,have the vehicle serviced.
Page 329 of 419
Chevrolet Malibu Owner Manual (GMNA-Localizing-U.S./Canada/Mexico-10122664) - 2017 - crc - 5/23/16
328 Vehicle Care
Tire Pressure Monitor
Operation
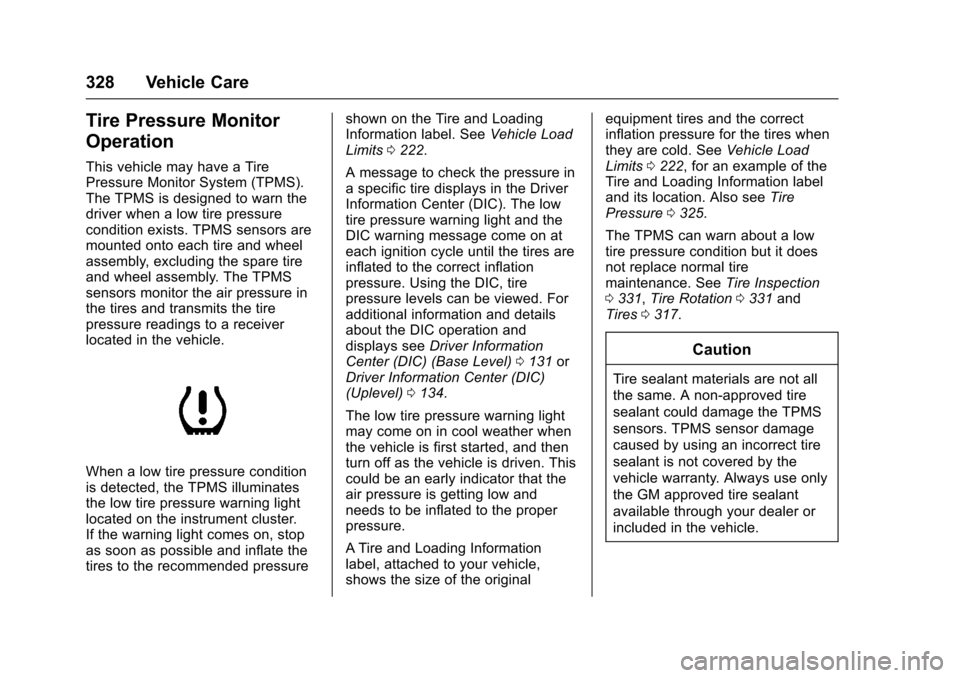
This vehicle may have a TirePressure Monitor System (TPMS).The TPMS is designed to warn thedriver when a low tire pressurecondition exists. TPMS sensors aremounted onto each tire and wheelassembly, excluding the spare tireand wheel assembly. The TPMSsensors monitor the air pressure inthe tires and transmits the tirepressure readings to a receiverlocated in the vehicle.
When a low tire pressure conditionis detected, the TPMS illuminatesthe low tire pressure warning lightlocated on the instrument cluster.If the warning light comes on, stopas soon as possible and inflate thetires to the recommended pressure
shown on the Tire and LoadingInformation label. SeeVehicle LoadLimits0222.
AmessagetocheckthepressureinaspecifictiredisplaysintheDriverInformation Center (DIC). The lowtire pressure warning light and theDIC warning message come on ateach ignition cycle until the tires areinflated to the correct inflationpressure. Using the DIC, tirepressure levels can be viewed. Foradditional information and detailsabout the DIC operation anddisplays seeDriver InformationCenter (DIC) (Base Level)0131orDriver Information Center (DIC)(Uplevel)0134.
The low tire pressure warning lightmay come on in cool weather whenthe vehicle is first started, and thenturn off as the vehicle is driven. Thiscould be an early indicator that theair pressure is getting low andneeds to be inflated to the properpressure.
ATire and Loading Informationlabel, attached to your vehicle,shows the size of the original
equipment tires and the correctinflation pressure for the tires whenthey are cold. SeeVehicle LoadLimits0222,foranexampleoftheTire and Loading Information labeland its location. Also seeTirePressure0325.
The TPMS can warn about a lowtire pressure condition but it doesnot replace normal tiremaintenance. SeeTire Inspection0331,Tire Rotation0331andTires0317.
Caution
Tire sealant materials are not all
the same. A non-approved tire
sealant could damage the TPMS
sensors. TPMS sensor damage
caused by using an incorrect tire
sealant is not covered by the
vehicle warranty. Always use only
the GM approved tire sealant
available through your dealer or
included in the vehicle.
Page 333 of 419
Chevrolet Malibu Owner Manual (GMNA-Localizing-U.S./Canada/Mexico-10122664) - 2017 - crc - 5/23/16
332 Vehicle Care
Check that all wheel nuts are
properly tightened. See“Wheel
Nut Torque”underCapacities
and Specifications0381.
{Warning
Rust or dirt on a wheel, or on the
parts to which it is fastened, can
make wheel nuts become loose
after time. The wheel could come
off and cause an accident. When
changing a wheel, remove any
rust or dirt from places where the
wheel attaches to the vehicle. In
an emergency, a cloth or a paper
towel can be used; however, use
ascraperorwirebrushlaterto
remove all rust or dirt.
Lightly coat the center of the
wheel hub with wheel bearing
grease after a wheel change or
tire rotation to prevent corrosion
or rust build-up. Do not get
grease on the flat wheel
mounting surface or on the
wheel nuts or bolts.
When It Is Time for New
Tires
Factors such as maintenance,temperatures, driving speeds,vehicle loading, and road conditionsaffect the wear rate of the tires.
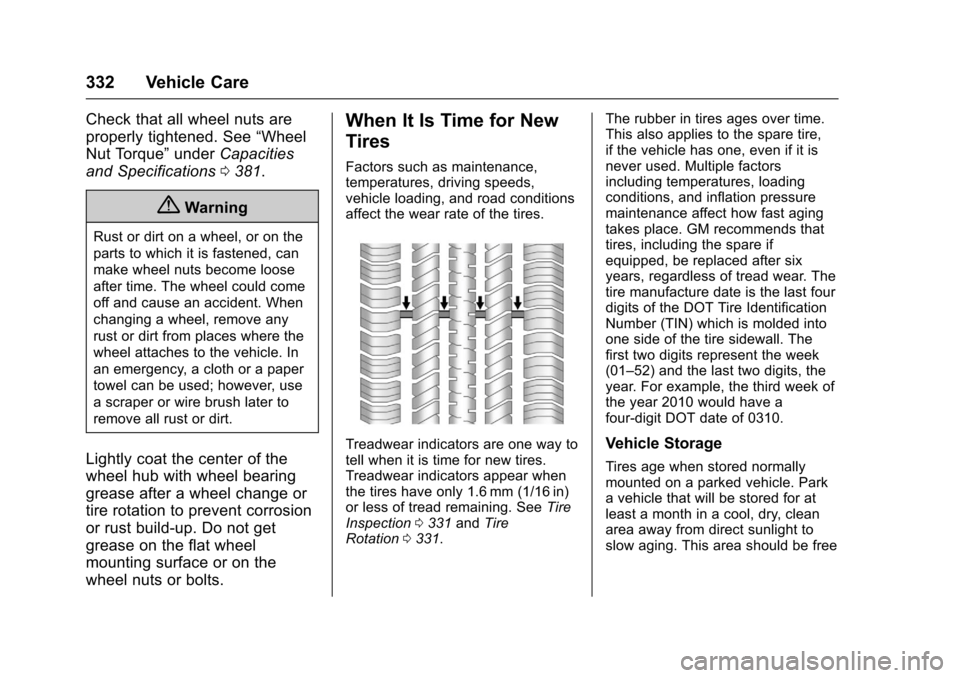
Treadwear indicators are one way totell when it is time for new tires.Treadwear indicators appear whenthe tires have only 1.6 mm (1/16 in)or less of tread remaining. SeeTireInspection0331andTireRotation0331.
The rubber in tires ages over time.This also applies to the spare tire,if the vehicle has one, even if it isnever used. Multiple factorsincluding temperatures, loadingconditions, and inflation pressuremaintenance affect how fast agingtakes place. GM recommends thattires, including the spare ifequipped, be replaced after sixyears, regardless of tread wear. Thetire manufacture date is the last fourdigits of the DOT Tire IdentificationNumber (TIN) which is molded intoone side of the tire sidewall. Thefirst two digits represent the week(01–52) and the last two digits, theyear. For example, the third week ofthe year 2010 would have afour-digit DOT date of 0310.
Vehicle Storage
Tires age when stored normallymounted on a parked vehicle. Parkavehiclethatwillbestoredforatleast a month in a cool, dry, cleanarea away from direct sunlight toslow aging. This area should be free
Page 337 of 419
Chevrolet Malibu Owner Manual (GMNA-Localizing-U.S./Canada/Mexico-10122664) - 2017 - crc - 5/23/16
336 Vehicle Care
Temperature
The temperature grades are A
(the highest), B, and C,
representing the tire's resistance
to the generation of heat and its
ability to dissipate heat when
tested under controlled
conditions on a specified indoor
laboratory test wheel. Sustained
high temperature can cause the
material of the tire to degenerate
and reduce tire life, and
excessive temperature can lead
to sudden tire failure. The grade
Ccorrespondstoalevelof
performance which all
passenger car tires must meet
under the Federal Motor Safety
Standard No. 109. Grades B and
Arepresenthigherlevelsof
performance on the laboratory
test wheel than the minimum
required by law. Warning: The
temperature grade for this tire is
established for a tire that is
properly inflated and not
overloaded. Excessive speed,
underinflation, or excessive
loading, either separately or in
combination, can cause heat
buildup and possible tire failure.
Wheel Alignment and Tire
Balance
The tires and wheels were alignedand balanced at the factory toprovide the longest tire life and bestoverall performance. Adjustments towheel alignment and tire balancingare not necessary on a regularbasis. Consider an alignment checkif there is unusual tire wear or thevehicle is significantly pulling to oneside or the other. Some slight pull tothe left or right, depending on thecrown of the road and/or other roadsurface variations such as troughsor ruts, is normal. If the vehicle isvibrating when driving on a smoothroad, the tires and wheels may needto be rebalanced. See your dealerfor proper diagnosis.
Wheel Replacement
Replace any wheel that is bent,cracked, or badly rusted orcorroded. If wheel nuts keep comingloose, the wheel, wheel bolts, andwheel nuts should be replaced.If the wheel leaks air, replace it.Some aluminum wheels can berepaired. See your dealer if any ofthese conditions exist.
Yo u r d e a l e r w i l l k n o w t h e k i n d o fwheel that is needed.
Each new wheel should have thesame load-carrying capacity,diameter, width, offset, and bemounted the same way as the one itreplaces.
Replace wheels, wheel bolts, wheelnuts, or Tire Pressure MonitorSystem (TPMS) sensors with newGM original equipment parts.
{Warning
Using the wrong replacement
wheels, wheel bolts, or wheel
nuts can be dangerous. It could
(Continued)
Page 343 of 419
Chevrolet Malibu Owner Manual (GMNA-Localizing-U.S./Canada/Mexico-10122664) - 2017 - crc - 5/23/16
342 Vehicle Care
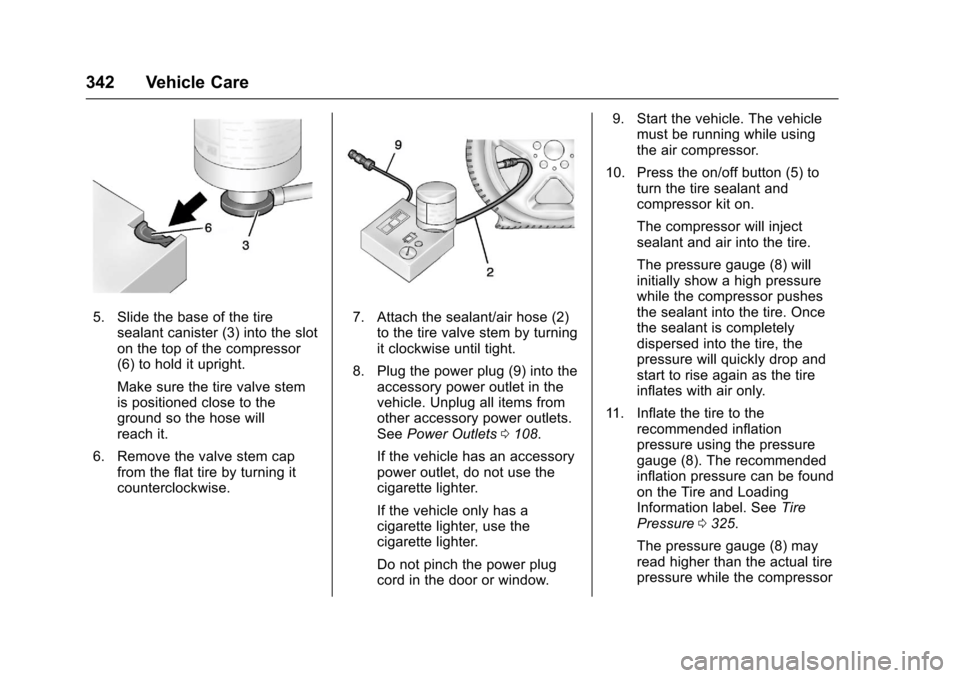
5. Slide the base of the tiresealant canister (3) into the sloton the top of the compressor(6) to hold it upright.
Make sure the tire valve stemis positioned close to theground so the hose willreach it.
6. Remove the valve stem capfrom the flat tire by turning itcounterclockwise.
7. Attach the sealant/air hose (2)to the tire valve stem by turningit clockwise until tight.
8. Plug the power plug (9) into theaccessory power outlet in thevehicle. Unplug all items fromother accessory power outlets.SeePower Outlets0108.
If the vehicle has an accessorypower outlet, do not use thecigarette lighter.
If the vehicle only has acigarette lighter, use thecigarette lighter.
Do not pinch the power plugcord in the door or window.
9. Start the vehicle. The vehiclemust be running while usingthe air compressor.
10. Press the on/off button (5) toturn the tire sealant andcompressor kit on.
The compressor will injectsealant and air into the tire.
The pressure gauge (8) willinitially show a high pressurewhile the compressor pushesthe sealant into the tire. Oncethe sealant is completelydispersed into the tire, thepressure will quickly drop andstart to rise again as the tireinflates with air only.
11 . I n f l a t e t h e t i r e t o t h erecommended inflationpressure using the pressuregauge (8). The recommendedinflation pressure can be foundon the Tire and LoadingInformation label. SeeTirePressure0325.
The pressure gauge (8) mayread higher than the actual tirepressure while the compressor
Page 346 of 419

Chevrolet Malibu Owner Manual (GMNA-Localizing-U.S./Canada/Mexico-10122664) - 2017 - crc - 5/23/16
Vehicle Care 345
1. Remove the compressor fromits storage location. SeeStoring the Tire Sealant andCompressor Kit0346.
2. Remove the air only hose (10)and the power plug (9) from thebottom of the compressor.
3. Place the compressor on theground near the flat tire.
Make sure the tire valve stemis positioned close to theground so the hose willreach it.
4. Remove the valve stem capfrom the flat tire by turning itcounterclockwise.
5. Attach the air only hose (10) tothe tire valve stem by turning itclockwise until tight.
6. Plug the power plug (9) into theaccessory power outlet in thevehicle. Unplug all items fromother accessory power outlets.SeePower Outlets0108.
If the vehicle has an accessorypower outlet, do not use thecigarette lighter.
If the vehicle only has acigarette lighter, use thecigarette lighter.
Do not pinch the power plugcord in the door or window.
7. Start the vehicle. The vehiclemust be running while usingthe air compressor.
8. Press the on/off button (5) toturn the tire sealant andcompressor kit on.
The compressor will inflate thetire with air only.
9. Inflate the tire to therecommended inflationpressure using the pressuregauge (8). The recommendedinflation pressure can be foundon the Tire and LoadingInformation label. SeeTirePressure0325.
The pressure gauge (8) mayread higher than the actual tirepressure while the compressoris on. Turn the compressor offto get an accurate pressure
reading. The compressor maybe turned on/off until thecorrect pressure is reached.
Caution
If the recommended pressure
cannot be reached after
approximately 25 minutes, the
vehicle should not be driven
farther. The tire is too severely
damaged and the tire sealant and
compressor kit cannot inflate the
tire. Remove the power plug from
the accessory power outlet and
unscrew the inflating hose from
the tire valve. SeeRoadside
Assistance Program0387.
10. Press the on/off button (5) toturn the tire sealant andcompressor kit off.
Be careful while handling thecompressor as it could bewarm after usage.
11 . U n p l u g t h e p o w e r p l u g ( 9 ) f r o mthe accessory power outlet inthe vehicle.
Page 411 of 419

Chevrolet Malibu Owner Manual (GMNA-Localizing-U.S./Canada/Mexico-10122664) - 2017 - crc - 5/23/16
410 Index
Door (cont'd)
Locks . . . . . . . . . . . . . . . . . . . . . . . . . . . 40
Power Locks . . . . . . . . . . . . . . . . . . . . 42
Drive Belt Routing, Engine . . . . . . 382
Driver Assistance Systems . . . . . 252
Driver Information
Center (DIC) . . . . . . . . . . . . . 131, 134
Driving
Assistance Systems . . . . . . . . . . 257
Characteristics and
To w i n g T i p s . . . . . . . . . . . . . . . . . 2 7 2
Defensive . . . . . . . . . . . . . . . . . . . . . 216
Drunk . . . . . . . . . . . . . . . . . . . . . . . . . 216
For Better Fuel Economy . . . . . . . 29
Hill and Mountain Roads . . . . . . 219
If the Vehicle is Stuck . . . . . . . . . 221
Loss of Control . . . . . . . . . . . . . . . 218
Off-Road Recovery . . . . . . . . . . . 217
Vehicle Load Limits . . . . . . . . . . . 222
Wet Roads . . . . . . . . . . . . . . . . . . . 218
Winter . . . . . . . . . . . . . . . . . . . . . . . . 220
Dual Automatic Climate
Control System . . . . . . . . . . . . . . . . 208
E
Electric Parking Brake . . . . . . . . . . 238
Electric Parking Brake Light . . . . 124
Electrical Equipment,
Add-On . . . . . . . . . . . . . . . . . . . . . . . 277
Electrical System
Engine Compartment Fuse
Block . . . . . . . . . . . . . . . . . . . . . . . . .311
Fuses . . . . . . . . . . . . . . . . . . . . . . . . 310
Instrument Panel Fuse
Block . . . . . . . . . . . . . . . . . . . . . . . . 315
Overload . . . . . . . . . . . . . . . . . . . . . 310
Emergency
OnStar®...................... 398
Energy Information . . . . . . . . . . . . . 131
Engine
Air Cleaner/Filter . . . . . . . . . . . . . 292
Check and Service Engine
Soon Light . . . . . . . . . . . . . . . . . . 122
Compartment Overview . . . . . . . 283
Coolant . . . . . . . . . . . . . . . . . . . . . . . 295
Coolant Temperature
Gauge . . . . . . . . . . . . . . . . . . . . . . .119
Cooling System . . . . . . . . . . 293, 294
Cooling System Messages . . . 140
Drive Belt Routing . . . . . . . . . . . . 382
Exhaust . . . . . . . . . . . . . . . . . . . . . . 232
Heater . . . . . . . . . . . . . . . . . . . . . . . . 229
Oil Life System . . . . . . . . . . . . . . . 291
Oil Messages . . . . . . . . . . . . . . . . . 141
Oil Pressure Light . . . . . . . . . . . . 128
Overheating . . . . . . . . . . . . . . . . . . 297
Power Messages . . . . . . . . . . . . . 141
Engine (cont'd)
Running While Parked . . . . . . . . 233
Starting . . . . . . . . . . . . . . . . . . . . . . . 227
Entry Lighting . . . . . . . . . . . . . . . . . . . 169
Equipment, Towing . . . . . . . . . . . . . 276
Event Data Recorders . . . . . . . . . . 395
Exit Lighting . . . . . . . . . . . . . . . . . . . . 169
Extended Parking . . . . . . . . . . . . . . . 232
Extender, Safety Belt . . . . . . . . . . . . 69
Exterior Lamp Controls . . . . . . . . . 163
Exterior Lamps Off Reminder . . . 165
Exterior Lighting Battery
Saver . . . . . . . . . . . . . . . . . . . . . . . . . 170
F
Features
Memory . . . . . . . . . . . . . . . . . . . . . . . . . 12
Filter,
Engine Air Cleaner . . . . . . . . . . . 292
Flash-to-Pass . . . . . . . . . . . . . . . . . . . 165
Flashers, Hazard Warning . . . . . . 166
Flat Tire . . . . . . . . . . . . . . . . . . . . . . . . 338
Changing . . . . . . . . . . . . . . . . . . . . . 346
Floor Mats . . . . . . . . . . . . . . . . . . . . . . 366
Fluid
Automatic Transmission . . . . . . 292
Brakes . . . . . . . . . . . . . . . . . . . . . . . . 300
Washer . . . . . . . . . . . . . . . . . . . . . . . 299
Folding Mirrors . . . . . . . . . . . . . . . . . . 49