towing CHEVROLET MALIBU 2019 Owner's Guide
[x] Cancel search | Manufacturer: CHEVROLET, Model Year: 2019, Model line: MALIBU, Model: CHEVROLET MALIBU 2019Pages: 382, PDF Size: 37.7 MB
Page 227 of 382
Chevrolet Malibu Owner Manual (GMNA-Localizing-U.S./Canada/Mexico-
12461813) - 2019 - crc - 12/11/18
Driving and Operating 227
When parking your vehicle and your
trailer on a hill:
1. Press the brake pedal, but do
not shift into P (Park) yet. Turn
the wheels into the curb if
facing downhill or into traffic if
facing uphill.
2. Have someone place chocks
under the trailer wheels.
3. When the wheel chocks are in
place, gradually release the
brake pedal to allow the chocks
to absorb the load of the trailer.
4. Reapply the brake pedal. Then
apply the parking brake and
shift into P (Park).
5. Release the brake pedal.
Leaving After Parking on a Hill
1. Apply and hold the brake
pedal.
.
Start the engine.
.
Shift into a gear.
.
Release the parking brake.
2. Let up on the brake pedal.3. Drive slowly until the trailer is
clear of the chocks.
4. Stop and have someone pick
up and store the chocks.
Maintenance When Trailer
Towing
The vehicle needs service more
often when used to tow trailers. See
Maintenance Schedule0329. It is
especially important to check the
automatic transmission fluid, engine
oil, axle lubricant, belts, cooling
system, and brake system before
and during each trip.
Check periodically that all nuts and
bolts on the trailer hitch are tight.
Engine Cooling When Trailer
Towing
The cooling system may temporarily
overheat during severe operating
conditions. SeeEngine Overheating
0253.
Trailer Towing
Caution
Towing a trailer improperly can
damage the vehicle and result in
costly repairs not covered by the
vehicle warranty. To tow a trailer
correctly, follow the directions in
this section and see your dealer
for important information about
towing a trailer with the vehicle.
Trailer Weight
{Warning
Never exceed the towing capacity
for your vehicle.
Safe trailering requires monitoring
the weight, speed, altitude, road
grades, outside temperature,
dimensions of the front of the trailer,
and how frequently the vehicle is
used to tow a trailer.
Before towing a trailer, always
separately weigh:
Page 228 of 382
Chevrolet Malibu Owner Manual (GMNA-Localizing-U.S./Canada/Mexico-
12461813) - 2019 - crc - 12/11/18
228 Driving and Operating
.
The fully loaded vehicle and
trailer combination.
.
The trailer.
.
The trailer tongue.
{Warning
You and others could be seriously
injured or killed if the trailer is too
heavy or the trailer brakes are
inadequate for the load. The
vehicle may be damaged, and the
repairs would not be covered by
the vehicle warranty.
Only tow a trailer if all the steps in
this section have been followed.
Ask your dealer for advice and
information about towing a trailer.
Gross Vehicle Weight
Rating (GVWR)
For information about the vehicle's
maximum load capacity, seeVehicle
Load Limits0172. When calculating
the GVWR with a trailer attached,the trailer tongue weight must be
included as part of the weight the
vehicle is carrying.
Maximum Trailer Weight
The trailer should never weigh more
than 454 kg (1,000 lb). The
maximum allowable weight of the
trailer may be lower based on the
weight of the passengers and cargo
in your trailer.
Trailer Load Balance
The correct trailer load balance
must be maintained to ensure trailer
stability. Incorrect load balance is a
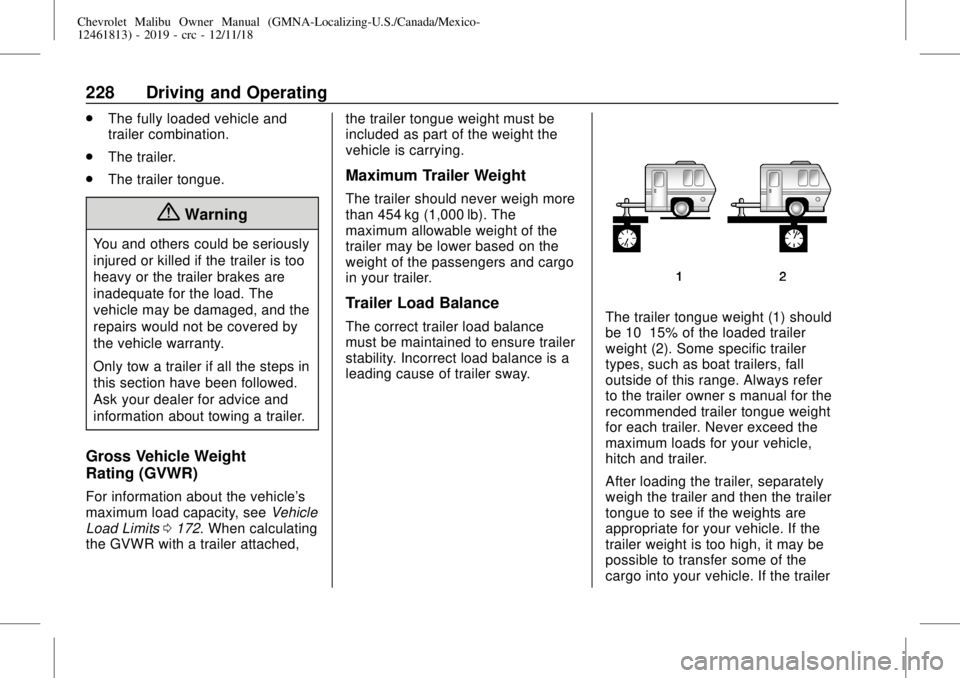
leading cause of trailer sway.The trailer tongue weight (1) should
be 10–15% of the loaded trailer
weight (2). Some specific trailer
types, such as boat trailers, fall
outside of this range. Always refer
to the trailer owner’s manual for the
recommended trailer tongue weight
for each trailer. Never exceed the
maximum loads for your vehicle,
hitch and trailer.
After loading the trailer, separately
weigh the trailer and then the trailer
tongue to see if the weights are
appropriate for your vehicle. If the
trailer weight is too high, it may be
possible to transfer some of the
cargo into your vehicle. If the trailer
Page 229 of 382
Chevrolet Malibu Owner Manual (GMNA-Localizing-U.S./Canada/Mexico-
12461813) - 2019 - crc - 12/11/18
Driving and Operating 229
tongue weight is too high or too low,
it may be possible to rearrange
some of the cargo inside of the
trailer.
Do not exceed the maximum
allowable tongue weight for your
vehicle. Use the shortest hitch
extension available to position the
hitch ball closer to your vehicle. This
will help reduce the effect of the
trailer tongue weight on the trailer
hitch and the rear axle.
If a cargo carrier is used in the
trailer hitch receiver, choose a
carrier that positions the load as
close to the vehicle as possible.
Make sure the total weight,
including the carrier, is no more than
half of the maximum allowable
tongue weight for the vehicle or
227 kg (500 lb), whichever is less.
Ask your dealer for trailering
information or assistance.Towing Equipment
Hitches
Always use the correct hitch
equipment for your vehicle.
Crosswinds, large trucks going by,
and rough roads can affect the
trailer and the hitch.
Never attach rental hitches or other
bumper-type hitches. Only use
frame-mounted hitches that do not
attach to the bumper.
Always seal any holes in your
vehicle if the trailer hitch removed.
If not sealed, dirt, water, and carbon
monoxide (CO) from the exhaust
may enter your vehicle. SeeEngine
Exhaust0184.
Consider using mechanical sway
controls with any trailer. Ask a
trailering professional about sway
controls or refer to the trailer
manufacturer's recommendations
and instructions.
Tires
.
Do not tow a trailer while using a
compact spare tire on the
vehicle.
.
Tires must be properly inflated to
support loads while towing a
trailer. SeeTires0276for
instructions on proper tire
inflation.
Safety Chains
Always attach chains between the
vehicle and the trailer, and attach
the chains to the holes on the trailer
hitch platform. Instructions about
safety chains may be provided by
the hitch manufacturer or by the
trailer manufacturer.
Cross the safety chains under the
tongue of the trailer to help prevent
the tongue from contacting the road
if it becomes separated from the
hitch. Always leave just enough
slack so the combination can turn.
Never allow safety chains to drag on
the ground.
Page 230 of 382
Chevrolet Malibu Owner Manual (GMNA-Localizing-U.S./Canada/Mexico-
12461813) - 2019 - crc - 12/11/18
230 Driving and Operating
State or local regulations may
require trailers to have their own
braking system if the loaded weight
of the trailer exceeds certain
minimums that can vary from state
to state. Read and follow the
instructions for the trailer brakes so
they are installed, adjusted, and
maintained properly. Never attempt
to tap into your vehicle's hydraulic
brake system. If you do, both the
vehicle anti-lock brakes and the
trailer brakes may not function,
which could result in a crash.
Trailer Lamps
Always check all trailer lamps are
working at the beginning of each
trip, and periodically on longer trips.
Turn Signals When Towing a
Trailer
When properly connected, the trailer
turn signals will illuminate to indicate
the vehicle is turning, changing
lanes, or stopping. When towing a
trailer, the arrows on the instrument
cluster will illuminate even if the
trailer is not properly connected or
the bulbs are burned out.
Trailer Tires
Special Trailer (ST) tires differ from
vehicle tires. Trailer tires are
designed with stiff sidewalls to help
prevent sway and to support heavy
loads. These features can make it
difficult to determine if the trailer tire
pressures are low only based on a
visual inspection.
Always check all trailer tire
pressures before each trip when the
tires are cool. Low trailer tire
pressure is a leading cause of trailer
tire blow-outs.
Trailer tires deteriorate over time.
The trailer tire sidewall will show the
week and year the tire was
manufactured. Many trailer tire
manufacturers recommend
replacing tires more than six
years old.
Overloading is another leading
cause of trailer tire blow-outs. Never
load your trailer with more weight
than the tires are designed to
support. The load rating is located
on the trailer tire sidewall.Always know the maximum speed
rating for the trailer tires before
driving. This may be significantly
lower than the vehicle tire speed
rating. The speed rating may be on
the trailer tire sidewall. If the speed
rating is not shown, the default
trailer tire speed rating is 105 km/h
(65 mph).
Page 233 of 382
Chevrolet Malibu Owner Manual (GMNA-Localizing-U.S./Canada/Mexico-
12461813) - 2019 - crc - 12/11/18
Vehicle Care 233
When It Is Time for New
Tires . . . . . . . . . . . . . . . . . . . . . . . . 292
Buying New Tires . . . . . . . . . . . . . 293
Different Size Tires and
Wheels . . . . . . . . . . . . . . . . . . . . . . 294
Uniform Tire Quality
Grading . . . . . . . . . . . . . . . . . . . . . 294
Wheel Alignment and Tire
Balance . . . . . . . . . . . . . . . . . . . . . 296
Wheel Replacement . . . . . . . . . . 296
Tire Chains . . . . . . . . . . . . . . . . . . . 297
If a Tire Goes Flat . . . . . . . . . . . . 298
Tire Sealant and
Compressor Kit . . . . . . . . . . . . . 299
Storing the Tire Sealant and
Compressor Kit . . . . . . . . . . . . . 306
Tire Changing . . . . . . . . . . . . . . . . 306
Compact Spare Tire . . . . . . . . . . 311
Jump Starting
Jump Starting - North
America . . . . . . . . . . . . . . . . . . . . . 312
Towing the Vehicle
Towing the Vehicle . . . . . . . . . . . 315
Recreational Vehicle
Towing . . . . . . . . . . . . . . . . . . . . . . 316
Appearance Care
Exterior Care . . . . . . . . . . . . . . . . . 318
Interior Care . . . . . . . . . . . . . . . . . . 322
Floor Mats . . . . . . . . . . . . . . . . . . . . 326General Information
For service and parts needs, visit
your dealer. You will receive
genuine GM parts and GM-trained
and supported service people.
Genuine GM parts have one of
these marks:
Page 315 of 382
Chevrolet Malibu Owner Manual (GMNA-Localizing-U.S./Canada/Mexico-
12461813) - 2019 - crc - 12/11/18
Vehicle Care 315
10. Start the vehicle with the good
battery and run the engine at
idle speed for at least
four minutes.
11. Try to start the vehicle that had
the dead battery. If it will not
start after a few tries, it
probably needs service.
For hybrid vehicles, the engine will
only start if needed after pressing
ENGINE START/STOP. The vehicle
ready light will come on when the
propulsion system is on and ready.
In cold temperatures, the engine will
not run with the hood open. Close
the hood.
Caution
For hybrid vehicles, repeatedly
trying to start the vehicle can
drain and damage the high
voltage battery, requiring
replacement. This would not be
covered by the vehicle warranty.
Caution
If the jumper cables are
connected or removed in the
wrong order, electrical shorting
may occur and damage the
vehicle. The repairs would not be
covered by the vehicle warranty.
Always connect and remove the
jumper cables in the correct order,
making sure that the cables do
not touch each other or other
metal.
Jumper Cable Removal
Reverse the sequence exactly when
removing the jumper cables.
After starting the disabled vehicle
and removing the jumper cables,
allow it to idle for several minutes.
Towing the Vehicle
Caution
Incorrectly towing a disabled
vehicle may cause damage. The
damage would not be covered by
the vehicle warranty. Do not lash
or hook to suspension
components. Use the proper
straps around the tires to secure
the vehicle. Do not drag a locked
wheel/tire while loading the
vehicle. Do not use a sling type
lift to tow the vehicle. This could
damage the vehicle.
GM recommends a flatbed tow truck
to transport a disabled vehicle. Use
ramps to help reduce approach
angles, if necessary. A towed
vehicle should have its drive wheels
off the ground. Contact Roadside
Assistance or a professional towing
service if the disabled vehicle must
be towed.
Page 316 of 382
Chevrolet Malibu Owner Manual (GMNA-Localizing-U.S./Canada/Mexico-
12461813) - 2019 - crc - 12/11/18
316 Vehicle Care
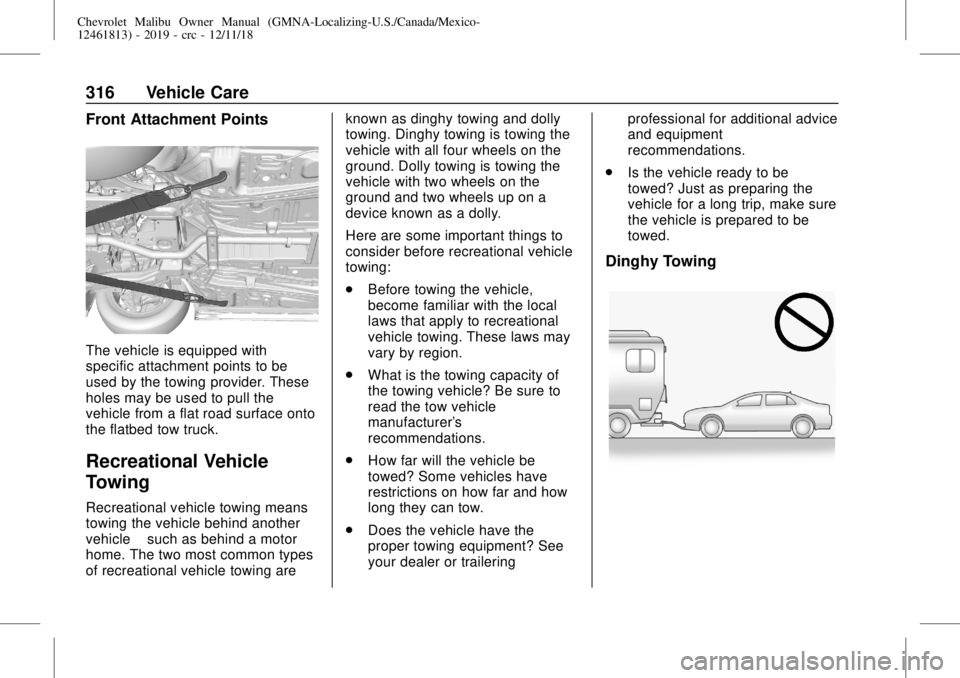
Front Attachment Points
The vehicle is equipped with
specific attachment points to be
used by the towing provider. These
holes may be used to pull the
vehicle from a flat road surface onto
the flatbed tow truck.
Recreational Vehicle
Towing
Recreational vehicle towing means
towing the vehicle behind another
vehicle–such as behind a motor
home. The two most common types
of recreational vehicle towing areknown as dinghy towing and dolly
towing. Dinghy towing is towing the
vehicle with all four wheels on the
ground. Dolly towing is towing the
vehicle with two wheels on the
ground and two wheels up on a
device known as a dolly.
Here are some important things to
consider before recreational vehicle
towing:
.
Before towing the vehicle,
become familiar with the local
laws that apply to recreational
vehicle towing. These laws may
vary by region.
.
What is the towing capacity of
the towing vehicle? Be sure to
read the tow vehicle
manufacturer's
recommendations.
.
How far will the vehicle be
towed? Some vehicles have
restrictions on how far and how
long they can tow.
.
Does the vehicle have the
proper towing equipment? See
your dealer or traileringprofessional for additional advice
and equipment
recommendations.
.
Is the vehicle ready to be
towed? Just as preparing the
vehicle for a long trip, make sure
the vehicle is prepared to be
towed.
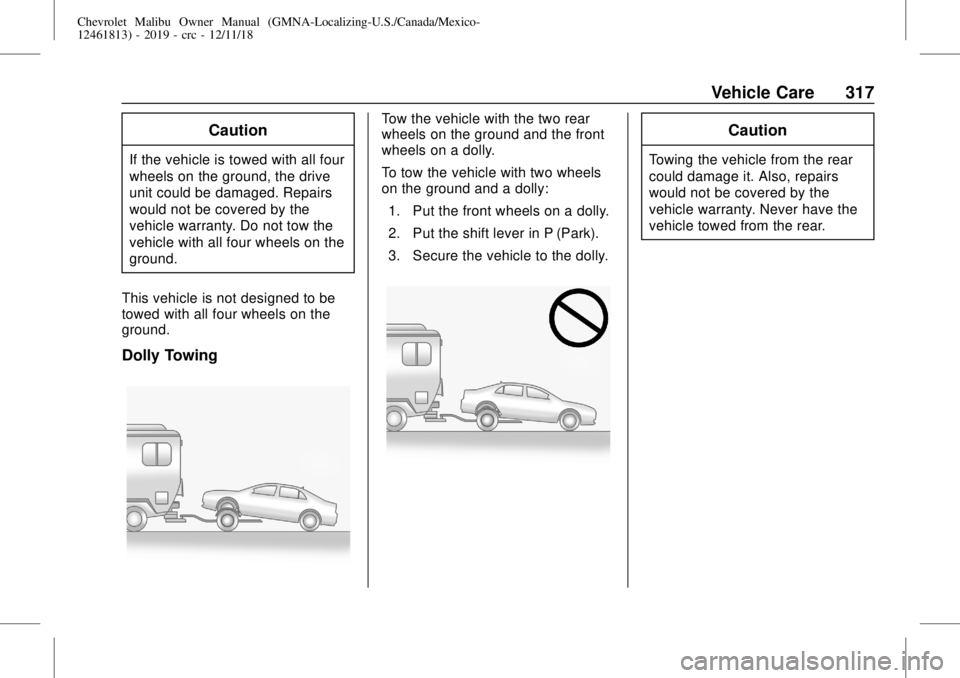
Dinghy Towing
Page 317 of 382
Chevrolet Malibu Owner Manual (GMNA-Localizing-U.S./Canada/Mexico-
12461813) - 2019 - crc - 12/11/18
Vehicle Care 317
Caution
If the vehicle is towed with all four
wheels on the ground, the drive
unit could be damaged. Repairs
would not be covered by the
vehicle warranty. Do not tow the
vehicle with all four wheels on the
ground.
This vehicle is not designed to be
towed with all four wheels on the
ground.
Dolly Towing
Tow the vehicle with the two rear
wheels on the ground and the front
wheels on a dolly.
To tow the vehicle with two wheels
on the ground and a dolly:
1. Put the front wheels on a dolly.
2. Put the shift lever in P (Park).
3. Secure the vehicle to the dolly.Caution
Towing the vehicle from the rear
could damage it. Also, repairs
would not be covered by the
vehicle warranty. Never have the
vehicle towed from the rear.
Page 328 of 382
Chevrolet Malibu Owner Manual (GMNA-Localizing-U.S./Canada/Mexico-
12461813) - 2019 - crc - 12/11/18
328 Service and Maintenance
The Tire Rotation and Required
Services are the responsibility of the
vehicle owner. It is recommended to
have your dealer perform these
services every 12 000 km/7,500 mi.
Proper vehicle maintenance helps to
keep the vehicle in good working
condition, improves fuel economy,
and reduces vehicle emissions.
Because of the way people use
vehicles, maintenance needs vary.
There may need to be more
frequent checks and services. The
Additional Required Services -
Normal are for vehicles that:
.
Carry passengers and cargo
within recommended limits on
the Tire and Loading Information
label. SeeVehicle Load Limits
0172.
.
Are driven on reasonable road
surfaces within legal driving
limits.
.
Use the recommended fuel. See
Recommended Fuel (1.5L and
1.8L Engines)0220or
Recommended Fuel (2.0L
Engine)0220.Refer to the information in the
Maintenance Schedule Additional
Required Services - Normal chart.
The Additional Required Services -
Severe are for vehicles that are:
.
Mainly driven in heavy city traffic
in hot weather.
.
Mainly driven in hilly or
mountainous terrain.
.
Frequently towing a trailer.
.
Used for high speed or
competitive driving.
.
Used for taxi, police, or delivery
service.
Refer to the information in the
Maintenance Schedule Additional
Required Services - Severe chart.
{Warning
Performing maintenance work can
be dangerous and can cause
serious injury. Perform
maintenance work only if the
required information, proper tools,
(Continued)
Warning (Continued)
and equipment are available.
If they are not, see your dealer to
have a trained technician do the
work. SeeDoing Your Own
Service Work0235.
Page 351 of 382
Chevrolet Malibu Owner Manual (GMNA-Localizing-U.S./Canada/Mexico-
12461813) - 2019 - crc - 12/11/18
Customer Information 351
driver if they decide the claims are
made too often, or the same type of
claim is made many times.
Services Provided
.
Emergency Fuel Delivery:
Delivery of enough fuel for the
vehicle to get to the nearest
service station.
.
Lock-Out Service:Service to
unlock the vehicle if you are
locked out. A remote unlock may
be available if you have OnStar.
For security reasons, the driver
must present identification
before this service is given.
.
Emergency Tow from a Public
Road or Highway:Tow to the
nearest Chevrolet dealer for
warranty service, or if the vehicle
was in a crash and cannot be
driven. Assistance is not given
when the vehicle is stuck in the
sand, mud, or snow.
.
Flat Tire Change:Service to
change a flat tire with the spare
tire. The spare tire, if equipped,
must be in good condition and
properly inflated. It is the owner'sresponsibility for the repair or
replacement of the tire if it is not
covered by the warranty.
.
Battery Jump Start:Service to
jump start a dead battery.
.
Trip Interruption Benefits and
Assistance:If your trip is
interrupted due to a warranty
event, incidental expenses may
be reimbursed within the
Powertrain warranty period.
Items considered are reasonable
and customary hotel, meals,
rental car, or a vehicle being
delivered back to the customer,
up to 500 miles.
Services Not Included in
Roadside Assistance
.
Impound towing caused by
violation of any laws
.
Legal fines
.
Mounting, dismounting,
or changing of snow tires,
chains, or other traction devices
Service is not provided if a vehicle
is in an area that is not accessible
to the service vehicle or is not aregularly traveled or maintained
public road, which includes ice and
winter roads. Off-road use is not
covered.
Services Specific to
Canadian-Purchased Vehicles
.
Fuel Delivery:Reimbursement
is up to 7 liters. If available,
diesel fuel delivery may be
restricted. Propane and other
fuels are not provided through
this service.
.
Lock-Out Service:Vehicle
registration is required.
.
Trip Interruption Benefits and
Assistance:Must be over
150 km from where your trip was
started to qualify.
Pre-authorization, original
detailed receipts, and a copy of
the repair orders are required.
Once authorization has been
received, the Roadside
Assistance advisor will help to
make arrangements and explain
how to receive payment.