warning light CHEVROLET MALIBU 2019 Workshop Manual
[x] Cancel search | Manufacturer: CHEVROLET, Model Year: 2019, Model line: MALIBU, Model: CHEVROLET MALIBU 2019Pages: 382, PDF Size: 37.7 MB
Page 255 of 382
Chevrolet Malibu Owner Manual (GMNA-Localizing-U.S./Canada/Mexico-
12461813) - 2019 - crc - 12/11/18
Vehicle Care 255
Open the cap with the washer
symbol on it. Add washer fluid until
the tank is full. SeeEngine
Compartment Overview0237for
reservoir location.
Caution
.
Do not use washer fluid that
contains any type of water
repellent coating. This can
cause the wiper blades to
chatter or skip.
.
Do not use engine coolant
(antifreeze) in the
windshield washer. It can
damage the windshield
washer system and paint.
.
Do not mix water with
ready-to-use washer fluid.
Water can cause the
solution to freeze and
damage the washer fluid
tank and other parts of the
washer system.
(Continued)
Caution (Continued)
.
When using concentrated
washer fluid, follow the
manufacturer instructions for
adding water.
.
Fill the washer fluid tank
only three-quarters full when
it is very cold. This allows
for fluid expansion if
freezing occurs, which could
damage the tank if it is
completely full.
Brakes
Disc brake pads have built-in wear
indicators that make a high-pitched
warning sound when the brake pads
are worn and new pads are needed.
The sound can come and go or can
be heard all the time when the
vehicle is moving, except when
applying the brake pedal firmly.
{Warning
The brake wear warning sound
means that soon the brakes will
not work well. That could lead to
a crash. When the brake wear
warning sound is heard, have the
vehicle serviced.
Caution
Continuing to drive with worn-out
brake pads could result in costly
brake repair.
Some driving conditions or climates
can cause a brake squeal when the
brakes are first applied or lightly
applied. This does not mean
something is wrong with the brakes.
Properly torqued wheel nuts are
necessary to help prevent brake
pulsation. When tires are rotated,
inspect brake pads for wear and
evenly tighten wheel nuts in the
Page 257 of 382
Chevrolet Malibu Owner Manual (GMNA-Localizing-U.S./Canada/Mexico-
12461813) - 2019 - crc - 12/11/18
Vehicle Care 257
When the brake fluid falls to a low
level, the brake warning light comes
on. SeeBrake System Warning
Light0126.
Brake fluid absorbs water over time
which degrades the effectiveness of
the brake fluid. Replace brake fluid
at the specified intervals to prevent
increased stopping distance. See
Maintenance Schedule0329.
What to Add
Use only GM approved DOT 3
brake fluid from a clean, sealed
container. SeeRecommended
Fluids and Lubricants0338.
{Warning
The wrong or contaminated brake
fluid could result in damage to the
brake system. This could result in
the loss of braking leading to a
possible injury. Always use the
proper GM approved brake fluid.
Caution
If brake fluid is spilled on the
vehicle's painted surfaces, the
paint finish can be damaged.
Immediately wash off any painted
surface.
Battery - North America
The original equipment battery is
maintenance free. Do not remove
the cap and do not add fluid.
The non-hybrid vehicle has a
standard 12-volt battery under the
hood. SeeEngine Compartment
Overview0237.
Refer to the replacement number
shown on the original battery label
when a new 12-volt battery is
needed.
Hybrid Vehicle
The hybrid vehicle 12-volt battery is
in the trunk on the driver side.
Hybrid vehicles also have a high
voltage battery. Only a trained
service technician with the properknowledge and tools should inspect,
test, or replace the high voltage
battery. See your dealer if the high
voltage battery needs service. The
dealer has information on how to
recycle the high voltage battery.
The hybrid high voltage battery is
cooled with air drawn from the
vehicle interior. The cold air intake
for the battery is under the rear
seat. Do not block the area in front
of the cold air intake.
{Warning
Damage to the high voltage
battery or high voltage system
can create a risk of electric shock,
overheating, or fire.
If the vehicle is damaged from a
moderate to severe crash, flood,
fire, or other event, the vehicle
should be inspected as soon as
possible. Until the vehicle has
been inspected, store it outside at
least 15 m (50 ft) from any
(Continued)
Page 287 of 382
Chevrolet Malibu Owner Manual (GMNA-Localizing-U.S./Canada/Mexico-
12461813) - 2019 - crc - 12/11/18
Vehicle Care 287
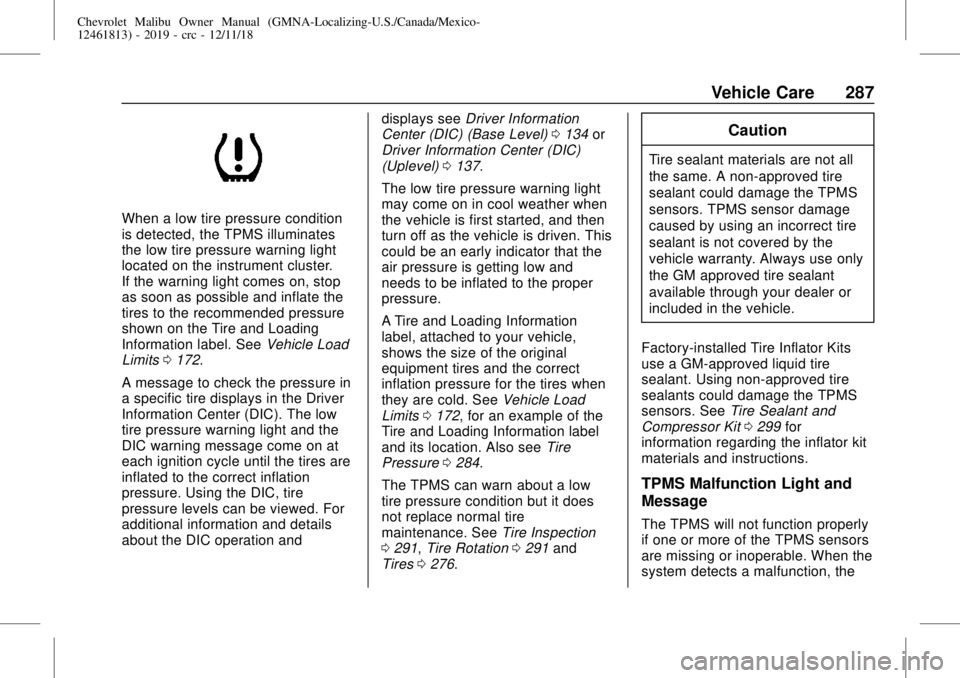
When a low tire pressure condition
is detected, the TPMS illuminates
the low tire pressure warning light
located on the instrument cluster.
If the warning light comes on, stop
as soon as possible and inflate the
tires to the recommended pressure
shown on the Tire and Loading
Information label. SeeVehicle Load
Limits0172.
A message to check the pressure in
a specific tire displays in the Driver
Information Center (DIC). The low
tire pressure warning light and the
DIC warning message come on at
each ignition cycle until the tires are
inflated to the correct inflation
pressure. Using the DIC, tire
pressure levels can be viewed. For
additional information and details
about the DIC operation anddisplays seeDriver Information
Center (DIC) (Base Level)0134or
Driver Information Center (DIC)
(Uplevel)0137.
The low tire pressure warning light
may come on in cool weather when
the vehicle is first started, and then
turn off as the vehicle is driven. This
could be an early indicator that the
air pressure is getting low and
needs to be inflated to the proper
pressure.
A Tire and Loading Information
label, attached to your vehicle,
shows the size of the original
equipment tires and the correct
inflation pressure for the tires when
they are cold. SeeVehicle Load
Limits0172, for an example of the
Tire and Loading Information label
and its location. Also seeTire
Pressure0284.
The TPMS can warn about a low
tire pressure condition but it does
not replace normal tire
maintenance. SeeTire Inspection
0291,Tire Rotation0291and
Tires0276.
Caution
Tire sealant materials are not all
the same. A non-approved tire
sealant could damage the TPMS
sensors. TPMS sensor damage
caused by using an incorrect tire
sealant is not covered by the
vehicle warranty. Always use only
the GM approved tire sealant
available through your dealer or
included in the vehicle.
Factory-installed Tire Inflator Kits
use a GM-approved liquid tire
sealant. Using non-approved tire
sealants could damage the TPMS
sensors. SeeTire Sealant and
Compressor Kit0299for
information regarding the inflator kit
materials and instructions.
TPMS Malfunction Light and
Message
The TPMS will not function properly
if one or more of the TPMS sensors
are missing or inoperable. When the
system detects a malfunction, the
Page 288 of 382
Chevrolet Malibu Owner Manual (GMNA-Localizing-U.S./Canada/Mexico-
12461813) - 2019 - crc - 12/11/18
288 Vehicle Care
low tire pressure warning light
flashes for about one minute and
then stays on for the remainder of
the ignition cycle. A DIC warning
message also displays. The
malfunction light and DIC warning
message come on at each ignition
cycle until the problem is corrected.
Some of the conditions that can
cause these to come on are:
.
One of the road tires has been
replaced with the spare tire. The
spare tire does not have a
TPMS sensor. The malfunction
light and DIC message should
go off after the road tire is
replaced and the sensor
matching process is performed
successfully. See“TPMS Sensor
Matching Process”later in this
section.
.
The TPMS sensor matching
process was not done or not
completed successfully after
rotating the tires. The
malfunction light and the DIC
message should go off after
successfully completing thesensor matching process. See
"TPMS Sensor Matching
Process" later in this section.
.
One or more TPMS sensors are
missing or damaged. The
malfunction light and the DIC
message should go off when the
TPMS sensors are installed and
the sensor matching process is
performed successfully. See
your dealer for service.
.
Replacement tires or wheels do
not match the original equipment
tires or wheels. Tires and wheels
other than those recommended
could prevent the TPMS from
functioning properly. SeeBuying
New Tires0293.
.
Operating electronic devices or
being near facilities using radio
wave frequencies similar to the
TPMS could cause the TPMS
sensors to malfunction.
If the TPMS is not functioning
properly it cannot detect or signal a
low tire pressure condition. Seeyour dealer for service if the TPMS
malfunction light and DIC message
come on and stay on.
Tire Fill Alert (If Equipped)
This feature provides visual and
audible alerts outside the vehicle to
help when inflating an underinflated
tire to the recommended cold tire
pressure.
When the low tire pressure warning
light comes on:
1. Park the vehicle in a safe, level
place.
2. Set the parking brake firmly.
3. Place the vehicle in P (Park).
4. Add air to the tire that is
underinflated. The turn signal
lamp will flash.
When the recommended
pressure is reached, the horn
sounds once and the turn
signal lamp will stop flashing
and briefly turn solid.
Page 289 of 382
Chevrolet Malibu Owner Manual (GMNA-Localizing-U.S./Canada/Mexico-
12461813) - 2019 - crc - 12/11/18
Vehicle Care 289
Repeat these steps for all
underinflated tires that have
illuminated the low tire pressure
warning light.
{Warning
Overinflating a tire could cause
the tire to rupture and you or
others could be injured. Do not
exceed the maximum pressure
listed on the tire sidewall. See
Tire Sidewall Labeling0278and
Vehicle Load Limits0172.
If the tire is overinflated by more
than 35 kPa (5 psi), the horn will
sound multiple times and the turn
signal lamp will continue to flash for
several seconds after filling stops.
To release and correct the pressure,
while the turn signal lamp is still
flashing, briefly press the center of
the valve stem. When the
recommended pressure is reached,
the horn sounds once.If the turn signal lamp does not flash
within 15 seconds after starting to
inflate the tire, the tire fill alert has
not been activated or is not working.
If the hazard warning flashers are
on, the tire fill alert visual feedback
will not work properly.
The TPMS will not activate the tire
fill alert properly under the following
conditions:
.
There is interference from an
external device or transmitter.
.
The air pressure from the
inflation device is not sufficient
to inflate the tire.
.
There is a malfunction in
the TPMS.
.
There is a malfunction in the
horn or turn signal lamps.
.
The identification code of the
TPMS sensor is not registered to
the system.
.
The battery of the TPMS sensor
is low.If the tire fill alert does not operate
due to TPMS interference, move the
vehicle about 1 m (3 ft) back or
forward and try again. If the tire fill
alert feature is not working, use a
tire pressure gauge.TPMS Sensor Matching
Process
Each TPMS sensor has a unique
identification code. The identification
code needs to be matched to a new
tire/wheel position after rotating the
vehicle’s tires or replacing one or
more of the TPMS sensors. The
TPMS sensor matching process
should also be performed after
replacing a spare tire with a road
tire containing the TPMS sensor.
The malfunction light and the DIC
message should go off at the next
ignition cycle. The sensors are
matched to the tire/wheel positions,
using a TPMS relearn tool, in the
following order: driver side front tire,
passenger side front tire, passenger
side rear tire, and driver side rear
tire. See your dealer for service or
to purchase a relearn tool. A TPMS
relearn tool can also be purchased.
Page 292 of 382
Chevrolet Malibu Owner Manual (GMNA-Localizing-U.S./Canada/Mexico-
12461813) - 2019 - crc - 12/11/18
292 Vehicle Care
Check that all wheel nuts are
properly tightened. See“Wheel
Nut Torque”underCapacities
and Specifications0343.
{Warning
Rust or dirt on a wheel, or on the
parts to which it is fastened, can
make wheel nuts become loose
after time. The wheel could come
off and cause a crash. When
changing a wheel, remove any
rust or dirt from places where the
wheel attaches to the vehicle. In
an emergency, a cloth or a paper
towel can be used; however, use
a scraper or wire brush later to
remove all rust or dirt.
Lightly coat the center of the
wheel hub with wheel bearing
grease after a wheel change or
tire rotation to prevent corrosion
or rust build-up. Do not get
grease on the flat wheel
mounting surface or on the
wheel nuts or bolts.
When It Is Time for New
Tires
Factors such as maintenance,
temperatures, driving speeds,
vehicle loading, and road conditions
affect the wear rate of the tires.
Treadwear indicators are one way to
tell when it is time for new tires.
Treadwear indicators appear when
the tires have only 1.6 mm (1/16 in)
or less of tread remaining. SeeTire
Inspection0291and
Tire Rotation0291.The rubber in tires ages over time.
This also applies to the spare tire,
if the vehicle has one, even if it is
never used. Multiple factors
including temperatures, loading
conditions, and inflation pressure
maintenance affect how fast aging
takes place. GM recommends that
tires, including the spare if
equipped, be replaced after six
years, regardless of tread wear. The
tire manufacture date is the last four
digits of the DOT Tire Identification
Number (TIN) which is molded into
one side of the tire sidewall. The
first two digits represent the week
(01–52) and the last two digits, the
year. For example, the third week of
the year 2010 would have a
four-digit DOT date of 0310.Vehicle Storage
Tires age when stored normally
mounted on a parked vehicle. Park
a vehicle that will be stored for at
least a month in a cool, dry, clean
area away from direct sunlight to
slow aging. This area should be free
Page 295 of 382
Chevrolet Malibu Owner Manual (GMNA-Localizing-U.S./Canada/Mexico-
12461813) - 2019 - crc - 12/11/18
Vehicle Care 295
Traffic Safety Administration
(NHTSA), which grades tires by
treadwear, traction, and
temperature performance. This
applies only to vehicles sold in
the United States. The grades
are molded on the sidewalls of
most passenger car tires. The
Uniform Tire Quality Grading
(UTQG) system does not apply
to deep tread, winter tires,
compact spare tires, tires with
nominal rim diameters of
10 to 12 inches (25 to 30 cm),
or to some limited-production
tires.
While the tires available on
General Motors passenger cars
and light trucks may vary with
respect to these grades, they
must also conform to federal
safety requirements and
additional General Motors Tire
Performance Criteria (TPC)
standards.Quality grades can be found
where applicable on the tire
sidewall between tread shoulder
and maximum section width. For
example:
Treadwear 200 Traction AA
Temperature A
All Passenger Car Tires Must
Conform to Federal Safety
Requirements In Addition To
These Grades.
Treadwear
The treadwear grade is a
comparative rating based on the
wear rate of the tire when tested
under controlled conditions on a
specified government test
course. For example, a tire
graded 150 would wear one and
one-half (1½) times as well on
the government course as a tire
graded 100. The relative
performance of tires depends
upon the actual conditions of
their use, however, and may
depart significantly from thenorm due to variations in driving
habits, service practices and
differences in road
characteristics and climate.
Traction
The traction grades, from
highest to lowest, are AA, A, B,
and C. Those grades represent
the tire's ability to stop on wet
pavement as measured under
controlled conditions on
specified government test
surfaces of asphalt and
concrete. A tire marked C may
have poor traction performance.
Warning: The traction grade
assigned to this tire is based on
straight-ahead braking traction
tests, and does not include
acceleration, cornering,
hydroplaning, or peak traction
characteristics.
Page 296 of 382
Chevrolet Malibu Owner Manual (GMNA-Localizing-U.S./Canada/Mexico-
12461813) - 2019 - crc - 12/11/18
296 Vehicle Care
Temperature
The temperature grades are A
(the highest), B, and C,
representing the tire's resistance
to the generation of heat and its
ability to dissipate heat when
tested under controlled
conditions on a specified indoor
laboratory test wheel. Sustained
high temperature can cause the
material of the tire to degenerate
and reduce tire life, and
excessive temperature can lead
to sudden tire failure. The grade
C corresponds to a level of
performance which all
passenger car tires must meet
under the Federal Motor Safety
Standard No. 109. Grades B and
A represent higher levels of
performance on the laboratory
test wheel than the minimum
required by law. Warning: The
temperature grade for this tire is
established for a tire that is
properly inflated and not
overloaded. Excessive speed,underinflation, or excessive
loading, either separately or in
combination, can cause heat
buildup and possible tire failure.
Wheel Alignment and Tire
Balance
The tires and wheels were aligned
and balanced at the factory to
provide the longest tire life and best
overall performance. Adjustments to
wheel alignment and tire balancing
are not necessary on a regular
basis. Consider an alignment check
if there is unusual tire wear or the
vehicle is significantly pulling to one
side or the other. Some slight pull to
the left or right, depending on the
crown of the road and/or other road
surface variations such as troughs
or ruts, is normal. If the vehicle is
vibrating when driving on a smooth
road, the tires and wheels may need
to be rebalanced. See your dealer
for proper diagnosis.
Wheel Replacement
Replace any wheel that is bent,
cracked, or badly rusted or
corroded. If wheel nuts keep coming
loose, the wheel, wheel bolts, and
wheel nuts should be replaced.
If the wheel leaks air, replace it.
Some aluminum wheels can be
repaired. See your dealer if any of
these conditions exist.
Your dealer will know the kind of
wheel that is needed.
Each new wheel should have the
same load-carrying capacity,
diameter, width, offset, and be
mounted the same way as the one it
replaces.
Replace wheels, wheel bolts, wheel
nuts, or Tire Pressure Monitor
System (TPMS) sensors with new
GM original equipment parts.
Page 314 of 382
Chevrolet Malibu Owner Manual (GMNA-Localizing-U.S./Canada/Mexico-
12461813) - 2019 - crc - 12/11/18
314 Vehicle Care
3. Set the parking brake firmly on
both vehicles. Put an automatic
transmission in P (Park) or a
manual transmission in Neutral
before setting the parking
brake.
Caution
If any accessories are left on or
plugged in during the jump
starting procedure, they could be
damaged. The repairs would not
be covered by the vehicle
warranty. Whenever possible, turn
off or unplug all accessories on
either vehicle when jump starting.
4. Turn the ignition off and switch
off all lights and accessories in
both vehicles, except the
hazard warning flashers if
needed.
{Warning
An electric fan can start up even
when the engine is not running
and can injure you. Keep hands,
clothing, and tools away from any
underhood electric fan.
{Warning
Using a match near a battery can
cause battery gas to explode.
People have been hurt doing this,
and some have been blinded.
Use a flashlight if you need more
light.
Battery fluid contains acid that
can burn you. Do not get it on
you. If you accidentally get it in
your eyes or on your skin, flush
the place with water and get
medical help immediately.
{Warning
Fans or other moving engine
parts can injure you badly. Keep
your hands away from moving
parts once the engine is running.
6. Connect the red positive (+)
cable to the positive (+) or
remote positive (+) terminal of
the discharged battery.
7. Connect the other end of the
positive (+) cable to the
positive (+) terminal of the
good battery. Use a remote
positive (+) terminal if the
vehicle has one.
8. Connect one end of the black
negative (−) cable to the
negative (−) terminal of the
good battery.
9. Connect the other end of the
negative (−) cable to the
negative (–) ground terminal for
the discharged battery.
Page 372 of 382

Chevrolet Malibu Owner Manual (GMNA-Localizing-U.S./Canada/Mexico-
12461813) - 2019 - crc - 12/11/18
372 Index
IndexA
Accessories and
Modifications . . . . . . . . . . . . . . . . . . 234
Accessory Power . . . . . . . . . . . . . . . 181
Active Fuel Management . . . . . . . 183
Adaptive Cruise Control . . . . . . . . 196
Add-On Electrical Equipment . . . 231
Additional Information
OnStar . . . . . . . . . . . . . . . . . . . . . . . 362
Additional Maintenance
and Care . . . . . . . . . . . . . . . . . . . . . . 335
Adjustments
Lumbar, Front Seats . . . . . . . . . . . . 57
Air Cleaner/Filter, Engine . . . . . . . 247
Air Conditioning . . . . . . . . . . . 156, 159
Air Filter
Life System . . . . . . . . . . . . . . . . . . . 246
Air Filter, Passenger
Compartment . . . . . . . . . . . . . . . . . 164
Air Vents . . . . . . . . . . . . . . . . . . . . . . . 163
Airbag System
Check . . . . . . . . . . . . . . . . . . . . . . . . . . 86
How Does an Airbag
Restrain? . . . . . . . . . . . . . . . . . . . . . 78
Passenger Sensing System . . . . 80
What Makes an Airbag
Inflate? . . . . . . . . . . . . . . . . . . . . . . . . 78Airbag System (cont'd)
What Will You See after an
Airbag Inflates? . . . . . . . . . . . . . . . 79
When Should an Airbag
Inflate? . . . . . . . . . . . . . . . . . . . . . . . . 77
Where Are the Airbags? . . . . . . . . 76
Airbags
Adding Equipment to the
Vehicle . . . . . . . . . . . . . . . . . . . . . . . . 85
Passenger Status Indicator . . . 123
Readiness Light . . . . . . . . . . . . . . 123
Servicing Airbag-Equipped
Vehicles . . . . . . . . . . . . . . . . . . . . . . . 84
System Check . . . . . . . . . . . . . . . . . . 74
Alarm
Vehicle Security . . . . . . . . . . . . . . . . 45
Alert
Lane Change . . . . . . . . . . . . . . . . . 215
Side Blind Zone (SBZA) . . . . . . 215
All-Season Tires . . . . . . . . . . . . . . . . 277
Antilock Brake System (ABS) . . . 188
Warning Light . . . . . . . . . . . . . . . . . 127
Appearance Care
Exterior . . . . . . . . . . . . . . . . . . . . . . . 318
Interior . . . . . . . . . . . . . . . . . . . . . . . . 322
Armrest
Rear Seat . . . . . . . . . . . . . . . . . . . . . . 66