bulb CHEVROLET MALIBU 2019 Owner's Manual
[x] Cancel search | Manufacturer: CHEVROLET, Model Year: 2019, Model line: MALIBU, Model: CHEVROLET MALIBU 2019Pages: 382, PDF Size: 37.7 MB
Page 141 of 382
Chevrolet Malibu Owner Manual (GMNA-Localizing-U.S./Canada/Mexico-
12461813) - 2019 - crc - 12/11/18
Instruments and Controls 141
Vehicle Messages
Messages displayed on the DIC
indicate the status of the vehicle or
some action that may be needed to
correct a condition. Multiple
messages may appear one after
another.
The messages that do not require
immediate action can be
acknowledged and cleared by
pressing
V. The messages that
require immediate action cannot be
cleared until that action is
performed.
All messages should be taken
seriously; clearing the message
does not correct the problem.
If a SERVICE message appears,
see your dealer.
Follow the instructions given in the
messages. The system displays
messages regarding the following
topics:
.
Service Messages
.
Fluid Levels
.
Vehicle Security.
Brakes
.
Steering
.
Ride Control Systems
.
Driver Assistance Systems
.
Cruise Control
.
Lighting and Bulb Replacement
.
Wiper/Washer Systems
.
Doors and Windows
.
Seat Belts
.
Airbag Systems
.
Engine and Transmission
.
Tire Pressure
.
Battery
Engine Power Messages
ENGINE POWER IS REDUCED
This message displays when the
vehicle's propulsion power is
reduced. A reduction in propulsion
power can affect the vehicle's ability
to accelerate. If this message is on,
but there is no observed reduction
in performance, proceed to your
destination. The performance maybe reduced the next time the vehicle
is driven. The vehicle may be driven
while this message is on, but
maximum acceleration and speed
may be reduced. Anytime this
message stays on, or displays
repeatedly, the vehicle should be
taken to your dealer for service as
soon as possible.
Vehicle Speed Messages
SPEED LIMITED TO XXX
KM/H (MPH)
This message shows that the
vehicle speed has been limited to
the speed displayed. The limited
speed is a protection for various
propulsion and vehicle systems,
such as lubrication, thermal,
suspension, Teen Driver if
equipped, or tires.
Page 151 of 382
Chevrolet Malibu Owner Manual (GMNA-Localizing-U.S./Canada/Mexico-
12461813) - 2019 - crc - 12/11/18
Lighting 151
Turn and Lane-Change
Signals
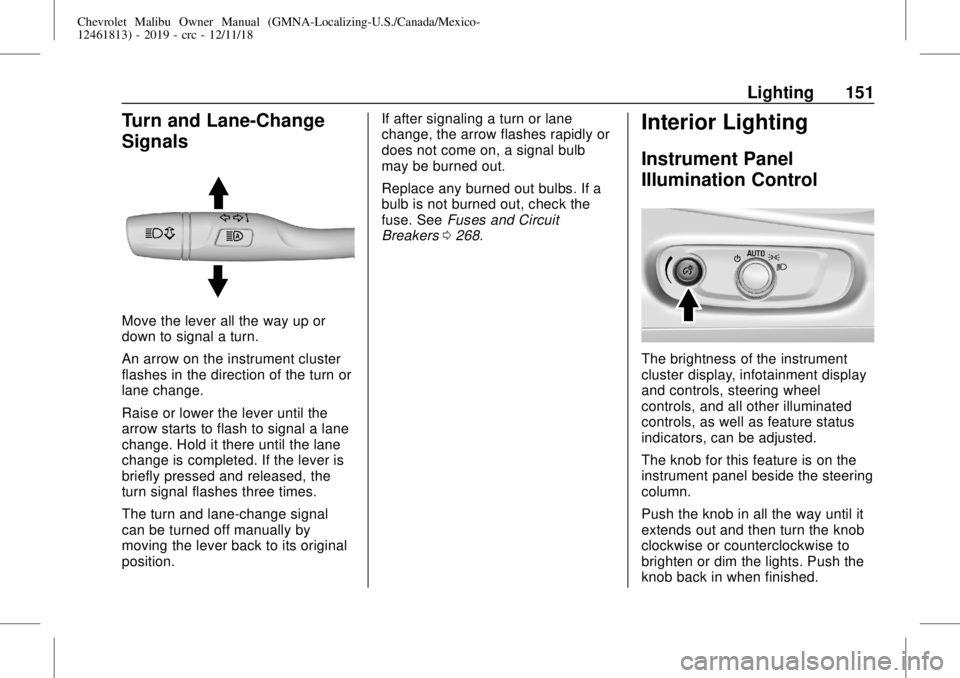
Move the lever all the way up or
down to signal a turn.
An arrow on the instrument cluster
flashes in the direction of the turn or
lane change.
Raise or lower the lever until the
arrow starts to flash to signal a lane
change. Hold it there until the lane
change is completed. If the lever is
briefly pressed and released, the
turn signal flashes three times.
The turn and lane-change signal
can be turned off manually by
moving the lever back to its original
position.If after signaling a turn or lane
change, the arrow flashes rapidly or
does not come on, a signal bulb
may be burned out.
Replace any burned out bulbs. If a
bulb is not burned out, check the
fuse. SeeFuses and Circuit
Breakers0268.
Interior Lighting
Instrument Panel
Illumination Control
The brightness of the instrument
cluster display, infotainment display
and controls, steering wheel
controls, and all other illuminated
controls, as well as feature status
indicators, can be adjusted.
The knob for this feature is on the
instrument panel beside the steering
column.
Push the knob in all the way until it
extends out and then turn the knob
clockwise or counterclockwise to
brighten or dim the lights. Push the
knob back in when finished.
Page 230 of 382
Chevrolet Malibu Owner Manual (GMNA-Localizing-U.S./Canada/Mexico-
12461813) - 2019 - crc - 12/11/18
230 Driving and Operating
State or local regulations may
require trailers to have their own
braking system if the loaded weight
of the trailer exceeds certain
minimums that can vary from state
to state. Read and follow the
instructions for the trailer brakes so
they are installed, adjusted, and
maintained properly. Never attempt
to tap into your vehicle's hydraulic
brake system. If you do, both the
vehicle anti-lock brakes and the
trailer brakes may not function,
which could result in a crash.
Trailer Lamps
Always check all trailer lamps are
working at the beginning of each
trip, and periodically on longer trips.
Turn Signals When Towing a
Trailer
When properly connected, the trailer
turn signals will illuminate to indicate
the vehicle is turning, changing
lanes, or stopping. When towing a
trailer, the arrows on the instrument
cluster will illuminate even if the
trailer is not properly connected or
the bulbs are burned out.
Trailer Tires
Special Trailer (ST) tires differ from
vehicle tires. Trailer tires are
designed with stiff sidewalls to help
prevent sway and to support heavy
loads. These features can make it
difficult to determine if the trailer tire
pressures are low only based on a
visual inspection.
Always check all trailer tire
pressures before each trip when the
tires are cool. Low trailer tire
pressure is a leading cause of trailer
tire blow-outs.
Trailer tires deteriorate over time.
The trailer tire sidewall will show the
week and year the tire was
manufactured. Many trailer tire
manufacturers recommend
replacing tires more than six
years old.
Overloading is another leading
cause of trailer tire blow-outs. Never
load your trailer with more weight
than the tires are designed to
support. The load rating is located
on the trailer tire sidewall.Always know the maximum speed
rating for the trailer tires before
driving. This may be significantly
lower than the vehicle tire speed
rating. The speed rating may be on
the trailer tire sidewall. If the speed
rating is not shown, the default
trailer tire speed rating is 105 km/h
(65 mph).
Page 232 of 382
Chevrolet Malibu Owner Manual (GMNA-Localizing-U.S./Canada/Mexico-
12461813) - 2019 - crc - 12/11/18
232 Vehicle Care
Vehicle Care
General Information
General Information . . . . . . . . . . 233
California Proposition
65 Warning . . . . . . . . . . . . . . . . . 234
California Perchlorate
Materials Requirements . . . . . 234
Accessories and
Modifications . . . . . . . . . . . . . . . . 234
Vehicle Checks
Doing Your Own
Service Work . . . . . . . . . . . . . . . 235
Hood . . . . . . . . . . . . . . . . . . . . . . . . . 235
Engine Compartment
Overview . . . . . . . . . . . . . . . . . . . . 237
Engine Oil . . . . . . . . . . . . . . . . . . . . 242
Engine Oil Life System . . . . . . . 245
Automatic Transmission
Fluid . . . . . . . . . . . . . . . . . . . . . . . . 246
Engine Air Filter Life
System . . . . . . . . . . . . . . . . . . . . . . 246
Engine Air Cleaner/Filter . . . . . . 247
Cooling System (Engine) . . . . . 248
Cooling System (Power
Electronics) . . . . . . . . . . . . . . . . . 253
Engine Overheating . . . . . . . . . . 253
Washer Fluid . . . . . . . . . . . . . . . . . 254Brakes . . . . . . . . . . . . . . . . . . . . . . . 255
Brake Fluid . . . . . . . . . . . . . . . . . . . 256
Battery - North America . . . . . . 257
Starter Switch Check . . . . . . . . . 260
Automatic Transmission Shift
Lock Control Function
Check . . . . . . . . . . . . . . . . . . . . . . . 260
Park Brake and P (Park)
Mechanism Check . . . . . . . . . . 260
Wiper Blade Replacement . . . . 261
Windshield Replacement . . . . . 262
Gas Strut(s) . . . . . . . . . . . . . . . . . . 262Headlamp Aiming
Headlamp Aiming . . . . . . . . . . . . 263
Bulb Replacement
Bulb Replacement . . . . . . . . . . . . 263
Halogen Bulbs . . . . . . . . . . . . . . . . 263
LED Lighting . . . . . . . . . . . . . . . . . 264
Headlamps, Front Turn Signal,
Sidemarker, and Parking
Lamps . . . . . . . . . . . . . . . . . . . . . . 264
Taillamps, Turn Signal,
Stoplamps, and Back-Up
Lamps (LS and LT) . . . . . . . . . . 264
Taillamps, Turn Signal,
Stoplamps, and Back-Up
Lamps (LT and Premier) . . . . . 266
License Plate Lamp . . . . . . . . . . 266
Electrical System
High Voltage Devices and
Wiring . . . . . . . . . . . . . . . . . . . . . . . 267
Electrical System Overload . . . 267
Fuses and Circuit Breakers . . . 268
Engine Compartment Fuse
Block . . . . . . . . . . . . . . . . . . . . . . . . 268
Instrument Panel Fuse
Block . . . . . . . . . . . . . . . . . . . . . . . . 273
Wheels and Tires
Tires . . . . . . . . . . . . . . . . . . . . . . . . . . 276
All-Season Tires . . . . . . . . . . . . . . 277
Winter Tires . . . . . . . . . . . . . . . . . . 277
Low-Profile Tires . . . . . . . . . . . . . 277
Summer Tires . . . . . . . . . . . . . . . . 278
Tire Sidewall Labeling . . . . . . . . 278
Tire Designations . . . . . . . . . . . . . 280
Tire Terminology and
Definitions . . . . . . . . . . . . . . . . . . 281
Tire Pressure . . . . . . . . . . . . . . . . . 284
Tire Pressure for High-Speed
Operation . . . . . . . . . . . . . . . . . . . 285
Tire Pressure Monitor
System . . . . . . . . . . . . . . . . . . . . . . 285
Tire Pressure Monitor
Operation . . . . . . . . . . . . . . . . . . . 286
Tire Inspection . . . . . . . . . . . . . . . . 291
Tire Rotation . . . . . . . . . . . . . . . . . 291
Page 263 of 382
Chevrolet Malibu Owner Manual (GMNA-Localizing-U.S./Canada/Mexico-
12461813) - 2019 - crc - 12/11/18
Vehicle Care 263
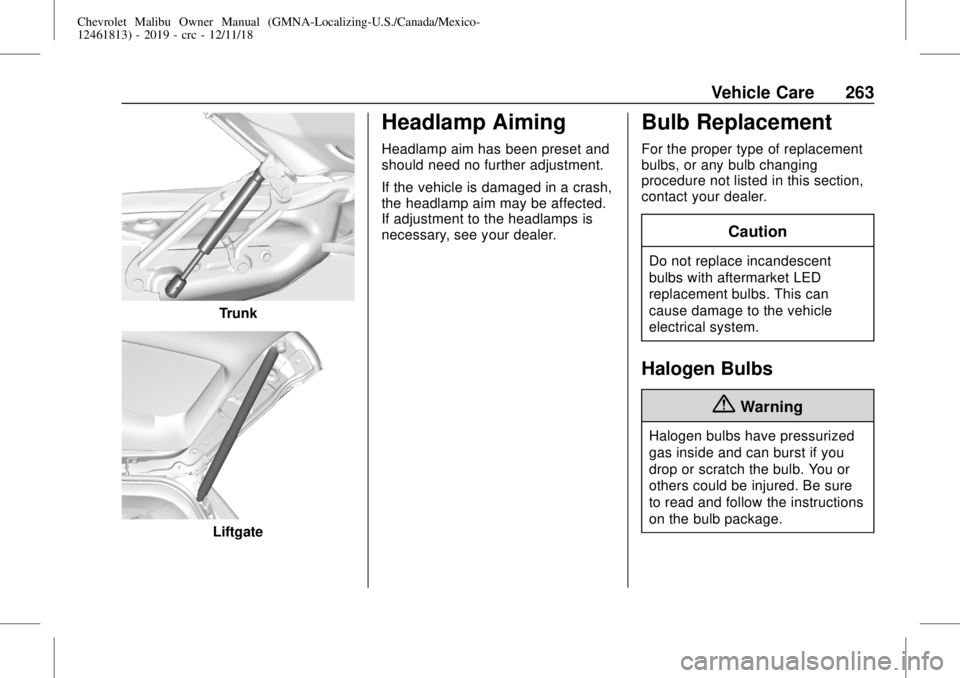
Trunk
Liftgate
Headlamp Aiming
Headlamp aim has been preset and
should need no further adjustment.
If the vehicle is damaged in a crash,
the headlamp aim may be affected.
If adjustment to the headlamps is
necessary, see your dealer.
Bulb Replacement
For the proper type of replacement
bulbs, or any bulb changing
procedure not listed in this section,
contact your dealer.
Caution
Do not replace incandescent
bulbs with aftermarket LED
replacement bulbs. This can
cause damage to the vehicle
electrical system.
Halogen Bulbs
{Warning
Halogen bulbs have pressurized
gas inside and can burst if you
drop or scratch the bulb. You or
others could be injured. Be sure
to read and follow the instructions
on the bulb package.
Page 264 of 382
Chevrolet Malibu Owner Manual (GMNA-Localizing-U.S./Canada/Mexico-
12461813) - 2019 - crc - 12/11/18
264 Vehicle Care
LED Lighting
This vehicle has several LED lamps.
For replacement of any LED lighting
assembly, contact your dealer.
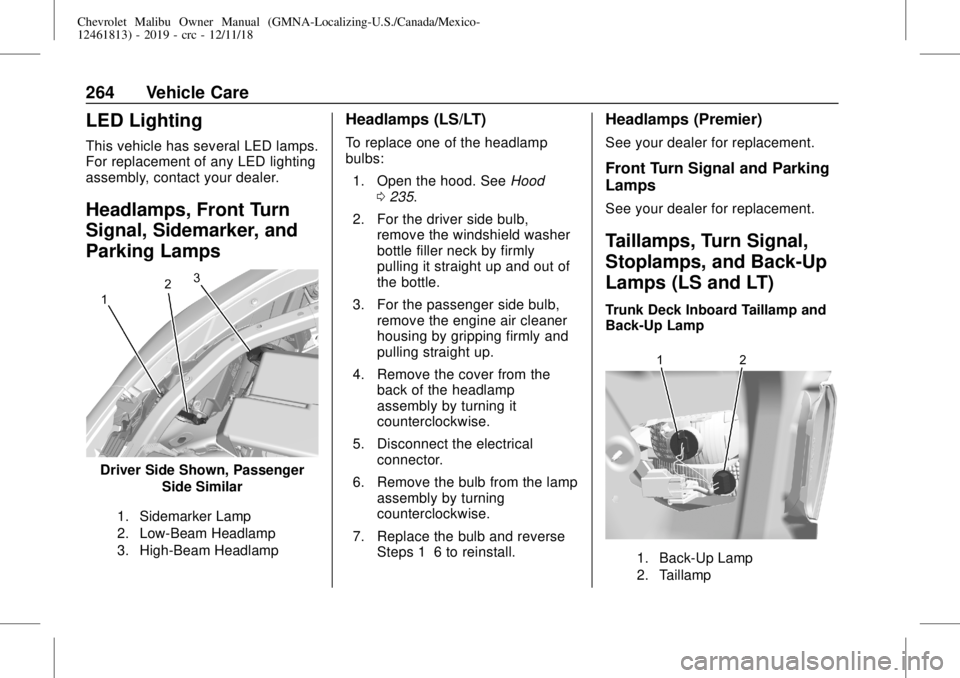
Headlamps, Front Turn
Signal, Sidemarker, and
Parking Lamps
Driver Side Shown, Passenger
Side Similar
1. Sidemarker Lamp
2. Low-Beam Headlamp
3. High-Beam Headlamp
Headlamps (LS/LT)
To replace one of the headlamp
bulbs:
1. Open the hood. SeeHood
0235.
2. For the driver side bulb,
remove the windshield washer
bottle filler neck by firmly
pulling it straight up and out of
the bottle.
3. For the passenger side bulb,
remove the engine air cleaner
housing by gripping firmly and
pulling straight up.
4. Remove the cover from the
back of the headlamp
assembly by turning it
counterclockwise.
5. Disconnect the electrical
connector.
6. Remove the bulb from the lamp
assembly by turning
counterclockwise.
7. Replace the bulb and reverse
Steps 1–6 to reinstall.
Headlamps (Premier)
See your dealer for replacement.
Front Turn Signal and Parking
Lamps
See your dealer for replacement.
Taillamps, Turn Signal,
Stoplamps, and Back-Up
Lamps (LS and LT)
Trunk Deck Inboard Taillamp and
Back-Up Lamp
1. Back-Up Lamp
2. Taillamp
Page 265 of 382
Chevrolet Malibu Owner Manual (GMNA-Localizing-U.S./Canada/Mexico-
12461813) - 2019 - crc - 12/11/18
Vehicle Care 265
1. Open the trunk. SeeTrunk
043.
2. Remove the push pins and pull
back the trunk deck trim.
3. Remove the bulb socket by
turning counterclockwise and
pulling straight out.
4. Remove the bulb from the
socket.
5. Install the new bulb in the bulb
socket.
6. Install the bulb socket by
turning clockwise.
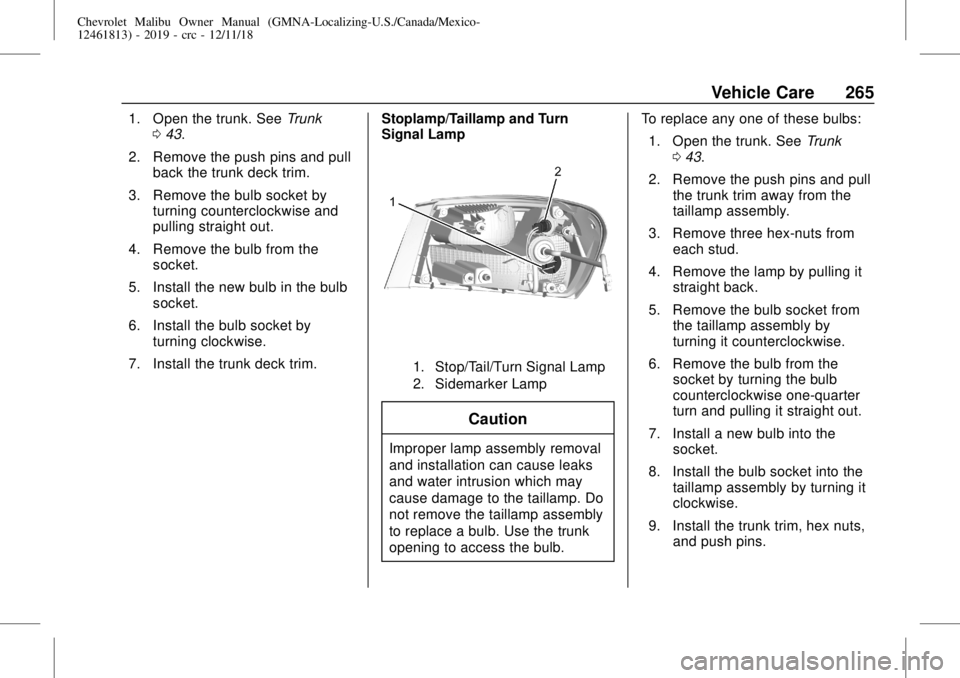
7. Install the trunk deck trim.Stoplamp/Taillamp and Turn
Signal Lamp
1. Stop/Tail/Turn Signal Lamp
2. Sidemarker Lamp
Caution
Improper lamp assembly removal
and installation can cause leaks
and water intrusion which may
cause damage to the taillamp. Do
not remove the taillamp assembly
to replace a bulb. Use the trunk
opening to access the bulb.To replace any one of these bulbs:
1. Open the trunk. SeeTrunk
043.
2. Remove the push pins and pull
the trunk trim away from the
taillamp assembly.
3. Remove three hex-nuts from
each stud.
4. Remove the lamp by pulling it
straight back.
5. Remove the bulb socket from
the taillamp assembly by
turning it counterclockwise.
6. Remove the bulb from the
socket by turning the bulb
counterclockwise one-quarter
turn and pulling it straight out.
7. Install a new bulb into the
socket.
8. Install the bulb socket into the
taillamp assembly by turning it
clockwise.
9. Install the trunk trim, hex nuts,
and push pins.
Page 266 of 382
Chevrolet Malibu Owner Manual (GMNA-Localizing-U.S./Canada/Mexico-
12461813) - 2019 - crc - 12/11/18
266 Vehicle Care
Taillamps, Turn Signal,
Stoplamps, and Back-Up
Lamps (LT and Premier)
Caution
Improper lamp assembly removal
and installation can cause leaks
and water intrusion which may
cause damage to the taillamp. Do
not remove the taillamp assembly
to replace a bulb. Use the trunk
opening to access the bulb.
The stoplamp/taillamp and trunk
deck inboard taillamp are LEDs. To
replace, see your dealer.
Back-Up Lamp
1. Open the trunk. SeeTrunk
043.
2. Remove the push pins and pull
back the trunk deck trim.
3. Remove the bulb socket by
turning counterclockwise and
pulling straight out.
4. Remove the bulb from the
socket.
5. Install the new bulb in the bulb
socket.
6. Install the bulb socket by
turning clockwise.
7. Install the trunk deck trim.
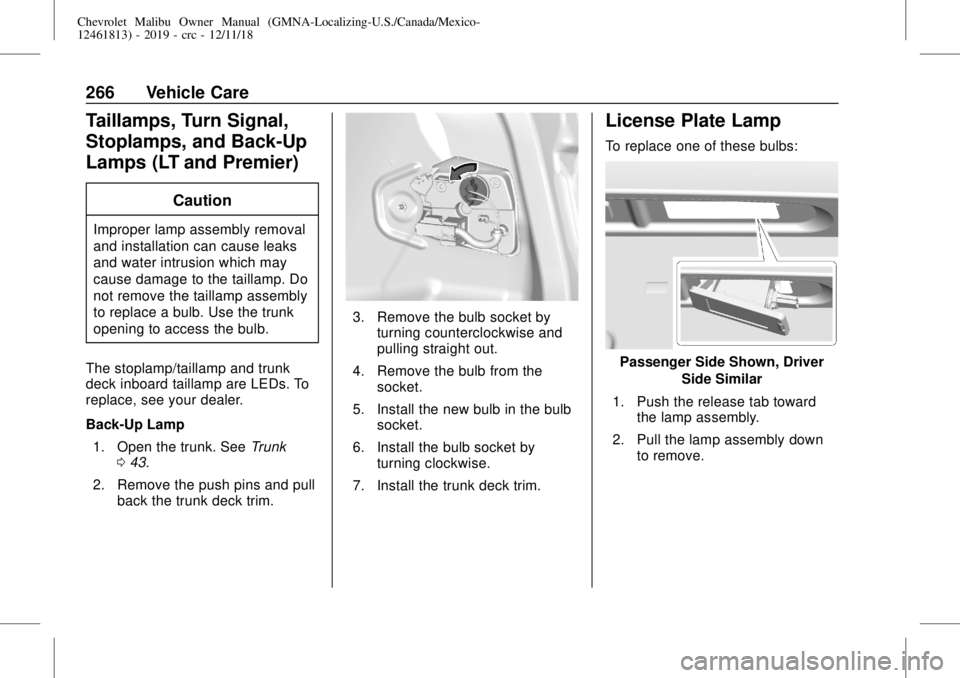
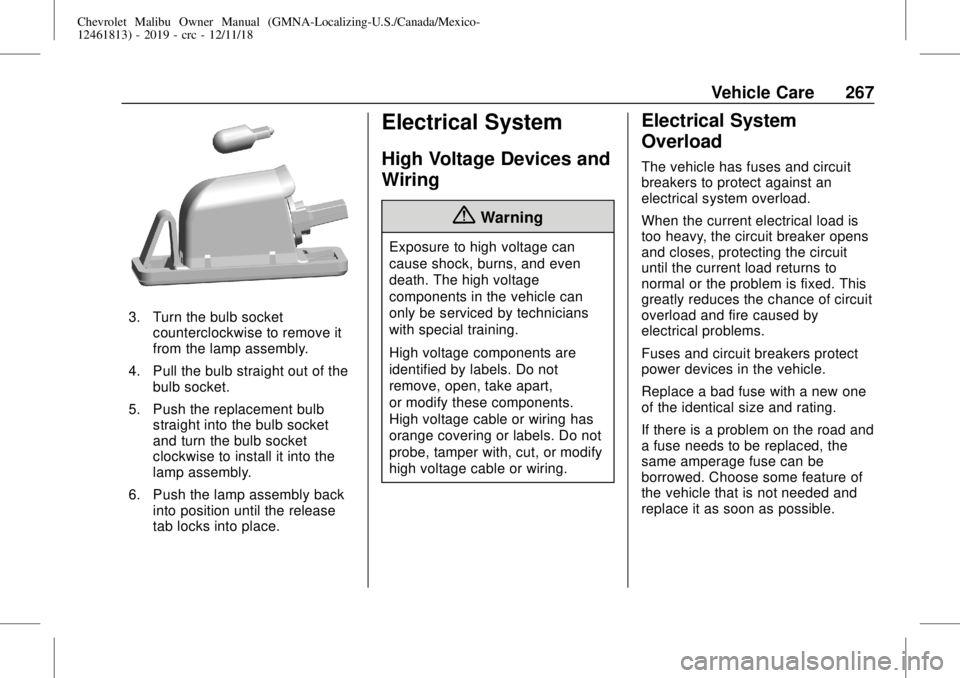
License Plate Lamp
To replace one of these bulbs:
Passenger Side Shown, Driver
Side Similar
1. Push the release tab toward
the lamp assembly.
2. Pull the lamp assembly down
to remove.
Page 267 of 382
Chevrolet Malibu Owner Manual (GMNA-Localizing-U.S./Canada/Mexico-
12461813) - 2019 - crc - 12/11/18
Vehicle Care 267
3. Turn the bulb socket
counterclockwise to remove it
from the lamp assembly.
4. Pull the bulb straight out of the
bulb socket.
5. Push the replacement bulb
straight into the bulb socket
and turn the bulb socket
clockwise to install it into the
lamp assembly.
6. Push the lamp assembly back
into position until the release
tab locks into place.
Electrical System
High Voltage Devices and
Wiring
{Warning
Exposure to high voltage can
cause shock, burns, and even
death. The high voltage
components in the vehicle can
only be serviced by technicians
with special training.
High voltage components are
identified by labels. Do not
remove, open, take apart,
or modify these components.
High voltage cable or wiring has
orange covering or labels. Do not
probe, tamper with, cut, or modify
high voltage cable or wiring.
Electrical System
Overload
The vehicle has fuses and circuit
breakers to protect against an
electrical system overload.
When the current electrical load is
too heavy, the circuit breaker opens
and closes, protecting the circuit
until the current load returns to
normal or the problem is fixed. This
greatly reduces the chance of circuit
overload and fire caused by
electrical problems.
Fuses and circuit breakers protect
power devices in the vehicle.
Replace a bad fuse with a new one
of the identical size and rating.
If there is a problem on the road and
a fuse needs to be replaced, the
same amperage fuse can be
borrowed. Choose some feature of
the vehicle that is not needed and
replace it as soon as possible.
Page 373 of 382

Chevrolet Malibu Owner Manual (GMNA-Localizing-U.S./Canada/Mexico-
12461813) - 2019 - crc - 12/11/18
Index 373
Assistance Program,
Roadside . . . . . . . . . . . . . . . . . . . . . . 350
Assistance Systems for
Driving . . . . . . . . . . . . . . . . . . . . . . . . 209
Assistance Systems for
Parking and Backing . . . . . . . . . . 205
Auto Stop
Stop/Start System . . . . . . . . . . . . 179
Automatic
Door Locks . . . . . . . . . . . . . . . . . . . . . 42
Forward Braking . . . . . . . . . . . . . . .211
Headlamp System . . . . . . . . . . . . 150
Transmission . . . . . . . . . . . . . . . . . 185
Transmission Fluid . . . . . . . . . . . 246
Automatic Transmission
Manual Mode . . . . . . . . . . . . . . . . . 186
Shift Lock Control Function
Check . . . . . . . . . . . . . . . . . . . . . . . 260
B
Battery
Exterior Lighting Battery
Saver . . . . . . . . . . . . . . . . . . . . . . . 154
Load Management . . . . . . . . . . . . 153
Power Protection . . . . . . . . . . . . . 154
Battery - North America . . . . 257, 312
Blade Replacement, Wiper . . . . . 261Brake
Parking, Electric . . . . . . . . . . . . . . 189
System Warning Light . . . . . . . . 126
Brakes . . . . . . . . . . . . . . . . . . . . . . . . . . 255
Antilock . . . . . . . . . . . . . . . . . . . . . . . 188
Assist . . . . . . . . . . . . . . . . . . . . . . . . . 190
Fluid . . . . . . . . . . . . . . . . . . . . . . . . . . 256
Parking . . . . . . . . . . . . . . . . . . . . . . . 188
Regenerative Braking . . . . . . . . . 191
Braking . . . . . . . . . . . . . . . . . . . . . . . . . 167
Automatic Forward . . . . . . . . . . . .211
Braking System
Front Pedestrian (FPB) . . . . . . . 213
Break-In, New Vehicle . . . . . . . . . . 176
Bulb Replacement
Halogen Bulbs . . . . . . . . . . . . . . . . 263
Headlamp Aiming . . . . . . . . . . . . . 263
Headlamps . . . . . . . . . . . . . . . . . . . 263
Headlamps, Front Turn
Signal, Sidemarker, and
Parking Lamps . . . . . . . . . . . . . . 264
License Plate Lamps . . . . . . . . . 266
Taillamps, Turn Signal,
Stoplamps, and
Back-up Lamps . . . . . . . . 264, 266
Buying New Tires . . . . . . . . . . . . . . . 293
C
Calibration . . . . . . . . . . . . . . . . . . . . . . 110
California
Perchlorate Materials
Requirements . . . . . . . . . . . . . . . 234
California
Proposition
65 Warning . . . . . . . . . .234, 257, 312,
Back Cover
Canadian Vehicle Owners . . . . . . . . 2
Capacities and
Specifications . . . . . . . . . . . . . . . . . 343
Carbon Monoxide
Engine Exhaust . . . . . . . . . . . . . . . 184
Trunk . . . . . . . . . . . . . . . . . . . . . . . . . . . 43
Winter Driving . . . . . . . . . . . . . . . . 171
Cargo
Tie-Downs . . . . . . . . . . . . . . . . . . . . 105
Caution, Danger, and Warning . . . . 3
Center Console Storage . . . . . . . . 105
Chains, Tire . . . . . . . . . . . . . . . . . . . . 297
Charging
Wireless . . . . . . . . . . . . . . . . . . . . . . .112
Charging System Light . . . . . . . . . 124
Check
Engine Light (Malfunction
Indicator) . . . . . . . . . . . . . . . . . . . . 124