lock CHEVROLET MALIBU 2020 Owners Manual
[x] Cancel search | Manufacturer: CHEVROLET, Model Year: 2020, Model line: MALIBU, Model: CHEVROLET MALIBU 2020Pages: 358, PDF Size: 3.27 MB
Page 248 of 358
Chevrolet Malibu Owner Manual (GMNA-Localizing-U.S./Canada/Mexico-
13555849) - 2020 - CRC - 8/21/19
Vehicle Care 247
RelaysUsage
42 –
64 Starter motor
66 Powertrain
71 –
73 Air conditioning
80 Starter pinion
90 –
94 –
98 –Instrument Panel Fuse
Block
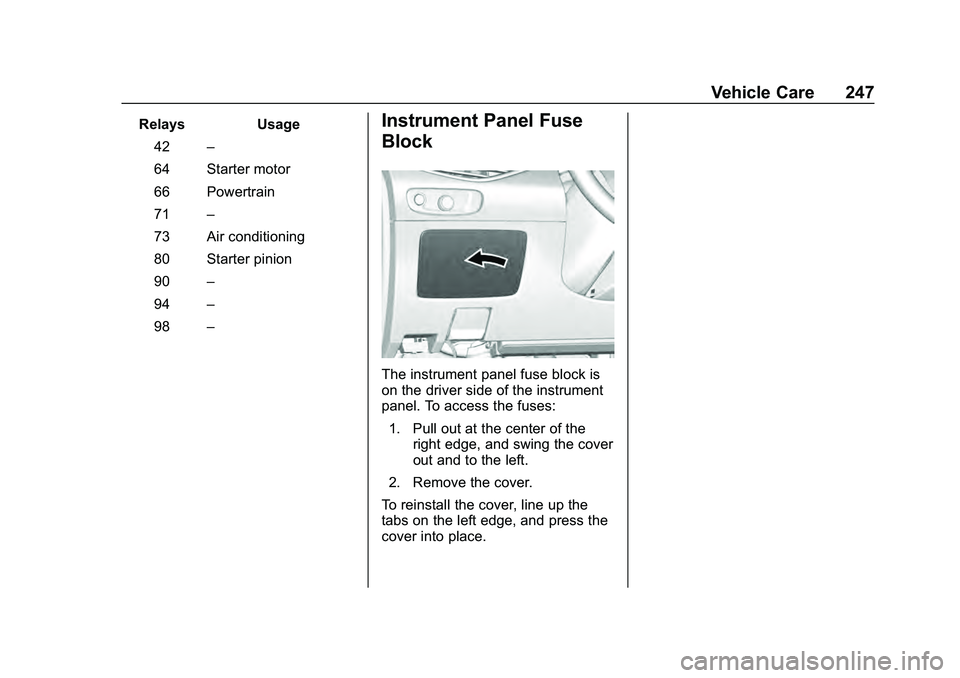
The instrument panel fuse block is
on the driver side of the instrument
panel. To access the fuses:
1. Pull out at the center of the right edge, and swing the cover
out and to the left.
2. Remove the cover.
To reinstall the cover, line up the
tabs on the left edge, and press the
cover into place.
Page 250 of 358
Chevrolet Malibu Owner Manual (GMNA-Localizing-U.S./Canada/Mexico-
13555849) - 2020 - CRC - 8/21/19
Vehicle Care 249
FusesUsage
F22 –
F23 Electric steering column lock
F24 Sensing and diagnostic module/
Automatic occupant
sensing (Airbag)
F25 Data link connector
F26 –
F27 AC DC inverter
F28 –
F29 Body control module 8
F30 Overhead console
F31 Steering wheel controls
F32 –
F33 Heating, ventilation, and air conditioning
F34 Central gateway module
F35 – Fuses
Usage
F36 Wireless charger/USB charger
F37 Front accessory power outlets/
Cigarette lighter –
China only
F38 OnStar
F39 Display
F40 Obstacle detection
F41 Body control module 1 (with Stop/Start
option)
F42 Radio
F43 –
F44 Console accessory power outlet –rear
Relays Usage
K1 –
K2 Retained accessory power
K3 –
K4 – Relays
Usage
K5 –
Page 269 of 358

Chevrolet Malibu Owner Manual (GMNA-Localizing-U.S./Canada/Mexico-
13555849) - 2020 - CRC - 8/21/19
268 Vehicle Care
Warning (Continued)
A tire and/or wheel could fail
suddenly and cause a crash.
Use only radial-ply tires with
the wheels on the vehicle.
If the vehicle tires must be
replaced with a tire that does not
have a TPC Spec number, make
sure they are the same size,
load range, speed rating, and
construction (radial) as the
original tires.
Vehicles that have a tire
pressure monitoring system
could give an inaccurate
low-pressure warning if non-TPC
Spec rated tires are installed.
See Tire Pressure Monitor
System 0259.
The Tire and Loading
Information label indicates the
original equipment tires on the
vehicle. See Vehicle Load Limits
0 151.Different Size Tires and
Wheels
If wheels or tires are installed that
are a different size than the original
equipment wheels and tires, vehicle
performance, including its braking,
ride and handling characteristics,
stability, and resistance to rollover
may be affected. If the vehicle has
electronic systems such as antilock
brakes, rollover airbags, traction
control, electronic stability control,
or All-Wheel Drive, the performance
of these systems can also be
affected.
{Warning
If different sized wheels are used,
there may not be an acceptable
level of performance and safety if
tires not recommended for those
wheels are selected. This
increases the chance of a crash
and serious injury. Only use GM
specific wheel and tire systems
(Continued)
Warning (Continued)
developed for the vehicle, and
have them properly installed by a
GM certified technician.
See Buying New Tires 0266 and
Accessories and Modifications
0 213.
Uniform Tire Quality
Grading
The following information relates
to the system developed by the
United States National Highway
Traffic Safety Administration
(NHTSA), which grades tires by
treadwear, traction, and
temperature performance. This
applies only to vehicles sold in
the United States. The grades
are molded on the sidewalls of
most passenger car tires. The
Uniform Tire Quality Grading
(UTQG) system does not apply
to deep tread, winter tires,
Page 274 of 358
Chevrolet Malibu Owner Manual (GMNA-Localizing-U.S./Canada/Mexico-
13555849) - 2020 - CRC - 8/21/19
Vehicle Care 273
Warning (Continued)
5. Place wheel blocks,if equipped, on both sides of
the tire at the opposite
corner of the tire being
changed.
This vehicle may come with a jack
and spare tire or a tire sealant and
compressor kit. To use the jacking
equipment to change a spare tire
safely, follow the instructions below.
Then see Tire Changing 0280. To
use the tire sealant and compressor
kit, see Tire Sealant and
Compressor Kit 0273.
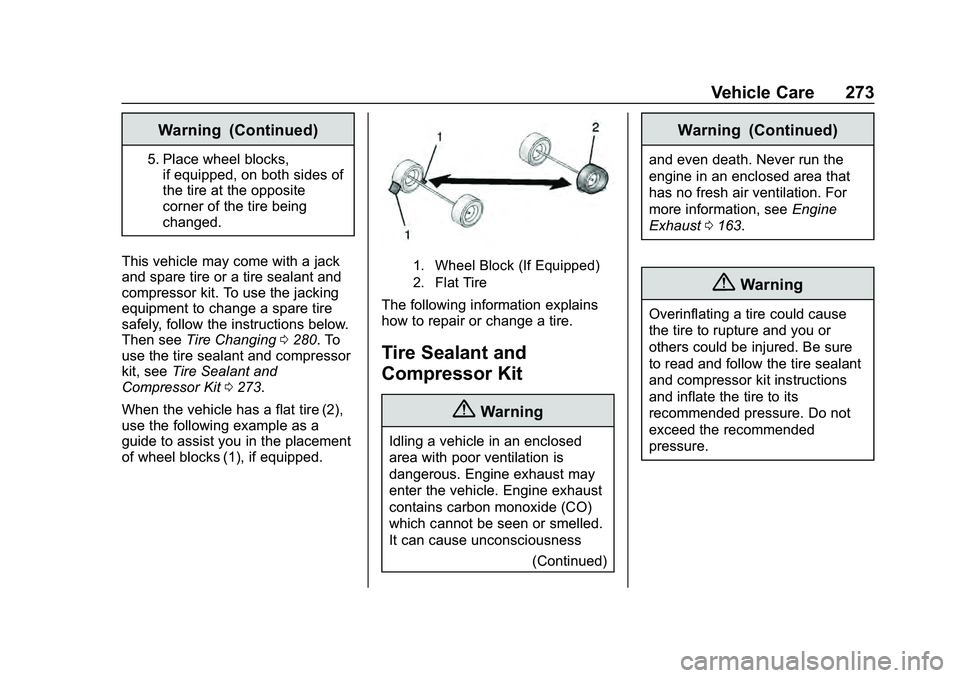
When the vehicle has a flat tire (2),
use the following example as a
guide to assist you in the placement
of wheel blocks (1), if equipped.
1. Wheel Block (If Equipped)
2. Flat Tire
The following information explains
how to repair or change a tire.
Tire Sealant and
Compressor Kit
{Warning
Idling a vehicle in an enclosed
area with poor ventilation is
dangerous. Engine exhaust may
enter the vehicle. Engine exhaust
contains carbon monoxide (CO)
which cannot be seen or smelled.
It can cause unconsciousness (Continued)
Warning (Continued)
and even death. Never run the
engine in an enclosed area that
has no fresh air ventilation. For
more information, seeEngine
Exhaust 0163.
{Warning
Overinflating a tire could cause
the tire to rupture and you or
others could be injured. Be sure
to read and follow the tire sealant
and compressor kit instructions
and inflate the tire to its
recommended pressure. Do not
exceed the recommended
pressure.
Page 276 of 358

Chevrolet Malibu Owner Manual (GMNA-Localizing-U.S./Canada/Mexico-
13555849) - 2020 - CRC - 8/21/19
Vehicle Care 275
Using the Tire Sealant and
Compressor Kit to Temporarily
Seal and Inflate a
Punctured Tire
When using the tire sealant and
compressor kit during cold
temperatures, warm the kit in a
heated environment for five minutes.
This will help to inflate the tire
faster.
If a tire goes flat, avoid further tire
and wheel damage by driving slowly
to a level place. Turn on the hazard
warning flashers. SeeHazard
Warning Flashers 0128.
See If a Tire Goes Flat 0271 for
other important safety warnings.
Do not remove any objects that
have penetrated the tire.
1. Remove the tire sealant canister (4) and compressor
from its storage location. See
Storing the Tire Sealant and
Compressor Kit 0279.
2. Remove the air only hose (10) and the power plug (9) from the
bottom of the compressor. 3. Place the compressor on the
ground near the flat tire.
4. Attach the air only hose (10) tothe sealant canister inlet
valve (1) by turning it clockwise
until tight.
5. Slide the base of the tire
sealant canister (3) into the slot
on the top of the compressor
(6) to hold it upright.
Make sure the tire valve stem
is positioned close to the
ground so the hose will
reach it.
6. Remove the valve stem cap from the flat tire by turning it
counterclockwise.
Page 277 of 358
Chevrolet Malibu Owner Manual (GMNA-Localizing-U.S./Canada/Mexico-
13555849) - 2020 - CRC - 8/21/19
276 Vehicle Care
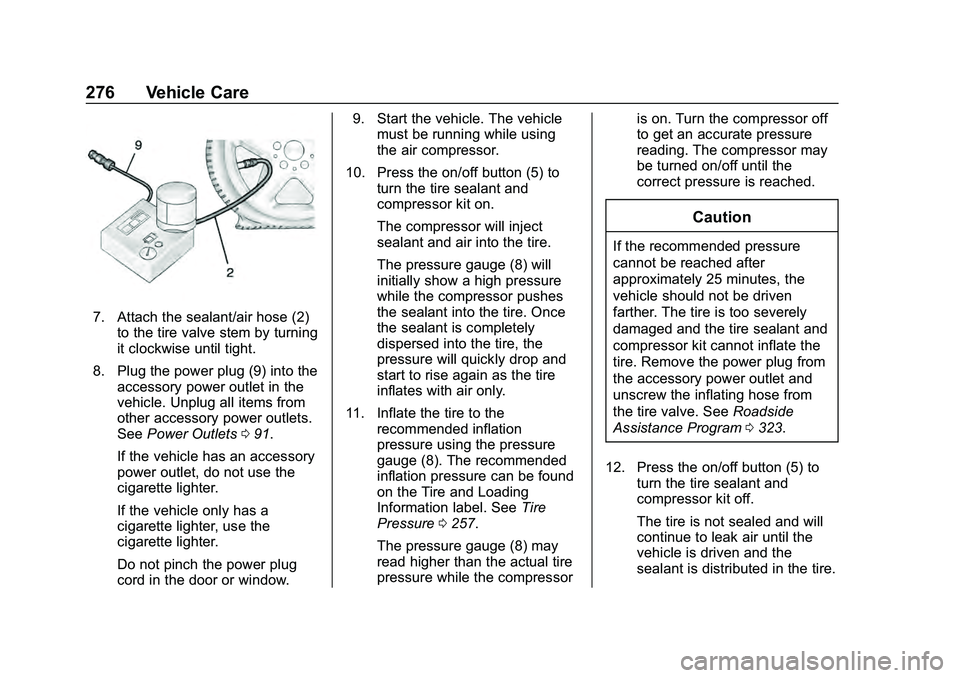
7. Attach the sealant/air hose (2)to the tire valve stem by turning
it clockwise until tight.
8. Plug the power plug (9) into the accessory power outlet in the
vehicle. Unplug all items from
other accessory power outlets.
See Power Outlets 091.
If the vehicle has an accessory
power outlet, do not use the
cigarette lighter.
If the vehicle only has a
cigarette lighter, use the
cigarette lighter.
Do not pinch the power plug
cord in the door or window. 9. Start the vehicle. The vehicle
must be running while using
the air compressor.
10. Press the on/off button (5) to turn the tire sealant and
compressor kit on.
The compressor will inject
sealant and air into the tire.
The pressure gauge (8) will
initially show a high pressure
while the compressor pushes
the sealant into the tire. Once
the sealant is completely
dispersed into the tire, the
pressure will quickly drop and
start to rise again as the tire
inflates with air only.
11. Inflate the tire to the recommended inflation
pressure using the pressure
gauge (8). The recommended
inflation pressure can be found
on the Tire and Loading
Information label. See Tire
Pressure 0257.
The pressure gauge (8) may
read higher than the actual tire
pressure while the compressor is on. Turn the compressor off
to get an accurate pressure
reading. The compressor may
be turned on/off until the
correct pressure is reached.
Caution
If the recommended pressure
cannot be reached after
approximately 25 minutes, the
vehicle should not be driven
farther. The tire is too severely
damaged and the tire sealant and
compressor kit cannot inflate the
tire. Remove the power plug from
the accessory power outlet and
unscrew the inflating hose from
the tire valve. See
Roadside
Assistance Program 0323.
12. Press the on/off button (5) to turn the tire sealant and
compressor kit off.
The tire is not sealed and will
continue to leak air until the
vehicle is driven and the
sealant is distributed in the tire.
Page 278 of 358
Chevrolet Malibu Owner Manual (GMNA-Localizing-U.S./Canada/Mexico-
13555849) - 2020 - CRC - 8/21/19
Vehicle Care 277
Therefore, Steps 13–21 must
be done immediately after
Step 12.
Be careful while handling the
tire sealant and compressor kit
as it could be warm after
usage.
13. Unplug the power plug (9) from the accessory power outlet in
the vehicle.
14. Turn the sealant/air hose (2) counterclockwise to remove it
from the tire valve stem.
15. Replace the tire valve stem cap.
16. Remove the tire sealant canister (4) from the slot on top
of the compressor (6).
17. Turn the air only hose (10) counterclockwise to remove it
from the tire sealant canister
inlet valve (1).
18. Turn the sealant/air hose (2) clockwise onto the sealant
canister inlet valve (1) to
prevent sealant leakage. 19. Return the air only hose (10)
and power plug (9) back to
their original storage location.
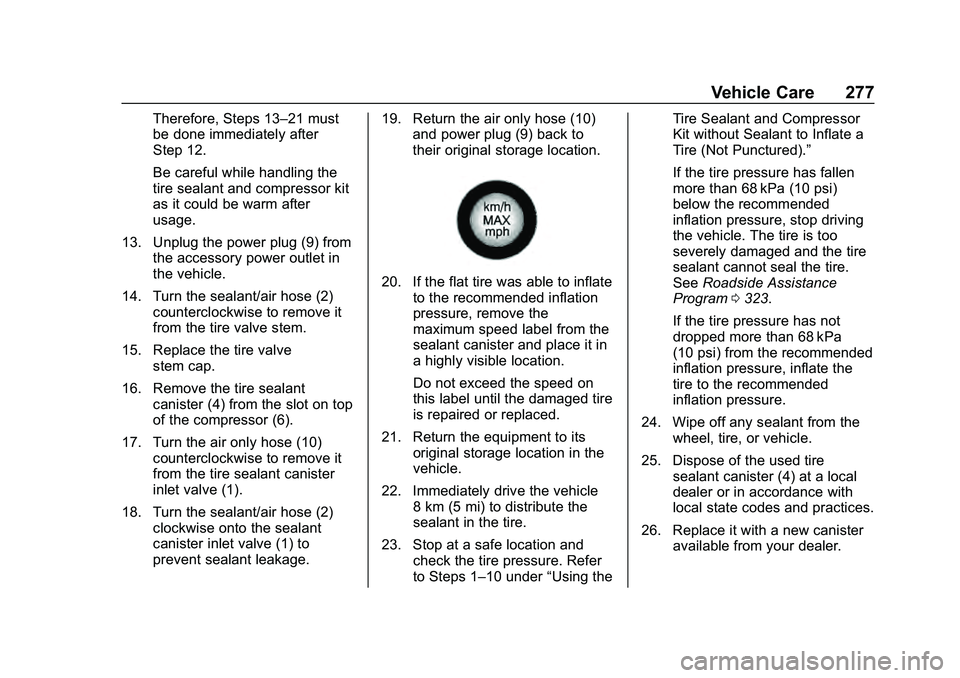
20. If the flat tire was able to inflate
to the recommended inflation
pressure, remove the
maximum speed label from the
sealant canister and place it in
a highly visible location.
Do not exceed the speed on
this label until the damaged tire
is repaired or replaced.
21. Return the equipment to its original storage location in the
vehicle.
22. Immediately drive the vehicle 8 km (5 mi) to distribute the
sealant in the tire.
23. Stop at a safe location and check the tire pressure. Refer
to Steps 1–10 under “Using theTire Sealant and Compressor
Kit without Sealant to Inflate a
Tire (Not Punctured).”
If the tire pressure has fallen
more than 68 kPa (10 psi)
below the recommended
inflation pressure, stop driving
the vehicle. The tire is too
severely damaged and the tire
sealant cannot seal the tire.
See
Roadside Assistance
Program 0323.
If the tire pressure has not
dropped more than 68 kPa
(10 psi) from the recommended
inflation pressure, inflate the
tire to the recommended
inflation pressure.
24. Wipe off any sealant from the wheel, tire, or vehicle.
25. Dispose of the used tire sealant canister (4) at a local
dealer or in accordance with
local state codes and practices.
26. Replace it with a new canister available from your dealer.
Page 279 of 358
Chevrolet Malibu Owner Manual (GMNA-Localizing-U.S./Canada/Mexico-
13555849) - 2020 - CRC - 8/21/19
278 Vehicle Care
27. After temporarily sealing a tireusing the tire sealant and
compressor kit, take the
vehicle to an authorized dealer
within 161 km (100 mi) of
driving to have the tire repaired
or replaced.
Using the Tire Sealant and
Compressor Kit without
Sealant to Inflate a Tire (Not
Punctured)
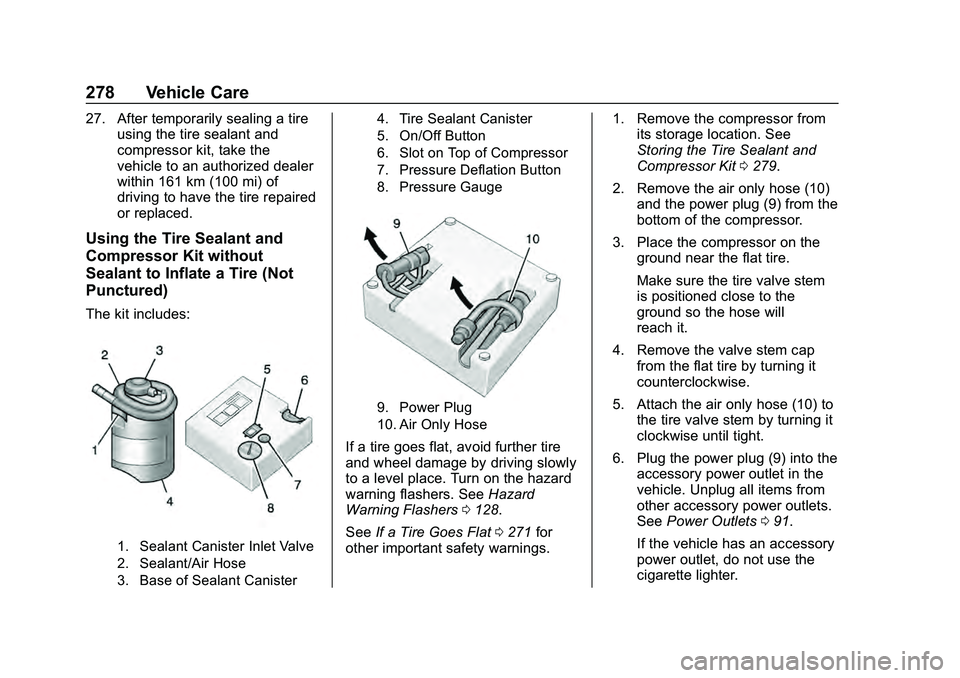
The kit includes:
1. Sealant Canister Inlet Valve
2. Sealant/Air Hose
3. Base of Sealant Canister 4. Tire Sealant Canister
5. On/Off Button
6. Slot on Top of Compressor
7. Pressure Deflation Button
8. Pressure Gauge
9. Power Plug
10. Air Only Hose
If a tire goes flat, avoid further tire
and wheel damage by driving slowly
to a level place. Turn on the hazard
warning flashers. See
Hazard
Warning Flashers 0128.
See If a Tire Goes Flat 0271 for
other important safety warnings. 1. Remove the compressor from
its storage location. See
Storing the Tire Sealant and
Compressor Kit 0279.
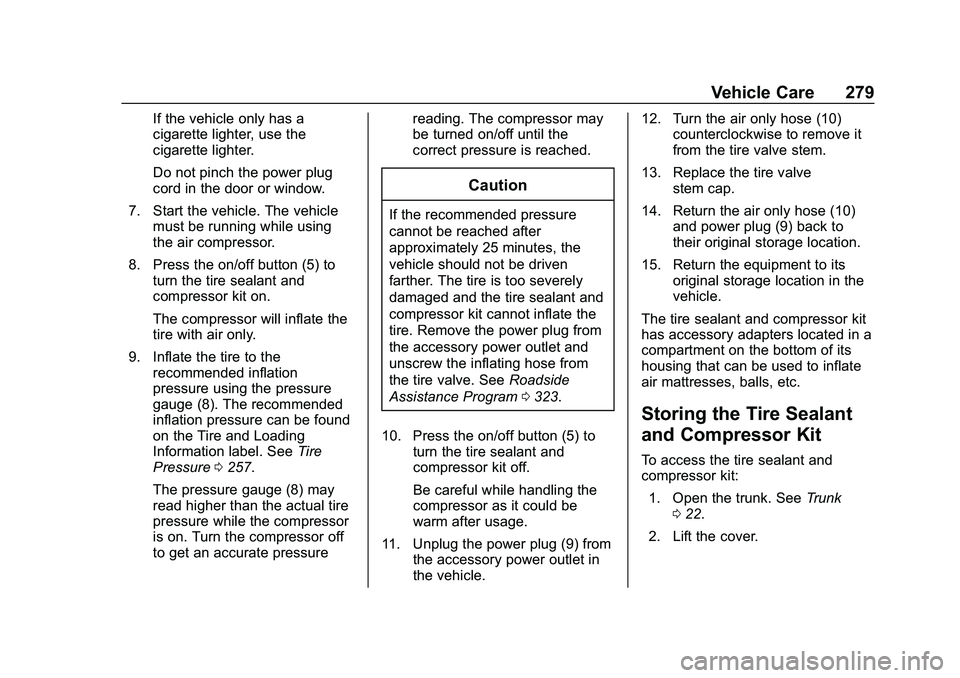
2. Remove the air only hose (10) and the power plug (9) from the
bottom of the compressor.
3. Place the compressor on the ground near the flat tire.
Make sure the tire valve stem
is positioned close to the
ground so the hose will
reach it.
4. Remove the valve stem cap from the flat tire by turning it
counterclockwise.
5. Attach the air only hose (10) to the tire valve stem by turning it
clockwise until tight.
6. Plug the power plug (9) into the accessory power outlet in the
vehicle. Unplug all items from
other accessory power outlets.
See Power Outlets 091.
If the vehicle has an accessory
power outlet, do not use the
cigarette lighter.
Page 280 of 358
Chevrolet Malibu Owner Manual (GMNA-Localizing-U.S./Canada/Mexico-
13555849) - 2020 - CRC - 8/21/19
Vehicle Care 279
If the vehicle only has a
cigarette lighter, use the
cigarette lighter.
Do not pinch the power plug
cord in the door or window.
7. Start the vehicle. The vehicle must be running while using
the air compressor.
8. Press the on/off button (5) to turn the tire sealant and
compressor kit on.
The compressor will inflate the
tire with air only.
9. Inflate the tire to the recommended inflation
pressure using the pressure
gauge (8). The recommended
inflation pressure can be found
on the Tire and Loading
Information label. See Tire
Pressure 0257.
The pressure gauge (8) may
read higher than the actual tire
pressure while the compressor
is on. Turn the compressor off
to get an accurate pressure reading. The compressor may
be turned on/off until the
correct pressure is reached.
Caution
If the recommended pressure
cannot be reached after
approximately 25 minutes, the
vehicle should not be driven
farther. The tire is too severely
damaged and the tire sealant and
compressor kit cannot inflate the
tire. Remove the power plug from
the accessory power outlet and
unscrew the inflating hose from
the tire valve. See
Roadside
Assistance Program 0323.
10. Press the on/off button (5) to turn the tire sealant and
compressor kit off.
Be careful while handling the
compressor as it could be
warm after usage.
11. Unplug the power plug (9) from the accessory power outlet in
the vehicle. 12. Turn the air only hose (10)
counterclockwise to remove it
from the tire valve stem.
13. Replace the tire valve stem cap.
14. Return the air only hose (10) and power plug (9) back to
their original storage location.
15. Return the equipment to its original storage location in the
vehicle.
The tire sealant and compressor kit
has accessory adapters located in a
compartment on the bottom of its
housing that can be used to inflate
air mattresses, balls, etc.
Storing the Tire Sealant
and Compressor Kit
To access the tire sealant and
compressor kit: 1. Open the trunk. See Trunk
0 22.
2. Lift the cover.
Page 281 of 358

Chevrolet Malibu Owner Manual (GMNA-Localizing-U.S./Canada/Mexico-
13555849) - 2020 - CRC - 8/21/19
280 Vehicle Care
3. Turn the wing nutcounterclockwise to remove the
tire sealant and compressor
kit bag.
4. Remove the tire sealant and compressor kit from the bag.
To store the tire sealant and
compressor kit, reverse the steps.
Tire Changing
Removing the Spare Tire and
Tools
1. Jack
2. Wrench
3. Tow Hook (If Equipped)
4. Extension Bolt
5. Insulator Pad
To access the spare tire and tools: 1. Open the trunk.
2. Remove the spare tire cover. 3. Turn the retainer nut
counterclockwise and remove
the spare tire. Place the spare
tire next to the tire being
changed.
4. The jack and tools are stored below the spare tire. Remove
them from their container and
place them near the tire being
changed.
Removing the Flat Tire and
Installing the Spare Tire
Take off the wheel cover or center
cap, if the vehicle has one, to reach
the wheel bolts.