turn signal CHEVROLET MALIBU 2021 Get To Know Guide
[x] Cancel search | Manufacturer: CHEVROLET, Model Year: 2021, Model line: MALIBU, Model: CHEVROLET MALIBU 2021Pages: 16, PDF Size: 2.69 MB
Page 2 of 16
2
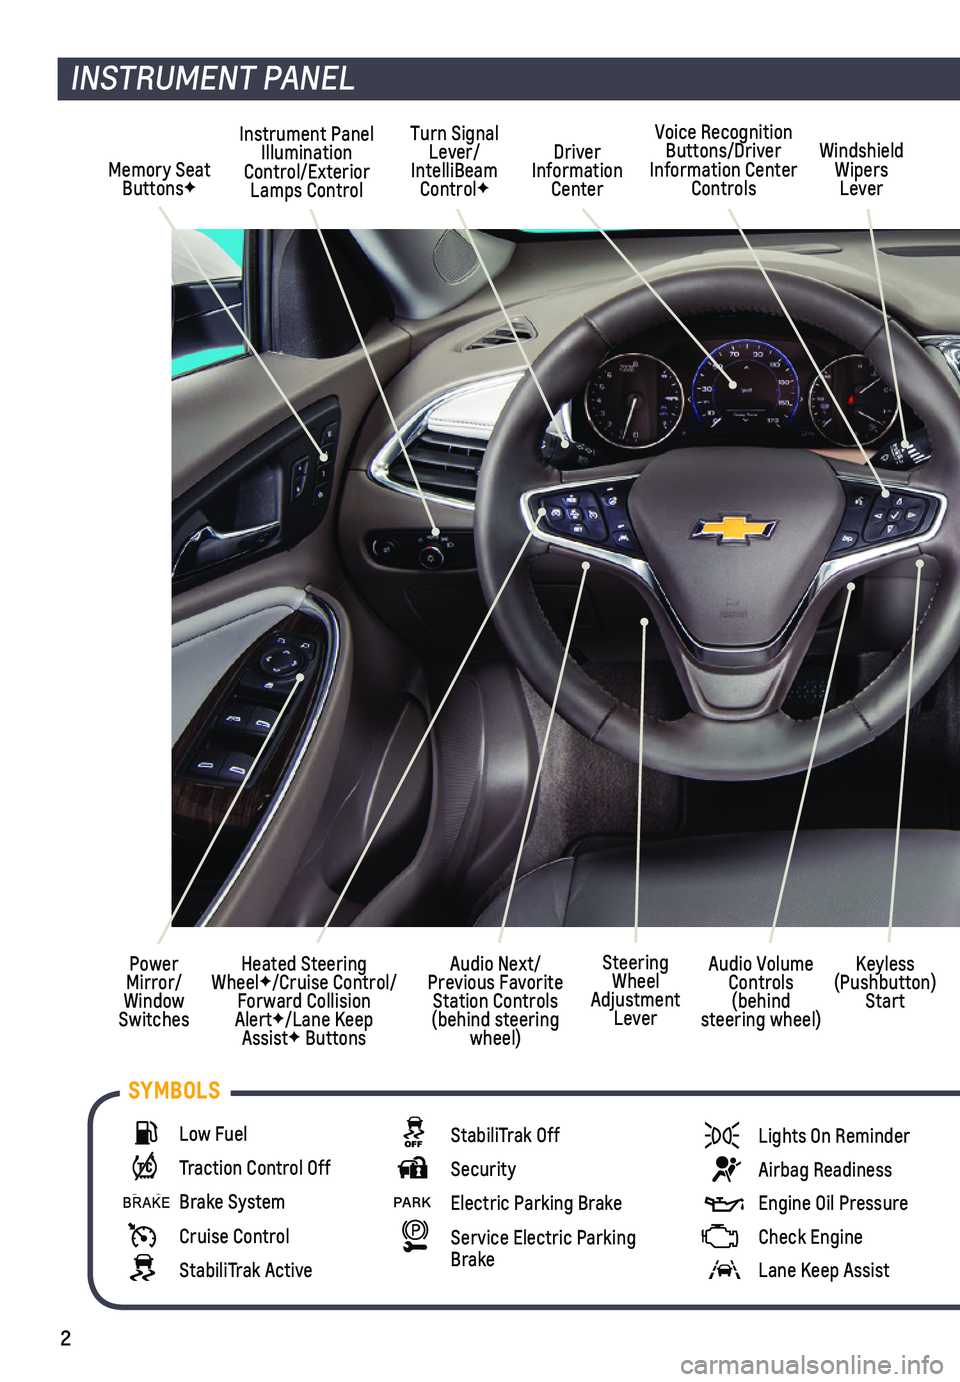
Memory Seat ButtonsF
Instrument Panel Illumination Control/Exterior Lamps Control
Driver Information Center
Voice Recognition Buttons/Driver Information Center Controls
Windshield Wipers Lever
Audio Next/Previous Favorite Station Controls (behind steering wheel)
Turn Signal Lever/IntelliBeam ControlF
Heated Steering WheelF/Cruise Control/Forward Collision AlertF/Lane Keep AssistF Buttons
Power Mirror/Window Switches
INSTRUMENT PANEL
Keyless (Pushbutton) Start
Audio Volume Controls (behind steering wheel)
Steering Wheel Adjustment Lever
Low Fuel
Traction Control Off
Brake System
Cruise Control
StabiliTrak Active
StabiliTrak Off
Security
PARK Electric Parking Brake
Service Electric Parking Brake
Lights On Reminder
Airbag Readiness
Engine Oil Pressure
Check Engine
Lane Keep Assist
SYMBOLS
Page 4 of 16
4
KEYLESS ACCESS SYSTEM
The Keyless Access System enables operation of the doors and trunk witho\
ut removing the Remote Keyless Entry transmitter from a pocket or purse. The transmi\
tter must be within 3 feet of a front door or within 3 feet of the trunk.
KEYLESS UNLOCKING
With the transmitter within range:
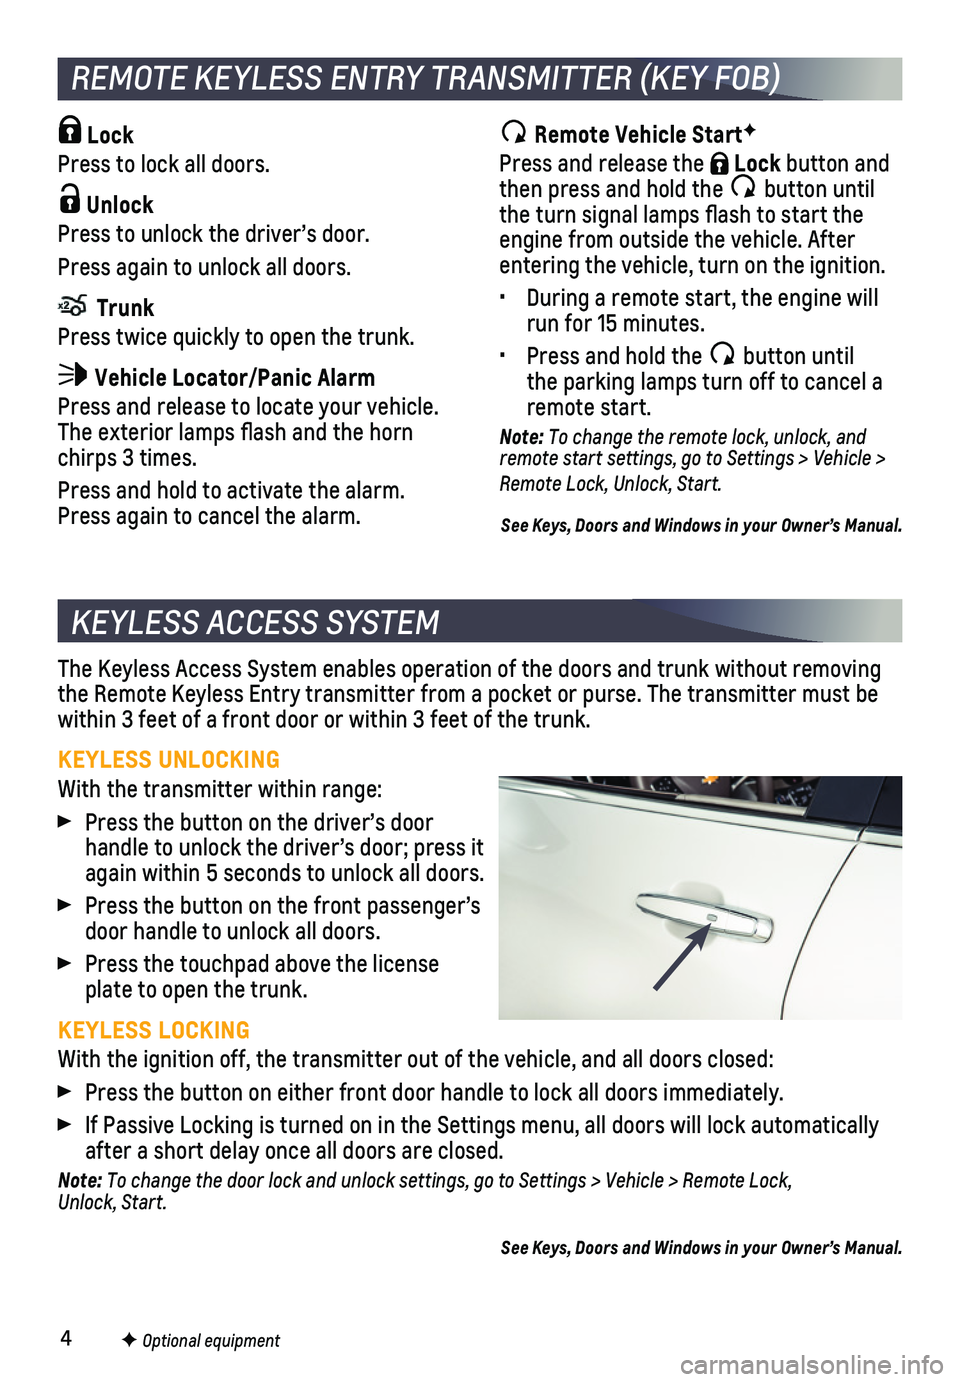
Press the button on the driver’s door
handle to unlock the driver’s door; press it again within 5 seconds to unlock all doors.
Press the button on the front passenger’s door handle to unlock all doors.
Press the touchpad above the license plate to open the trunk.
KEYLESS LOCKING
With the ignition off, the transmitter out of the vehicle, and all doors\
closed:
Press the button on either front door handle to lock all doors immediate\
ly.
If Passive Locking is turned on in the Settings menu, all doors will loc\
k automatically after a short delay once all doors are closed.
Note: To change the door lock and unlock settings, go to Settings > Vehicle > Remote Lock, Unlock, Start.
See Keys, Doors and Windows in your Owner’s Manual.
Remote Vehicle StartF
Press and release the Lock button and then press and hold the button until the turn signal lamps flash to start the engine from outside the vehicle. After entering the vehicle, turn on the ignition.
• During a remote start, the engine will run for 15 minutes.
• Press and hold the button until the parking lamps turn off to cancel a remote start.
Note: To change the remote lock, unlock, and remote start settings, go to Settings > Vehicle > Remote Lock, Unlock, Start.
See Keys, Doors and Windows in your Owner’s Manual.
Lock
Press to lock all doors.
Unlock
Press to unlock the driver’s door.
Press again to unlock all doors.
Trunk
Press twice quickly to open the trunk.
Vehicle Locator/Panic Alarm
Press and release to locate your vehicle. The exterior lamps flash and the horn chirps 3 times.
Press and hold to activate the alarm. Press again to cancel the alarm.
REMOTE KEYLESS ENTRY TRANSMITTER (KEY FOB)
F Optional equipment
Page 12 of 16
12
SETTING CRUISE CONTROL
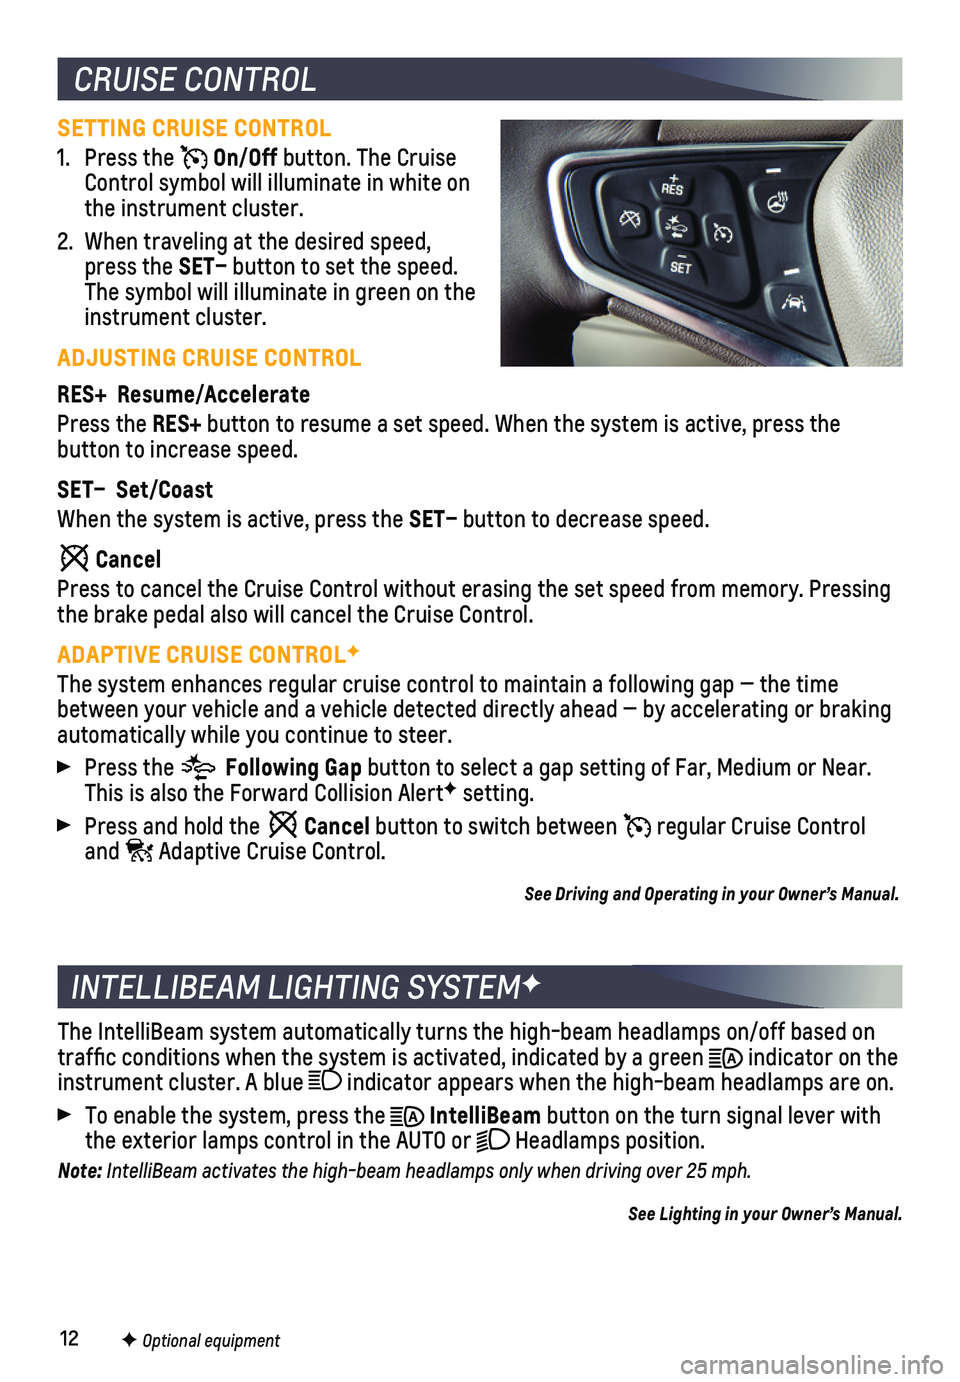
1. Press the On/Off button. The Cruise Control symbol will illuminate in white on the instrument cluster.
2. When traveling at the desired speed, press the SET– button to set the speed. The symbol will illuminate in green on the instrument cluster.
ADJUSTING CRUISE CONTROL
RES+ Resume/Accelerate
Press the RES+ button to resume a set speed. When the system is active, press the
button to increase speed.
SET– Set/Coast
When the system is active, press the SET– button to decrease speed.
Cancel
Press to cancel the Cruise Control without erasing the set speed from me\
mory. Pressing the brake pedal also will cancel the Cruise Control.
ADAPTIVE CRUISE CONTROLF
The system enhances regular cruise control to maintain a following gap —\
the time between your vehicle and a vehicle detected directly ahead — by accel\
erating or braking automatically while you continue to steer.
Press the Following Gap button to select a gap setting of Far, Medium or Near. This is also the Forward Collision AlertF setting.
Press and hold the Cancel button to switch between regular Cruise Control and Adaptive Cruise Control.
See Driving and Operating in your Owner’s Manual.
CRUISE CONTROL
F Optional equipment
INTELLIBEAM LIGHTING SYSTEMF
The IntelliBeam system automatically turns the high-beam headlamps on/of\
f based on traffic conditions when the system is activated, indicated by a green \
indicator on the instrument cluster. A blue indicator appears when the high-beam headlamps are on.
To enable the system, press the IntelliBeam button on the turn signal lever with the exterior lamps control in the AUTO or Headlamps position.
Note: IntelliBeam activates the high-beam headlamps only when driving over 25 mph.
See Lighting in your Owner’s Manual.
Page 13 of 16
13
DRIVER ASSISTANCE SYSTEMS
Safety or driver assistance features are no substitute for the driver’\
s responsibility to operate the vehicle in a safe manner. The driver should remain attentive to traffic, surroundings and road conditions at all times. Read your Owner’s Manual for important feature limitations and information.
LANE CHANGE ALERT WITH SIDE BLIND ZONE ALERTF — While driving, the system
displays a warning symbol on the left or right side mirror when a moving vehicle is\
detected rapidly approaching or is in a side blind zone. The warning sy\
mbol flashes if a turn signal is activated when a vehicle has been detected on the same si\
de.
To turn on or off, go to Settings > Vehicle > Collision/Detection System\
s > Lane Change Alert.
LANE KEEP ASSIST WITH LANE DEPARTURE WARNINGF — The system may help you avoid collisions due to unintentional lane departures. The Lane Keep Assist Indicator is green on the instrument cluster if the system is available to assist.\
If the vehicle approaches a detected lane marking without using a turn signal in that d\
irection, the system may assist by providing brief, gentle steering wheel turns and di\
splaying an amber .
If active driver steering is not detected, the amber may flash and 3 beeps may sound on the side of the departure direction as the lane marking is crossed. T\
he Lane Keep Assist system does not continuously steer the vehicle; the driver needs \
to steer and be in complete control of the vehicle.
To turn on or off, press the Lane Keep Assist button on the steering wheel.
FORWARD COLLISION ALERTF — The Vehicle Ahead Indicator is green on the instru-ment cluster when a vehicle is detected and is amber when following a ve\
hicle ahead much too closely. When approaching a detected vehicle directly ahead too\
rapidly, a red alert flashes on the windshield and rapid beeps sound.
Press the Forward Collision Alert button on the steering wheel to set the alert timing to Far, Medium, or Near. The setting is displayed on the Driver I\
nformation Center.
ENHANCED AUTOMATIC EMERGENCY BRAKINGF — In detected potential imminent
collision situations with vehicles directly ahead, the system can provid\
e alerts and enhance driver braking or automatically apply hard emergency braking, if\
you have not already done so, to help reduce the severity or help avoid collisions at\
very low speeds.
To set Enhanced Automatic Emergency Braking and Forward Collision Alert \
to Alert and Brake, Alert, or Off, go to Settings > Vehicle > Collision/Detection\
Systems > Forward Collision System.
FRONT PEDESTRIAN BRAKINGF — During daytime driving, the system can detect
pedestrians directly ahead up to a distance of approximately 131 feet an\
d displays an amber indicator. When approaching a detected pedestrian too quickly, a red ale\
rt flashes on the windshield and rapid beeps sound. The system may prepar\
e the brakes or automatically apply hard emergency braking, if you have not already done\
so.
To set the system to Alert and Brake, Alert, or Off, go to Settings > Ve\
hicle > Collision/ Detection Systems > Front Pedestrian Detection.
See Driving and Operating in your Owner’s Manual.
F Optional equipment
Page 15 of 16
15
TIRE PRESSURE MONITOR SYSTEM
The Low Tire Pressure warning light on the instrument cluster illuminates wh\
en one or more of the vehicle’s tires is significantly underinflated. Fi\
ll the tires to the proper tire pressures listed on the Tire and Loading Information label, located belo\
w the driver’s door latch. Current tire pressures can be viewed on the Driver Informati\
on Center.
The Tire Fill Alert provides visual and audible alerts to help when infl\
ating a tire to the recommended tire pressure. The horn sounds and the turn signals change f\
rom flashing to solid when the recommended pressure is reached.
See Vehicle Care in your Owner’s Manual.
TRACTION CONTROL
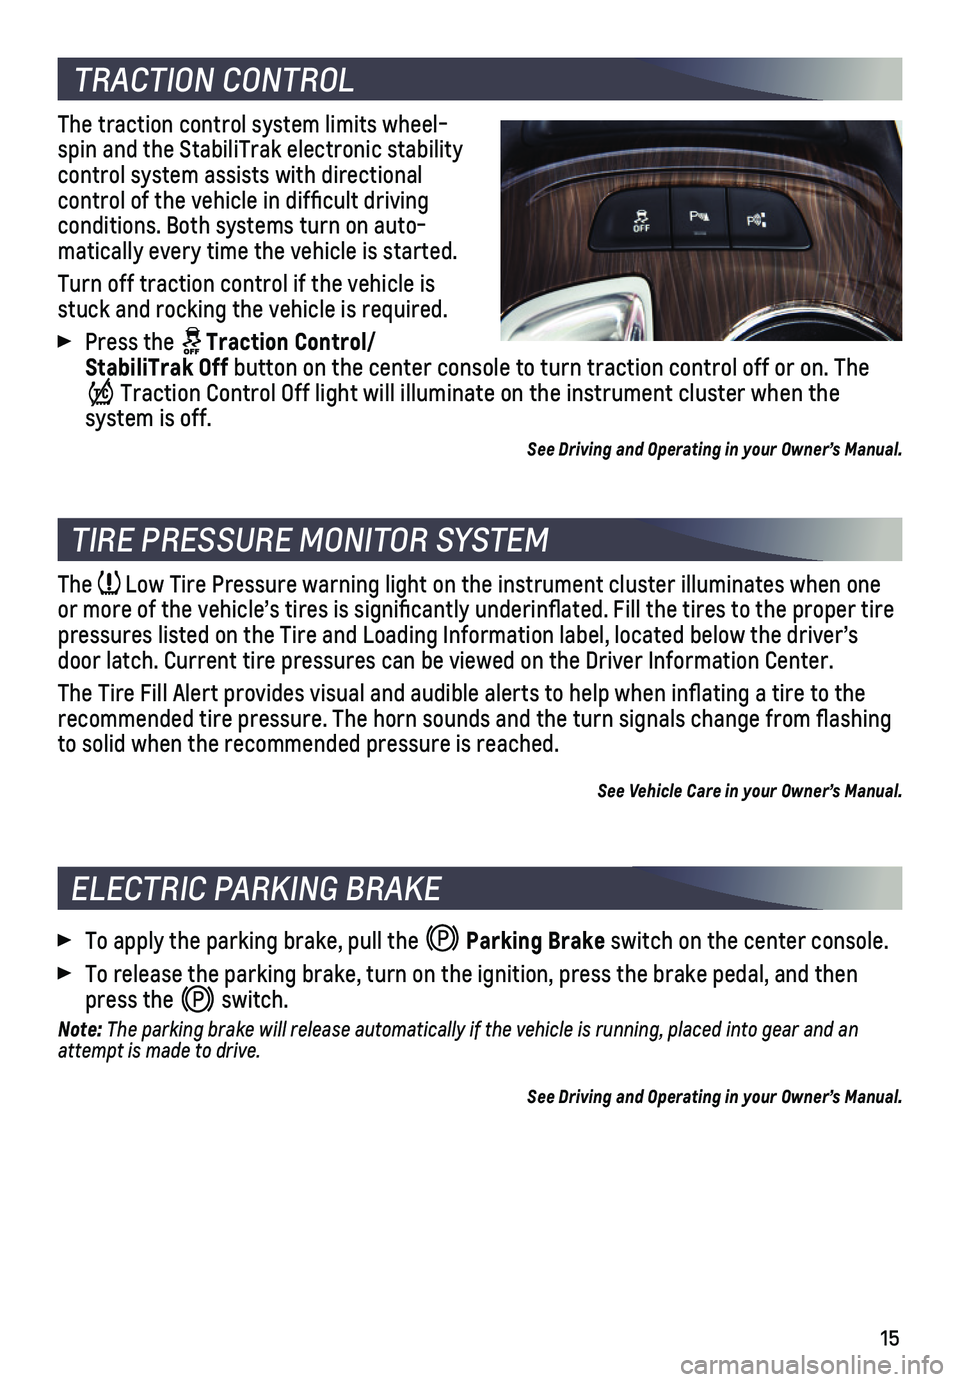
The traction control system limits wheel-spin and the StabiliTrak electronic stability
control system assists with directional
control of the vehicle in difficult driving conditions. Both systems turn on auto-matically every time the vehicle is started.
Turn off traction control if the vehicle is stuck and rocking the vehicle is required.
Press the Traction Control/StabiliTrak Off button on the center console to turn traction control off or on. The
Traction Control Off light will illuminate on the instrument cluster when the
system is off.
See Driving and Operating in your Owner’s Manual.
ELECTRIC PARKING BRAKE
To apply the parking brake, pull the Parking Brake switch on the center console.
To release the parking brake, turn on the ignition, press the brake peda\
l, and then press the switch.
Note: The parking brake will release automatically if the vehicle is running, \
placed into gear and an attempt is made to drive.
See Driving and Operating in your Owner’s Manual.