console CHEVROLET MALIBU 2022 Owners Manual
[x] Cancel search | Manufacturer: CHEVROLET, Model Year: 2022, Model line: MALIBU, Model: CHEVROLET MALIBU 2022Pages: 351, PDF Size: 9.4 MB
Page 11 of 351
Chevrolet Malibu Owner Manual (GMNA-Localizing-U.S./Canada-
14584249) - 2021 - CRC - 11/9/20
10 Keys, Doors, and Windows
heard. Passive locking will then remain
disabled until
Qon the interior door is
pressed, or until the vehicle is turned on.
Remote Left In Vehicle Alert
When the vehicle is turned off and an RKE
transmitter is left in the vehicle, the horn
will chirp three times after all doors are
closed. To turn on or off see Vehicle
Personalization 0100.
Remote No Longer In Vehicle Alert
If the vehicle is on with a door open, and
then all doors are closed, the vehicle will
check for an RKE transmitter inside. If an
RKE transmitter is not detected, the Driver
Information Center (DIC) will display NO
REMOTE DETECTED and the horn will chirp
three times.
This occurs only once each time the vehicle
is driven. See Vehicle Personalization 0100.
Keyless Trunk Opening
Press the touch pad on the rear of the trunk
to open it if the RKE transmitter is within
1 m (3 ft) of the trunk.
Key Access
To access a vehicle with a weak transmitter
battery, see Door Locks014.
Programming Transmitters to the Vehicle
Only RKE transmitters programmed to the
vehicle will work. If a transmitter is lost or
stolen, a replacement can be purchased and
programmed through your dealer. The
vehicle can be reprogrammed so that lost or
stolen transmitters no longer work. Any
remaining transmitters will need to be
reprogrammed. Each vehicle can have up to
eight transmitters matched to it.
Programming with Recognized Transmitters
A new transmitter can be programmed to
the vehicle when there are two recognized
transmitters. To program, the vehicle must
be off and all of the transmitters, both
currently recognized and new, must be
with you.
1. Place the two recognized transmitters in the cupholder.
2. Remove the key lock cylinder cap on the driver door handle. See Door Locks014.
Insert the vehicle key of the new
transmitter into the key lock cylinder on
the outside of the driver door and turn
the key counterclockwise five times
within 10 seconds.
The DIC displays READY FOR REMOTE #2,
3, 4 or 5.
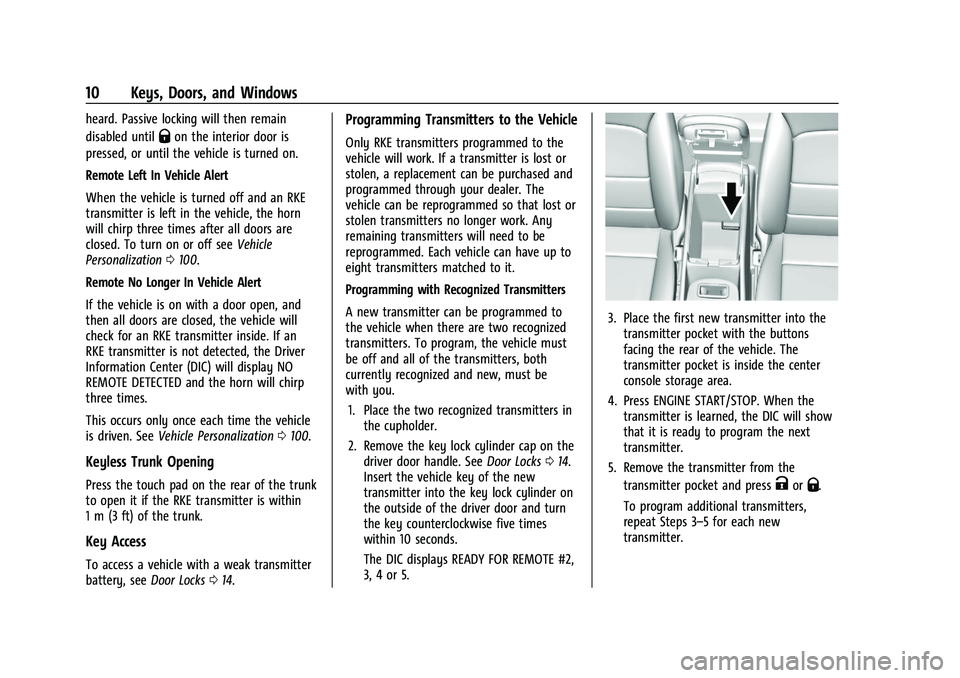
3. Place the first new transmitter into the transmitter pocket with the buttons
facing the rear of the vehicle. The
transmitter pocket is inside the center
console storage area.
4. Press ENGINE START/STOP. When the transmitter is learned, the DIC will show
that it is ready to program the next
transmitter.
5. Remove the transmitter from the transmitter pocket and press
KorQ.
To program additional transmitters,
repeat Steps 3–5 for each new
transmitter.
Page 12 of 351
Chevrolet Malibu Owner Manual (GMNA-Localizing-U.S./Canada-
14584249) - 2021 - CRC - 11/9/20
Keys, Doors, and Windows 11
When all additional transmitters are
programmed, press and hold ENGINE
START/STOP for 12 seconds to exit
programming mode.
6. Put the key back into the transmitter.
7. Replace the key lock cylinder cap. See Door Locks 014.
Programming without Recognized
Transmitters
If two currently recognized transmitters are
not available, follow this procedure to
program up to eight transmitters. This
feature is not available in Canada. This
procedure will take approximately
30 minutes to complete. The vehicle must
be off and all of the transmitters to be
programmed must be with you. 1. Remove the key lock cylinder cap on the driver door handle. See Door Locks014.
Insert the vehicle key of the transmitter
into the key lock cylinder on the outside
of the driver door and turn the key
counterclockwise five times within
10 seconds.
The DIC displays REMOTE LEARN
PENDING, PLEASE WAIT. 2. Wait for 10 minutes until the DIC
displays PRESS ENGINE START BUTTON TO
LEARN and then press ENGINE
START/STOP.
The DIC will again display REMOTE LEARN
PENDING, PLEASE WAIT.
3. Repeat Step 2 two additional times. After the third time, all previously known
transmitters will no longer work with the
vehicle. Remaining transmitters can be
relearned during the next steps.
The DIC should now display READY FOR
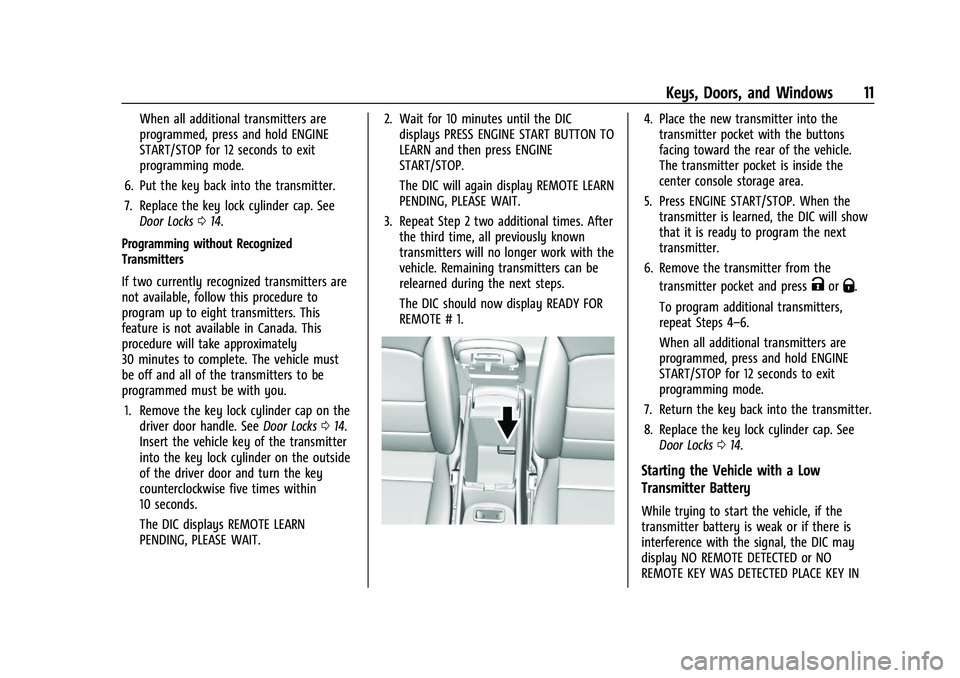
REMOTE # 1.4. Place the new transmitter into thetransmitter pocket with the buttons
facing toward the rear of the vehicle.
The transmitter pocket is inside the
center console storage area.
5. Press ENGINE START/STOP. When the transmitter is learned, the DIC will show
that it is ready to program the next
transmitter.
6. Remove the transmitter from the transmitter pocket and press
KorQ.
To program additional transmitters,
repeat Steps 4–6.
When all additional transmitters are
programmed, press and hold ENGINE
START/STOP for 12 seconds to exit
programming mode.
7. Return the key back into the transmitter.
8. Replace the key lock cylinder cap. See Door Locks 014.
Starting the Vehicle with a Low
Transmitter Battery
While trying to start the vehicle, if the
transmitter battery is weak or if there is
interference with the signal, the DIC may
display NO REMOTE DETECTED or NO
REMOTE KEY WAS DETECTED PLACE KEY IN
Page 13 of 351
Chevrolet Malibu Owner Manual (GMNA-Localizing-U.S./Canada-
14584249) - 2021 - CRC - 11/9/20
12 Keys, Doors, and Windows
TRANSMITTER POCKET THEN START YOUR
VEHICLE. The DIC may also display REPLACE
BATTERY IN REMOTE KEY.
To start the vehicle:1. Open the center console and place the transmitter in the transmitter pocket
with the buttons facing the rear of the
vehicle.
2. With the vehicle in P (Park) or N (Neutral), press the brake pedal and
press ENGINE START/STOP. See Starting
the Engine 0183.
Replace the transmitter battery as soon
as possible.
Battery Replacement
{Warning
Never allow children to play with the RKE
transmitter. The transmitter contains a
small battery, which can be a choking
hazard. If swallowed, internal burns can
occur, resulting in severe injury or death.
Seek medical attention immediately if a
battery is swallowed.
{Warning
To avoid personal injury, do not touch
metal surfaces on the RKE transmitter
when it has been exposed to extreme
heat. These surfaces can be hot to the
touch at temperatures above 59 °C (138
°F).
Caution
When replacing the battery, do not touch
any of the circuitry on the transmitter.
Static from your body could damage the
transmitter.
Caution
Always replace the battery with the
correct type. Replacing the battery with
an incorrect type could potentially create
a risk of battery explosion. Dispose of
used batteries according to instructions
and local laws. Do not attempt to burn,
crush, or cut the used battery, and avoid
exposing the battery to environments
with extremely low air pressures or high
temperatures. Replace the battery if the DIC displays
REPLACE BATTERY IN REMOTE KEY.
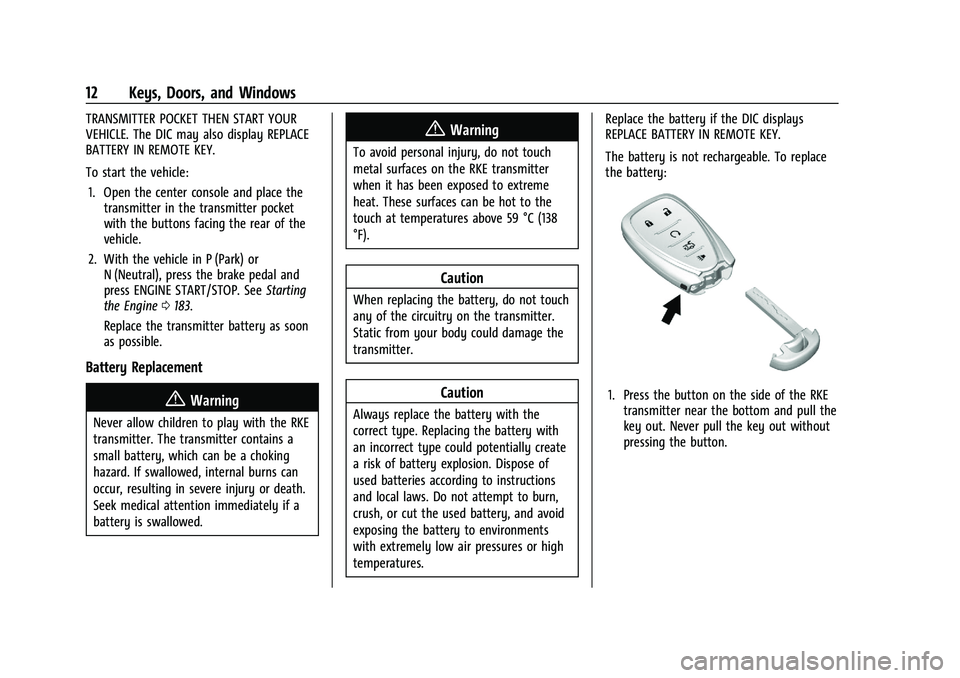
The battery is not rechargeable. To replace
the battery:
1. Press the button on the side of the RKE
transmitter near the bottom and pull the
key out. Never pull the key out without
pressing the button.
Page 51 of 351
Chevrolet Malibu Owner Manual (GMNA-Localizing-U.S./Canada-
14584249) - 2021 - CRC - 11/9/20
50 Seats and Restraints
include airbag modules and possibly other
parts. The service manual for the vehicle
covers the need to replace other parts.
.The vehicle has a crash sensing and
diagnostic module which records
information after a crash. SeeVehicle
Data Recording and Privacy 0329 and
Event Data Recorders 0330.
.Let only qualified technicians work on the
airbag systems. Improper service can
mean that an airbag system will not work
properly. See your dealer for service.
Passenger Sensing System
The vehicle has a passenger sensing system
for the front outboard passenger position.
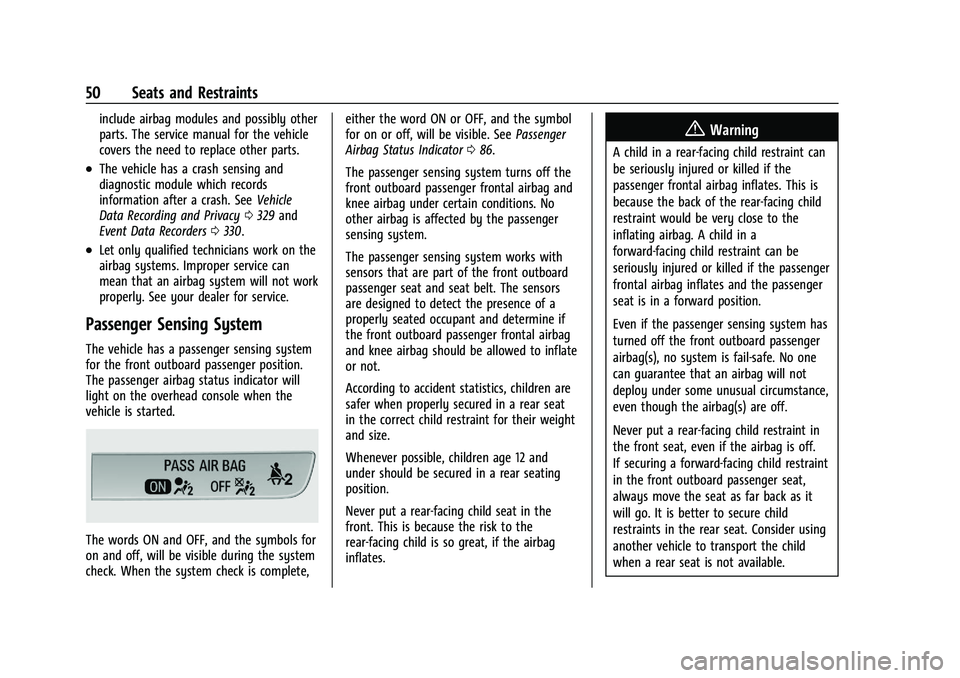
The passenger airbag status indicator will
light on the overhead console when the
vehicle is started.
The words ON and OFF, and the symbols for
on and off, will be visible during the system
check. When the system check is complete, either the word ON or OFF, and the symbol
for on or off, will be visible. See
Passenger
Airbag Status Indicator 086.
The passenger sensing system turns off the
front outboard passenger frontal airbag and
knee airbag under certain conditions. No
other airbag is affected by the passenger
sensing system.
The passenger sensing system works with
sensors that are part of the front outboard
passenger seat and seat belt. The sensors
are designed to detect the presence of a
properly seated occupant and determine if
the front outboard passenger frontal airbag
and knee airbag should be allowed to inflate
or not.
According to accident statistics, children are
safer when properly secured in a rear seat
in the correct child restraint for their weight
and size.
Whenever possible, children age 12 and
under should be secured in a rear seating
position.
Never put a rear-facing child seat in the
front. This is because the risk to the
rear-facing child is so great, if the airbag
inflates.
{Warning
A child in a rear-facing child restraint can
be seriously injured or killed if the
passenger frontal airbag inflates. This is
because the back of the rear-facing child
restraint would be very close to the
inflating airbag. A child in a
forward-facing child restraint can be
seriously injured or killed if the passenger
frontal airbag inflates and the passenger
seat is in a forward position.
Even if the passenger sensing system has
turned off the front outboard passenger
airbag(s), no system is fail-safe. No one
can guarantee that an airbag will not
deploy under some unusual circumstance,
even though the airbag(s) are off.
Never put a rear-facing child restraint in
the front seat, even if the airbag is off.
If securing a forward-facing child restraint
in the front outboard passenger seat,
always move the seat as far back as it
will go. It is better to secure child
restraints in the rear seat. Consider using
another vehicle to transport the child
when a rear seat is not available.
Page 54 of 351
Chevrolet Malibu Owner Manual (GMNA-Localizing-U.S./Canada-
14584249) - 2021 - CRC - 11/9/20
Seats and Restraints 53
A thick layer of additional material, such as
a blanket or cushion, or aftermarket
equipment such as seat covers, seat heaters,
and seat massagers can affect how well the
passenger sensing system operates. We
recommend that you not use seat covers or
other aftermarket equipment except when
approved by GM for your specific vehicle.
SeeAdding Equipment to the
Airbag-Equipped Vehicle 053 for more
information about modifications that can
affect how the system operates.
The ON indicator may be lit if an object,
such as a briefcase, handbag, grocery bag,
laptop, or other electronic device is put on
an unoccupied seat. If this is not desired
remove the object from the seat.
{Warning
Stowing articles under the passenger seat
or between the passenger seat cushion
and seatback may interfere with the
proper operation of the passenger
sensing system.
Servicing the Airbag-Equipped
Vehicle
Airbags affect how the vehicle should be
serviced. There are parts of the airbag
system in several places around the vehicle.
Your dealer and the service manual have
information about servicing the vehicle and
the airbag system. To purchase a service
manual, see Publication Ordering
Information 0327.
{Warning
For up to 10 seconds after the vehicle is
turned off and the 12‐volt battery is
disconnected, an airbag can still inflate
during improper service. You can be
injured if you are close to an airbag
when it inflates. Avoid yellow connectors.
They are probably part of the airbag
system. Be sure to follow proper service
procedures, and make sure the person
performing work for you is qualified to
do so.
Adding Equipment to the
Airbag-Equipped Vehicle
Adding accessories that change the vehicle's
frame, bumper system, height, front end,
or side sheet metal may keep the airbag
system from working properly.
The operation of the airbag system can also
be affected by changing, including
improperly repairing or replacing, any parts
of the following:
.Airbag system, including airbag modules,
front or side impact sensors, sensing and
diagnostic module, or airbag wiring
.Front seats, including stitching, seams or
zippers
.Seat belts
.Steering wheel, instrument panel,
overhead console, ceiling trim, or pillar
garnish trim
.Inner door seals, including speakers
Your dealer and the service manual have
information about the location of the airbag
modules and sensors, sensing and diagnostic
module, and airbag wiring along with the
proper replacement procedures.
Page 73 of 351
Chevrolet Malibu Owner Manual (GMNA-Localizing-U.S./Canada-
14584249) - 2021 - CRC - 11/9/20
72 Storage
Storage
Storage Compartments
Storage Compartments . . . . . . . . . . . . . . . . . 72
Glove Box . . . . . . . . . . . . . . . . . . . . . . . . . . . . . . 72
Cupholders . . . . . . . . . . . . . . . . . . . . . . . . . . . . . 72
Center Console Storage . . . . . . . . . . . . . . . . . 72
Umbrella Storage . . . . . . . . . . . . . . . . . . . . . . . 73
Additional Storage Features
Cargo Tie-Downs . . . . . . . . . . . . . . . . . . . . . . . . 73
Convenience Net . . . . . . . . . . . . . . . . . . . . . . . . 73
Storage Compartments{
Warning
Do not store heavy or sharp objects in
storage compartments. In a crash, these
objects may cause the cover to open and
could result in injury.
Glove Box
Pull the handle up to open.
Cupholders
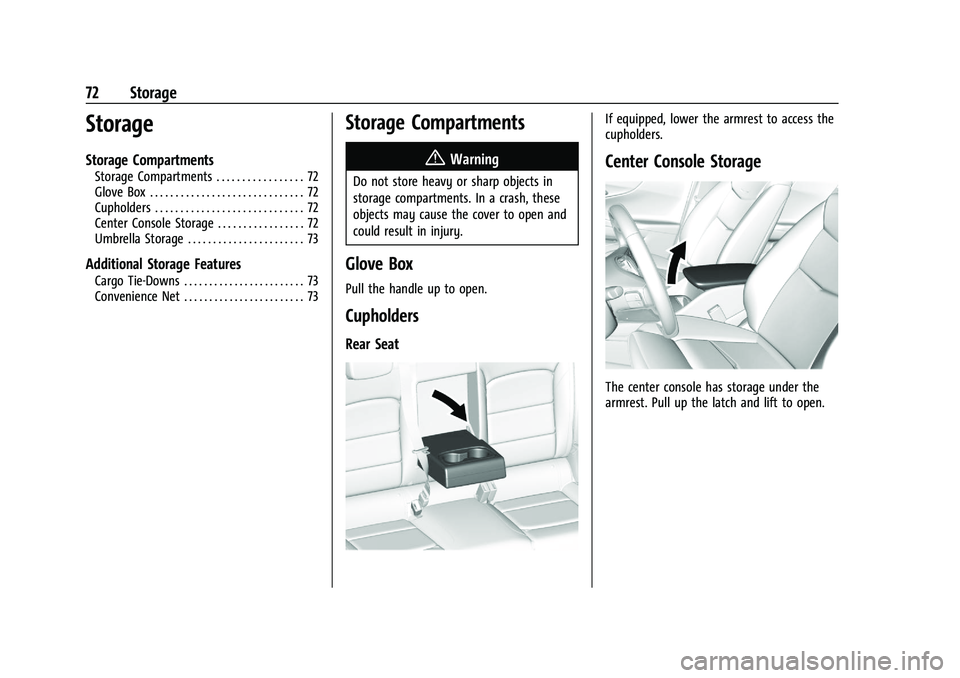
Rear Seat
If equipped, lower the armrest to access the
cupholders.
Center Console Storage
The center console has storage under the
armrest. Pull up the latch and lift to open.
Page 78 of 351
Chevrolet Malibu Owner Manual (GMNA-Localizing-U.S./Canada-
14584249) - 2021 - CRC - 11/9/20
Instruments and Controls 77
Power Outlets
Power Outlet 12-Volt Direct Current
The accessory power outlets can be used to
plug in electrical equipment, such as a cell
phone or MP3 player.
There are two accessory power outlets:
.One on the center stack below the
climate control system
.One on the rear of the center console
The outlet is powered when the ignition is
on or in ACC/ACCESSORY, or until the driver
door is opened within 10 minutes of turning
off the vehicle. See Retained Accessory
Power (RAP) 0186.
Open the protective cover to use the
accessory power outlet.
Certain electrical accessories may not be
compatible with the accessory power outlets
and could overload vehicle or adapter fuses.
If there is a problem, see your dealer.
When adding electrical equipment, be sure
to follow the installation instructions
included with the equipment. See Add-On
Electrical Equipment 0226.
Caution
Hanging heavy equipment from the
power outlet can cause damage not
covered by the vehicle warranty. The
power outlets are designed for accessory
power plugs only, such as cell phone
charge cords.
Always unplug electrical equipment when
not in use and do not plug in equipment
that exceeds the maximum 20 amps rating.
Power Outlet 110/120-Volt Alternating
Current
If equipped, this power outlet can be used
to plug in electrical equipment that uses a
maximum limit of 150 watts.
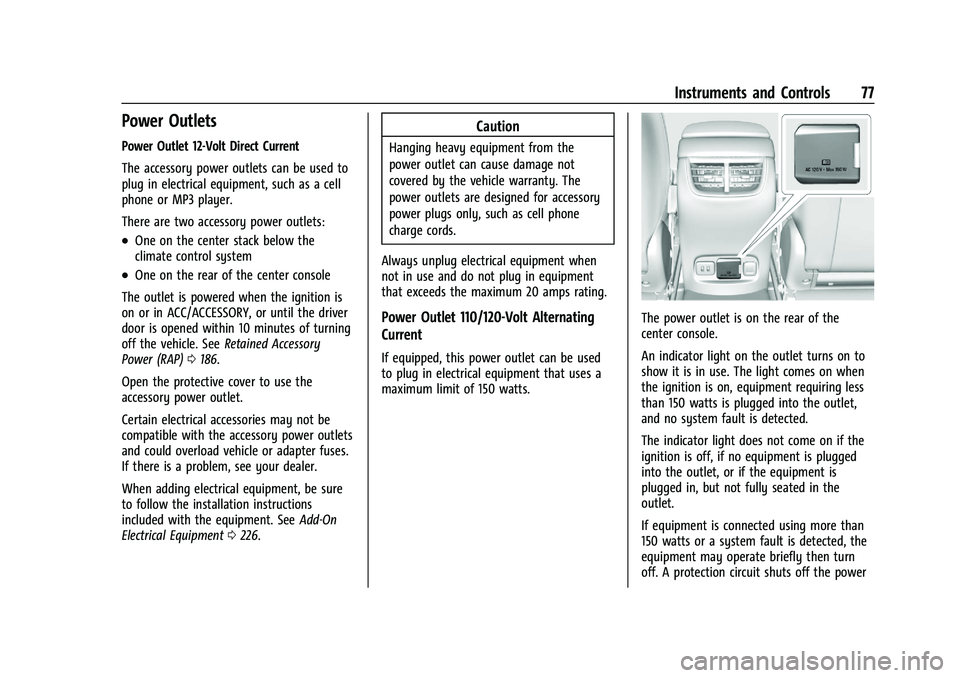
The power outlet is on the rear of the
center console.
An indicator light on the outlet turns on to
show it is in use. The light comes on when
the ignition is on, equipment requiring less
than 150 watts is plugged into the outlet,
and no system fault is detected.
The indicator light does not come on if the
ignition is off, if no equipment is plugged
into the outlet, or if the equipment is
plugged in, but not fully seated in the
outlet.
If equipment is connected using more than
150 watts or a system fault is detected, the
equipment may operate briefly then turn
off. A protection circuit shuts off the power
Page 79 of 351
Chevrolet Malibu Owner Manual (GMNA-Localizing-U.S./Canada-
14584249) - 2021 - CRC - 11/9/20
78 Instruments and Controls
supply and the indicator light turns off. To
reset the circuit, unplug the item and plug it
back in or turn the Retained Accessory
Power (RAP) off and then back on. See
Retained Accessory Power (RAP)0186. The
power restarts when equipment using 150
watts or less is plugged into the outlet and
a system fault is not detected.
The power outlet is not designed for the
following, and may not work properly if
they are plugged in:
.Equipment with high initial peak wattage,
such as compressor-driven refrigerators
and electric power tools
.Other equipment requiring an extremely
stable power supply, such as
microcomputer-controlled electric blankets
and touch sensor lamps
.Medical equipment
See High Voltage Devices and Wiring 0253.
Wireless Charging
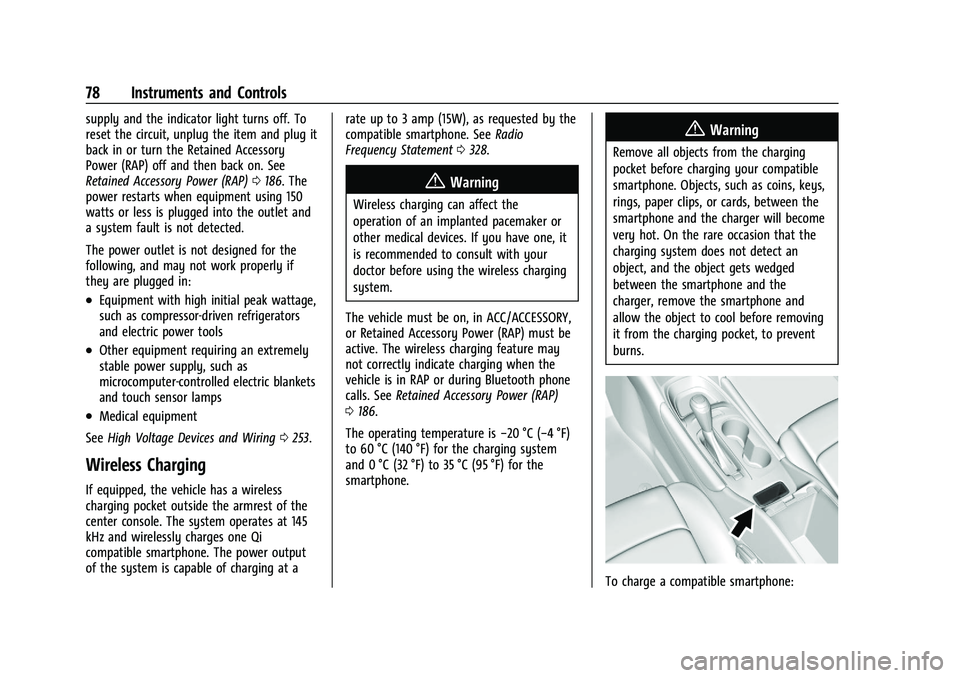
If equipped, the vehicle has a wireless
charging pocket outside the armrest of the
center console. The system operates at 145
kHz and wirelessly charges one Qi
compatible smartphone. The power output
of the system is capable of charging at a rate up to 3 amp (15W), as requested by the
compatible smartphone. See
Radio
Frequency Statement 0328.
{Warning
Wireless charging can affect the
operation of an implanted pacemaker or
other medical devices. If you have one, it
is recommended to consult with your
doctor before using the wireless charging
system.
The vehicle must be on, in ACC/ACCESSORY,
or Retained Accessory Power (RAP) must be
active. The wireless charging feature may
not correctly indicate charging when the
vehicle is in RAP or during Bluetooth phone
calls. See Retained Accessory Power (RAP)
0 186.
The operating temperature is −20 °C (−4 °F)
to 60 °C (140 °F) for the charging system
and 0 °C (32 °F) to 35 °C (95 °F) for the
smartphone.
{Warning
Remove all objects from the charging
pocket before charging your compatible
smartphone. Objects, such as coins, keys,
rings, paper clips, or cards, between the
smartphone and the charger will become
very hot. On the rare occasion that the
charging system does not detect an
object, and the object gets wedged
between the smartphone and the
charger, remove the smartphone and
allow the object to cool before removing
it from the charging pocket, to prevent
burns.
To charge a compatible smartphone:
Page 87 of 351
Chevrolet Malibu Owner Manual (GMNA-Localizing-U.S./Canada-
14584249) - 2021 - CRC - 11/9/20
86 Instruments and Controls
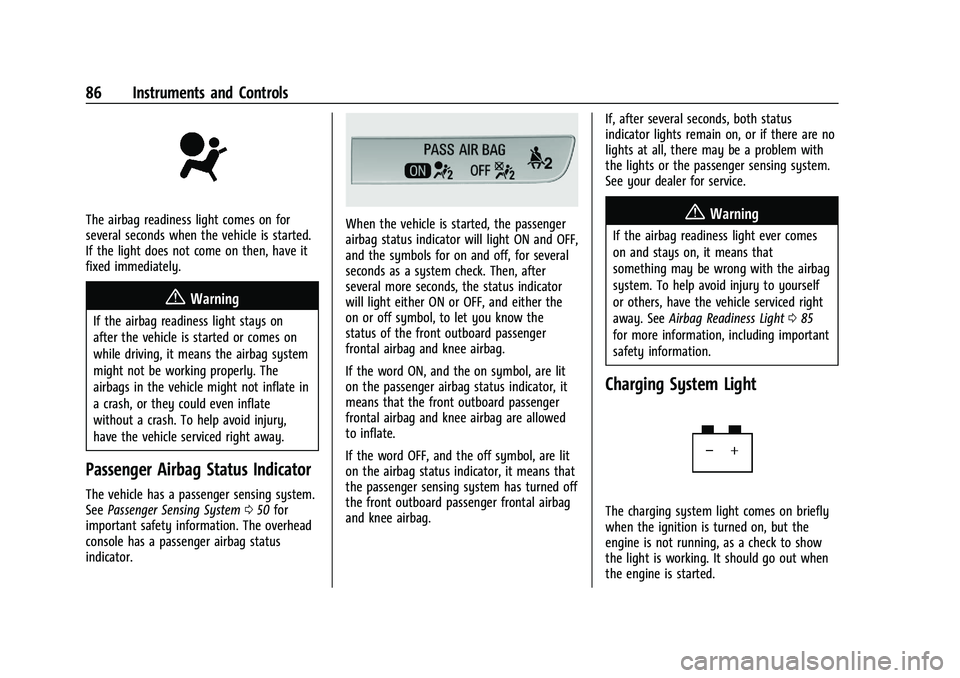
The airbag readiness light comes on for
several seconds when the vehicle is started.
If the light does not come on then, have it
fixed immediately.
{Warning
If the airbag readiness light stays on
after the vehicle is started or comes on
while driving, it means the airbag system
might not be working properly. The
airbags in the vehicle might not inflate in
a crash, or they could even inflate
without a crash. To help avoid injury,
have the vehicle serviced right away.
Passenger Airbag Status Indicator
The vehicle has a passenger sensing system.
SeePassenger Sensing System 050 for
important safety information. The overhead
console has a passenger airbag status
indicator.
When the vehicle is started, the passenger
airbag status indicator will light ON and OFF,
and the symbols for on and off, for several
seconds as a system check. Then, after
several more seconds, the status indicator
will light either ON or OFF, and either the
on or off symbol, to let you know the
status of the front outboard passenger
frontal airbag and knee airbag.
If the word ON, and the on symbol, are lit
on the passenger airbag status indicator, it
means that the front outboard passenger
frontal airbag and knee airbag are allowed
to inflate.
If the word OFF, and the off symbol, are lit
on the airbag status indicator, it means that
the passenger sensing system has turned off
the front outboard passenger frontal airbag
and knee airbag. If, after several seconds, both status
indicator lights remain on, or if there are no
lights at all, there may be a problem with
the lights or the passenger sensing system.
See your dealer for service.{Warning
If the airbag readiness light ever comes
on and stays on, it means that
something may be wrong with the airbag
system. To help avoid injury to yourself
or others, have the vehicle serviced right
away. See
Airbag Readiness Light 085
for more information, including important
safety information.
Charging System Light
The charging system light comes on briefly
when the ignition is turned on, but the
engine is not running, as a check to show
the light is working. It should go out when
the engine is started.
Page 109 of 351
Chevrolet Malibu Owner Manual (GMNA-Localizing-U.S./Canada-
14584249) - 2021 - CRC - 11/9/20
108 Lighting
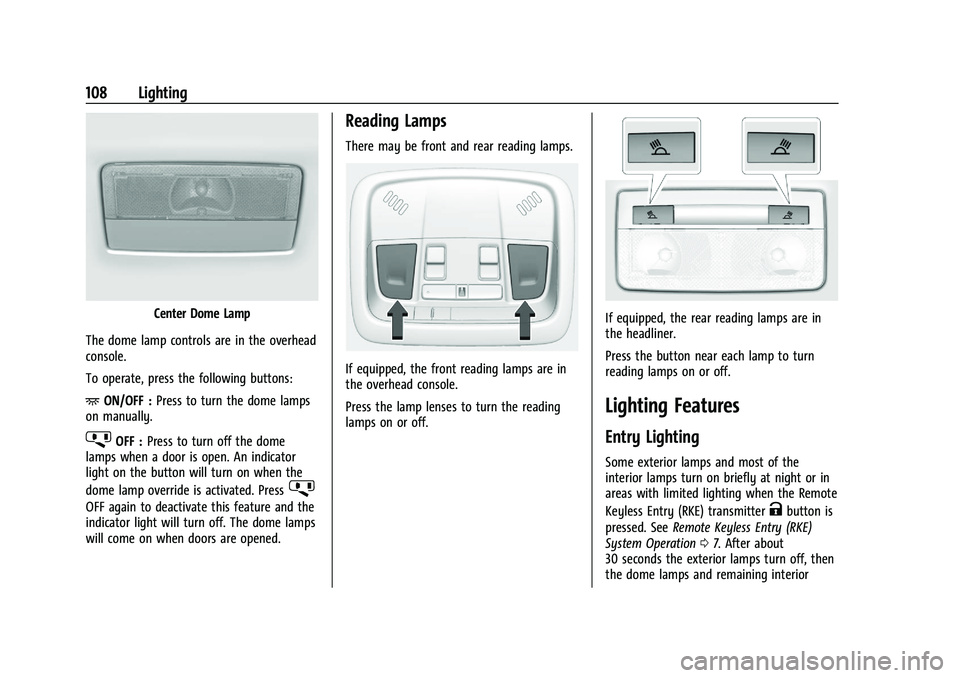
Center Dome Lamp
The dome lamp controls are in the overhead
console.
To operate, press the following buttons:
+ ON/OFF : Press to turn the dome lamps
on manually.
jOFF : Press to turn off the dome
lamps when a door is open. An indicator
light on the button will turn on when the
dome lamp override is activated. Press
j
OFF again to deactivate this feature and the
indicator light will turn off. The dome lamps
will come on when doors are opened.
Reading Lamps
There may be front and rear reading lamps.
If equipped, the front reading lamps are in
the overhead console.
Press the lamp lenses to turn the reading
lamps on or off.
If equipped, the rear reading lamps are in
the headliner.
Press the button near each lamp to turn
reading lamps on or off.
Lighting Features
Entry Lighting
Some exterior lamps and most of the
interior lamps turn on briefly at night or in
areas with limited lighting when the Remote
Keyless Entry (RKE) transmitter
Kbutton is
pressed. See Remote Keyless Entry (RKE)
System Operation 07. After about
30 seconds the exterior lamps turn off, then
the dome lamps and remaining interior