high CHEVROLET MALIBU 2022 Owners Manual
[x] Cancel search | Manufacturer: CHEVROLET, Model Year: 2022, Model line: MALIBU, Model: CHEVROLET MALIBU 2022Pages: 351, PDF Size: 9.4 MB
Page 3 of 351
Chevrolet Malibu Owner Manual (GMNA-Localizing-U.S./Canada-
14584249) - 2021 - CRC - 11/9/20
2 Introduction
Using this Manual
To quickly locate information about the
vehicle, use the Index in the back of the
manual. It is an alphabetical list of what is
in the manual and the page number where
it can be found.
Danger, Warning, and Caution
Warning messages found on vehicle labels
and in this manual describe hazards and
what to do to avoid or reduce them.
{Danger
Danger indicates a hazard with a high
level of risk which will result in serious
injury or death.
{Warning
Warning indicates a hazard that could
result in injury or death.
Caution
Caution indicates a hazard that could
result in property or vehicle damage.
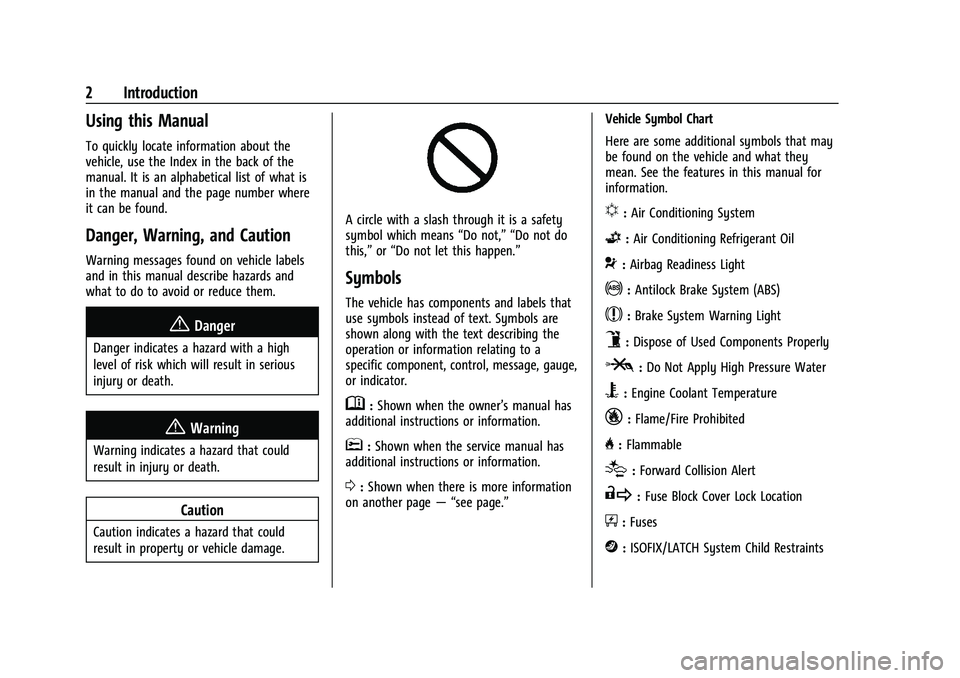
A circle with a slash through it is a safety
symbol which means“Do not,” “Do not do
this,” or“Do not let this happen.”
Symbols
The vehicle has components and labels that
use symbols instead of text. Symbols are
shown along with the text describing the
operation or information relating to a
specific component, control, message, gauge,
or indicator.
M:Shown when the owner’s manual has
additional instructions or information.
*: Shown when the service manual has
additional instructions or information.
0: Shown when there is more information
on another page — “see page.” Vehicle Symbol Chart
Here are some additional symbols that may
be found on the vehicle and what they
mean. See the features in this manual for
information.
u:
Air Conditioning System
G:Air Conditioning Refrigerant Oil
9:Airbag Readiness Light
!:Antilock Brake System (ABS)
$:Brake System Warning Light
9:Dispose of Used Components Properly
P:Do Not Apply High Pressure Water
B:Engine Coolant Temperature
_:Flame/Fire Prohibited
H: Flammable
[:Forward Collision Alert
R:Fuse Block Cover Lock Location
+:Fuses
j:ISOFIX/LATCH System Child Restraints
Page 13 of 351
Chevrolet Malibu Owner Manual (GMNA-Localizing-U.S./Canada-
14584249) - 2021 - CRC - 11/9/20
12 Keys, Doors, and Windows
TRANSMITTER POCKET THEN START YOUR
VEHICLE. The DIC may also display REPLACE
BATTERY IN REMOTE KEY.
To start the vehicle:1. Open the center console and place the transmitter in the transmitter pocket
with the buttons facing the rear of the
vehicle.
2. With the vehicle in P (Park) or N (Neutral), press the brake pedal and
press ENGINE START/STOP. See Starting
the Engine 0183.
Replace the transmitter battery as soon
as possible.
Battery Replacement
{Warning
Never allow children to play with the RKE
transmitter. The transmitter contains a
small battery, which can be a choking
hazard. If swallowed, internal burns can
occur, resulting in severe injury or death.
Seek medical attention immediately if a
battery is swallowed.
{Warning
To avoid personal injury, do not touch
metal surfaces on the RKE transmitter
when it has been exposed to extreme
heat. These surfaces can be hot to the
touch at temperatures above 59 °C (138
°F).
Caution
When replacing the battery, do not touch
any of the circuitry on the transmitter.
Static from your body could damage the
transmitter.
Caution
Always replace the battery with the
correct type. Replacing the battery with
an incorrect type could potentially create
a risk of battery explosion. Dispose of
used batteries according to instructions
and local laws. Do not attempt to burn,
crush, or cut the used battery, and avoid
exposing the battery to environments
with extremely low air pressures or high
temperatures. Replace the battery if the DIC displays
REPLACE BATTERY IN REMOTE KEY.
The battery is not rechargeable. To replace
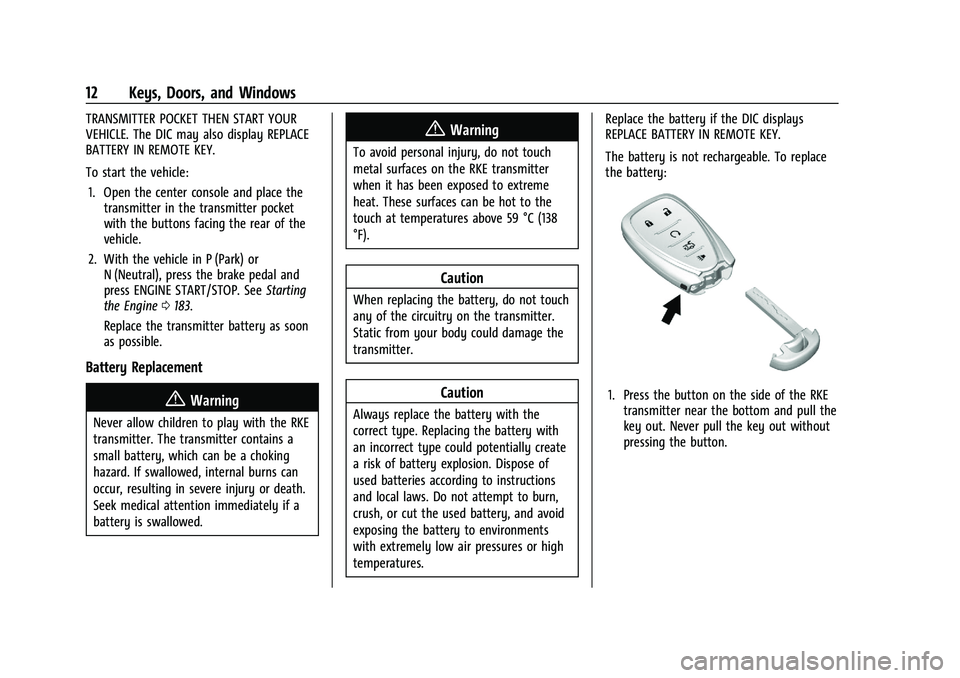
the battery:
1. Press the button on the side of the RKE
transmitter near the bottom and pull the
key out. Never pull the key out without
pressing the button.
Page 15 of 351
Chevrolet Malibu Owner Manual (GMNA-Localizing-U.S./Canada-
14584249) - 2021 - CRC - 11/9/20
14 Keys, Doors, and Windows
When the engine starts, the parking lamps
will turn on and remain on as long as the
engine is running. The doors will be locked
and the climate control system may
come on.
The engine will continue to run for
15 minutes. After 30 seconds, repeat the
steps if a 15-minute extension is desired.
Remote start can be extended only once.
Start the vehicle before driving.
Extending Engine Run Time
The engine run time can be extended by
another 15 minutes, if during the first
15 minutes Steps 1 and 2 are repeated while
the engine is still running. An extension can
be requested 30 seconds after starting.
When the remote start is extended, the
second 15-minute period is added on to the
first 15 minutes for a total of 30 minutes.
The remote start can only be extended once.
A maximum of two remote starts, or a
single start with an extension, is allowed
between ignition cycles.
The vehicle's ignition must be turned on and
then back off before the remote start
procedure can be used again.Canceling a Remote Start
To cancel a remote start, do one of the
following:
.Aim the RKE transmitter at the vehicle
and press and hold
/until the parking
lamps turn off.
.Turn on the hazard warning flashers.
.Turn the vehicle on and then off.
Conditions in Which Remote Start Will
Not Work
The remote vehicle start feature will not
operate if:
.A transmitter is in the vehicle.
.The hood is not closed.
.The vehicle is on.
.The hazard warning flashers are on.
.The malfunction indicator lamp is on.
.The engine coolant temperature is
too high.
.The oil pressure is low.
.Two remote vehicle starts, or a single
remote start with an extension, have
already been used.
.The vehicle is not in P (Park).
Door Locks
{Warning
Unlocked doors can be dangerous.
.Passengers, especially children, can
easily open the doors and fall out of a
moving vehicle. The doors can be
unlocked and opened while the vehicle
is moving. The chance of being thrown
out of the vehicle in a crash is
increased if the doors are not locked.
So, all passengers should wear seat
belts properly and the doors should be
locked whenever the vehicle is driven.
.Young children who get into unlocked
vehicles may be unable to get out.
A child can be overcome by extreme
heat and can suffer permanent injuries
or even death from heat stroke.
Always lock the vehicle whenever
leaving it.
.Outsiders can easily enter through an
unlocked door when you slow down
or stop the vehicle. Locking the doors
can help prevent this from happening.
Page 19 of 351
Chevrolet Malibu Owner Manual (GMNA-Localizing-U.S./Canada-
14584249) - 2021 - CRC - 11/9/20
18 Keys, Doors, and Windows
When the safety lock is enabled, adults and
older children will not be able to open the
rear door from the inside. Cancel the safety
locks to enable the doors to open from the
inside.
To cancel the safety lock:1. Unlock the door and open it from the outside.
2. Move the lever rearward to unlock. Do the same for the other door.
Doors
Trunk
{Warning
Exhaust gases can enter the vehicle if it
is driven with the liftgate, hatch/trunk
open, or with any objects that pass
through the seal between the body and
the hatch/trunk or liftgate. Engine
exhaust contains carbon monoxide (CO)
which cannot be seen or smelled. It can
cause unconsciousness and even death.
(Continued)
Warning (Continued)
If the vehicle must be driven with the
liftgate or hatch/trunk open:
.Close all of the windows.
.Fully open the air outlets on or under
the instrument panel.
.Adjust the climate control system to a
setting that brings in only outside air
and set the fan speed to the highest
setting. See“Climate Control Systems”
in the Index.
.If the vehicle is equipped with a
power liftgate, disable the power
liftgate function.
For more information about carbon
monoxide, see Engine Exhaust 0188.
Trunk Release
To open the trunk the vehicle must be off or
the shift lever must be in P (Park).
.PressXtwice quickly on the RKE
transmitter.
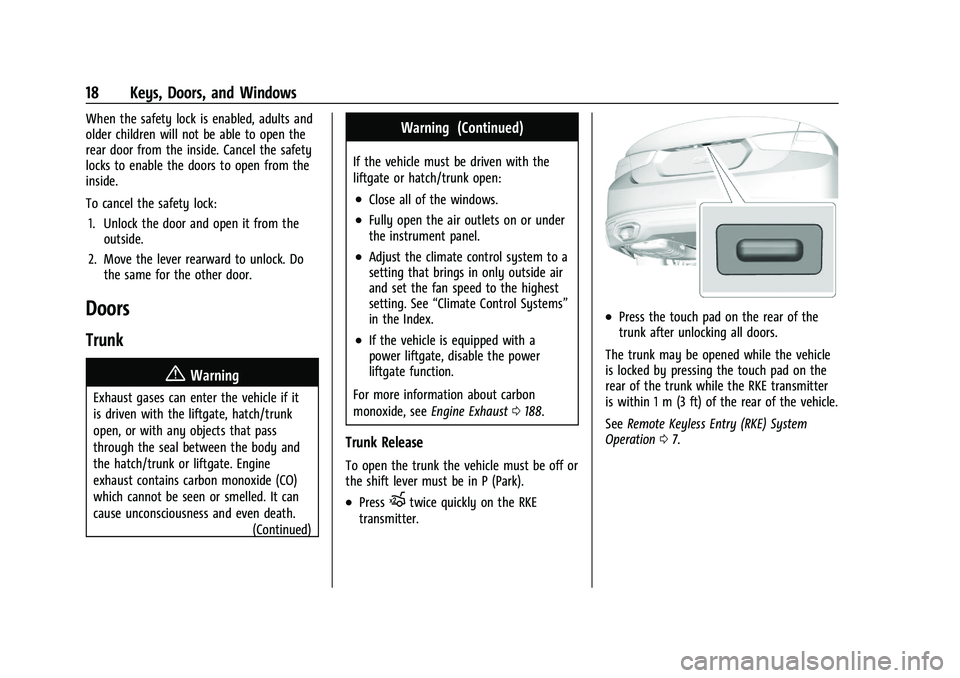
.Press the touch pad on the rear of the
trunk after unlocking all doors.
The trunk may be opened while the vehicle
is locked by pressing the touch pad on the
rear of the trunk while the RKE transmitter
is within 1 m (3 ft) of the rear of the vehicle.
See Remote Keyless Entry (RKE) System
Operation 07.
Page 35 of 351
Chevrolet Malibu Owner Manual (GMNA-Localizing-U.S./Canada-
14584249) - 2021 - CRC - 11/9/20
34 Seats and Restraints
.Power steering wheel, if equipped
If the saved memory seat position does not
automatically recall or recalls to the wrong
positions, the driver’s RKE transmitter
number (1 or 2) may not match the memory
button number that positions were saved to.
Try storing the position to the other
memory button or try the other RKE
transmitter.
Seat Exit Memory
Seat Exit Memory is not linked to an RKE
transmitter. The position saved to
Bis
used for all drivers. To turn Seat Exit
Memory on or off, see "Vehicle
Personalization Settings" previously in this
section and Vehicle Personalization 0100.
If turned on, the position saved to
Bis
automatically recalled when one of the
following occurs:
.The vehicle is turned off and the driver
door is opened within a short time.
.The vehicle is turned off with the driver
door open.
To stop Seat Exit Memory movement, press
any of the following memory controls:
.Power seat
.Memory SET, 1, 2, orB
.Power mirror, with the driver or
passenger side mirror selected
.Power steering wheel, if equipped
Obstructions
If something has blocked the driver seat
while recalling a memory position, the recall
may stop. Remove the obstruction and try
the recall again. If the memory position still
does not recall, see your dealer.
Heated and Ventilated Front
Seats
{Warning
If temperature change or pain to the skin
cannot be felt, the seat heater may cause
burns. To reduce the risk of burns, use
care when using the seat heater,
especially for long periods of time. Do
not place anything on the seat that
insulates against heat, such as a blanket,
cushion, cover, or similar item. This may
cause the seat heater to overheat. An
overheated seat heater may cause a burn
or may damage the seat.
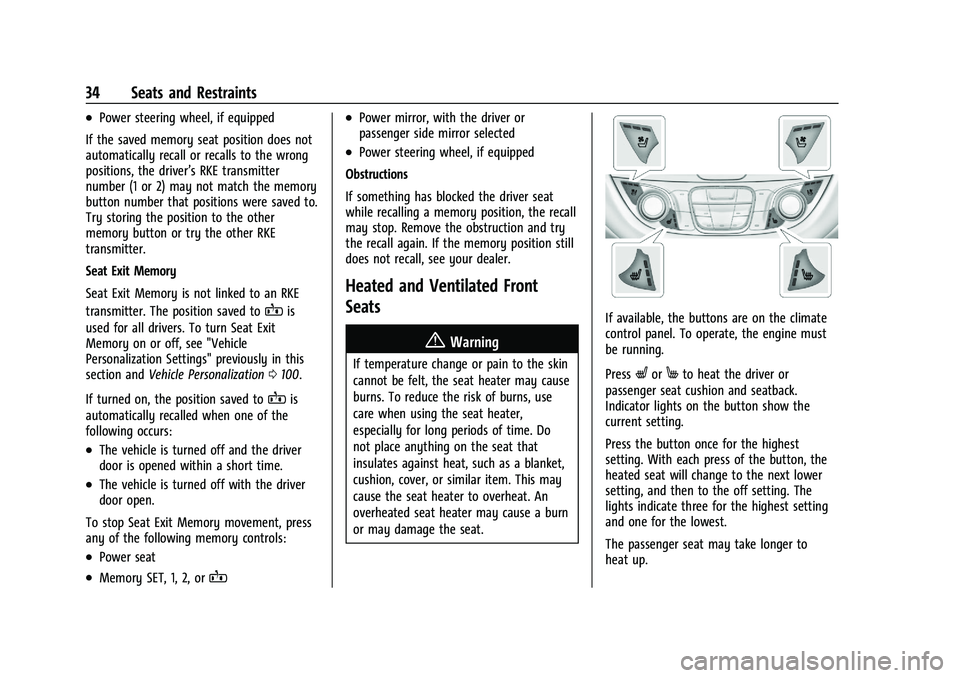
If available, the buttons are on the climate
control panel. To operate, the engine must
be running.
Press
LorMto heat the driver or
passenger seat cushion and seatback.
Indicator lights on the button show the
current setting.
Press the button once for the highest
setting. With each press of the button, the
heated seat will change to the next lower
setting, and then to the off setting. The
lights indicate three for the highest setting
and one for the lowest.
The passenger seat may take longer to
heat up.
Page 36 of 351
Chevrolet Malibu Owner Manual (GMNA-Localizing-U.S./Canada-
14584249) - 2021 - CRC - 11/9/20
Seats and Restraints 35
Press{orCto ventilate the driver or
passenger seat. Indicator lights on the
button show the current setting.
Press the button once for the highest
setting. With each press of the button, the
ventilated seat will change to the next lower
setting, and then to the off setting. The
lights indicate three for the highest setting
and one for the lowest.
Auto Heated Seats
When the vehicle is on, this feature will
automatically activate the heated seats at
the level required by the vehicle’s interior
temperature.
The active high, medium, low, or off heated
seat level will be indicated by the manual
heated seat buttons on the center stack. Use
the manual heated seat buttons on the
center stack to turn auto heated seats off.
If the passenger seat is unoccupied, the auto
heated seats feature will not activate that
seat. The auto heated seats feature can be
programmed to always be enabled when
the vehicle is on.
See Vehicle Personalization 0100. Remote Start Auto Heated and Ventilated
Seats
During a remote start, the heated or
ventilated seats, if equipped, can be turned
on automatically. When it is cold outside,
the heated seats turn on, and when it is hot
outside the ventilated seats turn on. The
heated or ventilated seats may be canceled
when the ignition is turned on. Press the
button to use the heated or ventilated seats
after the vehicle is started.
The heated or ventilated seat indicator lights
on the button may not turn on during a
remote start.
The heated seat temperature performance of
an unoccupied seat may be reduced. This is
normal.
The heated or ventilated seats will not turn
on during a remote start unless they are
enabled in the vehicle personalization menu.
See
Remote Vehicle Start 013 and
Vehicle Personalization 0100.Rear Seats
Rear Seat Reminder
If equipped, the message REAR SEAT
REMINDER LOOK IN REAR SEAT displays
under certain conditions indicating there
may be an item or passenger in the rear
seat. Check before exiting the vehicle.
This feature will activate when a second row
door is opened while the vehicle is on or up
to 10 minutes before the vehicle is turned
on. There will be an alert when the vehicle
is turned off. The alert does not directly
detect objects in the rear seat; instead,
under certain conditions, it detects when a
rear door is opened and closed, indicating
that there may be something in the
rear seat.
The feature is active only once each time
the vehicle is turned on and off, and will
require reactivation by opening and closing
the second row doors. There may be an
alert even when there is nothing in the rear
seat; for example, if a child entered the
vehicle through the rear door and left the
vehicle without the vehicle being shut off.
The feature can be turned on or off. See
Vehicle Personalization 0100.
Page 41 of 351
Chevrolet Malibu Owner Manual (GMNA-Localizing-U.S./Canada-
14584249) - 2021 - CRC - 11/9/20
40 Seats and Restraints
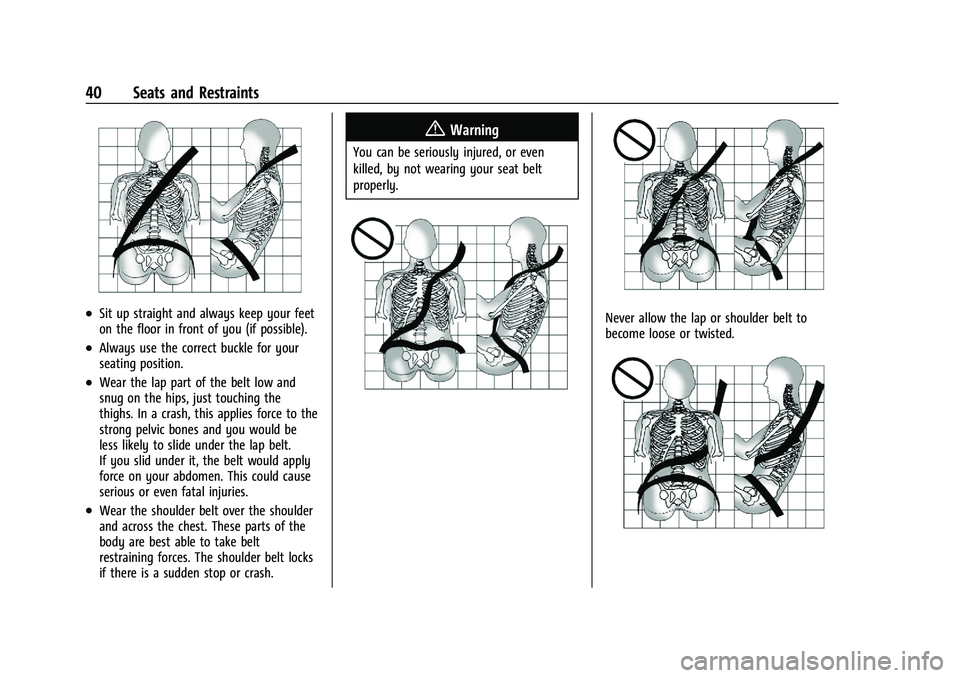
.Sit up straight and always keep your feet
on the floor in front of you (if possible).
.Always use the correct buckle for your
seating position.
.Wear the lap part of the belt low and
snug on the hips, just touching the
thighs. In a crash, this applies force to the
strong pelvic bones and you would be
less likely to slide under the lap belt.
If you slid under it, the belt would apply
force on your abdomen. This could cause
serious or even fatal injuries.
.Wear the shoulder belt over the shoulder
and across the chest. These parts of the
body are best able to take belt
restraining forces. The shoulder belt locks
if there is a sudden stop or crash.
{Warning
You can be seriously injured, or even
killed, by not wearing your seat belt
properly.
Never allow the lap or shoulder belt to
become loose or twisted.
Page 56 of 351
Chevrolet Malibu Owner Manual (GMNA-Localizing-U.S./Canada-
14584249) - 2021 - CRC - 11/9/20
Seats and Restraints 55
Child Restraints
Older Children
Older children who have outgrown booster
seats should wear the vehicle’s seat belts.
The manufacturer instructions that come
with the booster seat state the weight and
height limitations for that booster. Use a
booster seat with a lap-shoulder belt until
the child passes the fit test below:
.Sit all the way back on the seat. Do the
knees bend at the seat edge? If yes,
continue. If no, return to the booster seat.
.Buckle the lap-shoulder belt. Does the
shoulder belt rest on the shoulder? If yes,
continue. If no, try using the rear seatbelt comfort guide, if available. See
“Rear
Seat Belt Comfort Guides” under
Lap-Shoulder Belt 041. If a comfort guide
is not available, or if the shoulder belt
still does not rest on the shoulder, then
return to the booster seat.
.Does the lap belt fit low and snug on the
hips, touching the thighs? If yes, continue.
If no, return to the booster seat.
.Can proper seat belt fit be maintained for
the length of the trip? If yes, continue.
If no, return to the booster seat.
Q: What is the proper way to wear seat belts?
A: An older child should wear a lap-shoulder
belt and get the additional restraint a
shoulder belt can provide. The shoulder
belt should not cross the face or neck.
The lap belt should fit snugly below the
hips, just touching the top of the thighs.
This applies belt force to the child's
pelvic bones in a crash. It should never
be worn over the abdomen, which could
cause severe or even fatal internal
injuries in a crash.
Also see “Rear Seat Belt Comfort Guides”
under Lap-Shoulder Belt 041. According to accident statistics, children are
safer when properly restrained in a rear
seating position.
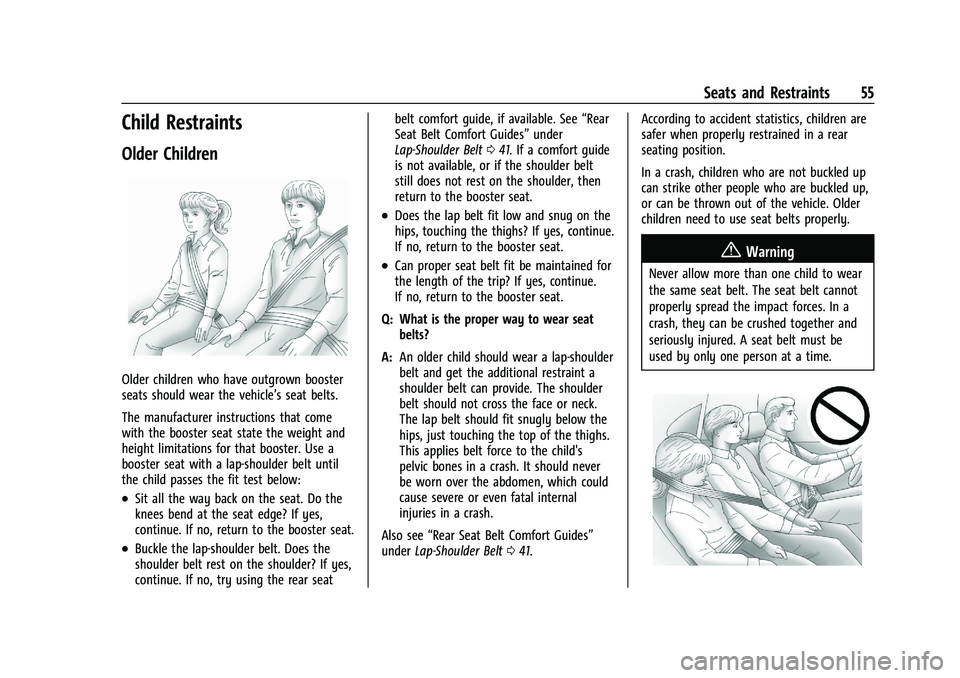
In a crash, children who are not buckled up
can strike other people who are buckled up,
or can be thrown out of the vehicle. Older
children need to use seat belts properly.{Warning
Never allow more than one child to wear
the same seat belt. The seat belt cannot
properly spread the impact forces. In a
crash, they can be crushed together and
seriously injured. A seat belt must be
used by only one person at a time.
Page 60 of 351
Chevrolet Malibu Owner Manual (GMNA-Localizing-U.S./Canada-
14584249) - 2021 - CRC - 11/9/20
Seats and Restraints 59
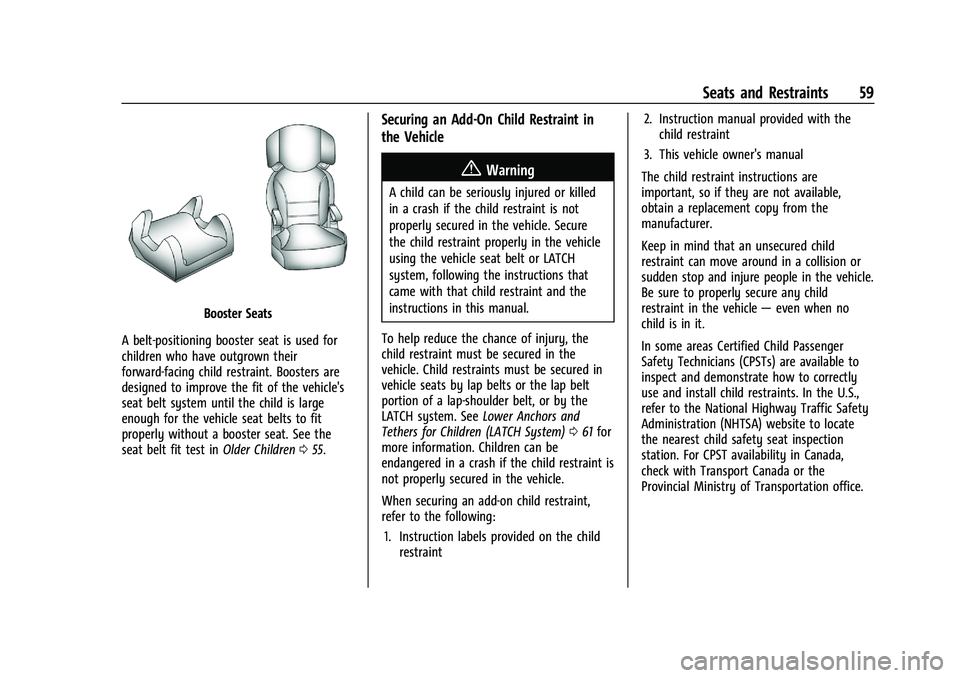
Booster Seats
A belt-positioning booster seat is used for
children who have outgrown their
forward-facing child restraint. Boosters are
designed to improve the fit of the vehicle's
seat belt system until the child is large
enough for the vehicle seat belts to fit
properly without a booster seat. See the
seat belt fit test in Older Children055.
Securing an Add-On Child Restraint in
the Vehicle
{Warning
A child can be seriously injured or killed
in a crash if the child restraint is not
properly secured in the vehicle. Secure
the child restraint properly in the vehicle
using the vehicle seat belt or LATCH
system, following the instructions that
came with that child restraint and the
instructions in this manual.
To help reduce the chance of injury, the
child restraint must be secured in the
vehicle. Child restraints must be secured in
vehicle seats by lap belts or the lap belt
portion of a lap-shoulder belt, or by the
LATCH system. See Lower Anchors and
Tethers for Children (LATCH System) 061 for
more information. Children can be
endangered in a crash if the child restraint is
not properly secured in the vehicle.
When securing an add-on child restraint,
refer to the following:
1. Instruction labels provided on the child restraint 2. Instruction manual provided with the
child restraint
3. This vehicle owner's manual
The child restraint instructions are
important, so if they are not available,
obtain a replacement copy from the
manufacturer.
Keep in mind that an unsecured child
restraint can move around in a collision or
sudden stop and injure people in the vehicle.
Be sure to properly secure any child
restraint in the vehicle —even when no
child is in it.
In some areas Certified Child Passenger
Safety Technicians (CPSTs) are available to
inspect and demonstrate how to correctly
use and install child restraints. In the U.S.,
refer to the National Highway Traffic Safety
Administration (NHTSA) website to locate
the nearest child safety seat inspection
station. For CPST availability in Canada,
check with Transport Canada or the
Provincial Ministry of Transportation office.
Page 75 of 351
Chevrolet Malibu Owner Manual (GMNA-Localizing-U.S./Canada-
14584249) - 2021 - CRC - 11/9/20
74 Instruments and Controls
Instruments and Controls
Controls
Steering Wheel Adjustment . . . . . . . . . . . . . 75
Steering Wheel Controls . . . . . . . . . . . . . . . . 75
Heated Steering Wheel . . . . . . . . . . . . . . . . . 75
Horn . . . . . . . . . . . . . . . . . . . . . . . . . . . . . . . . . . . . 75
Windshield Wiper/Washer . . . . . . . . . . . . . . 75
Clock . . . . . . . . . . . . . . . . . . . . . . . . . . . . . . . . . . . 76
Power Outlets . . . . . . . . . . . . . . . . . . . . . . . . . . 77
Wireless Charging . . . . . . . . . . . . . . . . . . . . . . 78
Warning Lights, Gauges, and Indicators
Warning Lights, Gauges, andIndicators . . . . . . . . . . . . . . . . . . . . . . . . . . . . 80
Instrument Cluster . . . . . . . . . . . . . . . . . . . . . 80
Speedometer . . . . . . . . . . . . . . . . . . . . . . . . . . . 82
Odometer . . . . . . . . . . . . . . . . . . . . . . . . . . . . . . 82
Trip Odometer . . . . . . . . . . . . . . . . . . . . . . . . . . 82
Tachometer . . . . . . . . . . . . . . . . . . . . . . . . . . . . 83
Fuel Gauge . . . . . . . . . . . . . . . . . . . . . . . . . . . . . 83
Engine Coolant Temperature Gauge . . . . 84
Voltmeter Gauge (Uplevel Cluster Only) . . . . . . . . . . . . . . . . . . . . . . . . . 84
Seat Belt Reminders . . . . . . . . . . . . . . . . . . . . 85
Airbag Readiness Light . . . . . . . . . . . . . . . . . 85
Passenger Airbag Status Indicator . . . . . . 86
Charging System Light . . . . . . . . . . . . . . . . . 86
Malfunction Indicator Lamp (Check Engine Light) . . . . . . . . . . . . . . . . . . . . . . . . . 87 Brake System Warning Light . . . . . . . . . . . 88
Electric Parking Brake Light . . . . . . . . . . . . . 89
Service Electric Parking Brake Light . . . . . 89
Antilock Brake System (ABS) Warning
Light . . . . . . . . . . . . . . . . . . . . . . . . . . . . . . . . . 89
Lane Keep Assist (LKA) Light . . . . . . . . . . . 90
Vehicle Ahead Indicator . . . . . . . . . . . . . . . . 90
Pedestrian Ahead Indicator . . . . . . . . . . . . . 90
Traction Off Light . . . . . . . . . . . . . . . . . . . . . . 90
StabiliTrak OFF Light . . . . . . . . . . . . . . . . . . . . 91
Traction Control System (TCS)/StabiliTrak Light . . . . . . . . . . . . . . . . . . . . . . . . . . . . . . . . . . 91
Engine Coolant Temperature Warning Light (Uplevel Only) . . . . . . . . . . . . . . . . . . 91
Tire Pressure Light . . . . . . . . . . . . . . . . . . . . . . 92
Engine Oil Pressure Light . . . . . . . . . . . . . . . 92
Low Fuel Warning Light . . . . . . . . . . . . . . . . 92
Security Light . . . . . . . . . . . . . . . . . . . . . . . . . . 93
High-Beam On Light . . . . . . . . . . . . . . . . . . . . 93
Lamps On Reminder . . . . . . . . . . . . . . . . . . . . 93
Cruise Control Light . . . . . . . . . . . . . . . . . . . . 93
Door Ajar Light (Uplevel) . . . . . . . . . . . . . . . 94
Information Displays
Driver Information Center (DIC) (Base Level) . . . . . . . . . . . . . . . . . . . . . . . . . . . . . . . . . 94
Driver Information Center (DIC) (Uplevel) . . . . . . . . . . . . . . . . . . . . . . . . . . . . . 96
Vehicle Messages
Vehicle Messages . . . . . . . . . . . . . . . . . . . . . . 99
Engine Power Messages . . . . . . . . . . . . . . . . 99
Vehicle Speed Messages . . . . . . . . . . . . . . . 100
Vehicle Personalization
Vehicle Personalization . . . . . . . . . . . . . . . . 100