brake light CHEVROLET MALIBU 2023 Owner's Manual
[x] Cancel search | Manufacturer: CHEVROLET, Model Year: 2023, Model line: MALIBU, Model: CHEVROLET MALIBU 2023Pages: 332, PDF Size: 6.2 MB
Page 221 of 332
Chevrolet Malibu Owner Manual (GMNA-Localizing-U.S./Canada-
16273584) - 2023 - CRC - 9/28/22
220 Vehicle Care
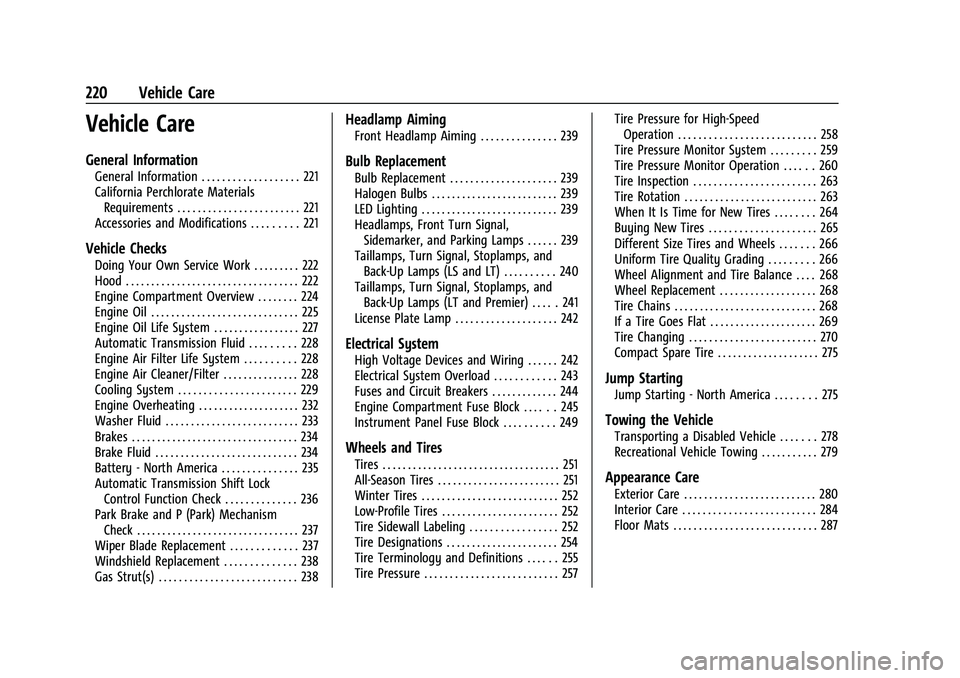
Vehicle Care
General Information
General Information . . . . . . . . . . . . . . . . . . . 221
California Perchlorate MaterialsRequirements . . . . . . . . . . . . . . . . . . . . . . . . 221
Accessories and Modifications . . . . . . . . . 221
Vehicle Checks
Doing Your Own Service Work . . . . . . . . . 222
Hood . . . . . . . . . . . . . . . . . . . . . . . . . . . . . . . . . . 222
Engine Compartment Overview . . . . . . . . 224
Engine Oil . . . . . . . . . . . . . . . . . . . . . . . . . . . . . 225
Engine Oil Life System . . . . . . . . . . . . . . . . . 227
Automatic Transmission Fluid . . . . . . . . . 228
Engine Air Filter Life System . . . . . . . . . . 228
Engine Air Cleaner/Filter . . . . . . . . . . . . . . . 228
Cooling System . . . . . . . . . . . . . . . . . . . . . . . 229
Engine Overheating . . . . . . . . . . . . . . . . . . . . 232
Washer Fluid . . . . . . . . . . . . . . . . . . . . . . . . . . 233
Brakes . . . . . . . . . . . . . . . . . . . . . . . . . . . . . . . . . 234
Brake Fluid . . . . . . . . . . . . . . . . . . . . . . . . . . . . 234
Battery - North America . . . . . . . . . . . . . . . 235
Automatic Transmission Shift Lock Control Function Check . . . . . . . . . . . . . . 236
Park Brake and P (Park) Mechanism Check . . . . . . . . . . . . . . . . . . . . . . . . . . . . . . . . 237
Wiper Blade Replacement . . . . . . . . . . . . . 237
Windshield Replacement . . . . . . . . . . . . . . 238
Gas Strut(s) . . . . . . . . . . . . . . . . . . . . . . . . . . . 238
Headlamp Aiming
Front Headlamp Aiming . . . . . . . . . . . . . . . 239
Bulb Replacement
Bulb Replacement . . . . . . . . . . . . . . . . . . . . . 239
Halogen Bulbs . . . . . . . . . . . . . . . . . . . . . . . . . 239
LED Lighting . . . . . . . . . . . . . . . . . . . . . . . . . . . 239
Headlamps, Front Turn Signal, Sidemarker, and Parking Lamps . . . . . . 239
Taillamps, Turn Signal, Stoplamps, and Back-Up Lamps (LS and LT) . . . . . . . . . . 240
Taillamps, Turn Signal, Stoplamps, and Back-Up Lamps (LT and Premier) . . . . . 241
License Plate Lamp . . . . . . . . . . . . . . . . . . . . 242
Electrical System
High Voltage Devices and Wiring . . . . . . 242
Electrical System Overload . . . . . . . . . . . . 243
Fuses and Circuit Breakers . . . . . . . . . . . . . 244
Engine Compartment Fuse Block . . . . . . 245
Instrument Panel Fuse Block . . . . . . . . . . 249
Wheels and Tires
Tires . . . . . . . . . . . . . . . . . . . . . . . . . . . . . . . . . . . 251
All-Season Tires . . . . . . . . . . . . . . . . . . . . . . . . 251
Winter Tires . . . . . . . . . . . . . . . . . . . . . . . . . . . 252
Low-Profile Tires . . . . . . . . . . . . . . . . . . . . . . . 252
Tire Sidewall Labeling . . . . . . . . . . . . . . . . . 252
Tire Designations . . . . . . . . . . . . . . . . . . . . . . 254
Tire Terminology and Definitions . . . . . . 255
Tire Pressure . . . . . . . . . . . . . . . . . . . . . . . . . . 257 Tire Pressure for High-Speed
Operation . . . . . . . . . . . . . . . . . . . . . . . . . . . 258
Tire Pressure Monitor System . . . . . . . . . 259
Tire Pressure Monitor Operation . . . . . . 260
Tire Inspection . . . . . . . . . . . . . . . . . . . . . . . . 263
Tire Rotation . . . . . . . . . . . . . . . . . . . . . . . . . . 263
When It Is Time for New Tires . . . . . . . . 264
Buying New Tires . . . . . . . . . . . . . . . . . . . . . 265
Different Size Tires and Wheels . . . . . . . 266
Uniform Tire Quality Grading . . . . . . . . . 266
Wheel Alignment and Tire Balance . . . . 268
Wheel Replacement . . . . . . . . . . . . . . . . . . . 268
Tire Chains . . . . . . . . . . . . . . . . . . . . . . . . . . . . 268
If a Tire Goes Flat . . . . . . . . . . . . . . . . . . . . . 269
Tire Changing . . . . . . . . . . . . . . . . . . . . . . . . . 270
Compact Spare Tire . . . . . . . . . . . . . . . . . . . . 275
Jump Starting
Jump Starting - North America . . . . . . . . 275
Towing the Vehicle
Transporting a Disabled Vehicle . . . . . . . 278
Recreational Vehicle Towing . . . . . . . . . . . 279
Appearance Care
Exterior Care . . . . . . . . . . . . . . . . . . . . . . . . . . 280
Interior Care . . . . . . . . . . . . . . . . . . . . . . . . . . 284
Floor Mats . . . . . . . . . . . . . . . . . . . . . . . . . . . . 287
Page 236 of 332
Chevrolet Malibu Owner Manual (GMNA-Localizing-U.S./Canada-
16273584) - 2023 - CRC - 9/28/22
Vehicle Care 235
Checking Brake Fluid
With the vehicle in P (Park) on a level
surface, the brake fluid level should be
between the minimum and maximum marks
on the brake fluid reservoir.
There are only two reasons why the brake
fluid level in the reservoir may go down:
.Normal brake lining wear. When new
linings are installed, the fluid level goes
back up.
.A fluid leak in the brake hydraulic system.
Have the brake hydraulic system fixed.
With a leak, the brakes will not
work well.
Always clean the brake fluid reservoir cap
and the area around the cap before
removing it.
Do not top off the brake fluid. Adding fluid
does not correct a leak. If fluid is added
when the linings are worn, there will be too
much fluid when new brake linings are
installed. Add or remove fluid, as necessary,
only when work is done on the brake
hydraulic system.
{Warning
If too much brake fluid is added, it can
spill on the engine and burn, if the
engine is hot enough. You or others could
be burned, and the vehicle could be
damaged. Add brake fluid only when
work is done on the brake hydraulic
system.
When the brake fluid falls to a low level,
the brake warning light comes on. See Brake
System Warning Light 089.
Brake fluid absorbs water over time which
degrades the effectiveness of the brake fluid.
Replace brake fluid at the specified intervals
to prevent increased stopping distance. See
Maintenance Schedule 0290.
What to Add
Use only GM approved DOT 4 brake fluid
from a clean, sealed container. See
Recommended Fluids and Lubricants 0294.
{Warning
The wrong or contaminated brake fluid
could result in damage to the brake
system. This could result in the loss of
braking leading to a possible injury.
Always use the proper GM approved
brake fluid.
Caution
If brake fluid is spilled on the vehicle's
painted surfaces, the paint finish can be
damaged. Immediately wash off any
painted surface.
Battery - North America
The original equipment battery is
maintenance free. Do not remove the cap
and do not add fluid.
The vehicle has a standard 12-volt battery
under the hood. See Engine Compartment
Overview 0224.
Refer to the replacement number shown on
the original battery label when a new 12-volt
battery is needed.
Page 248 of 332
Chevrolet Malibu Owner Manual (GMNA-Localizing-U.S./Canada-
16273584) - 2023 - CRC - 9/28/22
Vehicle Care 247
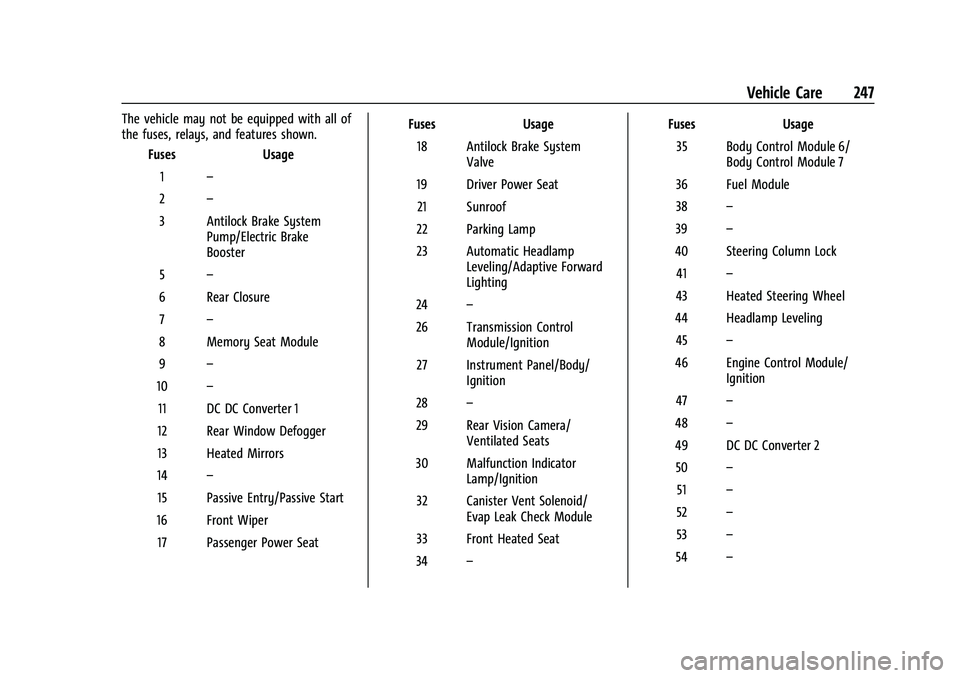
The vehicle may not be equipped with all of
the fuses, relays, and features shown.Fuses Usage
1 –
2 –
3 Antilock Brake System Pump/Electric Brake
Booster
5 –
6 Rear Closure 7 –
8 Memory Seat Module
9 –
10 –
11 DC DC Converter 1
12 Rear Window Defogger
13 Heated Mirrors
14 –
15 Passive Entry/Passive Start
16 Front Wiper 17 Passenger Power Seat Fuses
Usage
18 Antilock Brake System Valve
19 Driver Power Seat 21 Sunroof
22 Parking Lamp
23 Automatic Headlamp Leveling/Adaptive Forward
Lighting
24 –
26 Transmission Control Module/Ignition
27 Instrument Panel/Body/ Ignition
28 –
29 Rear Vision Camera/ Ventilated Seats
30 Malfunction Indicator Lamp/Ignition
32 Canister Vent Solenoid/ Evap Leak Check Module
33 Front Heated Seat
34 – Fuses
Usage
35 Body Control Module 6/ Body Control Module 7
36 Fuel Module
38 –
39 –
40 Steering Column Lock 41 –
43 Heated Steering Wheel
44 Headlamp Leveling 45 –
46 Engine Control Module/ Ignition
47 –
48 –
49 DC DC Converter 2 50 –
51 –
52 –
53 –
54 –
Page 262 of 332
Chevrolet Malibu Owner Manual (GMNA-Localizing-U.S./Canada-
16273584) - 2023 - CRC - 9/28/22
Vehicle Care 261
until the problem is corrected. Some of the
conditions that can cause these to come
on are:
.One of the road tires has been replaced
with the spare tire. The spare tire does
not have a TPMS sensor. The malfunction
light and DIC message should go off after
the road tire is replaced and the sensor
matching process is performed
successfully. See“TPMS Sensor Matching
Process” later in this section.
.The TPMS sensor matching process was
not done or not completed successfully
after rotating the tires. The malfunction
light and the DIC message should go off
after successfully completing the sensor
matching process. See "TPMS Sensor
Matching Process" later in this section.
.One or more TPMS sensors are missing or
damaged. The malfunction light and the
DIC message should go off when the
TPMS sensors are installed and the sensor
matching process is performed
successfully. See your dealer for service.
.Replacement tires or wheels do not match
the original equipment tires or wheels.
Tires and wheels other than those recommended could prevent the TPMS
from functioning properly. See
Buying
New Tires 0265.
.Operating electronic devices or being near
facilities using radio wave frequencies
similar to the TPMS could cause the TPMS
sensors to malfunction.
If the TPMS is not functioning properly it
cannot detect or signal a low tire pressure
condition. See your dealer for service if the
TPMS malfunction light and DIC message
come on and stay on.
Tire Fill Alert (If Equipped)
This feature provides visual and audible
alerts outside the vehicle to help when
inflating an underinflated tire to the
recommended cold tire pressure.
When the low tire pressure warning light
comes on: 1. Park the vehicle in a safe, level place.
2. Set the parking brake firmly.
3. Place the vehicle in P (Park).
4. Add air to the tire that is underinflated. The turn signal lamp will flash. When the recommended pressure is
reached, the horn sounds once and the
turn signal lamp will stop flashing and
briefly turn solid.
Repeat these steps for all underinflated tires
that have illuminated the low tire pressure
warning light.
{Warning
Overinflating a tire could cause the tire
to rupture and you or others could be
injured. Do not exceed the maximum
pressure listed on the tire sidewall. See
Tire Sidewall Labeling 0252 and
Vehicle Load Limits 0172.
If the tire is overinflated by more than
35 kPa (5 psi), the horn will sound multiple
times and the turn signal lamp will continue
to flash for several seconds after filling
stops. To release and correct the pressure,
while the turn signal lamp is still flashing,
briefly press the center of the valve stem.
When the recommended pressure is reached,
the horn sounds once.
Page 263 of 332
Chevrolet Malibu Owner Manual (GMNA-Localizing-U.S./Canada-
16273584) - 2023 - CRC - 9/28/22
262 Vehicle Care
If the turn signal lamp does not flash within
15 seconds after starting to inflate the tire,
the tire fill alert has not been activated or is
not working.
If the hazard warning flashers are on, the
tire fill alert visual feedback will not work
properly.
The TPMS will not activate the tire fill alert
properly under the following conditions:
.There is interference from an external
device or transmitter.
.The air pressure from the inflation device
is not sufficient to inflate the tire.
.There is a malfunction in the TPMS.
.There is a malfunction in the horn or turn
signal lamps.
.The identification code of the TPMS
sensor is not registered to the system.
.The battery of the TPMS sensor is low.
If the tire fill alert does not operate due to
TPMS interference, move the vehicle about
1 m (3 ft) back or forward and try again.
If the tire fill alert feature is not working,
use a tire pressure gauge.
TPMS Sensor Matching Process
Each TPMS sensor has a unique
identification code. The identification code
needs to be matched to a new tire/wheel
position after rotating the vehicle’s tires or
replacing one or more of the TPMS sensors.
The TPMS sensor matching process should
also be performed after replacing a spare
tire with a road tire containing the TPMS
sensor. The malfunction light and the DIC
message should go off at the next ignition
cycle. The sensors are matched to the
tire/wheel positions, using a TPMS relearn
tool, in the following order: driver side front
tire, passenger side front tire, passenger side
rear tire, and driver side rear. See your
dealer for service or to purchase a relearn
tool. A TPMS relearn tool can also be
purchased. See Tire Pressure Monitor Sensor
Activation Tool at
www.gmtoolsandequipment.com or call
1-800-GM TOOLS (1-800-468-6657).
There are two minutes to match the first
tire/wheel position, and five minutes overall
to match all four tire/wheel positions. If it
takes longer, the matching process stops
and must be restarted. The TPMS sensor matching process is:
1. Set the parking brake.
2. Place the vehicle in Service Mode. See Ignition Positions 0175.
3. Make sure the Tire Pressure info page option is turned on. The info pages on
the DIC can be turned on and off
through the Options menu. See Driver
Information Center (DIC) (Base Level)
0 95 or
Driver Information Center (DIC) (Uplevel)
0 98.
4. Use the DIC controls on the right side of the steering wheel to scroll to the Tire
Pressure screen under the DIC info page.
5. Press and hold
Vin the center of the
DIC controls.
The horn sounds twice to signal the
receiver is in relearn mode and the TIRE
LEARNING ACTIVE message displays on
the DIC screen.
6. Start with the driver side front tire.
7. Place the relearn tool against the tire sidewall, near the valve stem. Then press
the button to activate the TPMS sensor.
A horn chirp confirms that the sensor
identification code has been matched to
this tire and wheel position.
Page 266 of 332
Chevrolet Malibu Owner Manual (GMNA-Localizing-U.S./Canada-
16273584) - 2023 - CRC - 9/28/22
Vehicle Care 265
Number (TIN) molded into one side of the
tire sidewall. The last four digits of the TIN
indicate the tire manufactured date. The
first two digits represent the week and the
last two digits, the year. For example, the
third week of the year 2020 would have a
4-digit DOT date of 0320. Week 01 is the
first full week (Sunday through Saturday) of
each year.
Vehicle Storage
Tires age when stored normally mounted on
a parked vehicle. Park a vehicle that will be
stored for at least a month in a cool, dry,
clean area away from direct sunlight to slow
aging. This area should be free of grease,
gasoline, or other substances that can
deteriorate rubber.
Parking for an extended period can cause
flat spots on the tires that may result in
vibrations while driving. When storing a
vehicle for at least a month, remove the
tires or raise the vehicle to reduce the
weight from the tires.
Buying New Tires
GM has developed and matched specific
tires for the vehicle. The original
equipment tires installed were designed
to meet General Motors Tire
Performance Criteria Specification
(TPC Spec) system rating. When
replacement tires are needed, GM
strongly recommends buying tires with
the same TPC Spec rating.
GM's exclusive TPC Spec system
considers over a dozen critical
specifications that impact the overall
performance of the vehicle, including
brake system performance, ride and
handling, traction control, and tire
pressure monitoring performance. GM's
TPC Spec number is molded onto the
tire's sidewall near the tire size. If the
tires have an all-season tread design,
the TPC Spec number will be followed
by MS for mud and snow. SeeTire
Sidewall Labeling 0252 for additional
information. GM recommends replacing worn tires in
complete sets of four. Uniform tread
depth on all tires will help to maintain
the performance of the vehicle. Braking
and handling performance may be
adversely affected if all the tires are not
replaced at the same time. If proper
rotation and maintenance have been
done, all four tires should wear out at
about the same time. However, if it is
necessary to replace only one axle set
of worn tires, place the new tires on
the rear axle. See
Tire Rotation0263.
{Warning
Tires could explode during improper
service. Attempting to mount or
dismount a tire could cause injury or
death. Only your dealer or authorized
tire service center should mount or
dismount the tires.
Page 269 of 332
Chevrolet Malibu Owner Manual (GMNA-Localizing-U.S./Canada-
16273584) - 2023 - CRC - 9/28/22
268 Vehicle Care
Wheel Alignment and Tire
Balance
The tires and wheels were aligned and
balanced at the factory to provide the
longest tire life and best overall
performance. Adjustments to wheel
alignment and tire balancing are not
necessary on a regular basis. Consider an
alignment check if there is unusual tire wear
or the vehicle is significantly pulling to one
side or the other. Some slight pull to the
left or right, depending on the crown of the
road and/or other road surface variations
such as troughs or ruts, is normal. If the
vehicle is vibrating when driving on a
smooth road, the tires and wheels may
need to be rebalanced. See your dealer for
proper diagnosis.
Wheel Replacement
Replace any wheel that is bent, cracked,
or badly rusted or corroded. If wheel nuts
keep coming loose, the wheel, wheel bolts,
and wheel nuts should be replaced. If the
wheel leaks air, replace it. Some aluminum
wheels can be repaired. See your dealer if
any of these conditions exist.Your dealer will know the kind of wheel that
is needed.
Each new wheel should have the same
load-carrying capacity, diameter, width,
offset, and be mounted the same way as
the one it replaces.
Replace wheels, wheel bolts, wheel nuts,
or Tire Pressure Monitor System (TPMS)
sensors with new GM original equipment
parts.
{Warning
Using the wrong replacement wheels,
wheel bolts, or wheel nuts can be
dangerous. It could affect the braking and
handling of the vehicle. Tires can lose air
and cause loss of control, resulting in a
crash. Always use the correct wheel,
wheel bolts, and wheel nuts for
replacement.
{Warning
Replacing a wheel with a used one is
dangerous. How it has been used or how
far it has been driven may be unknown.
(Continued)
Warning (Continued)
It could fail suddenly and cause a crash.
When replacing wheels, use a new GM
original equipment wheel.
Caution
The wrong wheel can also cause
problems with bearing life, brake cooling,
speedometer or odometer calibration,
headlamp aim, bumper height, vehicle
ground clearance, and tire or tire chain
clearance to the body and chassis.
Tire Chains
{Warning
If the vehicle has 245/45R18 or 245/40R19
size tires, do not use tire chains. There is
not enough clearance. Tire chains used on
a vehicle without the proper amount of
clearance can cause damage to the
brakes, suspension, or other vehicle parts.
The area damaged by the tire chains
could cause loss of control and a crash.
Use another type of traction device only(Continued)
Page 278 of 332
Chevrolet Malibu Owner Manual (GMNA-Localizing-U.S./Canada-
16273584) - 2023 - CRC - 9/28/22
Vehicle Care 277
3. Set the parking brake firmly on bothvehicles. Put an automatic transmission
in P (Park) or a manual transmission in
Neutral before setting the parking brake.
Caution
If any accessories are left on or plugged
in during the jump starting procedure,
they could be damaged. The repairs
would not be covered by the vehicle
warranty. Whenever possible, turn off or
unplug all accessories on either vehicle
when jump starting.
4. Turn the ignition off and switch off all lights and accessories in both vehicles,
except the hazard warning flashers if
needed.
{Warning
An electric fan can start up even when
the engine is not running and can injure
you. Keep hands, clothing, and tools
away from any underhood electric fan.
{Warning
Using a match near a battery can cause
battery gas to explode. People have been
hurt doing this, and some have been
blinded. Use a flashlight if you need
more light.
Battery fluid contains acid that can burn
you. Do not get it on you. If you
accidentally get it in your eyes or on
your skin, flush the place with water and
get medical help immediately.
{Warning
Fans or other moving engine parts can
injure you badly. Keep your hands away
from moving parts once the engine is
running.
5. Connect one end of the red positive (+) cable to the discharged battery
positive (+) terminal.
6. Connect the other end of the red positive (+) cable to the good battery
positive (+) terminal. 7. Connect one end of the black negative
(−) cable to the good battery negative
(−) terminal.
8. Connect the other end of the negative (−) cable to the discharged battery
negative (–) grounding point.
9. Start the vehicle with the good battery and run the engine at idle speed for at
least four minutes.
10. Try to start the vehicle that had the discharged battery. If it will not start
after a few tries, it probably needs
service.
Jumper Cable Removal
Reverse the sequence exactly when
removing the jumper cables.
After starting the disabled vehicle and
removing the jumper cables, allow it to idle
for several minutes.
Page 293 of 332
Chevrolet Malibu Owner Manual (GMNA-Localizing-U.S./Canada-
16273584) - 2023 - CRC - 9/28/22
292 Service and Maintenance
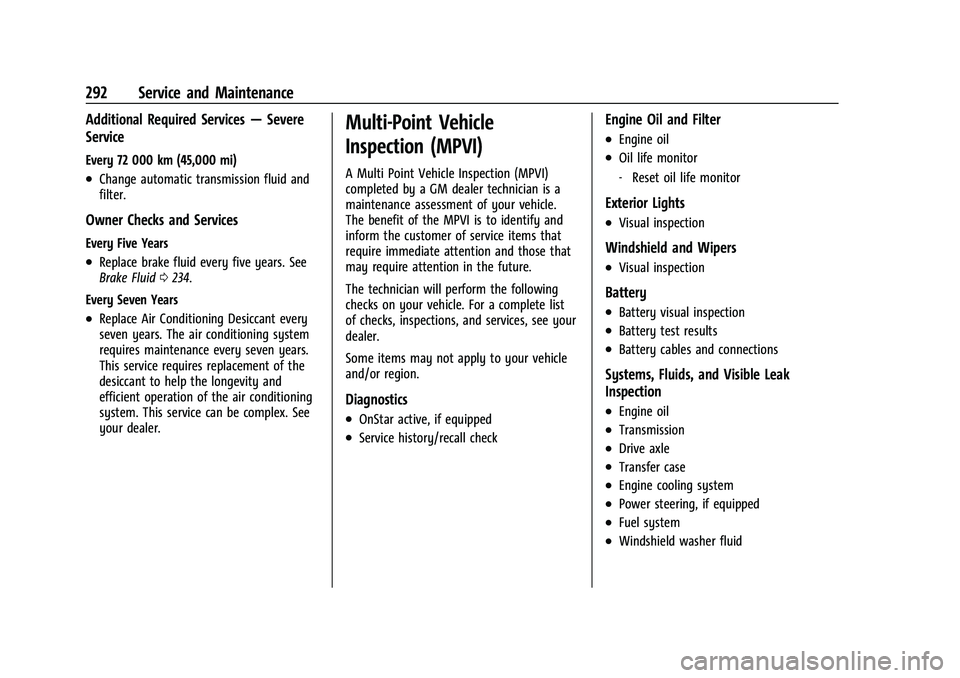
Additional Required Services—Severe
Service
Every 72 000 km (45,000 mi)
.Change automatic transmission fluid and
filter.
Owner Checks and Services
Every Five Years
.Replace brake fluid every five years. See
Brake Fluid 0234.
Every Seven Years
.Replace Air Conditioning Desiccant every
seven years. The air conditioning system
requires maintenance every seven years.
This service requires replacement of the
desiccant to help the longevity and
efficient operation of the air conditioning
system. This service can be complex. See
your dealer.
Multi-Point Vehicle
Inspection (MPVI)
A Multi Point Vehicle Inspection (MPVI)
completed by a GM dealer technician is a
maintenance assessment of your vehicle.
The benefit of the MPVI is to identify and
inform the customer of service items that
require immediate attention and those that
may require attention in the future.
The technician will perform the following
checks on your vehicle. For a complete list
of checks, inspections, and services, see your
dealer.
Some items may not apply to your vehicle
and/or region.
Diagnostics
.OnStar active, if equipped
.Service history/recall check
Engine Oil and Filter
.Engine oil
.Oil life monitor
‐ Reset oil life monitor
Exterior Lights
.Visual inspection
Windshield and Wipers
.Visual inspection
Battery
.Battery visual inspection
.Battery test results
.Battery cables and connections
Systems, Fluids, and Visible Leak
Inspection
.Engine oil
.Transmission
.Drive axle
.Transfer case
.Engine cooling system
.Power steering, if equipped
.Fuel system
.Windshield washer fluid
Page 321 of 332
Chevrolet Malibu Owner Manual (GMNA-Localizing-U.S./Canada-
16273584) - 2023 - CRC - 9/28/22
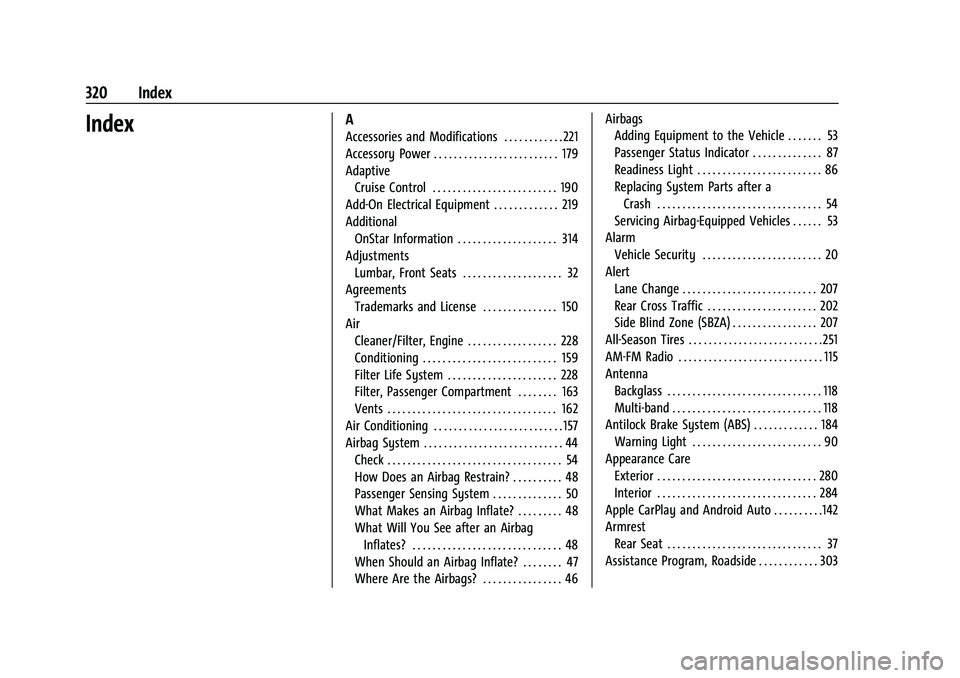
320 Index
IndexA
Accessories and Modifications . . . . . . . . . . . . 221
Accessory Power . . . . . . . . . . . . . . . . . . . . . . . . . 179
AdaptiveCruise Control . . . . . . . . . . . . . . . . . . . . . . . . . 190
Add-On Electrical Equipment . . . . . . . . . . . . . 219
Additional OnStar Information . . . . . . . . . . . . . . . . . . . . 314
Adjustments Lumbar, Front Seats . . . . . . . . . . . . . . . . . . . . 32
Agreements Trademarks and License . . . . . . . . . . . . . . . 150
Air Cleaner/Filter, Engine . . . . . . . . . . . . . . . . . . 228
Conditioning . . . . . . . . . . . . . . . . . . . . . . . . . . . 159
Filter Life System . . . . . . . . . . . . . . . . . . . . . . 228
Filter, Passenger Compartment . . . . . . . . 163
Vents . . . . . . . . . . . . . . . . . . . . . . . . . . . . . . . . . . 162
Air Conditioning . . . . . . . . . . . . . . . . . . . . . . . . . . 157
Airbag System . . . . . . . . . . . . . . . . . . . . . . . . . . . . 44
Check . . . . . . . . . . . . . . . . . . . . . . . . . . . . . . . . . . . 54
How Does an Airbag Restrain? . . . . . . . . . . 48
Passenger Sensing System . . . . . . . . . . . . . . 50
What Makes an Airbag Inflate? . . . . . . . . . 48
What Will You See after an AirbagInflates? . . . . . . . . . . . . . . . . . . . . . . . . . . . . . . 48
When Should an Airbag Inflate? . . . . . . . . 47
Where Are the Airbags? . . . . . . . . . . . . . . . . 46 Airbags
Adding Equipment to the Vehicle . . . . . . . 53
Passenger Status Indicator . . . . . . . . . . . . . . 87
Readiness Light . . . . . . . . . . . . . . . . . . . . . . . . . 86
Replacing System Parts after a
Crash . . . . . . . . . . . . . . . . . . . . . . . . . . . . . . . . . 54
Servicing Airbag-Equipped Vehicles . . . . . . 53
Alarm Vehicle Security . . . . . . . . . . . . . . . . . . . . . . . . 20
Alert Lane Change . . . . . . . . . . . . . . . . . . . . . . . . . . . 207
Rear Cross Traffic . . . . . . . . . . . . . . . . . . . . . . 202
Side Blind Zone (SBZA) . . . . . . . . . . . . . . . . . 207
All-Season Tires . . . . . . . . . . . . . . . . . . . . . . . . . . . 251
AM-FM Radio . . . . . . . . . . . . . . . . . . . . . . . . . . . . . 115
Antenna Backglass . . . . . . . . . . . . . . . . . . . . . . . . . . . . . . . 118
Multi-band . . . . . . . . . . . . . . . . . . . . . . . . . . . . . . 118
Antilock Brake System (ABS) . . . . . . . . . . . . . 184 Warning Light . . . . . . . . . . . . . . . . . . . . . . . . . . 90
Appearance Care
Exterior . . . . . . . . . . . . . . . . . . . . . . . . . . . . . . . . 280
Interior . . . . . . . . . . . . . . . . . . . . . . . . . . . . . . . . 284
Apple CarPlay and Android Auto . . . . . . . . . .142
Armrest Rear Seat . . . . . . . . . . . . . . . . . . . . . . . . . . . . . . . 37
Assistance Program, Roadside . . . . . . . . . . . . 303