fold seats CHEVROLET MALIBU LIMITED 2016 8.G Owners Manual
[x] Cancel search | Manufacturer: CHEVROLET, Model Year: 2016, Model line: MALIBU LIMITED, Model: CHEVROLET MALIBU LIMITED 2016 8.GPages: 360, PDF Size: 6.15 MB
Page 13 of 360
Chevrolet Malibu Limited Owner Manual (GMNA-Localizing-U.S/Canada-
9086425) - 2016 - crc - 7/30/15
12 In Brief
Memory Features
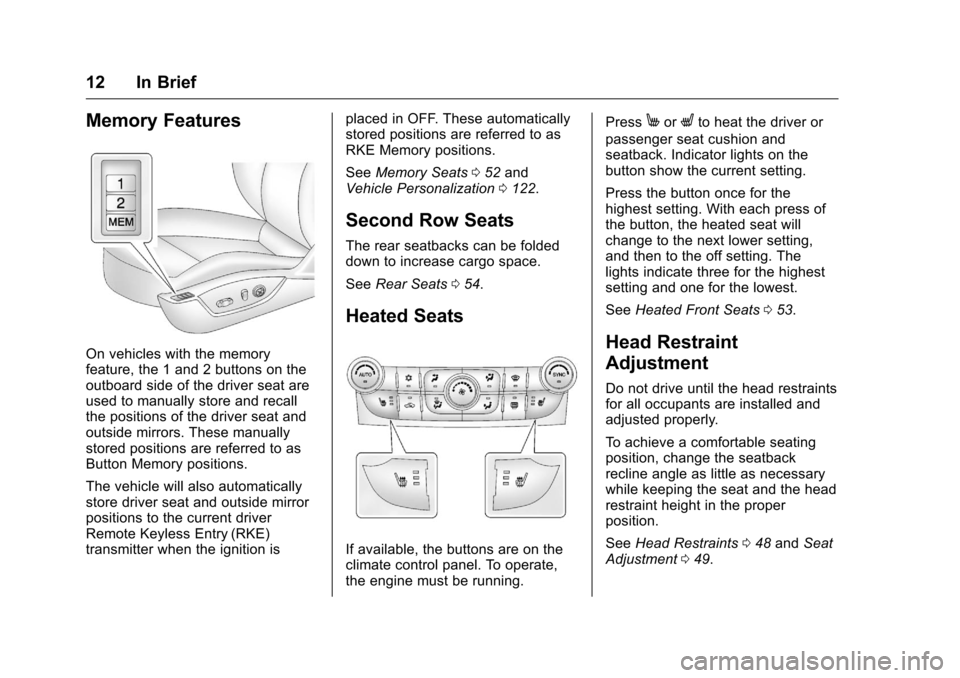
On vehicles with the memory
feature, the 1 and 2 buttons on the
outboard side of the driver seat are
used to manually store and recall
the positions of the driver seat and
outside mirrors. These manually
stored positions are referred to as
Button Memory positions.
The vehicle will also automatically
store driver seat and outside mirror
positions to the current driver
Remote Keyless Entry (RKE)
transmitter when the ignition isplaced in OFF. These automatically
stored positions are referred to as
RKE Memory positions.
See
Memory Seats 052 and
Vehicle Personalization 0122.
Second Row Seats
The rear seatbacks can be folded
down to increase cargo space.
See Rear Seats 054.
Heated Seats
If available, the buttons are on the
climate control panel. To operate,
the engine must be running. Press
MorLto heat the driver or
passenger seat cushion and
seatback. Indicator lights on the
button show the current setting.
Press the button once for the
highest setting. With each press of
the button, the heated seat will
change to the next lower setting,
and then to the off setting. The
lights indicate three for the highest
setting and one for the lowest.
See Heated Front Seats 053.
Head Restraint
Adjustment
Do not drive until the head restraints
for all occupants are installed and
adjusted properly.
To achieve a comfortable seating
position, change the seatback
recline angle as little as necessary
while keeping the seat and the head
restraint height in the proper
position.
See Head Restraints 048 and Seat
Adjustment 049.
Page 55 of 360
Chevrolet Malibu Limited Owner Manual (GMNA-Localizing-U.S/Canada-
9086425) - 2016 - crc - 7/30/15
54 Seats and Restraints
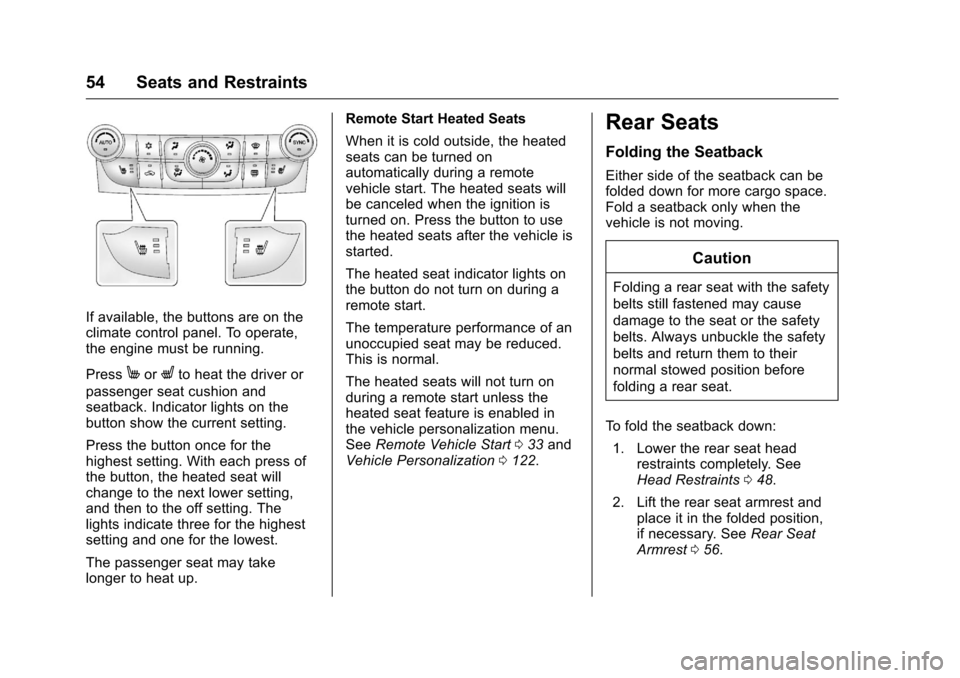
If available, the buttons are on the
climate control panel. To operate,
the engine must be running.
Press
MorLto heat the driver or
passenger seat cushion and
seatback. Indicator lights on the
button show the current setting.
Press the button once for the
highest setting. With each press of
the button, the heated seat will
change to the next lower setting,
and then to the off setting. The
lights indicate three for the highest
setting and one for the lowest.
The passenger seat may take
longer to heat up. Remote Start Heated Seats
When it is cold outside, the heated
seats can be turned on
automatically during a remote
vehicle start. The heated seats will
be canceled when the ignition is
turned on. Press the button to use
the heated seats after the vehicle is
started.
The heated seat indicator lights on
the button do not turn on during a
remote start.
The temperature performance of an
unoccupied seat may be reduced.
This is normal.
The heated seats will not turn on
during a remote start unless the
heated seat feature is enabled in
the vehicle personalization menu.
See
Remote Vehicle Start 033 and
Vehicle Personalization 0122.
Rear Seats
Folding the Seatback
Either side of the seatback can be
folded down for more cargo space.
Fold a seatback only when the
vehicle is not moving.
Caution
Folding a rear seat with the safety
belts still fastened may cause
damage to the seat or the safety
belts. Always unbuckle the safety
belts and return them to their
normal stowed position before
folding a rear seat.
To fold the seatback down: 1. Lower the rear seat head restraints completely. See
Head Restraints 048.
2. Lift the rear seat armrest and place it in the folded position,
if necessary. See Rear Seat
Armrest 056.
Page 56 of 360
Chevrolet Malibu Limited Owner Manual (GMNA-Localizing-U.S/Canada-
9086425) - 2016 - crc - 7/30/15
Seats and Restraints 55
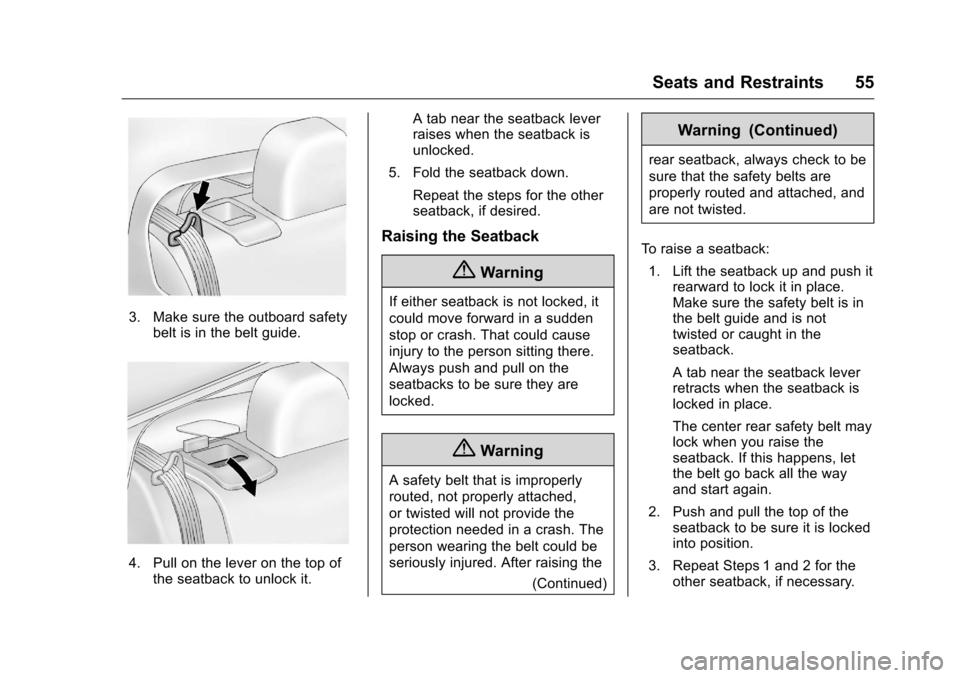
3. Make sure the outboard safetybelt is in the belt guide.
4. Pull on the lever on the top ofthe seatback to unlock it. A tab near the seatback lever
raises when the seatback is
unlocked.
5. Fold the seatback down. Repeat the steps for the other
seatback, if desired.
Raising the Seatback
{Warning
If either seatback is not locked, it
could move forward in a sudden
stop or crash. That could cause
injury to the person sitting there.
Always push and pull on the
seatbacks to be sure they are
locked.
{Warning
A safety belt that is improperly
routed, not properly attached,
or twisted will not provide the
protection needed in a crash. The
person wearing the belt could be
seriously injured. After raising the (Continued)
Warning (Continued)
rear seatback, always check to be
sure that the safety belts are
properly routed and attached, and
are not twisted.
To raise a seatback: 1. Lift the seatback up and push it rearward to lock it in place.
Make sure the safety belt is in
the belt guide and is not
twisted or caught in the
seatback.
A tab near the seatback lever
retracts when the seatback is
locked in place.
The center rear safety belt may
lock when you raise the
seatback. If this happens, let
the belt go back all the way
and start again.
2. Push and pull the top of the seatback to be sure it is locked
into position.
3. Repeat Steps 1 and 2 for the other seatback, if necessary.
Page 57 of 360
Chevrolet Malibu Limited Owner Manual (GMNA-Localizing-U.S/Canada-
9086425) - 2016 - crc - 7/30/15
56 Seats and Restraints
When the seat is not in use, it
should be kept in the upright, locked
position.
Rear Seat Armrest
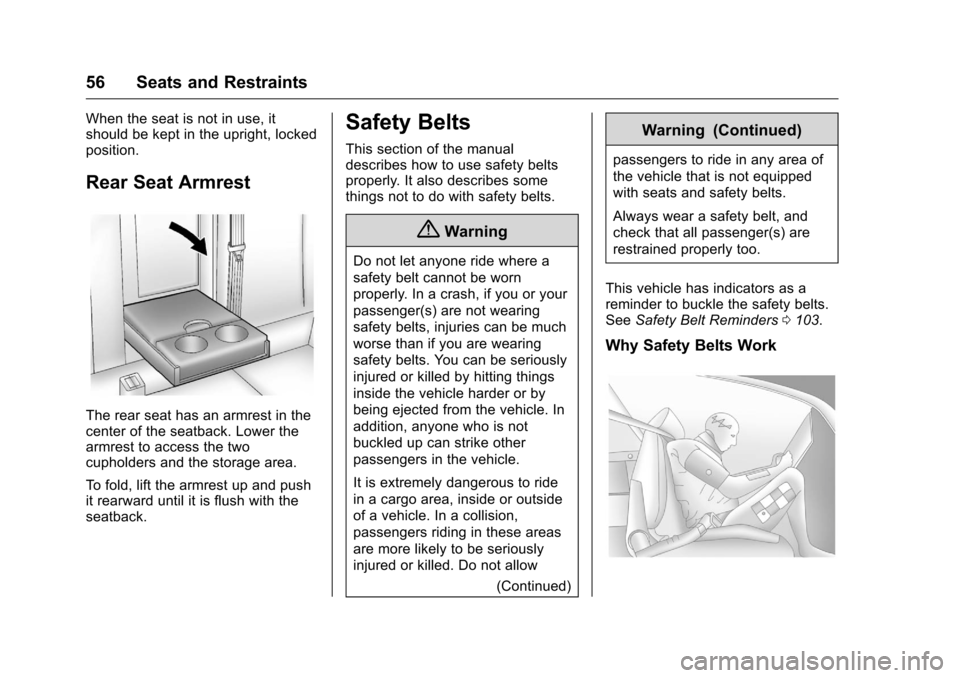
The rear seat has an armrest in the
center of the seatback. Lower the
armrest to access the two
cupholders and the storage area.
To fold, lift the armrest up and push
it rearward until it is flush with the
seatback.
Safety Belts
This section of the manual
describes how to use safety belts
properly. It also describes some
things not to do with safety belts.
{Warning
Do not let anyone ride where a
safety belt cannot be worn
properly. In a crash, if you or your
passenger(s) are not wearing
safety belts, injuries can be much
worse than if you are wearing
safety belts. You can be seriously
injured or killed by hitting things
inside the vehicle harder or by
being ejected from the vehicle. In
addition, anyone who is not
buckled up can strike other
passengers in the vehicle.
It is extremely dangerous to ride
in a cargo area, inside or outside
of a vehicle. In a collision,
passengers riding in these areas
are more likely to be seriously
injured or killed. Do not allow(Continued)
Warning (Continued)
passengers to ride in any area of
the vehicle that is not equipped
with seats and safety belts.
Always wear a safety belt, and
check that all passenger(s) are
restrained properly too.
This vehicle has indicators as a
reminder to buckle the safety belts.
See Safety Belt Reminders 0103.
Why Safety Belts Work
Page 85 of 360
Chevrolet Malibu Limited Owner Manual (GMNA-Localizing-U.S/Canada-
9086425) - 2016 - crc - 7/30/15
84 Seats and Restraints
{Warning
To reduce the risk of serious or
fatal injuries during a crash, do
not attach more than one child
restraint to a single anchor.
Attaching more than one child
restraint to a single anchor could
cause the anchor or attachment
to come loose or even break
during a crash. A child or others
could be injured.
{Warning
Children can be seriously injured
or strangled if a shoulder belt is
wrapped around their neck. The
shoulder belt can tighten but
cannot be loosened if it is locked.
The shoulder belt locks when it is
pulled all the way out of the
retractor. It unlocks when the
shoulder belt is allowed to go all
the way back into the retractor,
but it cannot do this if it is(Continued)
Warning (Continued)
wrapped around a child’s neck.
If the shoulder belt is locked and
tightened around a child’s neck,
the only way to loosen the belt is
to cut it.
Buckle any unused safety belts
behind the child restraint so
children cannot reach them. Pull
the shoulder belt all the way out
of the retractor to set the lock,
and tighten the belt behind the
child restraint after the child
restraint has been installed.
Caution
Do not let the LATCH
attachments rub against the
vehicle’s safety belts. This may
damage these parts. If necessary,
move buckled safety belts to
avoid rubbing the LATCH
attachments.
(Continued)
Caution (Continued)
Do not fold the empty rear seat
with a safety belt buckled. This
could damage the safety belt or
the seat. Unbuckle and return the
safety belt to its stowed position,
before folding the seat.
If you need to secure more than one
child restraint in the rear seat, see
Where to Put the Restraint 080.
You cannot secure three child
restraints using the LATCH anchors
in the rear seat at the same time,
but you can install two of them.
If you want to do this, install one
LATCH child restraint in the right
rear seating position, and install the
other one either in the left rear
seating position or in the center
seating position. If you need to
install child restraints in both the
center and left rear seating
positions, the one in the center
seating position will need to be
secured using the vehicle safety
belts instead of the LATCH anchors.
Page 88 of 360
Chevrolet Malibu Limited Owner Manual (GMNA-Localizing-U.S/Canada-
9086425) - 2016 - crc - 7/30/15
Seats and Restraints 87
be no more than 2.5 cm (1 in)
of movement for proper
installation.
Head Restraint Removal and
Reinstallation
The rear outboard head restraints
can be removed if they interfere with
the proper installation of the child
restraint.
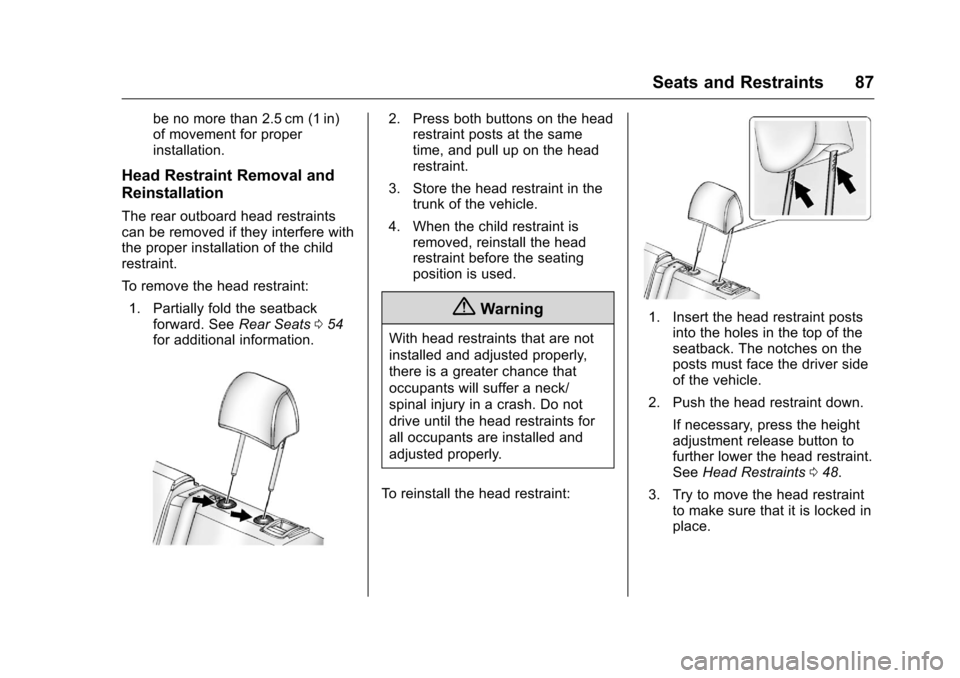
To remove the head restraint:1. Partially fold the seatback forward. See Rear Seats054
for additional information.
2. Press both buttons on the head restraint posts at the same
time, and pull up on the head
restraint.
3. Store the head restraint in the trunk of the vehicle.
4. When the child restraint is removed, reinstall the head
restraint before the seating
position is used.
{Warning
With head restraints that are not
installed and adjusted properly,
there is a greater chance that
occupants will suffer a neck/
spinal injury in a crash. Do not
drive until the head restraints for
all occupants are installed and
adjusted properly.
To reinstall the head restraint:
1. Insert the head restraint posts into the holes in the top of the
seatback. The notches on the
posts must face the driver side
of the vehicle.
2. Push the head restraint down.
If necessary, press the height
adjustment release button to
further lower the head restraint.
See Head Restraints 048.
3. Try to move the head restraint to make sure that it is locked in
place.
Page 187 of 360
Chevrolet Malibu Limited Owner Manual (GMNA-Localizing-U.S/Canada-
9086425) - 2016 - crc - 7/30/15
186 Driving and Operating
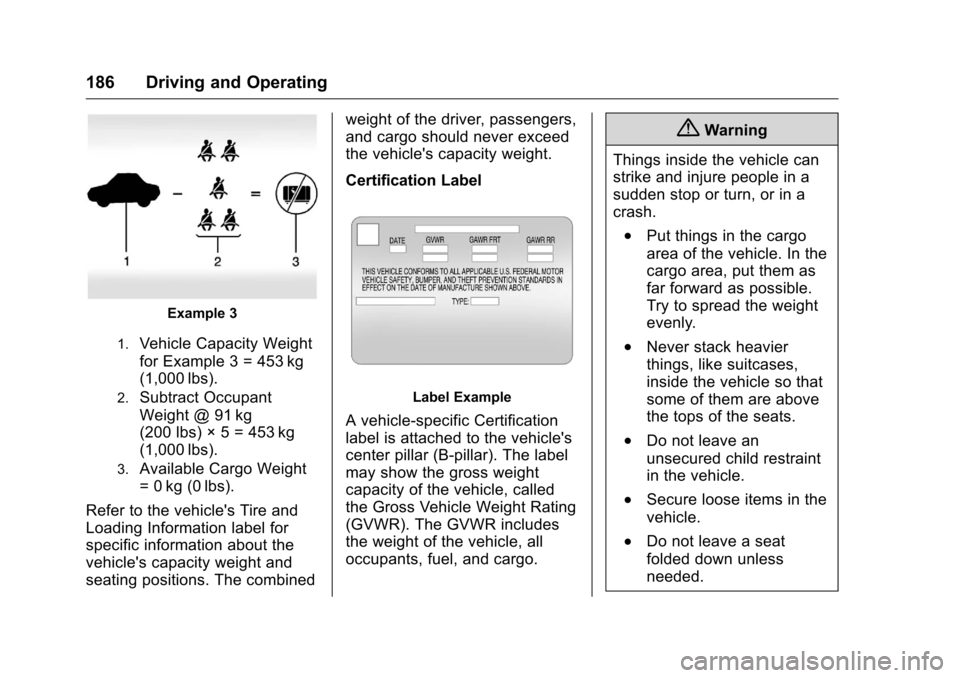
Example 3
1.Vehicle Capacity Weight
for Example 3 = 453 kg
(1,000 lbs).
2.Subtract Occupant
Weight @ 91 kg
(200 lbs) × 5 = 453 kg
(1,000 lbs).
3.Available Cargo Weight
= 0 kg (0 lbs).
Refer to the vehicle's Tire and
Loading Information label for
specific information about the
vehicle's capacity weight and
seating positions. The combined weight of the driver, passengers,
and cargo should never exceed
the vehicle's capacity weight.
Certification Label
Label Example
A vehicle-specific Certification
label is attached to the vehicle's
center pillar (B-pillar). The label
may show the gross weight
capacity of the vehicle, called
the Gross Vehicle Weight Rating
(GVWR). The GVWR includes
the weight of the vehicle, all
occupants, fuel, and cargo.
{Warning
Things inside the vehicle can
strike and injure people in a
sudden stop or turn, or in a
crash.
.Put things in the cargo
area of the vehicle. In the
cargo area, put them as
far forward as possible.
Try to spread the weight
evenly.
.Never stack heavier
things, like suitcases,
inside the vehicle so that
some of them are above
the tops of the seats.
.Do not leave an
unsecured child restraint
in the vehicle.
.Secure loose items in the
vehicle.
.Do not leave a seat
folded down unless
needed.