reset CHEVROLET MONTE CARLO 1995 5.G User Guide
[x] Cancel search | Manufacturer: CHEVROLET, Model Year: 1995, Model line: MONTE CARLO, Model: CHEVROLET MONTE CARLO 1995 5.GPages: 324, PDF Size: 16.74 MB
Page 124 of 324
Downloaded from www.Manualslib.com manuals search engine Unlocking the System
If battery power is removed for any reason, LOC will
appear on the display when power is reapplied.
You will
need to enter your code to unlock the system. You have
only
15 seconds between each of the following steps.
Disabling THEFTLOCK
If you want to turn off THEFTLOCK, you will need to
enter your code. If
you lose or forget your code, see
your dealer.
1. Turn the ignition on and the radio off.
2. Press the 1 and 4 preset buttons at the same time and
hold until
SEC shows on the display.
1. Turn the ignition on. LOC will appear on the display.
2. Press MN and “000” will appear on the display.
3. Press MN again and hold until the last two digits of
your code appear.
your code appear.
4. Press and hold HR until the first digit or digits of
5. Press AM FM after you make sure the code matches
the one you wrote down. SEC should appear on the
display, meaning you can now use your system, and
it is secured. If LOC appears, you entered the wrong
code and the system is still locked.
If you lose
or forget your code and cannot unlock the
system, contact your dealer.
You now have only 15 seconds between each of the
following steps.
3. Press
MN and “000” will appear on the display.
4. Press MN again and hold until the last two digits of
your code appear.
5. Press and hold HR until the first digit or digits of
your code appear.
6. Press AM FM after you make sure the code matches
the one you wrote down.
“- - -” should appear on the
display, meaning your system is unsecured.
If SEC
appears, you entered the wrong code and the system
is still secured.
3-14
Page 126 of 324
Downloaded from www.Manualslib.com manuals search engine Care of Your Cassette Tape Player
A tape player that is not cleaned regularly is subject to
reduced sound quality, ruining the cassette or damaging
the mechanism. Tape cassettes that are not properly
stored
in their plastic cases away from contaminants,
direct sunlight, and extreme heat may not operate
properly and could cause premature failure
of the
tape player.
Your tape player should be cleaned with every
50 hours
of use to provide optimum performance.
Your radio may
display Cln to indicate that you have used your tape
player for
50 hours without resetting the tape clean
timer.
If you notice a reduction in sound quality,
regardless
of when the tape player was last cleaned, try
playing a different cassette to see
if the tape or the
tape player is at fault. If the second cassette results
in
no improvement in sound quality, try cleaning the
tape player.
Proper tape player cleaning should be done with
a
scrubbing action, non-abrasive cleaner cassette. This is a
wet-type cleaning system that uses
a cleaning cassette
with pads that scrub the tape head as the hubs of
the
cleaner cassette turn. To properly clean your tape player,
follow the instructions with the cleaning cassette. If
you
use this type of cleaner, the radio may display an error
and eject the cartridge. This is normal and is the result
of an added feature in the tape player that detects broken
tapes. If an error occurs, you will need to insert the
cleaning cassette at least three times to thoroughly clean
the tape player.
You may prefer to use a non-scrubbing action, wet-type
cleaner. This type
of cleaner uses a fabric belt to clean
the tape head. This type of cleaner cassette will not
cause an error, but
it may not clean the tape player as
thoroughly as the scrubbing-type cleaner.
A scrubbing action cleaner is available through your
dealer
(GM Part No. 12344600).
Cassettes are subject to wear, and the sound quality may
degrade over time. Always verify that the cassette tape
is
in good condition and the tape player is clean before
obtaining service on your tape player.
3-16
Page 127 of 324
Downloaded from www.Manualslib.com manuals search engine Care of Your Compact Discs
Handle discs carefully. Store them in their original cases
or other protective cases and away from direct sunlight
and dust. If the surface
of a disc is soiled, dampen a
clean, soft cloth in a mild, neutral detergent solution and
clean
it, wiping from the center to the edge.
Be sure never to touch the signal surface
when handling
discs. Pick up discs by grasping the outer edges or
the
edge of the hole and the outer edge.
Fixed Mast Antenna
The fixed mast antenna can withstand most car washes
without being damaged. If the mast should ever become
slightly bent, you can straighten
it out by hand. If the
mast is badly bent, as it might be by vandals, you should
replace
it.
Check every once in a while to be sure the mast is still
tightened
to the fender.
Steering Wheel Touch Controls
(Option)
You can control certain audio system functions using the
buttons on your steering wheel.
VOLUME: Press the up or down arrows to increase or
decrease volume.
PLAY: Press to play the CD or cassette instead of the
radio.
MUTE: Press to silence the system. Press again to turn
on the sound.
SEEK: Press the up or down arrows to tune to the next
or previous radio station. If a tape
or compact disc is
playing, the player will advance or rewind.
PRESET Press to play a station you have programmed
on the radio preset buttons.
AM/FM: Press to choose AM, FMl or FM2. If a tape
or compact disc is playing,
it will stop and the radio will
play.
3-17
Page 216 of 324
Downloaded from www.Manualslib.com manuals search engine Radiator Pressure Cap
NOTICE:
Your radiator cap is a 15 psi (105 kPa)
pressure-type cap and must be tightly installed
to prevent coolant loss and possible engine
damage from overheating. Be sure the arrows on
the cap line up with the overflow tube on the
radiator filler neck.
When you replace your radiator pressure cap, an AC@
cap is recommended.
Thermostat
Engine coolant temperature is controlled by a thermostat
in the engine coolant system.
The thermostat stops the
flow of coolant through the radiator until the coolant
reaches a preset temperature.
When you replace your thermostat, an
AC@ thermostat
is recommended.
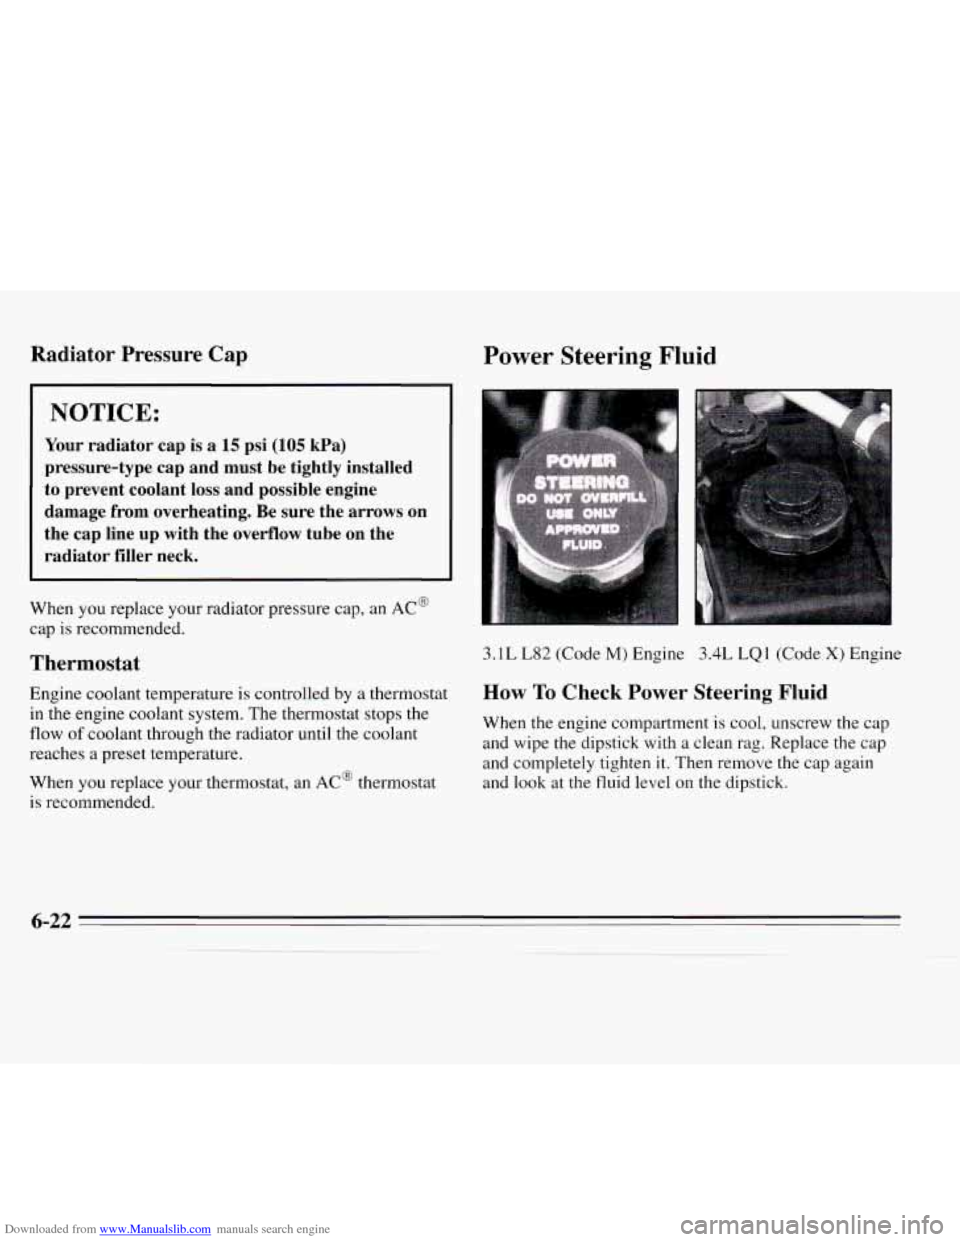
Power Steering Fluid
3.1 L L82 (Code M) Engine 3.4L LQ 1 (Code X) Engine
How To Check Power Steering Fluid
When the engine compartment is cool, unscrew the cap
and wipe the dipstick with a clean rag. Replace the cap
and completely tighten
it. Then remove the cap again
and look at the fluid level on the dipstick.
6-22
Page 235 of 324
Downloaded from www.Manualslib.com manuals search engine Temperature - A, B, C
The temperature grades are A (the highest), B, and C,
representing the tire’s resistance to the generation of
heat and its ability to dissipate heat when tested under
controlled conditions on a specified indoor laboratory
test wheel. Sustained high temperature can cause the
material of the tire to degenerate and reduce tire life, and
excessive temperature can lead to sudden tire failure.
The grade
C corresponds to a level of performance
which all passenger car tires must meet under the
Federal Motor Vehicle Safety Standard
No. 109. Grades
B and A represent higher levels of performance on the
laboratory test wheel than the minimum required by law.
Warning: The temperature grade for this tire is
established for
a tire that is properly inflated and not
overloaded. Excessive speed, underinflation, or
excessive loading, either separately or in combination,
can cause heat buildup and possible tire failure.
These grades are molded on the sidewalls of passenger
car tires. While the tires
available as standard or optional
equipment
on General Motors vehicles may vary with
respect to these grades, all such tires meet General
Motors performance standards and have been approved
for use on General Motors vehicles. All passenger type
(P Metric) tires must conform to Federal safety
requirements in addition to these grades.
Wheel Alignment and Tire Balance
The wheels on your vehicle were aligned and balanced
carefully at the factory to give you the longest tire life
and best overall performance.
In most cases, you will not need to have your wheels
aligned again. However, if you notice unusual tire wear
or your vehicle pulling one way or the other, the
alignment may need to be reset. If you notice your
vehicle vibrating when driving on a smooth road, your
wheels may need to be rebalanced.
6-4 1
- ___. __