display CHEVROLET MONTE CARLO 2003 6.G Repair Manual
[x] Cancel search | Manufacturer: CHEVROLET, Model Year: 2003, Model line: MONTE CARLO, Model: CHEVROLET MONTE CARLO 2003 6.GPages: 394, PDF Size: 2.73 MB
Page 203 of 394

Compact Disc Messages
If the disc comes out or CHECK CD appears on the
display, it could be for one of the following reasons:
·You're driving on a very rough road. When the road
becomes smoother, the disc should play.
·It's very hot. When the temperature returns to
normal, the disc should play.
·The disc is dirty, scratched, wet, or upside down.
·It is very humid. If so, wait about an hour and
try again.
·There may have been a problem while burning
the CD.
·The label may be caught in the CD player.
If any error occurs repeatedly or if an error can not be
corrected, contact your dealer.
Theft-Deterrent Feature
THEFTLOCKžis designed to discourage theft of your
radio. The feature works automatically by learning
a portion of the Vehicle Identi®cation Number (VIN). If
the radio is moved to a different vehicle, it will not
operate and LOCKED will be displayed.
When the ignition is off and RAP is not active, the
blinking red light indicates that THEFTLOCK is armed.
With THEFTLOCK activated, your radio will not
operate if stolen.
3-89
Page 204 of 394
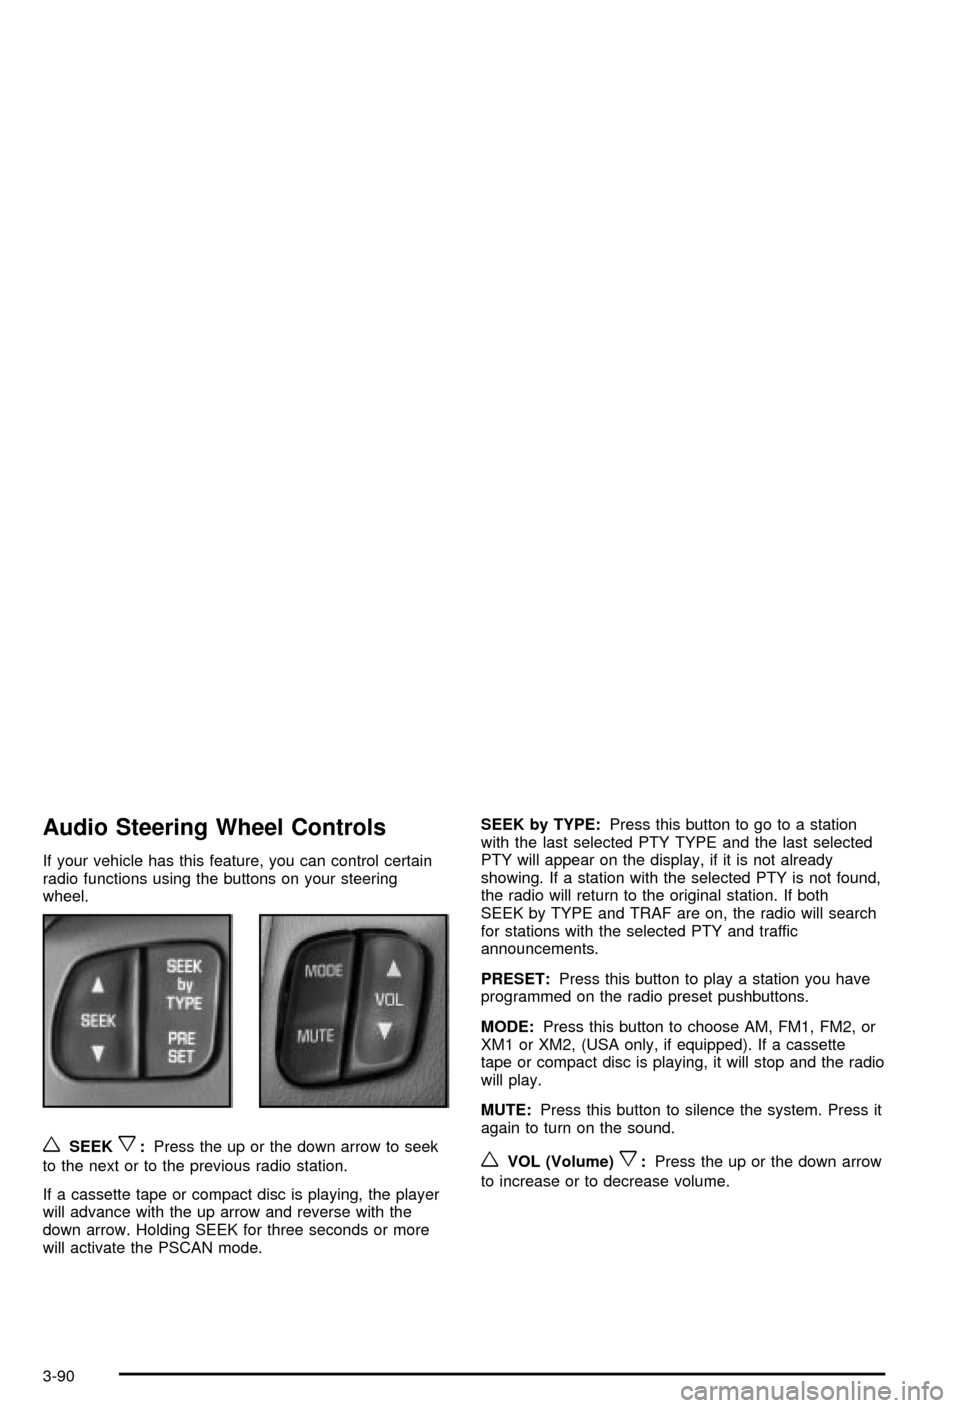
Audio Steering Wheel Controls
If your vehicle has this feature, you can control certain
radio functions using the buttons on your steering
wheel.
wSEEKx:Press the up or the down arrow to seek
to the next or to the previous radio station.
If a cassette tape or compact disc is playing, the player
will advance with the up arrow and reverse with the
down arrow. Holding SEEK for three seconds or more
will activate the PSCAN mode.SEEK by TYPE:Press this button to go to a station
with the last selected PTY TYPE and the last selected
PTY will appear on the display, if it is not already
showing. If a station with the selected PTY is not found,
the radio will return to the original station. If both
SEEK by TYPE and TRAF are on, the radio will search
for stations with the selected PTY and traffic
announcements.
PRESET:Press this button to play a station you have
programmed on the radio preset pushbuttons.
MODE:Press this button to choose AM, FM1, FM2, or
XM1 or XM2, (USA only, if equipped). If a cassette
tape or compact disc is playing, it will stop and the radio
will play.
MUTE:Press this button to silence the system. Press it
again to turn on the sound.wVOL (Volume)x:Press the up or the down arrow
to increase or to decrease volume.
3-90
Page 205 of 394

Understanding Radio Reception
AM
The range for most AM stations is greater than for FM,
especially at night. The longer range, however, can
cause stations to interfere with each other. AM can pick
up noise from things like storms and power lines. Try
reducing the treble to reduce this noise if you ever get it.
FM Stereo
FM stereo will give you the best sound, but FM signals
will reach only about 10 to 40 miles (16 to 65 km).
Tall buildings or hills can interfere with FM signals,
causing the sound to come and go.
XMŸ Satellite Radio Service
(USA Only)
XMŸ Satellite Radio gives you digital radio reception
from coast to coast. Just as with FM, tall buildings
or hills can interfere with satellite radio signals, causing
the sound to come and go. Your radio may display
NO SIGNAL to indicate interference.
Care of Your Cassette Tape Player
A tape player that is not cleaned regularly can cause
reduced sound quality, ruined cassettes or a damaged
mechanism. Cassette tapes should be stored in their
cases away from contaminants, direct sunlight and
extreme heat. If they aren't, they may not operate
properly or may cause failure of the tape player.
Your tape player should be cleaned regularly after every
50 hours of use. Your radio may display CLEAN to
indicate that you have used your tape player for
50 hours without resetting the tape clean timer. If this
message appears on the display, your cassette
tape player needs to be cleaned. It will still play tapes,
but you should clean it as soon as possible to
prevent damage to your tapes and player. If you notice
a reduction in sound quality, try a known good
cassette to see if the tape or the tape player is at fault.
If this other cassette has no improvement in sound
quality, clean the tape player.
For best results, use a scrubbing action, non-abrasive
cleaning cassette with pads which scrub the tape
head as the hubs of the cleaner cassette turn. The
recommended cleaning cassette is available through
your dealership.
3-91
Page 206 of 394

The broken tape detection feature of your cassette tape
player may identify the cleaning cassette as a
damaged tape, in error. To prevent the cleaning cassette
from being ejected, use the following steps:
1. Turn the ignition on.
2. Turn the radio off.
3. Press and hold the TAPE CD button for ®ve
seconds. READY will appear on the display and a
cassette symbol will ¯ash for ®ve seconds.
4. Insert the scrubbing action cleaning cassette.
5. Eject the cleaning cassette after the manufacturer's
recommended cleaning time.
After the cleaning cassette is ejected, the broken tape
detection feature will be active again.
You may also choose a non-scrubbing action, wet-type
cleaner which uses a cassette with a fabric belt to
clean the tape head. This type of cleaning cassette will
not eject on its own. A non-scrubbing action cleaner
may not clean as thoroughly as the scrubbing type
cleaner. The use of a non-scrubbing action, dry-type
cleaning cassette is not recommended.After you clean the player, press and hold the EJT
button for ®ve seconds to reset the CLEAN indicator.
The radio will display CLEANED to show the indicator
was reset.
Cassettes are subject to wear and the sound quality
may degrade over time. Always make sure the cassette
tape is in good condition before you have your tape
player serviced.
Care of Your CDs
Handle discs carefully. Store them in their original cases
or other protective cases and away from direct sunlight
and dust. If the surface of a disc is soiled, dampen
a clean, soft cloth in a mild, neutral detergent solution
and clean it, wiping from the center to the edge.
Be sure never to touch the side without writing when
handling discs. Pick up discs by grasping the outer
edges or the edge of the hole and the outer edge.
Care of Your CD Player
The use of CD lens cleaner discs is not advised, due to
the risk of contaminating the lens of the CD optics
with lubricants internal to the CD mechanism.
3-92
Page 208 of 394

XMŸ Satellite Radio Antenna
System (United States Only)
Your XMŸ Satellite Radio antenna is located on the
roof of your vehicle. Keep this antenna clear of
snow and ice build up for clear radio reception.
The performance of your XM system may be affected if
your sunroof is open.
Vehicle Customization Settings
Your audio system can be used to control vehicle
customization settings using the DISP button when the
radio is off. See
Vehicle Personalization on page 2-41for more information.
Chime Level Adjustment
Chime level adjustment is only available on RDS radios.
The radio is the vehicle chime producer. The chime is
produced from the driver's side front door speakers.
To change the volume level, press and hold
pushbutton 6 with the ignition on and the radio power
off. The chime volume level will change from the normal
level to loud, and LOUD will be displayed on the
radio. To change back to the default or normal setting,
press and hold pushbutton 6 again. The chime level
will change from the loud level to normal, and NORMAL
will be displayed. Each time the chime volume is
changed, three chimes will sound as an example of the
new volume selected. Removing the radio and not
replacing it with a factory radio or chime module will
disable vehicle chimes.
3-94
Page 269 of 394

How to Reset the Change Engine Oil
Message
The GM Oil Life System calculates when to change
your engine oil and ®lter based on vehicle use. Anytime
your oil is changed, reset the system so it can
calculate when the next oil change is required. If a
situation occurs where you change your oil prior to a
CHANGE ENGINE OIL message being turned on, reset
the system.
After changing the engine oil, the system must be reset.
To reset the CHANGE ENGINE OIL message use
one of the following procedures:
Using the Radio
1. Turn the ignition to ACC or ON, with the radio off.
2. Press and hold the TUNE DISP button on the radio
for at least ®ve seconds until SETTINGS is
displayed.
3. Press the SEEK PSCAN up or down arrow to scroll
through the main menu.
4. Scroll until OIL LIFE appears on the display.
5. Press the 1 PREV or 2 NEXT buttons to enter the
submenu. RESET will be displayed.
6. Press the TUNE DISP button to reset. A chime will
be heard to verify the new setting and DONE will
be displayed for one second.
7. Once the indicator has been reset, scroll until EXIT
appears on the display.
8. Press the TUNE DISP button to exit programming.
A chime will be heard to verify the exit.
5-21
Page 291 of 394
Windshield Washer Fluid
What to Use
When you need windshield washer ¯uid, be sure to read
the manufacturer's instructions before use. If you will
be operating your vehicle in an area where the
temperature may fall below freezing, use a ¯uid that has
sufficient protection against freezing.
Adding Washer Fluid
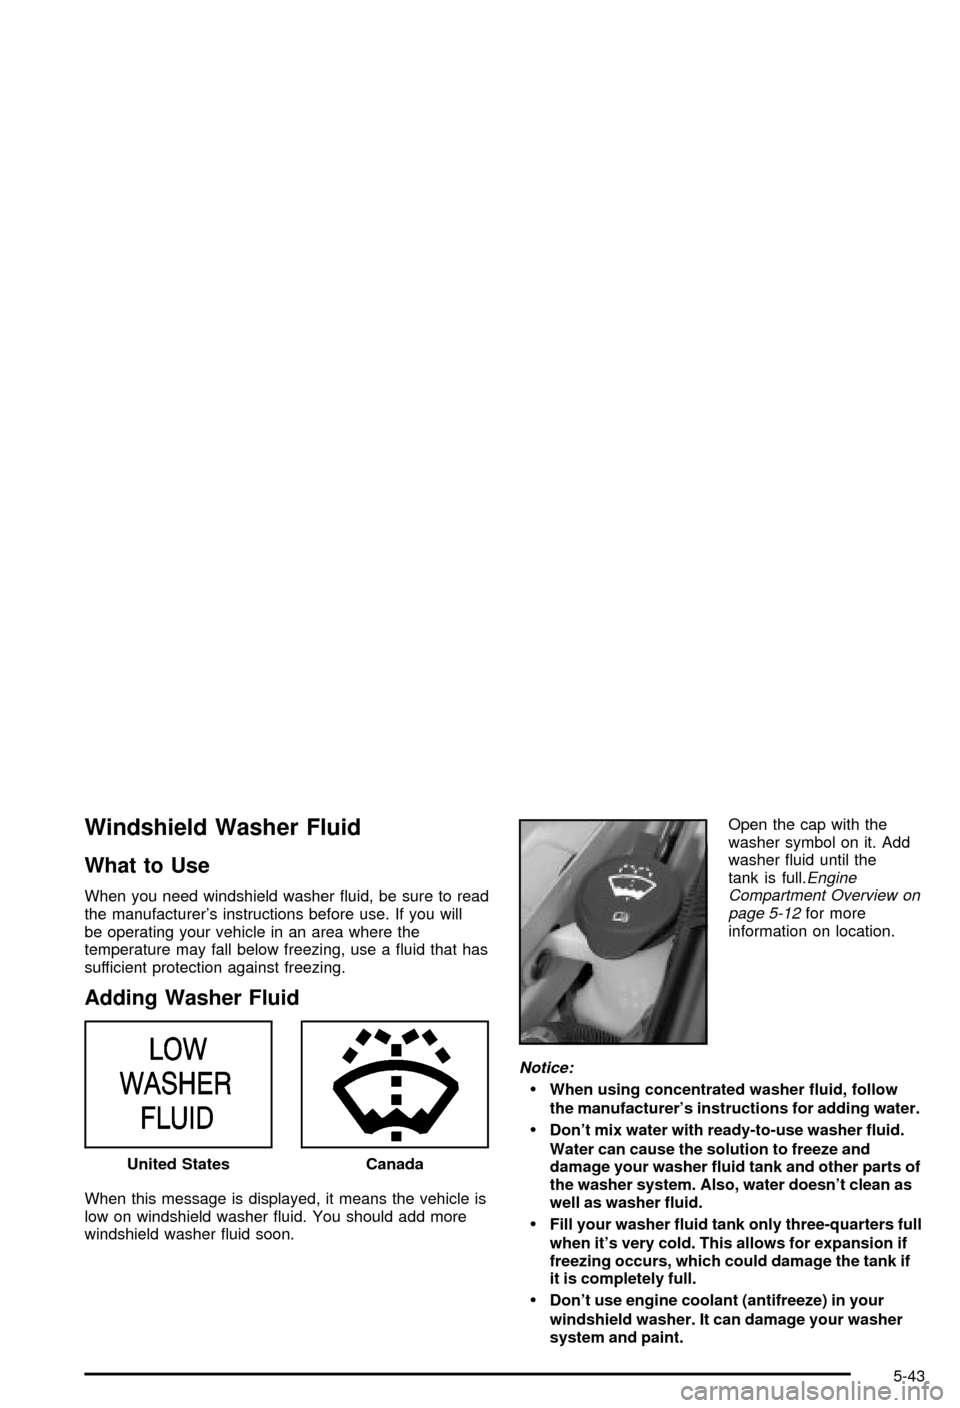
When this message is displayed, it means the vehicle is
low on windshield washer ¯uid. You should add more
windshield washer ¯uid soon.Open the cap with the
washer symbol on it. Add
washer ¯uid until the
tank is full.
Engine
Compartment Overview on
page 5-12
for more
information on location.
Notice:
·When using concentrated washer ¯uid, follow
the manufacturer's instructions for adding water.
·Don't mix water with ready-to-use washer ¯uid.
Water can cause the solution to freeze and
damage your washer ¯uid tank and other parts of
the washer system. Also, water doesn't clean as
well as washer ¯uid.
·Fill your washer ¯uid tank only three-quarters full
when it's very cold. This allows for expansion if
freezing occurs, which could damage the tank if
it is completely full.
·Don't use engine coolant (antifreeze) in your
windshield washer. It can damage your washer
system and paint. United States
Canada
5-43
Page 309 of 394

Tire Pressure Monitor System
If your vehicle has the tire pressure monitor system,
it can alert you to a large change in the pressure of
one tire. The system²learnsº the pressure for each tire
throughout the operating speed range of your vehicle.
The system normally takes between 45 and 90 minutes
of driving to learn the tire pressures. This time may
be longer depending on your individual driving habits.
Learning need not be accumulated during a single
trip. Once learned, the system will remember the tire
pressures until the system is recalibrated.
After the system has learned tire pressures with
properly in¯ated tires, the LOW TIRE PRESSURE
message will come on if the pressure in one tire
becomes 12 psi (83 kPa) lower than the other
three tires. The tire pressure monitor system won't alert
you if the pressure in more than one tire is low, if the
system is not properly calibrated, or if the vehicle
is moving faster than 70 mph (110 km/h).
The tire pressure monitor system detects differences
in tire rotation speeds that are caused by changes in tire
pressure. The system can alert you about a low
tire Ð but it doesn't replace normal tire maintenance.
See
Tires on page 5-59.When the LOW TIRE PRESSURE message comes on,
you should stop as soon as you can and check all
your tires for damage. (If a tire is ¯at, see
If a Tire Goes
Flat on page 5-69.) Also check the tire pressure in all
four tires as soon as you can. SeeIn¯ation -- Tire
Pressure on page 5-60.
The LOW TIRE PRESSURE message will also be
displayed (while the ignition is on) until you reset
(calibrate) the system.
Don't reset the tire pressure monitor system without ®rst
correcting the cause of the problem and checking
and adjusting the pressure in all four tires. If you reset
the system when the tire pressures are incorrect,
the system will not work properly and may not alert you
when a tire is low.
Any time you adjust a tire's pressure, rotate your tires,
or have one or more tires repaired or replaced, you'll
need to reset (calibrate) the tire pressure monitor
system. You'll also need to reset the system whenever
you buy new tires and whenever the vehicle's battery
has been disconnected.
5-61
Page 310 of 394

To reset (calibrate) the system: The tire pressure
monitor system can be reset by turning the exterior lamp
control from OFF to parking lamps three times while
the ignition is in ON. It can also be reset through
the radio using the following steps:
1. Turn the ignition to ACC or ON and turn the
radio off.
2. Press and hold the TUNE DISP button on the radio
for at least ®ve seconds until SETTINGS is
displayed.
3. Press the SEEK PSCAN up or down arrow to scroll
through the main menu.
4. Scroll until TIRE MON appears on the display.
5. Press the 1 PREV or 2 NEXT button to enter the
submenu. RESET will be displayed.
6. Press the TUNE DISP button to reset. A chime will
be heard to verify the new setting and DONE will
be displayed for one second.7. Once the monitor has been reset, scroll until EXIT
appears on the display.
8. Press the TUNE DISP button to exit programming.
A chime will be heard to verify exit.
The system completes the calibration process during
driving.
The system normally takes 15 to 20 minutes of driving
in each of three speed ranges to²learnº tire pressures.
The speed ranges are 15 to 40 mph (25 to 65 km/h),
40 to 65 mph (65 to 105 km/h) and above 65 mph
(105 km/h). When learning is complete, the system will
alert you after two to eight minutes if a tire is 12 psi
(83 kPa) different from the other three tires. Detection
thresholds may be higher and detection times may
be longer on rough roads, curves and at high speeds.
The system is not capable of detection at speeds greater
than 70 mph (110 km/h).
5-62
Page 391 of 394

Safety Belts (cont.)
How to Wear Safety Belts Properly................1-16
Questions and Answers About
Safety Belts.............................................1-15
Rear Safety Belt Comfort Guides for Children
and Small Adults......................................1-26
Rear Seat Passengers.................................1-23
Right Front Passenger Position......................1-23
Safety Belt Extender....................................1-28
Safety Belt Use During Pregnancy.................1-22
Safety Belts Are for Everyone.......................1-10
Safety Chains.................................................4-37
Safety Warnings and Symbols.............................. iii
Scheduled Maintenance..................................... 6-5
Seatback Latches............................................. 1-6
Seat............................................................... 1-6
Head Restraints............................................ 1-6
Seats.............................................................. 1-7
Easy Entry Seat............................................ 1-7
Heated Seats............................................... 1-4
Manual Lumbar............................................. 1-3
Manual........................................................ 1-2
Reclining Seatbacks...................................... 1-4
Seatback Latches.......................................... 1-6
Six-Way Power Seats.................................... 1-3
Split Folding Rear Seat.................................. 1-8
Securing a Child Restraint................................1-43
Designed for the LATCH System...................1-43
Rear Seat Position......................................1-43
Right Front Seat Position..............................1-46Securing a Child Restraint (cont.)
Selecting Outside Air or Recirculation................3-23
Selecting the Fan Speed..................................3-23
Service Bulletins.............................................7-10
Service Manuals............................................... 7-9
Service........................................................... 5-3
Adding Equipment to the Outside of
Your Vehicle.............................................. 5-4
Doing Your Own Work................................... 5-3
Engine Soon Light.......................................3-38
Message....................................................3-49
Publications Ordering Information..................... 7-9
Traction System Warning Message.................3-44
Vehicle Soon Message.................................3-51
Setting Preset Stations....................3-59, 3-70, 3-80
Setting the Time.............................................3-56
Setting the Tone (Bass/Treble)..........3-59, 3-70, 3-80
SETTINGS (Display Current Settings)................2-42
Sheet Metal Damage.......................................5-87
Shifting Into Park (P).......................................2-25
Shifting Out of Park (P)...................................2-27
Skidding........................................................4-14
Some Other Rainy Weather Tips.......................4-18
Special Fabric Cleaning Problems.....................5-83
Speci®cations, Capacities.................................5-98
Speedometer..................................................3-33
Split Folding Rear Seat..................................... 1-8
Starter Switch Check.......................................6-12
Starting Your 3400 V6 Engine...........................2-18
Starting Your 3800 Series II V6 Engine..............2-19
13