Section 8 CHEVROLET MONTE CARLO 2003 6.G Owners Manual
[x] Cancel search | Manufacturer: CHEVROLET, Model Year: 2003, Model line: MONTE CARLO, Model: CHEVROLET MONTE CARLO 2003 6.GPages: 394, PDF Size: 2.73 MB
Page 4 of 394

Vehicle Damage Warnings
Also, in this book you will ®nd these notices:
Notice:These mean there is something that could
damage your vehicle.
A notice will tell you about something that can damage
your vehicle. Many times, this damage would not be
covered by your warranty, and it could be costly.
But the notice will tell you what to do to help avoid
the damage.
When you read other manuals, you might see
CAUTION and NOTICE warnings in different colors
or in different words.
You'll also see warning labels on your vehicle. They use
the same words, CAUTION or NOTICE.
Vehicle Symbols
Your vehicle has components and labels that use
symbols instead of text. Symbols, used on your vehicle,
are shown along with the text describing the operation
or information relating to a speci®c component, control,
message, gage or indicator.
If you need help ®guring out a speci®c name of a
component, gage or indicator, reference the following
topics:
·Seats and Restraint Systems in Section 1
·Features and Controls in Section 2
·Instrument Panel Overview in Section 3
·Climate Controls in Section 3
·Warning Lights, Gages and Indicators in Section 3
·Audio System(s) in Section 3
·Engine Compartment Overview in Section 5
iv
Page 7 of 394

Front Seats......................................................1-2
Manual Seats................................................1-2
Six-Way Power Seats.....................................1-3
Manual Lumbar..............................................1-3
Heated Seats.................................................1-4
Reclining Seatbacks........................................1-4
Head Restraints.............................................1-6
Seatback Latches...........................................1-6
Easy Entry Seat.............................................1-7
Rear Seats.......................................................1-8
Split Folding Rear Seat...................................1-8
Safety Belts...................................................1-10
Safety Belts: They Are for Everyone................1-10
Questions and Answers About Safety Belts......1-15
How to Wear Safety Belts Properly.................1-16
Driver Position..............................................1-16
Safety Belt Use During Pregnancy..................1-22
Right Front Passenger Position.......................1-23
Rear Seat Passengers..................................1-23
Rear Safety Belt Comfort Guides for Children
and Small Adults.......................................1-26
Safety Belt Extender.....................................1-28
Child Restraints.............................................1-29
Older Children..............................................1-29
Infants and Young Children............................1-32Child Restraint Systems.................................1-35
Where to Put the Restraint.............................1-38
Top Strap....................................................1-39
Top Strap Anchor Location.............................1-40
Lower Anchorages and Top Tethers for
Children (LATCH System)...........................1-41
Securing a Child Restraint Designed for the
LATCH System.........................................1-43
Securing a Child Restraint in a Rear
Seat Position............................................1-43
Securing a Child Restraint in the Right Front
Seat Position............................................1-46
Air Bag Systems............................................1-48
Where Are the Air Bags?...............................1-51
When Should an Air Bag In¯ate?....................1-53
What Makes an Air Bag In¯ate?.....................1-53
How Does an Air Bag Restrain?.....................1-54
What Will You See After an Air
Bag In¯ates?............................................1-54
Servicing Your Air Bag-Equipped Vehicle.........1-56
Restraint System Check..................................1-56
Checking Your Restraint Systems...................1-56
Replacing Restraint System Parts After
a Crash...................................................1-57
Section 1 Seats and Restraint Systems
1-1
Page 63 of 394

Replacing Restraint System Parts
After a Crash
{CAUTION:
A crash can damage the restraint systems in
your vehicle. A damaged restraint system may
not properly protect the person using it,
resulting in serious injury or even death in a
crash. To help make sure your restraint
systems are working properly after a crash,
have them inspected and any necessary
replacements made as soon as possible.If you've had a crash, do you need new belts or LATCH
system parts?
After a very minor collision, nothing may be necessary.
But if the belts were stretched, as they would be if
worn during a more severe crash, then you need
new parts.
If the LATCH system was being used during a more
severe crash, you may need new LATCH system parts.
If belts are cut or damaged, replace them. Collision
damage also may mean you will need to have LATCH
system, safety belt or seat parts repaired or replaced.
New parts and repairs may be necessary even if the belt
or LATCH system wasn't being used at the time of
the collision.
If an air bag in¯ates, you'll need to replace air bag
system parts. See the part on the air bag system earlier
in this section.
1-57
Page 65 of 394

Keys...............................................................2-2
Remote Keyless Entry System.........................2-3
Remote Keyless Entry System Operation...........2-4
Doors and Locks.............................................2-8
Door Locks....................................................2-8
Power Door Locks..........................................2-9
Programmable Automatic Door Locks................2-9
Lockout Protection........................................2-10
Leaving Your Vehicle....................................2-10
Trunk..........................................................2-10
Windows........................................................2-12
Power Windows............................................2-13
Sun Visors...................................................2-14
Theft-Deterrent Systems..................................2-14
Content Theft-Deterrent.................................2-14
Passlock
ž....................................................2-16
Starting and Operating Your Vehicle................2-16
New Vehicle Break-In....................................2-16
Ignition Positions..........................................2-17
Starting Your Engine.....................................2-18
Engine Coolant Heater..................................2-20
Automatic Transaxle Operation.......................2-21
Parking Brake..............................................2-24
Shifting Into Park (P).....................................2-25
Shifting Out of Park (P).................................2-27Parking Over Things That Burn.......................2-27
Engine Exhaust............................................2-28
Running Your Engine While You
Are Parked...............................................2-28
Mirrors...........................................................2-29
Manual Rearview Mirror.................................2-29
Manual Rearview Mirror with OnStar
ž..............2-30
Automatic Dimming Rearview Mirror................2-31
Automatic Dimming Rearview Mirror with
OnStar
ž...................................................2-32
Outside Power Mirrors...................................2-33
Outside Convex Mirror...................................2-33
Outside Heated Mirrors..................................2-34
OnStar
žSystem.............................................2-34
HomeLinkžTransmitter...................................2-35
Programming the HomeLinkžTransmitter.........2-36
Storage Areas................................................2-39
Glove Box...................................................2-39
Center Console Storage Area.........................2-39
Rear Storage Area........................................2-39
Convenience Net..........................................2-40
Sunroof.........................................................2-40
Vehicle Personalization...................................2-41
Section 2 Features and Controls
2-1
Page 68 of 394

At times you may notice a decrease in range. This is
normal for any remote keyless entry system. If the
transmitter does not work or if you have to stand closer
to your vehicle for the transmitter to work, try this:
·Check the distance. You may be too far from your
vehicle. You may need to stand closer during
rainy or snowy weather.
·Check the location. Other vehicles or objects may
be blocking the signal. Take a few steps to the
left or right, hold the transmitter higher, and
try again.
·Check to determine if battery replacement or
resynchronization is necessary. See ªBattery
Replacementº and ªResynchronizationº under
Remote Keyless Entry System Operation on
page 2-4.
·If you are still having trouble, see your dealer
or a quali®ed technician for service.
Remote Keyless Entry System
Operation
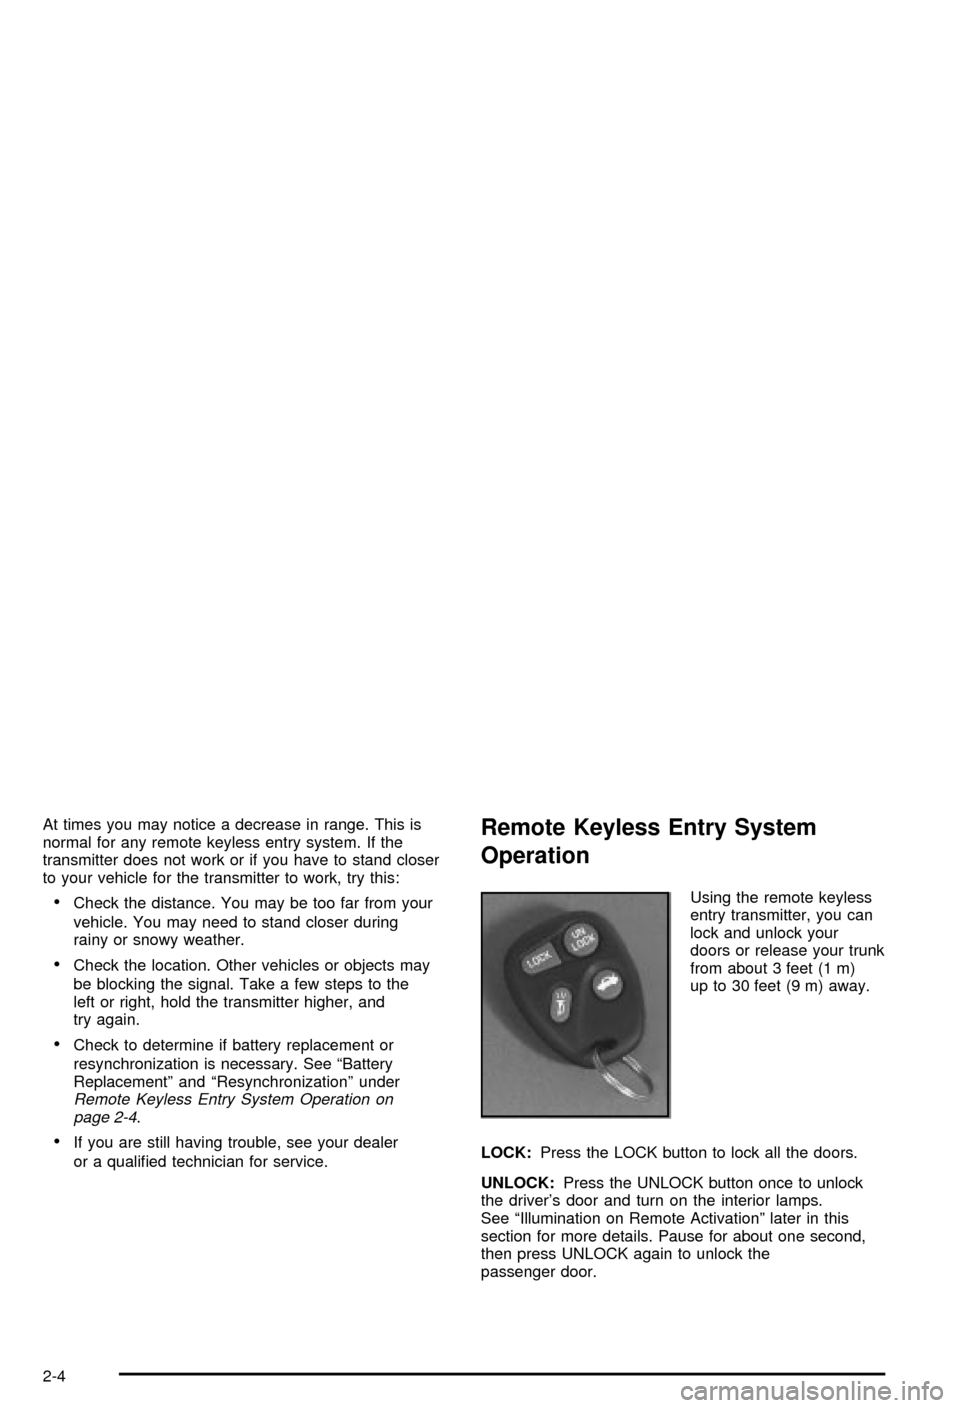
Using the remote keyless
entry transmitter, you can
lock and unlock your
doors or release your trunk
from about 3 feet (1 m)
up to 30 feet (9 m) away.
LOCK:Press the LOCK button to lock all the doors.
UNLOCK:Press the UNLOCK button once to unlock
the driver's door and turn on the interior lamps.
See ªIllumination on Remote Activationº later in this
section for more details. Pause for about one second,
then press UNLOCK again to unlock the
passenger door.
2-4
Page 89 of 394

Notice:Driving with the parking brake on can
cause your rear brakes to overheat. You may have
to replace them, and you could also damage
other parts of your vehicle.
If you are towing a trailer and parking on any hill, see
Towing a Trailer on page 4-34. That section shows what
to do ®rst to keep the trailer from moving.
Shifting Into Park (P)
{CAUTION:
It can be dangerous to get out of your vehicle
if the shift lever is not fully in PARK (P) with
the parking brake ®rmly set. Your vehicle can
roll. If you have left the engine running, the
vehicle can move suddenly. You or others
could be injured. To be sure your vehicle will
not move, even when you are on fairly level
ground, use the steps that follow. If you are
pulling a trailer, see ªTowing a Trailerº in the
Index.1. Hold the brake pedal down with your right foot and
set the parking brake.
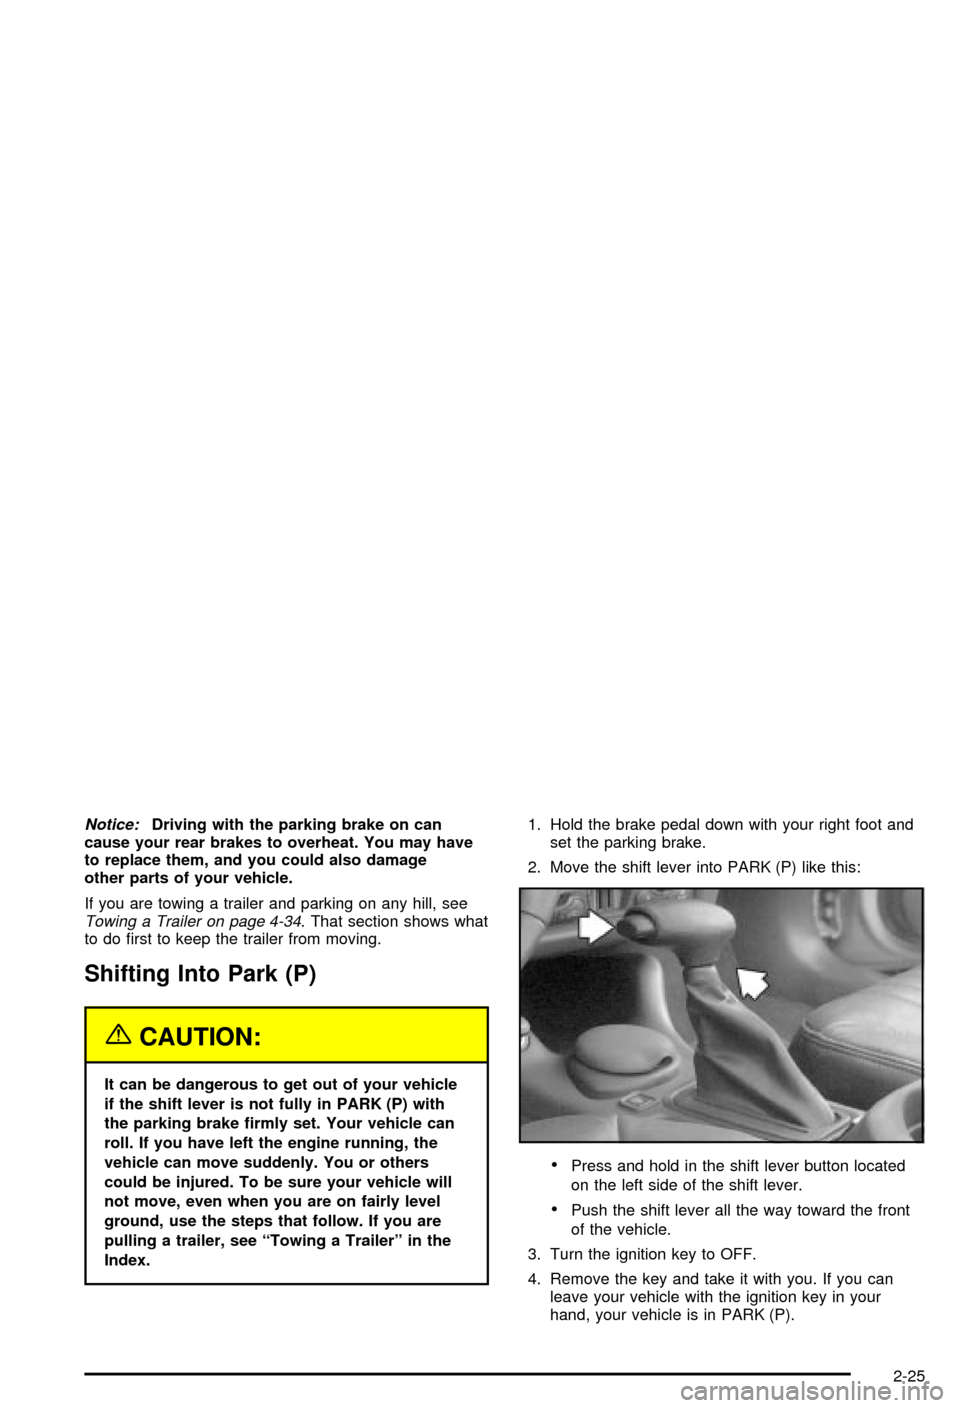
2. Move the shift lever into PARK (P) like this:
·Press and hold in the shift lever button located
on the left side of the shift lever.
·Push the shift lever all the way toward the front
of the vehicle.
3. Turn the ignition key to OFF.
4. Remove the key and take it with you. If you can
leave your vehicle with the ignition key in your
hand, your vehicle is in PARK (P).
2-25
Page 101 of 394

3. Simultaneously press and hold both the desired
button on HomeLinkžand the hand-held transmitter
button. Do not release the buttons until Step 4
has been completed.
Some entry gates and garage door openers may
require you to substitute Step 3 with the procedure
noted in ªGate Operator and Canadian
Programmingº later in this section.
4. The indicator light will ¯ash slowly at ®rst and then
rapidly after HomeLink
žsuccessfully receives the
frequency signal from the hand-held transmitter.
Release both buttons.
5. Press and hold the newly-trained HomeLink
žbutton
and observe the indicator light.
If the indicator light stays on constantly,
programming is complete and your device should
activate when the HomeLink
žbutton is pressed and
released.
To program the remaining two HomeLink
žbuttons,
begin with Step 2 under ªProgramming HomeLinkž.º
Do not repeat Step 1 as this will erase all of the
programmed channels.If the indicator light blinks rapidly for two seconds
and then turns to a constant light, continue with
Steps 6 through 8 following to complete the
programming of a rolling-code equipped device
(most commonly, a garage door opener).
6. Locate in the garage, the garage door opener
receiver (motor-head unit). Locate the ªLearnº
or ªSmartº button. This can usually be found where
the hanging antenna wire is attached to the
motor-head unit.
7. Firmly press and release the ªLearnº or ªSmartº
button. The name and color of the button may
vary by manufacturer.
You will have 30 seconds to start Step 8.
8. Return to the vehicle. Firmly press and hold the
programmed HomeLink
žbutton for two seconds,
then release. Repeat the press/hold/release
sequence a second time, and depending on the
brand of the garage door opener (or other rolling
code device), repeat this sequence a third time
to complete the programming.
HomeLink
žshould now activate your rolling-code
equipped device.
To program the remaining two HomeLink
žbuttons,
begin with Step 2 of ªProgramming HomeLinkž.º Do not
repeat Step 1.
2-37
Page 106 of 394

Programming Mode
To reset or customize the features, ®rst enter the
vehicle customization main menu. To enter the main
menu, do the following:
1. Turn the ignition to ACC or ON. The radio must
be off.
2. Press and hold the TUNE DISP knob on the radio
for at least ®ve seconds until SETTINGS is
displayed.
3. Press the SEEK PSCAN up or down arrows to
scroll through each available feature on your
main menu.
4. Press the 1 PREV or 2 NEXT buttons to scroll
through the lower menu. An asterisk (*) will
appear next to the item that is the current setting.
The following information shows how to reset or
customize features after entering the main menu.
SETTINGS (Display Current Settings)
This displays all current settings.
OIL LIFE (GM Oil Life System Reset)
This feature allows you to reset the GM Oil Life System
Monitor after an oil change. SeeEngine Oil on
page 5-16. Be careful not to reset the OIL LIFE system
at any time other than when the oil has been changed.
To clear the CHANGE ENGINE OIL light from the
instrument panel cluster and reset the oil life system, do
the following:
1. Scroll, using the SEEK PSCAN up or down arrows,
until OIL LIFE appears on the display.
2. Press the 1 PREV or 2 NEXT button to enter the
submenu. RESET will then be displayed.
3. Press the TUNE DISP knob to reset. A chime will
be heard to verify the new setting and DONE will
be displayed for one second.
The CHANGE ENGINE OIL light is now reset. You can
either exit the programming mode by following the
instructions later in this section or program the next
feature available on your vehicle.
2-42
Page 107 of 394

TIRE MON (Tire In¯ation Monitor
Reset)
This feature allows you to reset the tire pressure
monitor after checking all tire pressures. SeeTires on
page 5-59. To clear the LOW TIRE PRESSURE
light from the instrument panel cluster and reset the low
tire pressure monitor, do the following:
1. Scroll, using the SEEK PSCAN up or down arrows,
until TIRE MON appears on the display.
2. Press the 1 PREV or 2 NEXT button to enter the
submenu. RESET will be displayed.
3. Press the TUNE DISP button to reset. A chime will
be heard to verify the new setting and DONE will
be displayed for one second.
The low tire pressure monitor is now reset. You can
either exit the programming mode by following the
instructions later in this section or program the next
feature available on your vehicle.
LT DELAY (Delayed Headlamp
Illumination)
This feature allows the vehicle's headlamps and parking
lamps to stay on for a ®xed amount of time after you
exit the vehicle, or for them to turn off immediately.
Programmable Modes
Mode 1:OFF
Mode 2:30 SEC
Mode 3:60 SEC
Your vehicle was originally programmed to Mode 2.
The mode may have been changed since then.
To determine the current mode, or to change the mode,
do the following:
1. Scroll, using the SEEK PSCAN up or down arrows,
until LT DELAY appears on the display.
2. Press the 1 PREV or 2 NEXT button to enter the
submenu. The current selection will have an
asterisk (*) next to it. If you do not wish to change
the current mode, you can either exit the
programming mode by following the directions later
in this section or program the next feature
available on your vehicle.
3. Scroll, using the 1 PREV or 2 NEXT buttons,
through the modes to change the current mode.
4. With your preference displayed, press the TUNE
DISP button to select. A chime will be heard to
verify the new setting. The new selection will
be displayed with an asterisk (*) for one second.
2-43
Page 108 of 394

The mode you selected is now set. You can either exit
the programming mode by following the instructions
later in this section or program the next feature available
on your vehicle.
AUTOLOCK (Automatic Door Lock
and Unlock)
With the ignition in ON and the vehicle's doors closed,
this feature allows for the vehicle doors to automatically
lock and unlock when the driver shifts the vehicle's
transaxle into and out of PARK (P), or to turn the
feature off.
Programmable Modes
Mode 1:OFF
Mode 2:LCK ONLY ± Automatic door lock on/automatic
door unlock off.
Mode 3:DRVR UNL ± Automatic door lock
on/automatic door unlock on (driver's door only).
Mode 4:ALL UNL ± Automatic door lock on/automatic
door unlock on.Your vehicle was originally programmed to Mode 4.
The mode may have been changed since then.
To determine the current mode, or to change the mode,
do the following:
1. Scroll, using the SEEK PSCAN up or down arrows,
until AUTOLOCK appears on the display.
2. Press the 1 PREV or 2 NEXT button to enter the
submenu. The current selection will have an
asterisk (*) next to it. If you do not wish to change
the current mode, you can either exit the
programming mode by following the directions later
in this section or program the next feature
available on your vehicle.
3. Scroll, using the 1 PREV or 2 NEXT buttons,
through the modes to change the current mode.
4. With your preference displayed, press the TUNE
DISP button to select. A chime will be heard to
verify the new setting. The new selection will
be displayed with an asterisk (*) for one second.
The mode you selected is now set. You can either exit
the programming mode by following the instructions
later in this section or program the next feature available
on your vehicle.
2-44