tow bar CHEVROLET MONTE CARLO 2003 6.G Owners Manual
[x] Cancel search | Manufacturer: CHEVROLET, Model Year: 2003, Model line: MONTE CARLO, Model: CHEVROLET MONTE CARLO 2003 6.GPages: 394, PDF Size: 2.73 MB
Page 9 of 394

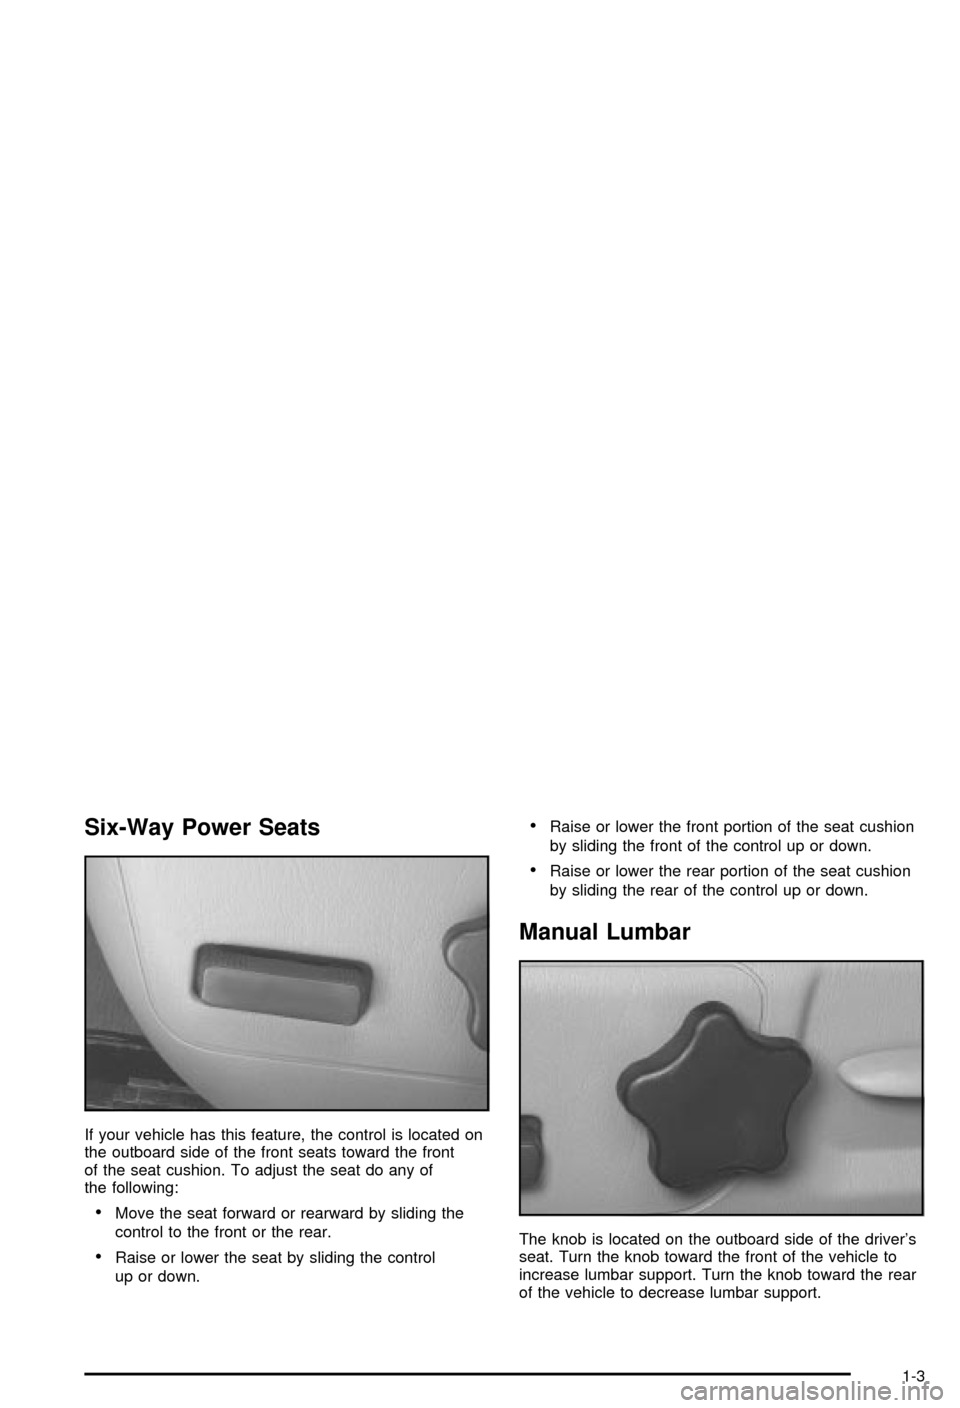
Six-Way Power Seats
If your vehicle has this feature, the control is located on
the outboard side of the front seats toward the front
of the seat cushion. To adjust the seat do any of
the following:
·Move the seat forward or rearward by sliding the
control to the front or the rear.
·Raise or lower the seat by sliding the control
up or down.
·Raise or lower the front portion of the seat cushion
by sliding the front of the control up or down.
·Raise or lower the rear portion of the seat cushion
by sliding the rear of the control up or down.
Manual Lumbar
The knob is located on the outboard side of the driver's
seat. Turn the knob toward the front of the vehicle to
increase lumbar support. Turn the knob toward the rear
of the vehicle to decrease lumbar support.
1-3
Page 335 of 394

Cleaning Aluminum Wheels
Keep your wheels clean using a soft clean cloth with
mild soap and water. Rinse with clean water. After
rinsing thoroughly, dry with a soft clean towel. A wax
may then be applied.
The surface of these wheels is similar to the painted
surface of your vehicle. Do not use strong soaps,
chemicals, abrasive polishes, abrasive cleaners,
cleaners with acid, or abrasive cleaning brushes on
them because you could damage the surface. Do not
use chrome polish on aluminum wheels.
Do not take your vehicle through an automatic car wash
that has silicone carbide tire cleaning brushes. These
brushes can also damage the surface of these wheels.
Cleaning Tires
To clean your tires, use a stiff brush with tire cleaner.
Notice:When applying a tire dressing, always take
care to wipe off any overspray or splash from all
painted surfaces on the body or wheels of the
vehicle. Petroleum-based products may damage the
paint ¬ģnish and tires.
Sheet Metal Damage
If your vehicle is damaged and requires sheet metal
repair or replacement, make sure the body repair shop
applies anti-corrosion material to parts repaired or
replaced to restore corrosion protection.
Original manufacturer replacement parts will provide the
corrosion protection while maintaining the warranty.
Finish Damage
Any stone chips, fractures or deep scratches in the
¬ģnish should be repaired right away. Bare metal
will corrode quickly and may develop into major repair
expense.
Minor chips and scratches can be repaired with touch-up
materials avaliable from your dealer. Larger areas of
¬ģnish damage can be corrected in your dealer's
body and paint shop.
5-87
Page 387 of 394

Locks............................................................. 2-8
Door........................................................... 2-8
Leaving Your Vehicle....................................2-10
Lockout Protection.......................................2-10
Power Door.................................................. 2-9
Programmable Automatic Door Locks............... 2-9
Loss of Control...............................................4-13
Low Brake Fluid Warning Message....................3-51
Low Engine Oil Level Message.........................3-47
Low Fuel Warning Message.............................3-50
Low Oil Pressure Message...............................3-46
Low Tire Message..........................................3-48
Low Washer Fluid Warning Message.................3-50
LT DELAY (Delayed Headlamp Illumination)........2-43
Lumbar........................................................... 1-3
Manual Controls............................................ 1-3
M
Maintenance, Normal Replacement Parts..........5-100
Maintenance Schedule.....................................6-10
At Each Fuel Fill.........................................6-10
At Least Once a Month................................6-10
At Least Once a Year..................................6-11
At Least Twice a Year..................................6-11
Brake System Inspection..............................6-15
Engine Cooling System Inspection.................6-15
Exhaust System Inspection...........................6-14
Fuel System Inspection................................6-15Maintenance Schedule (cont.)
How This Section is Organized....................... 6-3
Introduction.................................................. 6-2
Maintenance Requirements............................. 6-2
Part A - Scheduled Maintenance Services......... 6-4
Part B - Owner Checks and Services.............6-10
Part C - Periodic MaintenanceInspections......6-14
Part D - Recommended Fluids and
Lubricants...............................................6-16
Part E - Maintenance Record........................6-17
Scheduled Maintenance................................. 6-5
Steering, Suspension and Front Drive Axle
Boot and Seal Inspection..........................6-14
Throttle System Inspection............................6-15
Using Your................................................... 6-4
Your Vehicle and the Environment................... 6-2
Maintenance When Trailer Towing.....................4-40
Making Turns.................................................4-38
Malfunction Indicator Light................................3-38
Manual Lumbar Controls.................................... 1-3
Manual Seats................................................... 1-2
Matching Transmitter(s) to Your Vehicle............... 2-6
Message.......................................................3-45
Battery Warning..........................................3-45
Center.......................................................3-44
Change Engine Oil......................................3-47
Door Ajar Warning.......................................3-48
Highbeam Out Warning................................3-52
Hot Coolant Temperature Warning..................3-46
Low Brake Fluid Warning..............................3-51
9