keyless CHEVROLET MONTE CARLO 2006 6.G User Guide
[x] Cancel search | Manufacturer: CHEVROLET, Model Year: 2006, Model line: MONTE CARLO, Model: CHEVROLET MONTE CARLO 2006 6.GPages: 392, PDF Size: 2.34 MB
Page 91 of 392
Theft-Deterrent Systems
Vehicle theft is big business, especially in some cities.
Although your vehicle has a number of theft-deterrent
features, we know that nothing we put on it can make it
impossible to steal.
Content Theft-Deterrent
Your vehicle may have the optional content
theft-deterrent alarm system.
To activate the theft-deterrent system:
1. Open the door.
2. Lock the door with the power door lock switch or the
remote keyless entry transmitter. If you are using the
remote keyless entry transmitter, the door does not
need to be open.
3. Close all doors.
Once armed, the alarm will go off if someone tries to
enter the vehicle without using the remote keyless entry
transmitter or a key or turns the ignition on with an
incorrect key. The horn will sound and the turn signal
lamps will �ash for approximately two minutes.
When the alarm is armed, the trunk may be opened with
the remote keyless entry transmitter. The power door lock
switches are disabled and the doors remain locked. You
must use your remote keyless entry transmitter or your
key to unlock the doors when the system is armed.
Arming with the Power Lock Switch
The alarm system will arm when you use either power
lock switch to lock the doors while any door or the trunk
is open and the key is removed from the ignition.
Arming with the Remote Keyless Entry
Transmitter
The alarm system will arm when you use your remote
keyless entry transmitter to lock the doors, if the
key is not in the ignition.
Disarming with the Remote Keyless
Entry Transmitter
The alarm system will disarm when you use your
remote keyless entry transmitter to unlock the doors.
The �rst time a remote unlock command is received,
three �ashes will be seen and three horn chirps
heard to indicate an alarm condition has occurred since
last arming.
Disarming with Your Key
The alarm system will disarm when you use your key to
unlock the doors or insert your key in ignition and
turn it from the OFF position.
2-15
Page 132 of 392
Entry Lighting
Your vehicle may have the entry lighting feature. Your
courtesy lamps will come on and stay on for a set time
whenever you press UNLOCK on the remote keyless
entry transmitter, if equipped.
If you open a door, the lamps will stay on while it’s open
and then turn off automatically about 25 seconds after
you close it. If you press UNLOCK and don’t open
a door, the lamps will turn off after about 40 seconds.
Illuminated entry includes a feature called theater
dimming. With theater dimming, the lamps don’t just
turn off at the end of the delay time. Instead, they slowly
dim after the delay time until they go out. The delay
time is canceled if you turn the ignition key to RUN
or press the power door lock switch.
When the ignition is on, illuminated entry is inactive,
which means the courtesy lamps won’t come on unless
a door is opened.
Delayed Entry Lighting
Delayed entry lighting illuminates the interior for a
period of time after all the doors have been closed.The ignition must be off for delayed entry lighting to
work. Immediately after both doors have been closed,
the delayed entry lighting feature will continue to
work until one of the following occurs:
The ignition is in RUN.
The doors are locked.
An illumination period of 20 seconds has elapsed.
If during the illumination period a door is opened,
the timed illumination period will be canceled and the
interior lamps will remain on.
Delayed Exit Lighting
This feature illuminates the interior for a period of time
after the key is removed from the ignition.
The ignition must be off for delayed exit lighting to work.
When the key is removed, interior illumination will
activate and remain on until one of the following occurs:
The ignition is in RUN.
The power door locks are activated.
An illumination period of 20 seconds has elapsed.
If during the illumination period a door is opened,
the timed illumination period will be canceled and the
interior lamps will remain on because a door is open.
3-16
Page 156 of 392
DIC Operation and Displays
The DIC has different displays which can be accessed
by pressing the DIC buttons located on the instrument
panel, to the right of the instrument panel cluster.
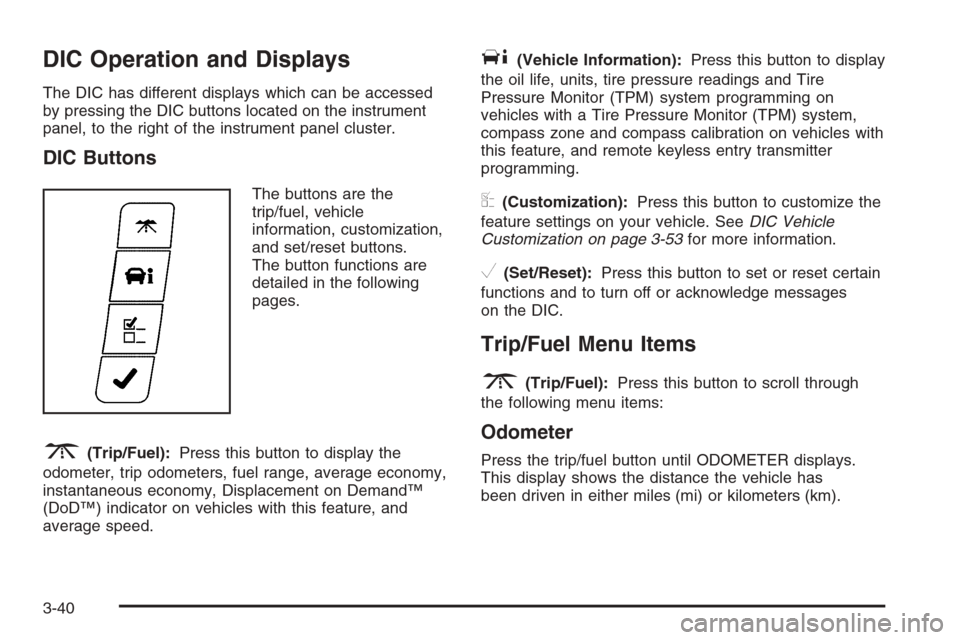
DIC Buttons
The buttons are the
trip/fuel, vehicle
information, customization,
and set/reset buttons.
The button functions are
detailed in the following
pages.
3(Trip/Fuel):Press this button to display the
odometer, trip odometers, fuel range, average economy,
instantaneous economy, Displacement on Demand™
(DoD™) indicator on vehicles with this feature, and
average speed.
T(Vehicle Information):Press this button to display
the oil life, units, tire pressure readings and Tire
Pressure Monitor (TPM) system programming on
vehicles with a Tire Pressure Monitor (TPM) system,
compass zone and compass calibration on vehicles with
this feature, and remote keyless entry transmitter
programming.
U(Customization):Press this button to customize the
feature settings on your vehicle. SeeDIC Vehicle
Customization on page 3-53for more information.
V(Set/Reset):Press this button to set or reset certain
functions and to turn off or acknowledge messages
on the DIC.
Trip/Fuel Menu Items
3
(Trip/Fuel):Press this button to scroll through
the following menu items:
Odometer
Press the trip/fuel button until ODOMETER displays.
This display shows the distance the vehicle has
been driven in either miles (mi) or kilometers (km).
3-40
Page 160 of 392
Learn Tire Positions
If your vehicle has a Tire Pressure Monitor (TPM) system,
after rotating the tires or after replacing a tire or sensor,
the system must re-learn the tire positions. To re-learn
the tire positions, seeTire Pressure Monitor System on
page 5-62.SeeTire Inspection and Rotation on
page 5-66andDIC Warnings and Messages on
page 3-46for more information.
Compass Zone
Your vehicle may have this feature. Under certain
circumstances, such as during a long distance
cross-country trip, it will be necessary to compensate for
compass variance and reset the zone. To change the
compass zone through the DIC, seeDIC Compass
on page 3-45.
Compass Calibration
The compass can be manually calibrated. To calibrate
the compass through the DIC, seeDIC Compass
on page 3-45.
Remote Key
This display allows you to match the remote keyless
entry transmitter to your vehicle. To match a remote
keyless entry transmitter to your vehicle, do the
following:
1. Press the vehicle information button until
PRESS
VTO RELEARN REMOTE KEY displays.
2. Press the set/reset button.
The message REMOTE KEY LEARNING ACTIVE
will display.
3. Press and hold the lock and unlock buttons on the
�rst transmitter at the same time for approximately
15 seconds.
A chime will sound indicating that the transmitter is
matched.
4. To match additional transmitters at this time, repeat
Step 3.
Each vehicle can have a maximum of eight
transmitters matched to it.
5. To exit the programming mode, you must cycle the
key to OFF.
Blank Display
This display shows no information.
3-44
Page 166 of 392
REMOTE KEY LEARNING ACTIVE
This message will display while you are matching a
remote keyless entry transmitter to your vehicle.
See “Matching Transmitter(s) to Your Vehicle” under
Remote Keyless Entry System Operation on page 2-4
andDIC Operation and Displays on page 3-40for more
information.
REPLACE BATTERY IN REMOTE KEY
This message will display when the battery in the remote
keyless entry transmitter needs to be replaced. To
replace the battery, see “Battery Replacement” under
Remote Keyless Entry System Operation on page 2-4.
SERVICE A/C (Air Conditioning)
SYSTEM
This message will display when the electronic sensors
that control the air conditioning and heating systems are
no longer working. Have the climate control system
serviced by your GM dealer if you notice a drop
in heating and air conditioning efficiency.
SERVICE AIR BAG
This message will display when there is a problem with
the airbag system. Have your vehicle serviced by
your GM dealer immediately. SeeAirbag Readiness
Light on page 3-27for more information.
SERVICE BATTERY CHARGING
SYSTEM
This message will display when there is a problem with
the generator and battery charging systems. Driving
with this problem could drain your battery. Turn off all
unnecessary accessories. Stop and turn off the
vehicle as soon as it is safe to do so. Have the electrical
system checked by your GM dealer immediately.
SERVICE BRAKE SYSTEM
This message will display when service is required on
the brake system. Have the brake system serviced
by your GM dealer as soon as possible. The brake
system warning light will also appear on the instrument
panel cluster when this message appears on the
DIC. SeeBrake System Warning Light on page 3-31.
SERVICE POWER STEERING
This message will display when a problem is detected
with the power steering system. When this message
is displayed, you may notice that the effort required to
steer the vehicle increases or feels heavier, but you will
still be able to steer the vehicle. Have your vehicle
serviced by your GM dealer immediately.
3-50
Page 171 of 392
ALL AT KEY OUT:All of the doors will unlock when
the key is taken out of the ignition.
ALL IN PARK (default):All of the doors will unlock
when the vehicle is shifted into PARK (P).
NO CHANGE:No change will be made to this feature.
The current setting will remain.
Select one of the available choices and press the
set/reset button while it is displayed on the DIC to
select it.
REMOTE DOOR LOCK
This feature allows you to select the type of feedback you
will receive when locking the vehicle with the remote
keyless entry transmitter. You will not receive feedback
when locking the vehicle with the remote keyless entry
transmitter if any of the doors are open. SeeRemote
Keyless Entry System Operation on page 2-4for more
information.
Press the customization button until REMOTE DOOR
LOCK appears on the DIC display. Press the set/reset
button to access the settings for this feature. Then
press the customization button to scroll through
the following choices:
HORN & LIGHTS OFF:There will be no feedback
when you press the lock button on the remote keyless
entry transmitter.LIGHTS ONLY:The exterior lamps will �ash when you
press the lock button on the remote keyless entry
transmitter.
HORN ONLY:The horn will sound on the second press
of the lock button on the remote keyless entry
transmitter.
HORN & LIGHTS ON (default):The exterior lamps will
�ash when you press the lock button on the remote
keyless entry transmitter, and the horn will sound when
the lock button is pressed again within �ve seconds
of the previous command.
NO CHANGE:No change will be made to this feature.
The current setting will remain.
Select one of the available choices and press the
set/reset button while it is displayed on the DIC to
select it.
REMOTE DOOR UNLOCK
This feature allows you to select the type of feedback
you will receive when unlocking the vehicle with
the remote keyless entry transmitter. You will not receive
feedback when unlocking the vehicle with the remote
keyless entry transmitter if the doors are open. See
Remote Keyless Entry System Operation on page 2-4
for more information.
3-55
Page 172 of 392
Press the customization button until REMOTE DOOR
UNLOCK appears on the DIC display. Press the
set/reset button to access the settings for this feature.
Then press the customization button to scroll through
the following choices:
LIGHTS OFF:The exterior lamps will not �ash when
you press the unlock button on the remote keyless entry
transmitter.
LIGHTS ON (default):The exterior lamps will �ash
when you press the unlock button on the remote keyless
entry transmitter.
NO CHANGE:No change will be made to this feature.
The current setting will remain.
Select one of the available choices and press the
set/reset button while it is displayed on the DIC to
select it.
EXIT LIGHTING
If it is dark enough outside, this feature allows you to
select the amount of time you want the exterior lamps to
remain on. This happens after the vehicle is unlocked
using the remote keyless entry transmitter or if the
vehicle key is turned to OFF from RUN.Press the customization button until EXIT LIGHTING
appears on the DIC display. Press the set/reset button to
access the settings for this feature. Then press the
customization button to scroll through the following
choices:
OFF:The exterior lamps will not turn on.
30 SECONDS (default):The exterior lamps will stay on
for 30 seconds.
1 MINUTE:The exterior lamps will stay on for
one minute.
2 MINUTES:The exterior lamps will stay on for
two minutes.
NO CHANGE:No change will be made to this feature.
The current setting will remain.
Select one of the available choices and press the
set/reset button while it is displayed on the DIC to
select it.APPROACH LIGHTING
This feature allows you to select whether or not to have
the exterior lights turn on brie�y during low light
periods after unlocking the vehicle using the remote
keyless entry transmitter.
3-56
Page 173 of 392
Press the customization button until APPROACH
LIGHTING appears on the DIC display. Press the
set/reset button to access the settings for this feature.
Then press the customization button to scroll through
the following choices:
OFF:The exterior lights will not turn on when you
unlock the vehicle with the remote keyless entry
transmitter.
ON (default):If it is dark enough outside, the exterior
lights will turn on brie�y when you unlock the vehicle
with the remote keyless entry transmitter.
The lights will remain on for 20 seconds or until the lock
button on the remote keyless entry transmitter is
pressed, or the vehicle is no longer off. SeeRemote
Keyless Entry System Operation on page 2-4for more
information.
NO CHANGE:No change will be made to this feature.
The current setting will remain.
Select one of the available choices and press the
set/reset button while it is displayed on the DIC to
select it.CHIME VOLUME
This feature allows you to select the volume level of
the chime.
Press the customization button until CHIME VOLUME
appears on the DIC display. Press the set/reset button to
access the settings for this feature. Then press the
customization button to scroll through the following
choices:
NORMAL (default):The chime volume will be set to a
normal level.
LOUD:The chime volume will be set to a loud level.
NO CHANGE:No change will be made to this feature.
The current setting will remain.
Select one of the available choices and press the
set/reset button while it is displayed on the DIC to
select it.
3-57
Page 174 of 392
REMOTE START
If your vehicle has this feature, it allows you to turn the
remote start off or on. The remote start feature allows
you to start the engine from outside of the vehicle using
your remote keyless entry transmitter. See “Remote
Vehicle Start” underRemote Keyless Entry System
Operation on page 2-4for more information.
Press the customization button until REMOTE START
appears on the DIC display. Press the set/reset button to
access the settings for this feature. Then press the
customization button to scroll through the following
choices:
OFF:The remote start feature will be disabled.
ON (default):The remote start feature will be enabled.
NO CHANGE:No change will be made to this
feature. The current setting will remain.
Select one of the available choices and press the
set/reset button while it is displayed on the DIC to
select it.
FACTORY SETTINGS
This feature allows you to set all of the customization
features back to their factory default settings.
Press the customization button until FACTORY
SETTINGS appears on the DIC display. Press the
set/reset button to access the settings for this feature.
Then press the customization button to scroll through
the following choices:
RESTORE ALL (default):The customization features
will be set to their factory default settings.
DO NOT RESTORE:The customization features will
not be set to their factory default settings.
Select one of the available choices and press the
set/reset button while it is displayed on the DIC to
select it.
EXIT FEATURE SETTINGS
This feature allows you to exit the FEATURE
SETTINGS menu.
Press the customization button until FEATURE
SETTINGS PRESS
VTO EXIT appears in the DIC
display. Press the set/reset button to exit the menu.
If you do not exit, pressing the customization button
again will return you to the beginning of the FEATURE
SETTINGS menu.
3-58
Page 384 of 392
Gasoline
Octane........................................................ 5-5
Speci�cations............................................... 5-5
Glove Box.....................................................2-39
GM Mobility Reimbursement Program.................. 7-5
H
Hazard Warning Flashers................................... 3-6
Head Restraints............................................... 1-6
Headlamp
Aiming .......................................................5-47
Headlamp Wiring............................................5-94
Headlamps
Bulb Replacement.......................................5-47
Daytime Running Lamps/Automatic
Headlamp System....................................3-14
Delayed.....................................................3-14
Flash-to-Pass............................................... 3-8
Halogen Bulbs............................................5-47
Headlamps, Front Turn Signal, Sidemarker,
and Parking Lamps..................................5-48
High/Low Beam Changer................................ 3-8
Heated Seats................................................... 1-3
Heater...........................................................3-19
Highbeam On Light.........................................3-38
Highway Hypnosis...........................................4-22
Hill and Mountain Roads..................................4-22Hood
Checking Things Under................................5-10
Release.....................................................5-11
Horn ............................................................... 3-6
How to Use This Manual...................................... ii
How to Wear Safety Belts Properly...................1-16I
Ignition Positions.............................................2-18
Infants and Young Children, Restraints...............1-32
In�ation - Tire Pressure...................................5-60
Instrument Panel
Overview..................................................... 3-4
Instrument Panel (I/P)
Brightness..................................................3-15
Cluster.......................................................3-25
J
Jump Starting.................................................5-43
K
Keyless Entry System....................................... 2-3
Keys............................................................... 2-2
6