mirror CHEVROLET MONTE CARLO 2006 6.G Owners Manual
[x] Cancel search | Manufacturer: CHEVROLET, Model Year: 2006, Model line: MONTE CARLO, Model: CHEVROLET MONTE CARLO 2006 6.GPages: 392, PDF Size: 2.34 MB
Page 1 of 392
Seats and Restraint Systems........................... 1-1
Front Seats
............................................... 1-2
Rear Seats
............................................... 1-9
Safety Belts
.............................................1-11
Child Restraints
.......................................1-29
Airbag System
.........................................1-54
Restraint System Check
............................1-69
Features and Controls..................................... 2-1
Keys
........................................................ 2-2
Doors and Locks
....................................... 2-9
Windows
.................................................2-13
Theft-Deterrent Systems
............................2-15
Starting and Operating Your Vehicle
...........2-18
Mirrors
....................................................2-30
OnStar
®System
......................................2-32
Universal Home Remote System
................2-34
Storage Areas
.........................................2-39
Sunroof
..................................................2-40
Instrument Panel............................................. 3-1
Instrument Panel Overview
.......................... 3-4
Climate Controls
......................................3-19
Warning Lights, Gages, and Indicators
........3-24
Driver Information Center (DIC)
..................3-39
Audio System(s)
.......................................3-59Driving Your Vehicle....................................... 4-1
Your Driving, the Road, and Your Vehicle
..... 4-2
Towing
...................................................4-34
Service and Appearance Care.......................... 5-1
Service
..................................................... 5-3
Fuel
......................................................... 5-4
Checking Things Under the Hood
...............5-10
Headlamp Aiming
.....................................5-47
Bulb Replacement
....................................5-47
Windshield Wiper Blade Replacement
.........5-52
Tires
......................................................5-54
Appearance Care
.....................................5-85
Vehicle Identi�cation
.................................5-93
Electrical System
......................................5-94
Capacities and Speci�cations
...................5-100
Maintenance Schedule..................................... 6-1
Maintenance Schedule
................................ 6-2
Customer Assistance and Information.............. 7-1
Customer Assistance and Information
........... 7-2
Reporting Safety Defects
...........................7-14
Index................................................................ 1
2006 Chevrolet Monte Carlo Owner ManualM
Page 77 of 392
Keys...............................................................2-2
Remote Keyless Entry System.........................2-3
Remote Keyless Entry System Operation...........2-4
Doors and Locks.............................................2-9
Door Locks....................................................2-9
Power Door Locks........................................2-10
Automatic Door Lock.....................................2-10
Programmable Automatic Door Unlock.............2-11
Lockout Protection........................................2-11
Trunk..........................................................2-11
Windows........................................................2-13
Power Windows............................................2-14
Sun Visors...................................................2-14
Theft-Deterrent Systems..................................2-15
Content Theft-Deterrent.................................2-15
PASS-Key
®III+............................................2-16
PASS-Key®III+ Operation..............................2-16
Starting and Operating Your Vehicle................2-18
New Vehicle Break-In....................................2-18
Ignition Positions..........................................2-18
Retained Accessory Power (RAP)...................2-19
Starting the Engine.......................................2-19
Engine Coolant Heater..................................2-20
Displacement on Demand™ (DoD™)
(5.3L V8 Engine).......................................2-21
Automatic Transaxle Operation.......................2-22Parking Brake..............................................2-25
Shifting Into Park (P).....................................2-26
Shifting Out of Park (P).................................2-27
Parking Over Things That Burn.......................2-28
Engine Exhaust............................................2-28
Running the Engine While Parked...................2-29
Mirrors...........................................................2-30
Manual Rearview Mirror.................................2-30
Manual Rearview Mirror with OnStar
®..............2-30
Automatic Dimming Rearview Mirror................2-30
Automatic Dimming Rearview Mirror
with OnStar
®............................................2-31
Outside Power Mirrors...................................2-31
Outside Convex Mirror...................................2-32
Outside Heated Mirrors..................................2-32
OnStar
®System.............................................2-32
Universal Home Remote System......................2-34
Universal Home Remote System Operation......2-35
Storage Areas................................................2-39
Glove Box...................................................2-39
Cupholder(s)................................................2-39
Center Console Storage Area.........................2-39
Rear Seat Armrest........................................2-39
Convenience Net..........................................2-39
Sunroof.........................................................2-40
Section 2 Features and Controls
2-1
Page 90 of 392
Power Windows
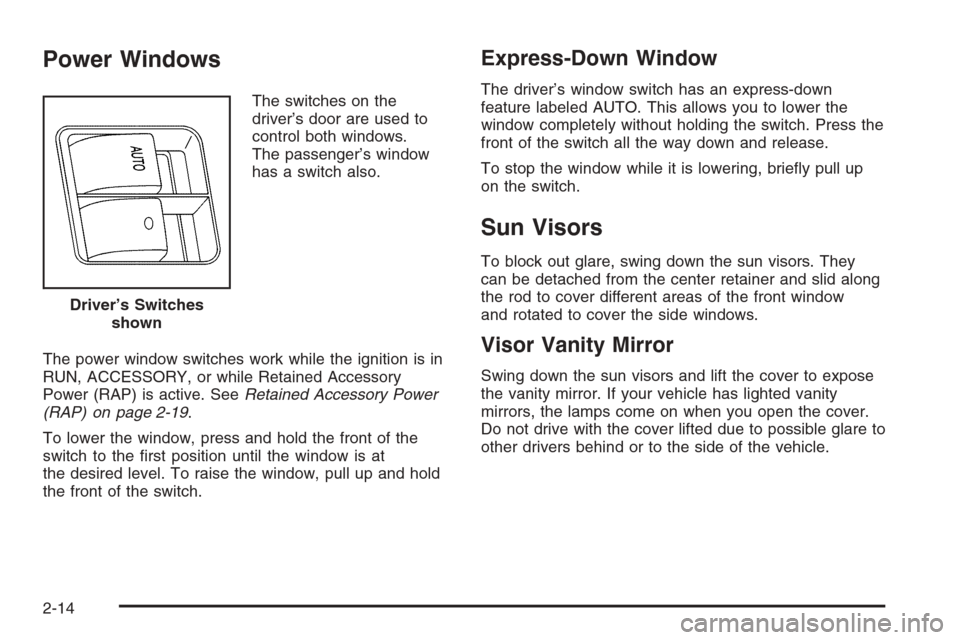
The switches on the
driver’s door are used to
control both windows.
The passenger’s window
has a switch also.
The power window switches work while the ignition is in
RUN, ACCESSORY, or while Retained Accessory
Power (RAP) is active. SeeRetained Accessory Power
(RAP) on page 2-19.
To lower the window, press and hold the front of the
switch to the �rst position until the window is at
the desired level. To raise the window, pull up and hold
the front of the switch.
Express-Down Window
The driver’s window switch has an express-down
feature labeled AUTO. This allows you to lower the
window completely without holding the switch. Press the
front of the switch all the way down and release.
To stop the window while it is lowering, brie�y pull up
on the switch.
Sun Visors
To block out glare, swing down the sun visors. They
can be detached from the center retainer and slid along
the rod to cover different areas of the front window
and rotated to cover the side windows.
Visor Vanity Mirror
Swing down the sun visors and lift the cover to expose
the vanity mirror. If your vehicle has lighted vanity
mirrors, the lamps come on when you open the cover.
Do not drive with the cover lifted due to possible glare to
other drivers behind or to the side of the vehicle. Driver’s Switches
shown
2-14
Page 106 of 392
Mirrors
Manual Rearview Mirror
Adjust all the mirrors so you can see clearly when you
are sitting in a comfortable driving position.
To reduce glare from headlamps behind you, pull the
lever at the bottom of the mirror toward you (to the night
position). To return the mirror back to the day position,
push the lever away from you.
There are two lamps located on the bottom of the
mirror. Press the button next to each lamp to turn it on
and off.
Manual Rearview Mirror with
OnStar
®
If the vehicle has this mirror, it has a lever located at
the bottom of the mirror between the two lamps.
The lever is used to change the mirror from the day to
the night position. To reduce glare from headlamps
behind you while driving at night, pull the lever toward
you. To return the mirror to the day position, return
the lever to its original position.There are two map lamps located on the bottom of the
mirror. Press the button next to each lamp to turn it
on and off.
There are also OnStar
®buttons located at the bottom of
the mirror face. See your dealer for more information
on the system and how to subscribe to OnStar
®.
SeeOnStar®System on page 2-32for more information
about the services OnStar®provides.
Automatic Dimming Rearview Mirror
Your vehicle may be equipped with an automatic
dimming rearview mirror. Push the center button on the
bottom of the mirror to turn this feature on. The mirror
will darken gradually to reduce glare from headlamps
behind you. This may take a few moments. The mirror
will lighten whenever you shift to REVERSE (R).
There are two lamps located on the bottom of the mirror.
Press the button next to each lamp to turn it on and off.
One photocell on the front of the mirror senses when it is
becoming dark outside. Another photocell, facing
rearward, senses headlamps behind you. To turn the
automatic dimming feature off, press the center
button again.
To keep the photocells operating well, occasionally
clean them with a cotton swab and glass cleaner.
2-30
Page 107 of 392
Automatic Dimming Rearview Mirror
with OnStar
®
Your vehicle may have an automatic dimming rearview
mirror with the OnStar®System.
Press the button located below the mirror, on the far
left, for up to three seconds to turn the automatic
dimming feature off and on. While turned on, this mirror
functions exactly like the automatic dimming mirror
described previously.
There are two lamps located on the bottom of the
mirror. Press the button next to each lamp to turn it on
and off.
There are also OnStar
®buttons located at the bottom of
the mirror. See your dealer for more information on
the system and how to subscribe to OnStar
®. See
OnStar®System on page 2-32for more information
about the service OnStar®provides.
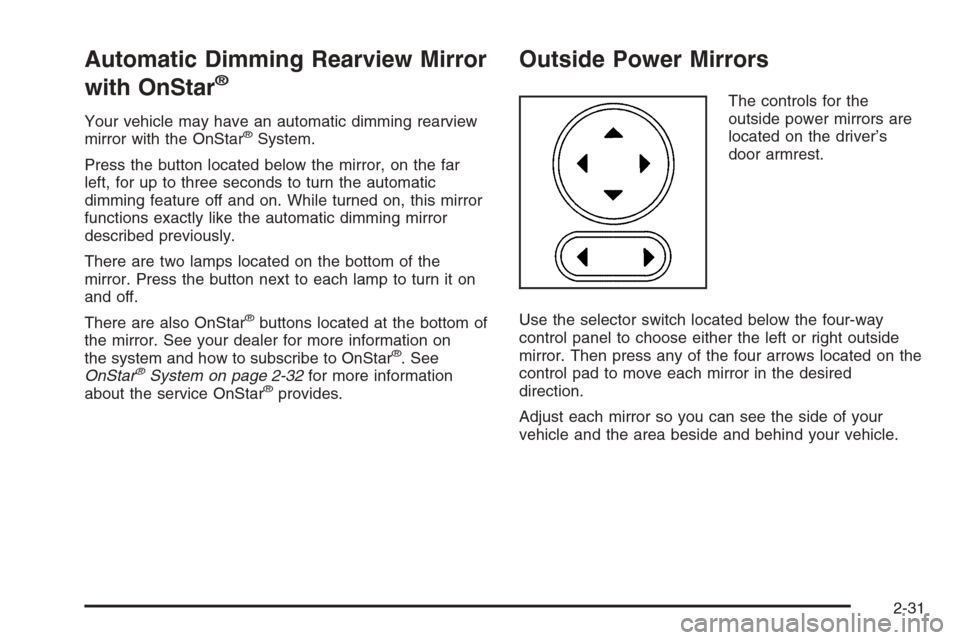
Outside Power Mirrors
The controls for the
outside power mirrors are
located on the driver’s
door armrest.
Use the selector switch located below the four-way
control panel to choose either the left or right outside
mirror. Then press any of the four arrows located on the
control pad to move each mirror in the desired
direction.
Adjust each mirror so you can see the side of your
vehicle and the area beside and behind your vehicle.
2-31
Page 108 of 392
Outside Convex Mirror
Your passenger’s side mirror is convex. A convex
mirror’s surface is curved so you can see more from the
driver’s seat.
{CAUTION:
A convex mirror can make things (like other
vehicles) look farther away than they really are.
If you cut too sharply into the right lane, you
could hit a vehicle on your right. Check your
inside mirror or glance over your shoulder
before changing lanes.
Outside Heated Mirrors
If your vehicle has this option, the surface of both
outside mirrors will heat when you activate the rear
window defogger. See “Rear Window Defogger” under
Climate Control System on page 3-19.
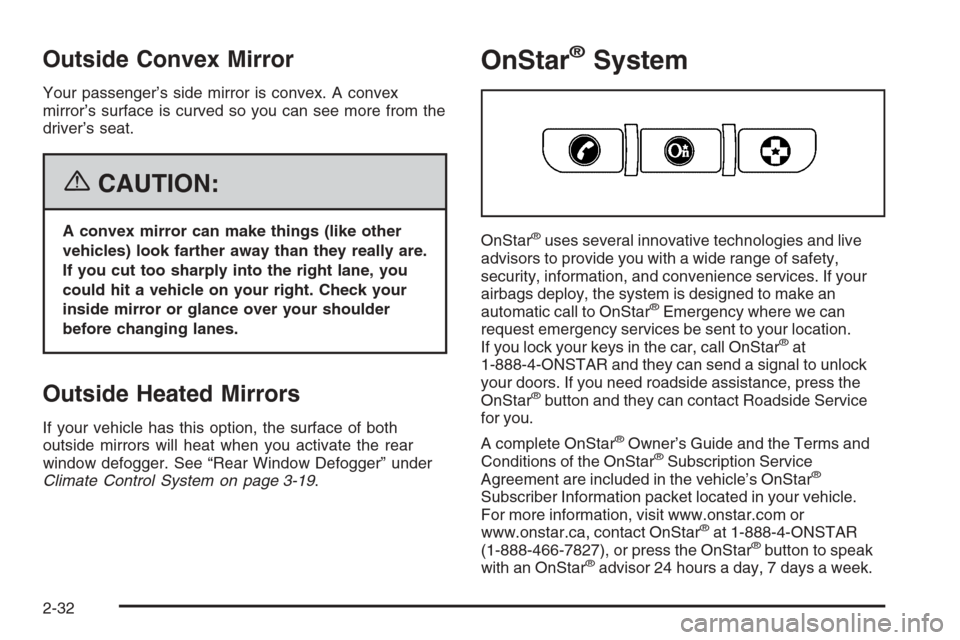
OnStar®System
OnStar®uses several innovative technologies and live
advisors to provide you with a wide range of safety,
security, information, and convenience services. If your
airbags deploy, the system is designed to make an
automatic call to OnStar
®Emergency where we can
request emergency services be sent to your location.
If you lock your keys in the car, call OnStar
®at
1-888-4-ONSTAR and they can send a signal to unlock
your doors. If you need roadside assistance, press the
OnStar
®button and they can contact Roadside Service
for you.
A complete OnStar
®Owner’s Guide and the Terms and
Conditions of the OnStar®Subscription Service
Agreement are included in the vehicle’s OnStar®
Subscriber Information packet located in your vehicle.
For more information, visit www.onstar.com or
www.onstar.ca, contact OnStar
®at 1-888-4-ONSTAR
(1-888-466-7827), or press the OnStar®button to speak
with an OnStar®advisor 24 hours a day, 7 days a week.
2-32
Page 131 of 392
Fog Lamps
-(Fog Lamps):If your vehicle is equipped with fog
lamps, it is located on the exterior lamps control.
The exterior lamps control is located on the instrument
panel to the left of the steering column.
Your ignition must be in RUN for the fog lamps to
illuminate.
To turn the fog lamps on, press exterior lamps button.
A light will come on in the button to let you know that the
fog lamps are on. Press the exterior lamps button
again to turn the fog lamps off.
The ignition must be in RUN and the parking lamps
must be on for your fog lamps to work. The parking
lamps will turn on automatically when you turn on the
fog lamps.
The fog lamps will go off while you change to high-beam
headlamps.
Some localities have laws that require the headlamps to
be on along with the fog lamps.
Instrument Panel Brightness
D(Instrument Panel Brightness):The knob with this
symbol on it is located next to the exterior lamps
control. Press the knob out halfway and then turn the
knob clockwise to brighten or counterclockwise to dim
the lights.
Courtesy Lamps
When a door is opened, the courtesy lamps automatically
come on. They make it easy for you to enter and leave
your vehicle. You can also manually turn these lamps on
by turning the instrument panel brightness control
clockwise all the way.
The reading lamps, located on the rearview mirror, can
be turned on or off independent of the automatic
courtesy lamps, when the doors are closed.
Dome Lamp
The dome lamp will come on when you open a door.
You can also turn this lamp on by turning the instrument
panel brightness control clockwise.
3-15
Page 133 of 392
Parade Dimming
The instrument panel has an added feature called
parade dimming. This feature prohibits the dimming of
your instrument panel displays during the daylight
while the headlamps are on so that you’ll still be able to
see the displays.
Reading Lamps
The reading lamps are located on the rearview mirror.
Press the button to turn them on and off.
Battery Run-Down Protection
Your vehicle has a feature to help prevent you from
draining the battery in case you accidentally leave on the
interior courtesy lamps, reading/map lamps, visor vanity
lamps, trunk lamp or glove box lamps. If you leave any
of these lamps on, they will automatically turn off after
10 minutes, if the ignition is off. The lamps won’t come
back on again until you do the following:
Turn the ignition on.
Turn the exterior lamps control off, then on again.
If your vehicle has less than 15 miles (25 km) on
the odometer, the battery saver will turn off the lamps
after only three minutes.Battery rundown protection will also work if the
headlamps are left on. After having been left on for
10 minutes, the headlamps and the parking lamps will
�ash three times. They will remain on for one more
minute before turning off automatically.
Accessory Power Outlet(s)
Your vehicle has a two 12-volt outlets which can be
used to plug in electrical equipment such as a cellular
telephone, a compact disc player, etc.
One is located at the front of the console and the other
is located at the rear of the console. Lift the cover to
access the outlet. When not using the outlet, make sure
the protective cover is in place.
Notice:Leaving electrical equipment on for
extended periods will drain the battery. Always turn
off electrical equipment when not in use and do
not plug in equipment that exceeds the maximum
20 ampere rating.
Certain accessory power plugs may not be compatible
with the accessory power outlet and could result in
blown vehicle or adapter fuses. If you experience
a problem see your dealer for additional information on
the accessory power plugs.
3-17
Page 138 of 392
Rear Window Defogger
The rear window defogger uses a warming grid to
remove fog from the rear window.
<:The rear window defogger will turn off automatically
after it has been activated. The duration the rear window
defogger is on will be longer if the vehicle is being driven.
The defogger can also be turned off by pressing the
button again or by turning off the engine.
The heated outside rearview mirrors will heat to help
clear fog or frost from the surface of the mirror when the
rear window defogger button is on.
Notice:Do not use anything sharp on the inside of
the rear window. If you do, you could cut or damage
the warming grid, and the repairs would not be
covered by your warranty. Do not attach a temporary
vehicle license, tape, a decal or anything similar to
the defogger grid.
Outlet Adjustment
Use the knob located below or to the side of the outlet,
to change the direction of the air �ow.
Operation Tips
Clear away any ice, snow or leaves from the air
inlets at the base of the windshield that may
block the �ow of air into your vehicle.
Use of non-GM approved hood de�ectors may
adversely affect the performance of the system.
Keep the path under the front seats clear of objects
to help circulate the air inside your vehicle more
effectively.
If the air�ow seems low when the fan is at the
highest setting, the passenger compartment
air �lter, if equipped, may need to replaced.
For more information, seePassenger Compartment
Air Filter on page 3-23andScheduled Maintenance
on page 6-4.
3-22
Page 216 of 392
Do not get too close to the vehicle you want to pass
while you are awaiting an opportunity. For one thing,
following too closely reduces your area of vision,
especially if you are following a larger vehicle. Also,
you will not have adequate space if the vehicle
ahead suddenly slows or stops. Keep back a
reasonable distance.
When it looks like a chance to pass is coming up,
start to accelerate but stay in the right lane and do
not get too close. Time your move so you will be
increasing speed as the time comes to move into the
other lane. If the way is clear to pass, you will have
a running start that more than makes up for the
distance you would lose by dropping back. And if
something happens to cause you to cancel your
pass, you need only slow down and drop back again
and wait for another opportunity.
If other vehicles are lined up to pass a slow vehicle,
wait your turn. But take care that someone is not
trying to pass you as you pull out to pass the slow
vehicle. Remember to glance over your shoulder and
check the blind spot.
Check your mirrors, glance over your shoulder, and
start your left lane change signal before moving out
of the right lane to pass. When you are far enough
ahead of the passed vehicle to see its front in your
inside mirror, activate your right lane change signal
and move back into the right lane. Remember thatyour passenger side outside mirror is convex. The
vehicle you just passed may seem to be farther away
from you than it really is.
Try not to pass more than one vehicle at a time on
two-lane roads. Reconsider before passing the next
vehicle.
Do not overtake a slowly moving vehicle too rapidly.
Even though the brake lamps are not �ashing, it may
be slowing down or starting to turn.
If you are being passed, make it easy for the
following driver to get ahead of you. Perhaps you
can ease a little to the right.
Loss of Control
Let us review what driving experts say about what
happens when the three control systems — brakes,
steering, and acceleration — do not have enough friction
where the tires meet the road to do what the driver has
asked.
In any emergency, do not give up. Keep trying to steer
and constantly seek an escape route or area of less
danger.
4-14