radio CHEVROLET MONTE CARLO 2006 6.G Owners Manual
[x] Cancel search | Manufacturer: CHEVROLET, Model Year: 2006, Model line: MONTE CARLO, Model: CHEVROLET MONTE CARLO 2006 6.GPages: 392, PDF Size: 2.34 MB
Page 79 of 392
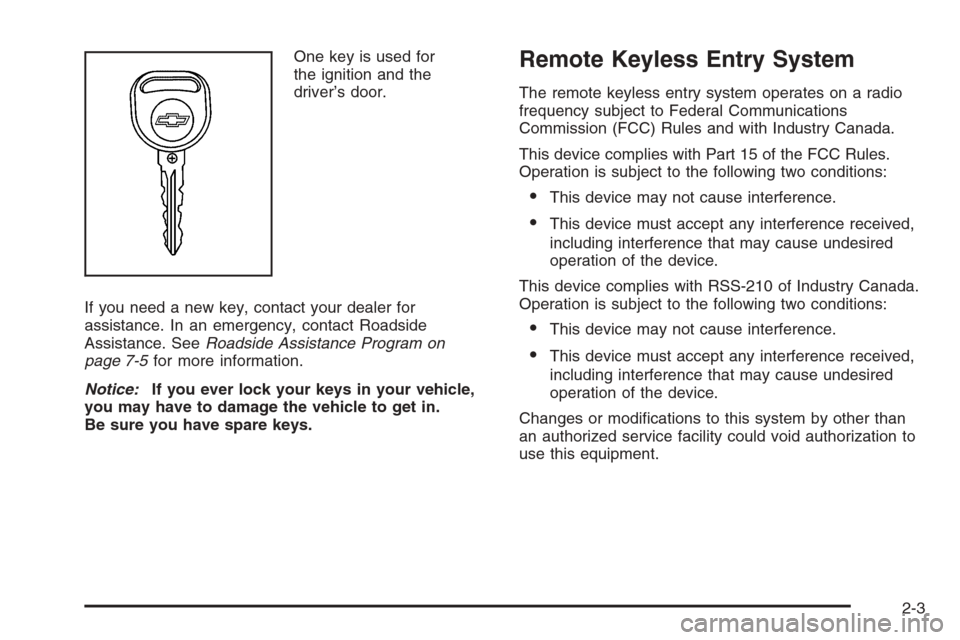
One key is used for
the ignition and the
driver’s door.
If you need a new key, contact your dealer for
assistance. In an emergency, contact Roadside
Assistance. SeeRoadside Assistance Program on
page 7-5for more information.
Notice:If you ever lock your keys in your vehicle,
you may have to damage the vehicle to get in.
Be sure you have spare keys.Remote Keyless Entry System
The remote keyless entry system operates on a radio
frequency subject to Federal Communications
Commission (FCC) Rules and with Industry Canada.
This device complies with Part 15 of the FCC Rules.
Operation is subject to the following two conditions:
This device may not cause interference.
This device must accept any interference received,
including interference that may cause undesired
operation of the device.
This device complies with RSS-210 of Industry Canada.
Operation is subject to the following two conditions:
This device may not cause interference.
This device must accept any interference received,
including interference that may cause undesired
operation of the device.
Changes or modi�cations to this system by other than
an authorized service facility could void authorization to
use this equipment.
2-3
Page 92 of 392
PASS-Key®III+
The PASS-Key®III+ system operates on a radio
frequency subject to Federal Communications
Commission (FCC) Rules and with Industry Canada.
This device complies with Part 15 of the FCC Rules.
Operation is subject to the following two conditions:
1. This device may not cause harmful interference.
2. This device must accept any interference received,
including interference that may cause undesired
operation.
This device complies with RSS-210 of Industry Canada.
Operation is subject to the following two conditions:
1. This device may not cause interference.
2. This device must accept any interference received,
including interference that may cause undesired
operation of the device.
Changes or modi�cations to this system by other than
an authorized service facility could void authorization to
use this equipment.
PASS-Key
®III+ uses a radio frequency transponder in
the key that matches a decoder in your vehicle.
PASS-Key®III+ Operation
Your vehicle has PASS-Key®III+ (Personalized
Automotive Security System) theft-deterrent system.
PASS-Key
®III+ is a passive theft-deterrent system. This
means you do not have to do anything special to arm
or disarm the system. It works when you transition
the key to RUN, ACCESSORY or START from the OFF
position.
When the PASS-Key
®III+ system senses that someone
is using the wrong key, it prevents the vehicle from
starting. Anyone using a trial-and-error method to start
the vehicle will be discouraged because of the high
number of electrical key codes.
If the engine does not start and the security light on the
instrument panel comes on when trying to start the
vehicle, the key may have a damaged transponder. Turn
the ignition off and try again.
If the engine still does not start, and the key appears to
be undamaged, try another ignition key. At this time,
you may also want to check the fuse, seeFuses
and Circuit Breakers on page 5-95. If the engine still
does not start with the other key, your vehicle needs
service. If your vehicle does start, the �rst key may be
faulty. See your dealer who can service the
PASS-Key
®III+ to have a new key made. In an
emergency, contact Roadside Assistance.
2-16
Page 95 of 392
B (ACCESSORY):This position lets the radio and
windshield wipers operate while the engine is off. To use
ACCESSORY, turn the key clockwise.
C (RUN):This position is where the key returns to after
the vehicle is started. This position displays some of
the warning and indicator lights.
D (START):This position starts the engine.
A warning chime will sound and the Driver Information
Center (DIC) will display DRIVER’S DOOR OPEN when
the driver’s door is opened if the ignition is in OFF,
ACCESSORY and the key is in the ignition. SeeDIC
Warnings and Messages on page 3-46for more
information.
Retained Accessory Power (RAP)
The vehicle has Retained Accessory Power (RAP),
which will allow your vehicle’s radio to work when the
ignition key is in RUN or ACCESSORY. Once the key
is turned from RUN to OFF the radio will continue
to work 10 minutes or until the driver’s door is opened.
Also, the power windows will continue to work for up
to 10 minutes or until any door is opened.
Starting the Engine
Move your shift lever to PARK (P) or NEUTRAL (N).
Your engine will not start in any other position — that is
a safety feature. To restart when you are already
moving, use NEUTRAL (N) only.
Notice:Shifting into PARK (P) with the vehicle
moving could damage the transaxle. Shift into
PARK (P) only when your vehicle is stopped.
Starting Your Engine
1. With your foot off the accelerator pedal, turn your
ignition key to START. When the engine starts, let
go of the key. The idle speed will go down as
your engine gets warm.
Your vehicle has a Computer-Controlled Cranking
System. This feature assists in starting the engine
and protects the electrical system. If the ignition key
is turned to START, and then released when the
engine begins cranking, the engine will continue
cranking until the vehicle starts or until it exceeds the
maximum cranking time allowed, approximately
15 seconds to prevent cranking motor damage. To
prevent starter-motor gear damage, this system also
prevents cranking if the engine is already running.
The engine cranking can be stopped by turning the
ignition switch to the ACCESSORY or OFF.
2-19
Page 111 of 392
This device complies with RSS-210 of Industry Canada.
Operation is subject to the following two conditions:
(1) this device may not cause interference, and (2) this
device must accept any interference, including
interference that may cause undesired operation of the
device.
Changes and modi�cations to this system by other than
an authorized service facility could void authorization
to use this equipment.
Universal Home Remote System
Operation
Do not use the Universal Home Remote with any
garage door opener that does not have the stop and
reverse feature. This includes any garage door opener
model manufactured before April 1, 1982. If you
have a newer garage door opener with rolling codes,
please be sure to follow Steps 6 through 8 to complete
the programming of your Universal Home Remote
Transmitter.Read the instructions completely before attempting to
program the Universal Home Remote. Because of
the steps involved, it may be helpful to have another
person available to assist you in the programming steps.
Keep the original hand-held transmitter for use in
other vehicles as well as for future Universal Home
Remote programming. It is also recommended that upon
the sale of the vehicle, the programmed Universal
Home Remote buttons should be erased for security
purposes. See “Erasing Universal Home Remote
Buttons” later in this section or, for assistance, see
Customer Assistance Offices on page 7-4.
Be sure that people and objects are clear of the garage
door or gate operator you are programming. When
programming a garage door, it is advised to park outside
of the garage.
It is recommended that a new battery be installed in
your hand-held transmitter for quicker and more
accurate transmission of the radio-frequency signal.
2-35
Page 113 of 392
7. Firmly press and release the “Learn” or “Smart”
button. The name and color of the button may
vary by manufacturer.
You will have 30 seconds to start Step 8.
8. Return to the vehicle. Firmly press and hold the
programmed Universal Home Remote button for
two seconds, then release. Repeat the
press/hold/release sequence a second time, and
depending on the brand of the garage door opener,
or other rolling code device, repeat this sequence
a third time to complete the programming.
The Universal Home Remote should now activate
your rolling-code equipped device.
To program the remaining two Universal Home Remote
buttons, begin with Step 2 of “Programming Universal
Home Remote.” You do not want to repeat Step 1,
as this will erase all previous programming from
the Universal Home Remote buttons.Gate Operator and Canadian
Programming
Canadian radio-frequency laws require transmitter
signals to time out or quit after several seconds of
transmission. This may not be long enough for Universal
Home Remote to pick up the signal during programming.
Similarly, some U.S. gate operators are manufactured
to time out in the same manner.
If you live in Canada, or you are having difficulty
programming a gate operator or garage door opener by
using the “Programming Universal Home Remote”
procedures, regardless of where you live, replace
Step 3 under “Programming Universal Home Remote”
with the following:
Continue to press and hold the Universal Home Remote
button while you press and release every two seconds
(cycle) the hand-held transmitter button until the
frequency signal has been successfully accepted by the
Universal Home Remote. The Universal Home Remote
indicator light will �ash slowly at �rst and then rapidly.
Proceed with Step 4 under “Programming Universal
Home Remote” to complete.
2-37
Page 118 of 392
Tire Pressure Light.......................................3-34
Malfunction Indicator Lamp.............................3-34
Oil Pressure Light.........................................3-37
Security Light...............................................3-37
Fog Lamp Light............................................3-38
Cruise Control Light......................................3-38
Highbeam On Light.......................................3-38
Fuel Gage...................................................3-38
Driver Information Center (DIC).......................3-39
DIC Operation and Displays...........................3-40
DIC Compass..............................................3-45
DIC Warnings and Messages.........................3-46
DIC Vehicle Customization.............................3-53Audio System(s).............................................3-59
Setting the Time (Without Date Display)...........3-60
Setting the Time (With Date Display)...............3-61
Radio with CD (Base)...................................3-62
Radio with CD (MP3)....................................3-67
Theft-Deterrent Feature..................................3-82
Audio Steering Wheel Controls.......................3-83
Radio Reception...........................................3-83
Care of Your CDs.........................................3-84
Care of the CD Player...................................3-84
Backglass Antenna.......................................3-85
XM™ Satellite Radio Antenna System.............3-85
Section 3 Instrument Panel
3-2
Page 146 of 392
If, after several seconds, all status indicator lights
remain on, or if there are no lights at all, there may be a
problem with the lights or the passenger sensing
system. See your dealer for service.
{CAUTION:
If the off indicator and the airbag readiness
light ever come on together, it means that
something may be wrong with the airbag
system. If this ever happens, have the vehicle
serviced promptly, because an adult-size
person sitting in the right front passenger seat
may not have the protection of an airbag.
SeeAirbag Readiness Light on page 3-27.
Charging System Light
The charging system light
will come on brie�y when
you turn on the ignition,
but the engine is not
running, as a check to
show you it is working.
It should go out once the engine is running. If it stays
on, or comes on while you are driving, you may have a
problem with the charging system. It could indicate that
you have problems with a generator drive belt, or another
electrical problem. Have it checked right away. Driving
while this light is on could drain your battery.
If you must drive a short distance with the light on, be
certain to turn off all your accessories, such as the radio
and air conditioner.
3-30
Page 175 of 392
Exiting the Feature Settings Menu
The feature settings menu will be exited when any of
the following occurs:
The vehicle is shifted out of PARK (P).
The vehicle is no longer in RUN.
The trip/fuel or vehicle information DIC buttons are
pressed.
The end of the feature settings menu is reached
and exited.
A 40 second time period has elapsed with no
selection made.
Audio System(s)
Determine which radio your vehicle has and then read
the pages following to familiarize yourself with its
features.
Driving without distraction is a necessity for a safer
driving experience. SeeDefensive Driving on page 4-2.
By taking a few moments to read this manual and
get familiar with your vehicle’s audio system, you can
use it with less effort, as well as take advantage of
its features. While your vehicle is parked, set up your
audio system by presetting your favorite radio stations,
setting the tone, and adjusting the speakers.Then, when driving conditions permit, you can tune to
your favorite stations using the presets and steering
wheel controls if the vehicle has them.
{CAUTION:
This system provides you with a far greater
access to audio stations and song listings.
Giving extended attention to entertainment
tasks while driving can cause a crash and you
or others can be injured or killed. Always keep
your eyes on the road and your mind on the
drive — avoid engaging in extended searching
while driving.
Keeping your mind on the drive is important for safe
driving. For more information, seeDefensive Driving on
page 4-2.
3-59
Page 176 of 392
Here are some ways in which you can help avoid
distraction while driving.
While your vehicle is parked:
Familiarize yourself with all of its controls.
Familiarize yourself with its operation.
Set up your audio system by presetting your
favorite radio stations, setting the tone, and
adjusting the speakers. Then, when driving
conditions permit, you can tune to your favorite
radio stations using the presets and steering wheel
controls if the vehicle has them.
Notice:Before adding any sound equipment to
your vehicle, such as an audio system, CD player,
CB radio, mobile telephone, or two-way radio, make
sure that it can be added by checking with your
dealer. Also, check federal rules covering mobile
radio and telephone units. If sound equipment can
be added, it is very important to do it properly.
Added sound equipment may interfere with
the operation of your vehicle’s engine, radio, or
other systems, and even damage them. Your
vehicle’s systems may interfere with the operation
of sound equipment that has been added.Notice:The chime signals related to safety belts,
parking brake, and other functions of your vehicle
operate through the radio/entertainment system.
If that equipment is replaced or additional equipment
is added to your vehicle, the chimes may not
work. Make sure that replacement or additional
equipment is compatible with your vehicle before
installing it. SeeAccessories and Modifications
on page 5-3.
Your vehicle has a feature called Retained Accessory
Power (RAP). With RAP, the audio system can be
played even after the ignition is turned off. SeeRetained
Accessory Power (RAP) on page 2-19for more
information.
Setting the Time
(Without Date Display)
If your vehicle has a base AM/FM radio with a single
CD player and preset buttons numbered one through
six, the radio will have a clock button for setting the time.
You can set the time by following these steps:
1. Press the clock button until the hour numbers begin
�ashing on the display. Press the clock button a
second time and the minute numbers will begin
�ashing on the display.
3-60
Page 177 of 392
2. While either the hour or the minute numbers are
�ashing, rotate the tune knob clockwise or
counterclockwise to increase or decrease the time.
Instead of using the tune knob, you can also
press the SEEK, FWD, or REV buttons to adjust
the time.
3. Press the clock button again until the clock display
stops �ashing to set the currently displayed time;
otherwise, the �ashing will stop after �ve seconds
and the current time displayed will be
automatically set.
To change the time default setting from 12 hour to
24 hour, press the clock button and then the pushbutton
located under the forward arrow label. Once the time
12H and 24H are displayed, press the pushbutton
located under the desired option or press the SEEK,
FWD, or REV buttons to select the default. Press
the clock button again to apply the selected default, or
let the screen time out.
Setting the Time (With Date Display)
If your vehicle has a radio with a single CD player,
the radio will have a clock button for setting the time and
date. Press the clock button and the HR, MIN, MM,
DD, YYYY (hour, minute, month, day, and year)
will appear on the display. Press the pushbutton located
under any one of the labels that you want to change.Every time the pushbutton is pressed again, the time or
the date if selected, will increase by one. Another
way to increase the time or date, is to press the right
SEEK arrow or FWD button. To decrease, press the left
SEEK arrow or REV button. You can also rotate the
tune knob to adjust the selected setting.
If your vehicle has a radio with a six-disc CD player, the
radio will have a MENU button instead of the clock button
to set the time and date. Press the MENU button.
Once the clock option is displayed, press the pushbutton
located under that label. The HR, MIN, MM, DD, YYYY
will appear on the display. To change the time or date,
follow the instructions given earlier in this section.
To change the time default setting from 12 hour to
24 hour or to change the date default setting from
month/day/year to day/month/year, press the clock
button and then the pushbutton located under the
forward arrow label. Once the time 12H and 24H, and
the date MM/DD/YYYY (month, day, and year) and
DD/MM/YYYY (day, month, and year) are displayed,
press the pushbutton located under the desired option.
Press the clock or MENU button again to apply the
selected default, or let the screen time out.
3-61