buttons CHEVROLET OPTRA 5 2005 1.G Owners Manual
[x] Cancel search | Manufacturer: CHEVROLET, Model Year: 2005, Model line: OPTRA 5, Model: CHEVROLET OPTRA 5 2005 1.GPages: 336, PDF Size: 2.21 MB
Page 75 of 336
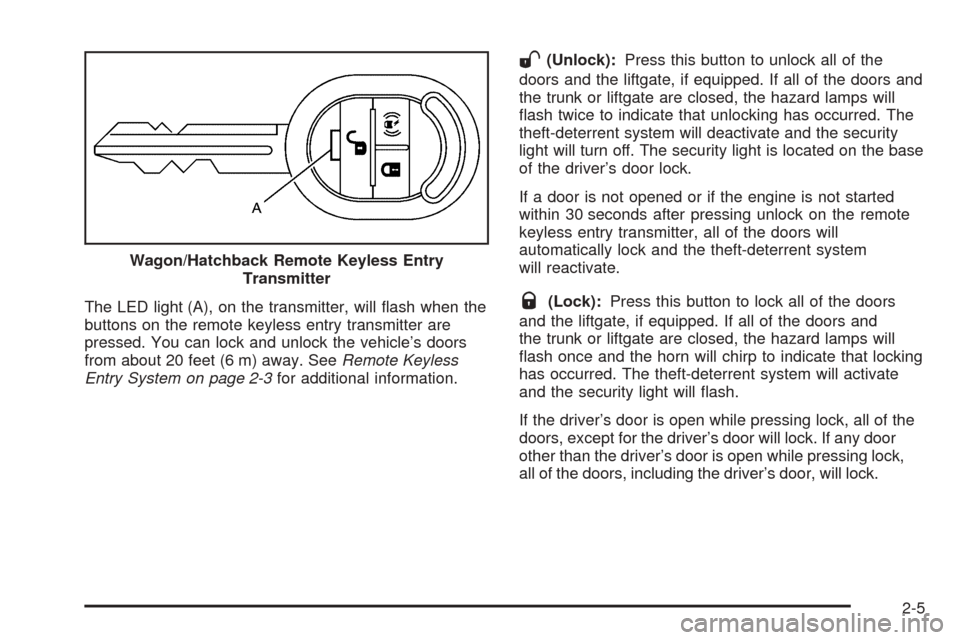
The LED light (A), on the transmitter, will flash when the
buttons on the remote keyless entry transmitter are
pressed. You can lock and unlock the vehicle’s doors
from about 20 feet (6 m) away. SeeRemote Keyless
Entry System on page 2-3for additional information.
W(Unlock):Press this button to unlock all of the
doors and the liftgate, if equipped. If all of the doors and
the trunk or liftgate are closed, the hazard lamps will
flash twice to indicate that unlocking has occurred. The
theft-deterrent system will deactivate and the security
light will turn off. The security light is located on the base
of the driver’s door lock.
If a door is not opened or if the engine is not started
within 30 seconds after pressing unlock on the remote
keyless entry transmitter, all of the doors will
automatically lock and the theft-deterrent system
will reactivate.
Q(Lock):Press this button to lock all of the doors
and the liftgate, if equipped. If all of the doors and
the trunk or liftgate are closed, the hazard lamps will
flash once and the horn will chirp to indicate that locking
has occurred. The theft-deterrent system will activate
and the security light will flash.
If the driver’s door is open while pressing lock, all of the
doors, except for the driver’s door will lock. If any door
other than the driver’s door is open while pressing lock,
all of the doors, including the driver’s door, will lock. Wagon/Hatchback Remote Keyless Entry
Transmitter
2-5
Page 76 of 336
V(Trunk):If your vehicle has this feature, press
this button to unlock the trunk. If all of the doors
are locked while pressing the trunk button, the trunk will
not unlock. The doors must be unlocked for the trunk
button to unlock the trunk.
S(Parking):If your vehicle has this feature, press this
button to turn on the hazard warning flashers. The hazard
warning lamps will flash for about 28 seconds. Press this
button again to turn off the hazard warning lamps.
The lock, unlock, trunk, and parking buttons, on the
remote keyless entry transmitter, will not operate while
the key is in the ignition. The theft-deterrent system
will not activate while the key is in the ignition.
Matching Transmitter(s) to Your
Vehicle
Each remote keyless entry transmitter is coded to
prevent another transmitter from unlocking your vehicle.
If a transmitter is lost or stolen, a replacement can
be purchased through your dealer. Remember to bring
any remaining transmitters with you when you go to
your dealer. When the dealer matches the replacement
transmitter to your vehicle, any remaining transmitters
must also be matched. Once your dealer has coded the
new transmitter, the lost transmitter will not unlock
your vehicle. Each vehicle can have a maximum of
four transmitters matched to it.
Battery Replacement
Under normal use, the battery in the remote keyless
entry transmitter should last about two years.
The battery is weak if the LED light fails to illuminate or
if the transmitter will not work at the normal operating
range. If you have to get close to your vehicle before
the transmitter works, it is probably time to change
the battery.
Notice:When replacing the battery, use care not to
touch any of the circuitry. Static from your body
transferred to these surfaces may damage the
transmitter.
2-6
Page 87 of 336
To avoid activating the alarm by accident, use one of
the following methods:
•Unlock the driver’s or passenger’s door using
the key.
•Press the unlock button on the remote keyless
entry transmitter.
Unlocking a door any other way will activate the alarm
when a door, the trunk or liftgate is opened.
If you do not want to arm the theft-deterrent system,
lock the vehicle using the key or the manual door locks.
Disarming the System
To disarm the system, use one of the following methods:
•Unlock the driver’s or passenger’s door using
the key.
•Press the unlock button on the transmitter.
- The LED light on the transmitter will
flash once.
- All of the doors will unlock.
- The hazard warning lamps will flash twice.
- The theft-deterrent mode will deactivate.
If the door is not opened or if the engine is not started
within 30 seconds after disarming the system with
the transmitter, all of the doors will automatically lock
and the theft-deterrent mode will reactivate.
How the System Alarm is Activated
If a door or the trunk or liftgate is opened without using
the key or the remote keyless entry transmitter, the
horn will sound and the lamps will flash for up to
30 seconds.
How to Turn Off the System Alarm
If the system alarm is active, it can be deactivated using
one of the following methods:
•Press the lock or unlock button on the remote
keyless entry transmitter.
•Unlock the driver’s or passenger’s front door using
the key.
Otherwise, the alarm will automatically stop after
30 seconds. The system will then lock the doors and
reactivate the theft-deterrent system.
How to Detect a Tamper Condition
If the hazard warning lamps flash once when you press
the lock or unlock buttons on the remote keyless
entry transmitter, that means the theft-deterrent system
alarm was triggered while you were away, from the
vehicle.
2-17
Page 108 of 336
Sunroof
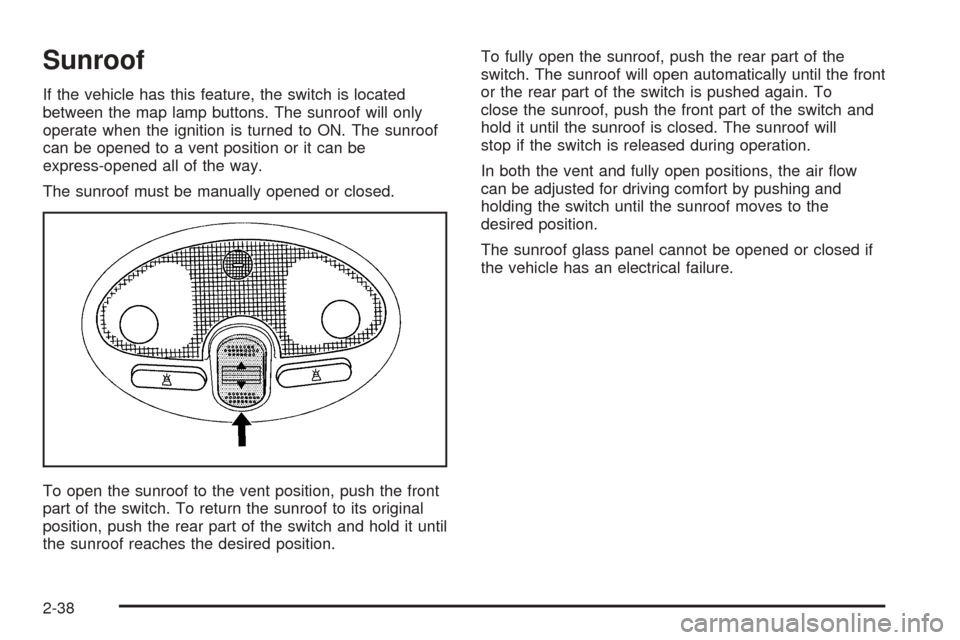
If the vehicle has this feature, the switch is located
between the map lamp buttons. The sunroof will only
operate when the ignition is turned to ON. The sunroof
can be opened to a vent position or it can be
express-opened all of the way.
The sunroof must be manually opened or closed.
To open the sunroof to the vent position, push the front
part of the switch. To return the sunroof to its original
position, push the rear part of the switch and hold it until
the sunroof reaches the desired position.To fully open the sunroof, push the rear part of the
switch. The sunroof will open automatically until the front
or the rear part of the switch is pushed again. To
close the sunroof, push the front part of the switch and
hold it until the sunroof is closed. The sunroof will
stop if the switch is released during operation.
In both the vent and fully open positions, the air flow
can be adjusted for driving comfort by pushing and
holding the switch until the sunroof moves to the
desired position.
The sunroof glass panel cannot be opened or closed if
the vehicle has an electrical failure.
2-38
Page 115 of 336
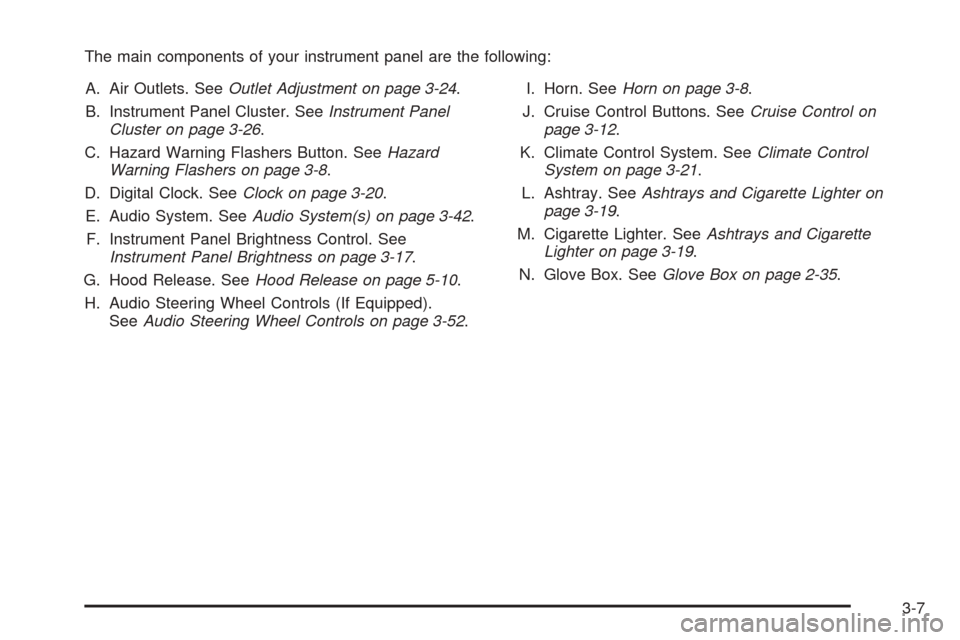
The main components of your instrument panel are the following:
A. Air Outlets. SeeOutlet Adjustment on page 3-24.
B. Instrument Panel Cluster. SeeInstrument Panel
Cluster on page 3-26.
C. Hazard Warning Flashers Button. SeeHazard
Warning Flashers on page 3-8.
D. Digital Clock. SeeClock on page 3-20.
E. Audio System. SeeAudio System(s) on page 3-42.
F. Instrument Panel Brightness Control. See
Instrument Panel Brightness on page 3-17.
G. Hood Release. SeeHood Release on page 5-10.
H. Audio Steering Wheel Controls (If Equipped).
SeeAudio Steering Wheel Controls on page 3-52.I. Horn. SeeHorn on page 3-8.
J. Cruise Control Buttons. SeeCruise Control on
page 3-12.
K. Climate Control System. SeeClimate Control
System on page 3-21.
L. Ashtray. SeeAshtrays and Cigarette Lighter on
page 3-19.
M. Cigarette Lighter. SeeAshtrays and Cigarette
Lighter on page 3-19.
N. Glove Box. SeeGlove Box on page 2-35.
3-7
Page 128 of 336
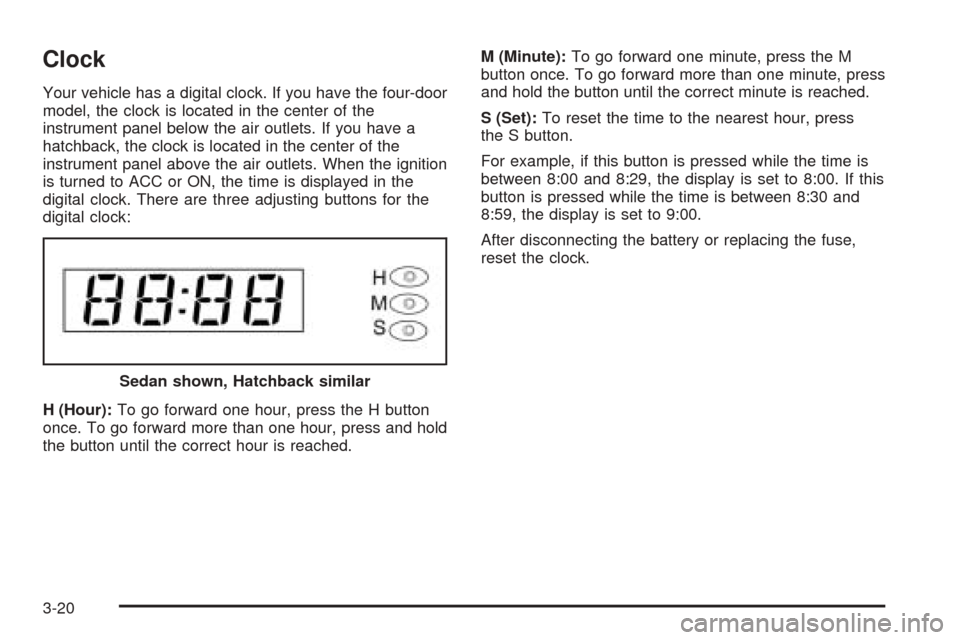
Clock
Your vehicle has a digital clock. If you have the four-door
model, the clock is located in the center of the
instrument panel below the air outlets. If you have a
hatchback, the clock is located in the center of the
instrument panel above the air outlets. When the ignition
is turned to ACC or ON, the time is displayed in the
digital clock. There are three adjusting buttons for the
digital clock:
H (Hour):To go forward one hour, press the H button
once. To go forward more than one hour, press and hold
the button until the correct hour is reached.M (Minute):To go forward one minute, press the M
button once. To go forward more than one minute, press
and hold the button until the correct minute is reached.
S (Set):To reset the time to the nearest hour, press
the S button.
For example, if this button is pressed while the time is
between 8:00 and 8:29, the display is set to 8:00. If this
button is pressed while the time is between 8:30 and
8:59, the display is set to 9:00.
After disconnecting the battery or replacing the fuse,
reset the clock.
Sedan shown, Hatchback similar
3-20
Page 151 of 336
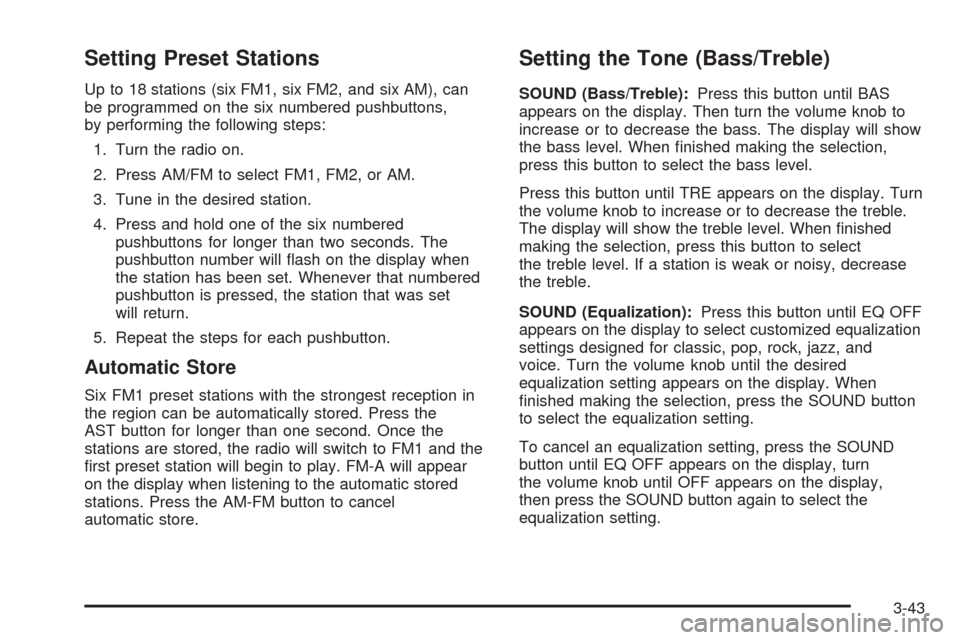
Setting Preset Stations
Up to 18 stations (six FM1, six FM2, and six AM), can
be programmed on the six numbered pushbuttons,
by performing the following steps:
1. Turn the radio on.
2. Press AM/FM to select FM1, FM2, or AM.
3. Tune in the desired station.
4. Press and hold one of the six numbered
pushbuttons for longer than two seconds. The
pushbutton number will flash on the display when
the station has been set. Whenever that numbered
pushbutton is pressed, the station that was set
will return.
5. Repeat the steps for each pushbutton.
Automatic Store
Six FM1 preset stations with the strongest reception in
the region can be automatically stored. Press the
AST button for longer than one second. Once the
stations are stored, the radio will switch to FM1 and the
first preset station will begin to play. FM-A will appear
on the display when listening to the automatic stored
stations. Press the AM-FM button to cancel
automatic store.
Setting the Tone (Bass/Treble)
SOUND (Bass/Treble):Press this button until BAS
appears on the display. Then turn the volume knob to
increase or to decrease the bass. The display will show
the bass level. When finished making the selection,
press this button to select the bass level.
Press this button until TRE appears on the display. Turn
the volume knob to increase or to decrease the treble.
The display will show the treble level. When finished
making the selection, press this button to select
the treble level. If a station is weak or noisy, decrease
the treble.
SOUND (Equalization):Press this button until EQ OFF
appears on the display to select customized equalization
settings designed for classic, pop, rock, jazz, and
voice. Turn the volume knob until the desired
equalization setting appears on the display. When
finished making the selection, press the SOUND button
to select the equalization setting.
To cancel an equalization setting, press the SOUND
button until EQ OFF appears on the display, turn
the volume knob until OFF appears on the display,
then press the SOUND button again to select the
equalization setting.
3-43
Page 154 of 336
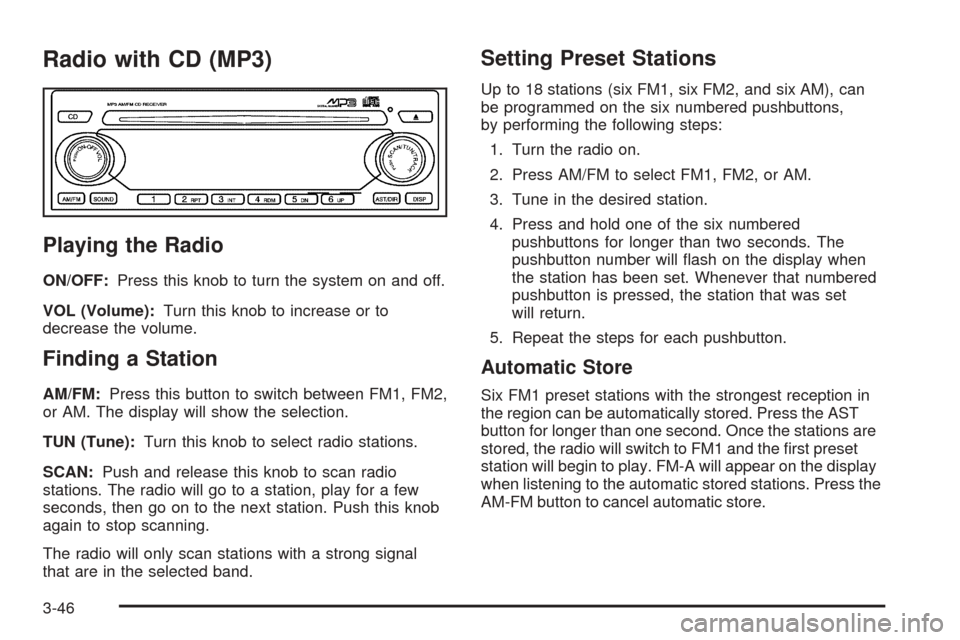
Radio with CD (MP3)
Playing the Radio
ON/OFF:Press this knob to turn the system on and off.
VOL (Volume):Turn this knob to increase or to
decrease the volume.
Finding a Station
AM/FM:Press this button to switch between FM1, FM2,
or AM. The display will show the selection.
TUN (Tune):Turn this knob to select radio stations.
SCAN:Push and release this knob to scan radio
stations. The radio will go to a station, play for a few
seconds, then go on to the next station. Push this knob
again to stop scanning.
The radio will only scan stations with a strong signal
that are in the selected band.
Setting Preset Stations
Up to 18 stations (six FM1, six FM2, and six AM), can
be programmed on the six numbered pushbuttons,
by performing the following steps:
1. Turn the radio on.
2. Press AM/FM to select FM1, FM2, or AM.
3. Tune in the desired station.
4. Press and hold one of the six numbered
pushbuttons for longer than two seconds. The
pushbutton number will flash on the display when
the station has been set. Whenever that numbered
pushbutton is pressed, the station that was set
will return.
5. Repeat the steps for each pushbutton.
Automatic Store
Six FM1 preset stations with the strongest reception in
the region can be automatically stored. Press the AST
button for longer than one second. Once the stations are
stored, the radio will switch to FM1 and the first preset
station will begin to play. FM-A will appear on the display
when listening to the automatic stored stations. Press the
AM-FM button to cancel automatic store.
3-46
Page 157 of 336
Using an MP3 CD
MP3 Format
This MP3 player will accept MP3 files that were recorded
on an up to 700 MB CD-R CD. The files can be
recorded with the following fixed bit rates: 32 kpbs,
40 kpbs, 56 kpbs, 64 kpbs, 80 kpbs, 96 kpbs, 112 kpbs,
128 kpbs, 160 kpbs, 192 kpbs, 224 kpbs, 256 kpbs,
and 320 kpbs or a variable bit rate. Song title, artist
name, and album will be available when recorded using
ID3 tags versions 1 and 2.
The player will be able to read and play a maximum of
50 folders, 50 playlists, 10 sessions, and 255 files.
Long file, folder, or playlist names or a combination of a
large number of files and folders or playlists may
cause the player to be unable to play up to the
maximum number of files, folders, playlists, or sessions.
If you wish to play large numbers of files, folders,
playlists or sessions minimize the length of the file,
folder or playlist name. You can also play an MP3 CD
that was recorded using no file folders. The system can
support up to 11 folders in depth, though, keep the
depth of the folders to a minimum in order to keep down
the complexity and confusion in trying to locate a
particular folder during playback. If a CD contains more
than the maximum of 50 folders, 50 playlists, 10
sessions, and 255 files the player will let you access
and navigate up to the maximum, but all items over the
maximum will be ignored.
Root Directory
The root directory will be treated as a folder. If the root
directory has compressed audio files, the directory
will be displayed as F1 ROOT. All files contained directly
under the root directory will be accessed prior to any
root directory folders. However, playlists (Px) will always
be accessed before root folders or files.
Empty Directory or Folder
If a root directory or a folder exists somewhere in the
file structure that contains only folders/subfolders and no
compressed files directly beneath them, the player will
advance to the next folder in the file structure that
contains compressed audio files and the empty folder
will not be displayed or numbered.
No Folder
When the CD contains only compressed files, the files
will be located under the root folder. The next and
previous folder functions will have no function on a
CD that was recorded without folders or playlists.
When displaying the name of the folder the radio will
display ROOT.
When the CD contains only playlists and compressed
audio files, but no folders, all files will be located under
the root folder. The folder down and the folder up
buttons will search playlists (Px) first and then go to the
root folder. When the radio displays the name of the
folder the radio will display ROOT.
3-49
Page 160 of 336
CD Messages
CHECK CD:If this message appears on the display
and/or the CD comes out, it could be for one of the
following reasons:
•It is very hot. When the temperature returns to
normal, the CD should play.
•You are driving on a very rough road. When the
road becomes smoother, the CD should play.
•The CD is dirty, scratched, wet, or upside down.
•The air is very humid. If so, wait about an hour and
try again.
•The format of the CD may not be compatible. See
“MP3 Format” earlier in this section.
•There may have been a problem while burning
the CD.
•The label may be caught in the CD player.
If the CD is not playing correctly, for any other reason,
try a known good CD.
If any error occurs repeatedly or if an error cannot be
corrected, contact your dealer. If the radio displays
an error message, write it down and provide it to your
dealer when reporting the problem.
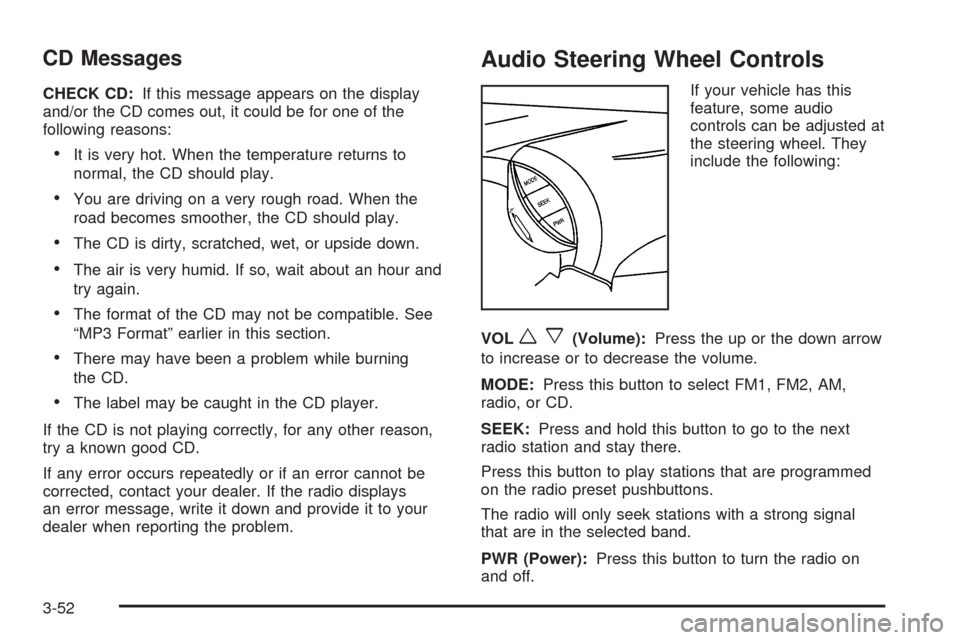
Audio Steering Wheel Controls
If your vehicle has this
feature, some audio
controls can be adjusted at
the steering wheel. They
include the following:
VOL
wx(Volume):Press the up or the down arrow
to increase or to decrease the volume.
MODE:Press this button to select FM1, FM2, AM,
radio, or CD.
SEEK:Press and hold this button to go to the next
radio station and stay there.
Press this button to play stations that are programmed
on the radio preset pushbuttons.
The radio will only seek stations with a strong signal
that are in the selected band.
PWR (Power):Press this button to turn the radio on
and off.
3-52