alarm CHEVROLET ORLANDO 2012 1.G Owners Manual
[x] Cancel search | Manufacturer: CHEVROLET, Model Year: 2012, Model line: ORLANDO, Model: CHEVROLET ORLANDO 2012 1.GPages: 378, PDF Size: 6.68 MB
Page 10 of 378
Black plate (4,1)Chevrolet Orlando Owner Manual - 2012
1-4 In Brief
Initial Drive
Information
This section provides a brief
overview about some of the
important features that may or may
not be on your specific vehicle.
For more detailed information, refer
to each of the features which can be
found later in this owner manual.
Remote Keyless Entry
(RKE) System
The Remote Keyless Entry (RKE)
transmitter will work up to 20 m
(65 ft) away from the vehicle.
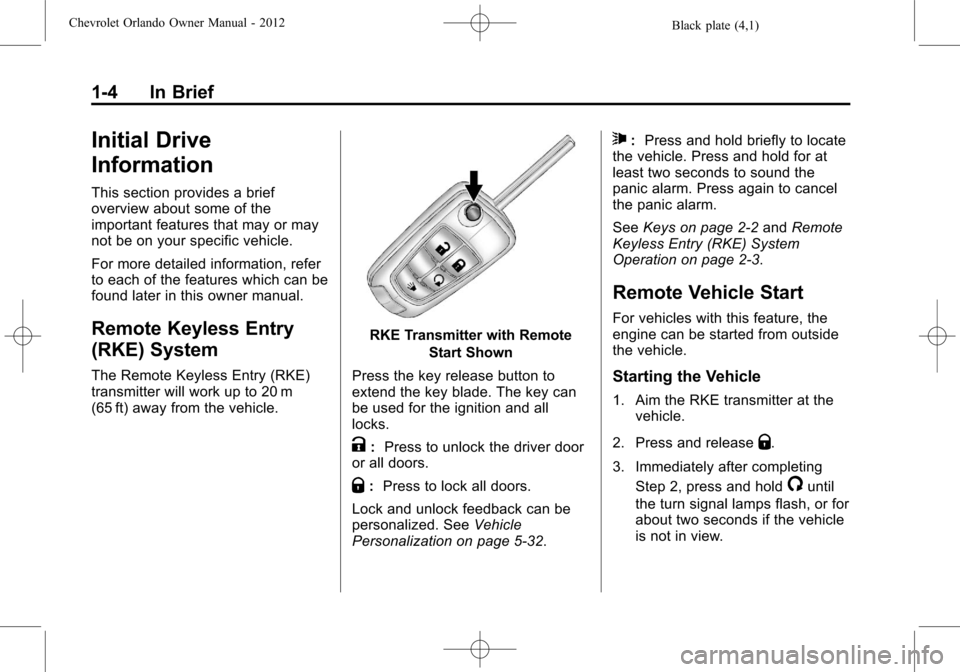
RKE Transmitter with RemoteStart Shown
Press the key release button to
extend the key blade. The key can
be used for the ignition and all
locks.
K: Press to unlock the driver door
or all doors.
Q: Press to lock all doors.
Lock and unlock feedback can be
personalized. See Vehicle
Personalization on page 5‑32.
7: Press and hold briefly to locate
the vehicle. Press and hold for at
least two seconds to sound the
panic alarm. Press again to cancel
the panic alarm.
See Keys on page 2‑2 andRemote
Keyless Entry (RKE) System
Operation on page 2‑3.
Remote Vehicle Start
For vehicles with this feature, the
engine can be started from outside
the vehicle.
Starting the Vehicle
1. Aim the RKE transmitter at the vehicle.
2. Press and release
Q.
3. Immediately after completing Step 2, press and hold
/until
the turn signal lamps flash, or for
about two seconds if the vehicle
is not in view.
Page 29 of 378
Black plate (1,1)Chevrolet Orlando Owner Manual - 2012
Keys, Doors, and Windows 2-1
Keys, Doors, and
Windows
Keys and Locks
Keys . . . . . . . . . . . . . . . . . . . . . . . . . . 2-2
Remote Keyless Entry (RKE)System . . . . . . . . . . . . . . . . . . . . . . 2-3
Remote Keyless Entry (RKE) System Operation . . . . . . . . . . . 2-3
Remote Vehicle Start . . . . . . . . . 2-5
Door Locks . . . . . . . . . . . . . . . . . . . 2-6
Power Door Locks . . . . . . . . . . . . 2-7
Automatic Door Locks . . . . . . . . . 2-7
Safety Locks . . . . . . . . . . . . . . . . . . 2-8
Doors
Liftgate . . . . . . . . . . . . . . . . . . . . . . . . 2-8
Vehicle Security
Vehicle Security . . . . . . . . . . . . . . . 2-9
Vehicle Alarm System . . . . . . . . . 2-9
Immobilizer . . . . . . . . . . . . . . . . . . 2-10
Immobilizer Operation . . . . . . . 2-10
Exterior Mirrors
Convex Mirrors . . . . . . . . . . . . . . 2-11
Manual Mirrors . . . . . . . . . . . . . . . 2-11
Power Mirrors . . . . . . . . . . . . . . . . 2-11
Folding Mirrors . . . . . . . . . . . . . . . 2-12
Heated Mirrors . . . . . . . . . . . . . . . 2-12
Interior Mirrors
Manual Rearview Mirror . . . . . . 2-12
Automatic Dimming Rearview Mirror . . . . . . . . . . . . . . . . . . . . . . . 2-12
Child-View Mirror . . . . . . . . . . . . 2-13
Windows
Windows . . . . . . . . . . . . . . . . . . . . . 2-14
Power Windows . . . . . . . . . . . . . 2-14
Sun Visors . . . . . . . . . . . . . . . . . . . 2-17
Roof
Sunroof . . . . . . . . . . . . . . . . . . . . . . 2-17
Page 32 of 378
Black plate (4,1)Chevrolet Orlando Owner Manual - 2012
2-4 Keys, Doors, and Windows
The following may be available:
Q(Lock):Press to lock all doors.
The turn signal indicators may flash
and/or the horn may sound to
indicate locking. See “Locking
Feedback” underVehicle
Personalization on page 5‑32.
If the driver door is open when
Qis
pressed and Unlocked Door Anti
Lock Out is enabled through vehicle
personalization, all doors will lock
and then the driver door will unlock.
See “Unlocked Door Anti Lock Out”
under Vehicle Personalization on
page 5‑32.
Pressing
Qmay also arm the
theft-deterrent system. See Vehicle
Alarm System on page 2‑9.
K(Unlock): Press to unlock the
driver door or all doors. See “Door
Unlock Options” underVehicle
Personalization on page 5‑32. The turn signal indicators may flash
and/or the horn may sound to
indicate unlocking. See
“Unlock
Feedback” underVehicle
Personalization on page 5‑32.
Pressing
Kwill disarm the
theft-deterrent system. See Vehicle
Alarm System on page 2‑9.
7(Vehicle Locator/Panic
Alarm): Press and hold briefly to
locate the vehicle. The exterior
lamps flash and the horn chirps.
Press and hold
7for at least
two seconds to sound the panic
alarm. The horn sounds and the
turn signals flash for 30 seconds,
or until
7is pressed again or the
key is placed in the ignition and
turned to ON/RUN.
/(Remote Vehicle Start): For
vehicles with this feature, press
Q
and then press and hold/to start
the engine from outside the vehicle using the RKE transmitter. See
Remote Vehicle Start on page 2‑5
for additional information.
The buttons on the keys are
disabled when there is a key in the
ignition.
Programming Transmitters to
the Vehicle
Only RKE transmitters programmed
to this vehicle will work. If a
transmitter is lost or stolen, a
replacement can be purchased and
programmed through your dealer.
When the replacement transmitter is
programmed to this vehicle, all
remaining transmitters must also be
reprogrammed. Any lost or stolen
transmitters will no longer work
once the new transmitter is
programmed.
Page 37 of 378
Black plate (9,1)Chevrolet Orlando Owner Manual - 2012
Keys, Doors, and Windows 2-9
WARNING (Continued)
If the vehicle must be driven with
the liftgate, or trunk/hatch open:
.Close all of the windows.
.Fully open the air outlets on
or under the instrument
panel.
.Adjust the Climate Control
system to a setting that
brings in only outside air and
set the fan speed to the
highest setting. See Climate
Control System in the Index.
For more information about
carbon monoxide, see Engine
Exhaust on page 9‑21. Notice:
If you open the liftgate
without checking for overhead
obstructions such as a garage
door, you could damage the
liftgate or the liftgate glass.
Always check to make sure the
area above and behind the liftgate
is clear before opening it.
Unlock the vehicle before opening
the liftgate.
Press the touch pad located in the
handle of the liftgate, above the
license plate, and lift up to open.
Do not press the touch pad while
closing the liftgate. This will cause
the liftgate to be unlatched.
Always close the liftgate before
driving.
Vehicle Security
This vehicle has theft-deterrent
features; however, they do not
make it impossible to steal.
Vehicle Alarm System
This vehicle has a theft alarm
system.
Arming the System
To arm the system, use the power
door lock switch or the RKE
transmitter to lock the vehicle while
exiting with the vehicle turned off.
The alarm arms after about
30 seconds after all the doors have
been closed.
Press
Qagain and the system arms
immediately.
The security light, located in the
center of the instrument panel, will
flash slowly.
Page 38 of 378
Black plate (10,1)Chevrolet Orlando Owner Manual - 2012
2-10 Keys, Doors, and Windows
Disarming the System
To disarm the system pressKon
the RKE transmitter.
Turning off the System Alarm
If there is an attempt to open the
doors, liftgate, or hood without first
pressing
Kon the transmitter, the
system alarm will be activated. The
exterior lamps will flash and the
horn will sound for about
30 seconds.
To turn off the system alarm press
Kon the RKE transmitter.
Immobilizer
See Radio Frequency Statement on
page 13‑15 for information
regarding Part 15 of the Federal
Communications Commission (FCC)
rules and Industry Canada
Standards RSS-GEN/210/220/310.
Immobilizer Operation
This vehicle has a passive
theft-deterrent system.
The system does not have to be
manually armed or disarmed.
The vehicle is automatically
immobilized when the key is
removed from the ignition.
The system is automatically
disarmed when the vehicle is
started with the correct key. The key
uses a transponder that matches an
immobilizer control unit in the
vehicle and automatically disarms
the system. Only an authorized key
starts the vehicle. The vehicle may
not start if the key is damaged.
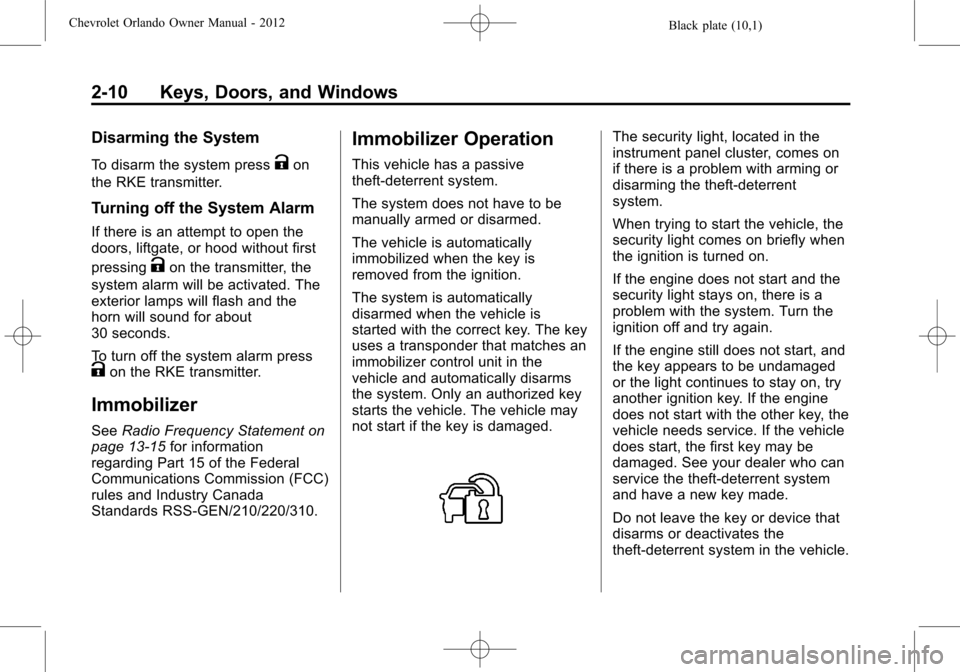
The security light, located in the
instrument panel cluster, comes on
if there is a problem with arming or
disarming the theft-deterrent
system.
When trying to start the vehicle, the
security light comes on briefly when
the ignition is turned on.
If the engine does not start and the
security light stays on, there is a
problem with the system. Turn the
ignition off and try again.
If the engine still does not start, and
the key appears to be undamaged
or the light continues to stay on, try
another ignition key. If the engine
does not start with the other key, the
vehicle needs service. If the vehicle
does start, the first key may be
damaged. See your dealer who can
service the theft-deterrent system
and have a new key made.
Do not leave the key or device that
disarms or deactivates the
theft-deterrent system in the vehicle.
Page 367 of 378

Black plate (1,1)Chevrolet Orlando Owner Manual - 2012
INDEX i-1
A
Accessories andModifications . . . . . . . . . . . . . . . . . 10-2
Accessory Power . . . . . . . . . . . . . . 9-19
Add-On Electrical Equipment . . . . . . . . . . . . . . . . . . . 9-46
Additional Information,
OnStar
®. . . . . . . . . . . . . . . . . . . . . . 14-5
Air Cleaner/Filter, Engine . . . . . 10-11
Air Conditioning . . . . . . . . . . . . . . . . 8-3
Air Vents . . . . . . . . . . . . . . . . . . . . . . . 8-6
Airbag System Check . . . . . . . . . . . . . . . . . . . . . . . . 3-32
How Does an AirbagRestrain? . . . . . . . . . . . . . . . . . . . 3-29
What Makes an Airbag
Inflate? . . . . . . . . . . . . . . . . . . . . . . 3-29
What Will You See after an Airbag Inflates? . . . . . . . . . . . . . 3-30
When Should an Airbag
Inflate? . . . . . . . . . . . . . . . . . . . . . . 3-28
Where Are the Airbags? . . . . . . 3-27 Airbags
Adding Equipment to the
Vehicle . . . . . . . . . . . . . . . . . . . . . . 3-31
Readiness Light . . . . . . . . . . . . . . 5-12
Servicing Airbag-Equipped Vehicles . . . . . . . . . . . . . . . . . . . . . 3-31
System Check . . . . . . . . . . . . . . . . 3-25
Alarm Vehicle Security . . . . . . . . . . . . . . . 2-9
AM-FM Radio . . . . . . . . . . . . . . . . . . 7-10
Antenna Multi-band . . . . . . . . . . . . . . . . . . . . 7-16
Satellite Radio . . . . . . . . . . . . . . . . 7-16
Antilock Brake System (ABS) . . . . . . . . . . . . . . . . 9-27
Warning Light . . . . . . . . . . . . . . . . . 5-16
Appearance Care Exterior . . . . . . . . . . . . . . . . . . . . . 10-79
Interior . . . . . . . . . . . . . . . . . . . . . . 10-82
Armrest Front Seat . . . . . . . . . . . . . . . . . . . . . 3-7
Ashtrays . . . . . . . . . . . . . . . . . . . . . . . . 5-7
Assistance Program, Roadside . . . . . . . . . . . . . . . . . . . . . 13-5 Audio Players . . . . . . . . . . . . . . . . . 7-16
CD . . . . . . . . . . . . . . . . . . . . . . . . . . . 7-16
Audio System Radio Reception . . . . . . . . . . . . . . 7-15
Theft-Deterrent Feature . . . . . . . . 7-2
Automatic Climate Control System . . . . . . . . 8-3
Door Locks . . . . . . . . . . . . . . . . . . . . 2-7
Headlamp System . . . . . . . . . . . . . 6-3
Transmission . . . . . . . . . . . . . . . . . 9-23
Transmission Fluid . . . . . . . . . 10-10
Automatic Transmission Manual Mode . . . . . . . . . . . . . . . . . 9-24
Shift Lock ControlFunction Check . . . . . . . . . . . 10-23
Auxiliary
Devices . . . . . . . . . . . . . . . . . . . . . . . 7-18
B
Battery . . . . . . . . . . . . . . . . . . . . . . . 10-21Jump Starting . . . . . . . . . . . . . . . 10-73
Power Protection . . . . . . . . . . . . . . 6-6
Voltage and ChargingMessages . . . . . . . . . . . . . . . . . . . 5-26
Page 375 of 378

Black plate (9,1)Chevrolet Orlando Owner Manual - 2012
INDEX i-9
Remote Keyless Entry (RKE)System . . . . . . . . . . . . . . . . . . . . . . . . 2-3
Remote Vehicle Start . . . . . . . . . . . 2-5
Replacement Bulbs . . . . . . . . . . . 10-30
Replacement Parts Airbags . . . . . . . . . . . . . . . . . . . . . . . 3-32
Maintenance . . . . . . . . . . . . . . . . .11-15
Replacing Airbag System . . . . . . 3-32
Replacing LATCH System Parts after a Crash . . . . . . . . . . . 3-46
Replacing Safety Belt
System Parts after a Crash . . . 3-24
Reporting Safety Defects Canadian Government . . . . . . 13-13
General Motors . . . . . . . . . . . . . 13-13
U.S. Government . . . . . . . . . . . 13-12
Restraints Where to Put . . . . . . . . . . . . . . . . . 3-40
Retained Accessory Power (RAP) . . . . . . . . . . . . . . . . . 9-19
Ride Control Systems
Messages . . . . . . . . . . . . . . . . . . . . 5-30
Roads Driving, Wet . . . . . . . . . . . . . . . . . . . 9-6
Roadside Assistance
Program . . . . . . . . . . . . . . . . . . . . . . 13-5 Roof
Sunroof . . . . . . . . . . . . . . . . . . . . . . . 2-17
Roof Rack System . . . . . . . . . . . . . . 4-5
Rotation, Tires . . . . . . . . . . . . . . . . 10-49
Routing, Engine Drive Belt . . . . . 12-3
Running the Vehicle While Parked . . . . . . . . . . . . . . . . . . . . . . . 9-22
S
Safety Belts . . . . . . . . . . . . . . . . . . . 3-16
Care . . . . . . . . . . . . . . . . . . . . . . . . . . 3-24
Extender . . . . . . . . . . . . . . . . . . . . . . 3-23
How to Wear Safety BeltsProperly . . . . . . . . . . . . . . . . . . . . . 3-17
Lap-Shoulder Belt . . . . . . . . . . . . 3-18
Reminders . . . . . . . . . . . . . . . . . . . . 5-11
Replacing after a Crash . . . . . . 3-24
Use During Pregnancy . . . . . . . . 3-23
Safety Defects Reporting Canadian Government . . . . . . 13-13
General Motors . . . . . . . . . . . . . 13-13
U.S. Government . . . . . . . . . . . 13-12
Safety Locks . . . . . . . . . . . . . . . . . . . . 2-8
Safety System Check . . . . . . . . . . 3-24
Satellite Radio . . . . . . . . . . . . . . . . . 7-12
Scheduling Appointments . . . . . . 13-7 Sealant Kit, Tire . . . . . . . . . . . . . . 10-58
Seats
Adjustment, Front . . . . . . . . . . . . . . 3-4
Head Restraints . . . . . . . . . . . . . . . 3-2
Heated Front . . . . . . . . . . . . . . . . . . 3-7
Power Adjustment, Front . . . . . . 3-5
Reclining Seatbacks . . . . . . . . . . . 3-5
Second Row . . . . . . . . . . . . . . . . . . . 3-8
Third Row Seat . . . . . . . . . . . . . . . 3-12
Second Row Seats . . . . . . . . . . . . . 3-8
Securing Child Restraints . . . . . . . . . . . . . . 3-46, 3-49
Security Light . . . . . . . . . . . . . . . . . . . . . . . . . . 5-20
Messages . . . . . . . . . . . . . . . . . . . . 5-30
OnStar
®. . . . . . . . . . . . . . . . . . . . . . 14-2
Vehicle . . . . . . . . . . . . . . . . . . . . . . . . 2-9
Vehicle Alarm . . . . . . . . . . . . . . . . . . 2-9
Service Accessories andModifications . . . . . . . . . . . . . . . . 10-2
Doing Your Own Work . . . . . . . . 10-3
Engine Soon Light . . . . . . . . . . . . 5-13
Maintenance Records . . . . . . .11-16
Maintenance, General Information . . . . . . . . . . . . . . . . . . 11-1
Page 377 of 378

Black plate (11,1)Chevrolet Orlando Owner Manual - 2012
INDEX i-11
Tires (cont'd)Sealant and Compressor
Kit, Storing . . . . . . . . . . . . . . . . 10-65
Sidewall Labeling . . . . . . . . . . . 10-39
Terminology and
Definitions . . . . . . . . . . . . . . . . . 10-41
Uniform Tire Quality Grading . . . . . . . . . . . . . . . . . . . 10-53
Wheel Alignment and Tire
Balance . . . . . . . . . . . . . . . . . . . 10-55
Wheel Replacement . . . . . . . . 10-55
When It Is Time for New Tires . . . . . . . . . . . . . . . . . . . . . . 10-50
Winter . . . . . . . . . . . . . . . . . . . . . . 10-38
Towing Driving Characteristics . . . . . . . . 9-41
Equipment . . . . . . . . . . . . . . . . . . . . 9-45
General Information . . . . . . . . . . 9-40
Recreational Vehicle . . . . . . . . 10-76
Trailer . . . . . . . . . . . . . . . . . . . . . . . . 9-44
Vehicle . . . . . . . . . . . . . . . . . . . . . 10-76 Traction
Control System (TCS) . . . . . . . . 9-29
Control System (TCS)/
StabiliTrak
®Light . . . . . . . . . . . . 5-18
Off Light . . . . . . . . . . . . . . . . . . . . . . 5-17
Trailer Towing . . . . . . . . . . . . . . . . . . . . . . . . 9-44
Transmission Automatic . . . . . . . . . . . . . . . . . . . . . 9-23
Fluid, Automatic . . . . . . . . . . . . 10-10
Fluid, Manual . . . . . . . . . . . . . . . .10-11
Messages . . . . . . . . . . . . . . . . . . . . 5-31
Transportation Program, Courtesy . . . . . . . . . . . . . . . . . . . . . 13-8
Turn and Lane-Change Signals . . . . . . . . . . . . . . . . . . . . . . . . 6-4
Turn Signal, Bulb Replacement . . . . . . . . . . 10-27
U
Ultrasonic Parking Assist . . . . . . 9-35
Uniform Tire QualityGrading . . . . . . . . . . . . . . . . . . . . . 10-53
Up-Shift Light . . . . . . . . . . . . . . . . . . 5-17
Using This Manual . . . . . . . . . . . . . . . . iv
V
Vehicle Alarm System . . . . . . . . . . . . . . . . . 2-9
Control . . . . . . . . . . . . . . . . . . . . . . . . 9-3
IdentificationNumber (VIN) . . . . . . . . . . . . . . . 12-1
Load Limits . . . . . . . . . . . . . . . . . . . 9-10
Messages . . . . . . . . . . . . . . . . . . . . 5-26
Personalization . . . . . . . . . . . . . . . 5-32
Reminder Messages . . . . . . . . . . 5-31
Remote Start . . . . . . . . . . . . . . . . . . 2-5
Security . . . . . . . . . . . . . . . . . . . . . . . 2-9
Service Soon Light . . . . . . . . . . . 5-15
Towing . . . . . . . . . . . . . . . . . . . . . . 10-76