radio controls CHEVROLET ORLANDO 2012 1.G Owners Manual
[x] Cancel search | Manufacturer: CHEVROLET, Model Year: 2012, Model line: ORLANDO, Model: CHEVROLET ORLANDO 2012 1.GPages: 378, PDF Size: 6.68 MB
Page 1 of 378

Black plate (1,1)Chevrolet Orlando Owner Manual - 2012
2012 Chevrolet Orlando Owner ManualM
In Brief. . . . . . . . . . . . . . . . . . . . . . . . 1-1
Instrument Panel . . . . . . . . . . . . . . 1-2
Initial Drive Information . . . . . . . . 1-4
Vehicle Features . . . . . . . . . . . . . 1-15
Performance and Maintenance . . . . . . . . . . . . . . . . 1-19
Keys, Doors, and Windows . . . . . . . . . . . . . . . . . . . . 2-1
Keys and Locks . . . . . . . . . . . . . . . 2-2
Doors . . . . . . . . . . . . . . . . . . . . . . . . . . 2-8
Vehicle Security . . . . . . . . . . . . . . . . 2-9
Exterior Mirrors . . . . . . . . . . . . . . . 2-11
Interior Mirrors . . . . . . . . . . . . . . . . 2-12
Windows . . . . . . . . . . . . . . . . . . . . . 2-14
Roof . . . . . . . . . . . . . . . . . . . . . . . . . . 2-17
Seats and Restraints . . . . . . . . . 3-1
Head Restraints . . . . . . . . . . . . . . . 3-2
Front Seats . . . . . . . . . . . . . . . . . . . . 3-4
Rear Seats . . . . . . . . . . . . . . . . . . . . 3-8
Safety Belts . . . . . . . . . . . . . . . . . . 3-16
Airbag System . . . . . . . . . . . . . . . . 3-25
Child Restraints . . . . . . . . . . . . . . 3-33 Storage
. . . . . . . . . . . . . . . . . . . . . . . 4-1
Storage Compartments . . . . . . . . 4-1
Additional Storage Features . . . 4-2
Roof Rack System . . . . . . . . . . . . . 4-5
Instruments and Controls . . . . 5-1
Controls . . . . . . . . . . . . . . . . . . . . . . . 5-2
Warning Lights, Gauges, and
Indicators . . . . . . . . . . . . . . . . . . . . 5-7
Information Displays . . . . . . . . . . 5-22
Vehicle Messages . . . . . . . . . . . . 5-26
Vehicle Personalization . . . . . . . 5-32
Lighting . . . . . . . . . . . . . . . . . . . . . . . 6-1
Exterior Lighting . . . . . . . . . . . . . . . 6-1
Interior Lighting . . . . . . . . . . . . . . . . 6-5
Lighting Features . . . . . . . . . . . . . . 6-6
Infotainment System . . . . . . . . . 7-1
Introduction . . . . . . . . . . . . . . . . . . . . 7-1
Radio . . . . . . . . . . . . . . . . . . . . . . . . . 7-10
Audio Players . . . . . . . . . . . . . . . . 7-16
Phone . . . . . . . . . . . . . . . . . . . . . . . . 7-21
Trademarks and License Agreements . . . . . . . . . . . . . . . . . 7-32 Climate Controls
. . . . . . . . . . . . . 8-1
Climate Control Systems . . . . . . 8-1
Air Vents . . . . . . . . . . . . . . . . . . . . . . . 8-6
Driving and Operating . . . . . . . . 9-1
Driving Information . . . . . . . . . . . . . 9-2
Starting and Operating . . . . . . . 9-14
Engine Exhaust . . . . . . . . . . . . . . 9-21
Automatic Transmission . . . . . . 9-23
Manual Transmission . . . . . . . . . 9-25
Brakes . . . . . . . . . . . . . . . . . . . . . . . 9-27
Ride Control Systems . . . . . . . . 9-29
Cruise Control . . . . . . . . . . . . . . . . 9-32
Object Detection Systems . . . . 9-35
Fuel . . . . . . . . . . . . . . . . . . . . . . . . . . 9-36
Towing . . . . . . . . . . . . . . . . . . . . . . . 9-40
Conversions and Add-Ons . . . 9-46
Page 7 of 378
Black plate (1,1)Chevrolet Orlando Owner Manual - 2012
In Brief 1-1
In Brief
Instrument Panel
Instrument Panel . . . . . . . . . . . . . . 1-2
Initial Drive Information
Initial Drive Information . . . . . . . . 1-4
Remote Keyless Entry (RKE)System . . . . . . . . . . . . . . . . . . . . . . 1-4
Remote Vehicle Start . . . . . . . . . 1-4
Door Locks . . . . . . . . . . . . . . . . . . . 1-5
Liftgate . . . . . . . . . . . . . . . . . . . . . . . . 1-6
Windows . . . . . . . . . . . . . . . . . . . . . . 1-6
Seat Adjustment . . . . . . . . . . . . . . 1-6
Second Row Seats . . . . . . . . . . . 1-8
Third Row Seats . . . . . . . . . . . . . . 1-8
Heated Seats . . . . . . . . . . . . . . . . . 1-8
Head Restraint Adjustment . . . . 1-8
Safety Belts . . . . . . . . . . . . . . . . . . . 1-9 Mirror Adjustment . . . . . . . . . . . . . 1-9
Steering Wheel
Adjustment . . . . . . . . . . . . . . . . . 1-10
Interior Lighting . . . . . . . . . . . . . . 1-11
Exterior Lighting . . . . . . . . . . . . . 1-11
Windshield Wiper/Washer . . . . 1-12
Climate Controls . . . . . . . . . . . . . 1-13
Transmission . . . . . . . . . . . . . . . . 1-14
Vehicle Features
Radio(s) . . . . . . . . . . . . . . . . . . . . . 1-15
Satellite Radio . . . . . . . . . . . . . . . 1-16
Portable Audio Devices . . . . . . 1-16
Bluetooth
®. . . . . . . . . . . . . . . . . . . 1-16
Steering Wheel Controls . . . . . 1-17
Cruise Control . . . . . . . . . . . . . . . 1-17
Navigation System . . . . . . . . . . . 1-18
Driver Information Center (DIC) . . . . . . . . . . . . . . . 1-18
Ultrasonic Parking Assist . . . . 1-18
Storage Compartments . . . . . . 1-19
Power Outlets . . . . . . . . . . . . . . . 1-19
Performance and Maintenance
Traction Control System (TCS) . . . . . . . . . . . . . . 1-19
StabiliTrak
®System . . . . . . . . . 1-20
Tire Pressure Monitor . . . . . . . . 1-20
Tire Sealant and Compressor Kit . . . . . . . . . . . . . 1-20
Engine Oil Life System . . . . . . 1-21
Driving for Better Fuel Economy . . . . . . . . . . . . . . . . . . . 1-21
Roadside Assistance Program . . . . . . . . . . . . . . . . . . . . 1-21
OnStar
®. . . . . . . . . . . . . . . . . . . . . 1-22
Page 22 of 378
Black plate (16,1)Chevrolet Orlando Owner Manual - 2012
1-16 In Brief
5. To save the time and return tothe Time Settings menu, press
the BACK button at any time or
press the MENU knob after
adjusting the minutes.
Setting the 12/24 Hour Format
1. Press the CONFIG button and select Time Settings.
2. Highlight 12/24 Hour Format.
3. Press the MENU knob to select the 12 hour or 24 hour display
format.
For more information, see Clock on
page 5‑5.
Satellite Radio
Vehicles with an XM™ satellite radio
tuner and a valid XM satellite radio
subscription can receive XM
programming.
XM Satellite Radio Service
XM is a satellite radio service based
in the 48 contiguous United States
and 10 Canadian provinces. XM
satellite radio has a wide variety of programming and commercial-free
music, coast to coast, and in
digital-quality sound. A fee is
required to receive the XM service.
For more information refer to:
.www.xmradio.com or call
1-800-929-2100 (U.S.).
.www.xmradio.ca or call
1-877-438-9677 (Canada).
For more information, see Satellite
Radio on page 7‑12.
Portable Audio Devices
Some vehicles have a 3.5 mm
(1/8 in) auxiliary input and a USB
port located in the center console.
External devices such as iPods®,
laptop computers, MP3 players, CD
changers, and USB drives may be
connected, depending on the audio
system.
For more information, see Auxiliary
Devices on page 7‑18.
Bluetooth®
The Bluetooth system allows users
with a Bluetooth-enabled cell phone
to make and receive hands-free
calls using the vehicle audio system
and controls.
The Bluetooth-enabled cell phone
must be paired with the in-vehicle
Bluetooth system before it can be
used in the vehicle. Not all phones
will support all functions.
See Bluetooth (Voice Recognition)
on page 7‑26 orBluetooth
(Infotainment Controls) on
page 7‑23 orBluetooth (Overview)
on page 7‑21.
Page 23 of 378
Black plate (17,1)Chevrolet Orlando Owner Manual - 2012
In Brief 1-17
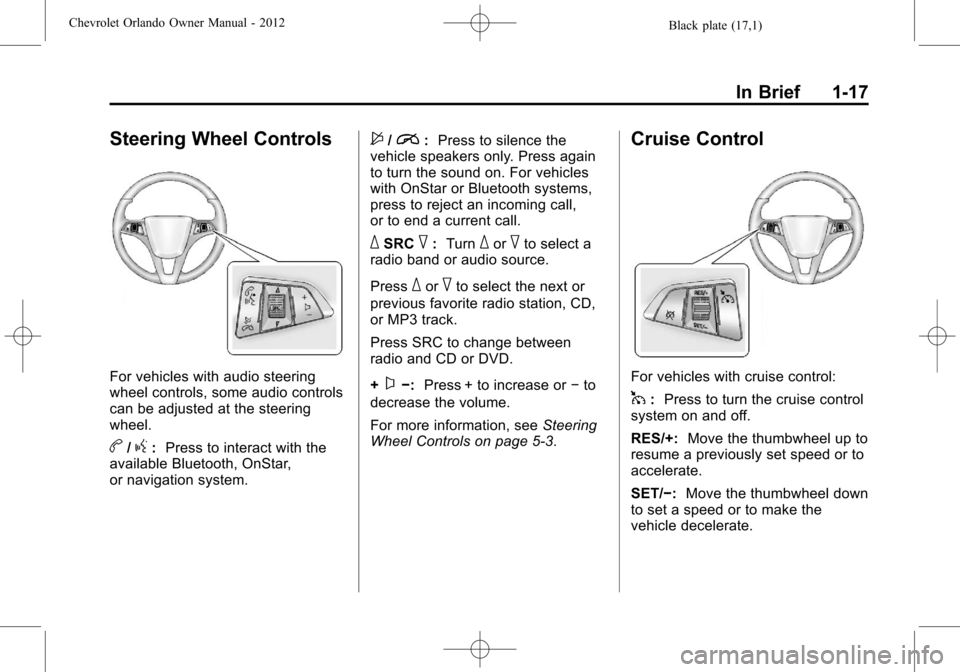
Steering Wheel Controls
For vehicles with audio steering
wheel controls, some audio controls
can be adjusted at the steering
wheel.
b/g:Press to interact with the
available Bluetooth, OnStar,
or navigation system.
$/i: Press to silence the
vehicle speakers only. Press again
to turn the sound on. For vehicles
with OnStar or Bluetooth systems,
press to reject an incoming call,
or to end a current call.
_SRC^: Turn_or^to select a
radio band or audio source.
Press
_or^to select the next or
previous favorite radio station, CD,
or MP3 track.
Press SRC to change between
radio and CD or DVD.
+
x−: Press + to increase or −to
decrease the volume.
For more information, see Steering
Wheel Controls on page 5‑3.
Cruise Control
For vehicles with cruise control:
1: Press to turn the cruise control
system on and off.
RES/+: Move the thumbwheel up to
resume a previously set speed or to
accelerate.
SET/−: Move the thumbwheel down
to set a speed or to make the
vehicle decelerate.
Page 24 of 378
Black plate (18,1)Chevrolet Orlando Owner Manual - 2012
1-18 In Brief
*:Press to disengage cruise
control without erasing the set
speed from memory.
See Cruise Control on page 9‑32.
Navigation System
If the vehicle has a navigation
system, there is a separate
navigation system manual that
includes information on the radio,
audio players, and navigation
system.
The navigation system provides
detailed maps of most major
freeways and roads. After a
destination has been set, the
system provides turn-by-turn
instructions for reaching the
destination. In addition, the system
can help locate a variety of points of
interest (POIs), such as banks,
airports, restaurants, and more.
See the navigation system manual
for more information.
Driver Information
Center (DIC)
The DIC display is located in the
center of the instrument panel
cluster. It shows the status of many
vehicle systems. The controls for
the DIC are located on the turn
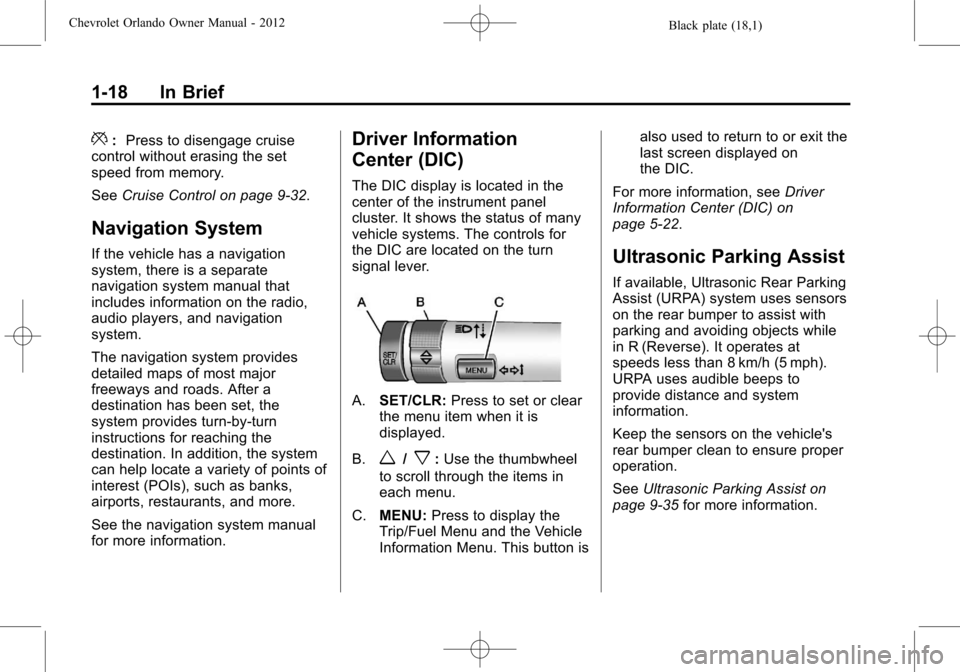
signal lever.
A.SET/CLR: Press to set or clear
the menu item when it is
displayed.
B.
w/x: Use the thumbwheel
to scroll through the items in
each menu.
C. MENU: Press to display the
Trip/Fuel Menu and the Vehicle
Information Menu. This button is also used to return to or exit the
last screen displayed on
the DIC.
For more information, see Driver
Information Center (DIC) on
page 5‑22.
Ultrasonic Parking Assist
If available, Ultrasonic Rear Parking
Assist (URPA) system uses sensors
on the rear bumper to assist with
parking and avoiding objects while
in R (Reverse). It operates at
speeds less than 8 km/h (5 mph).
URPA uses audible beeps to
provide distance and system
information.
Keep the sensors on the vehicle's
rear bumper clean to ensure proper
operation.
See Ultrasonic Parking Assist on
page 9‑35 for more information.
Page 107 of 378
Black plate (3,1)Chevrolet Orlando Owner Manual - 2012
Instruments and Controls 5-3
Steering Wheel Controls
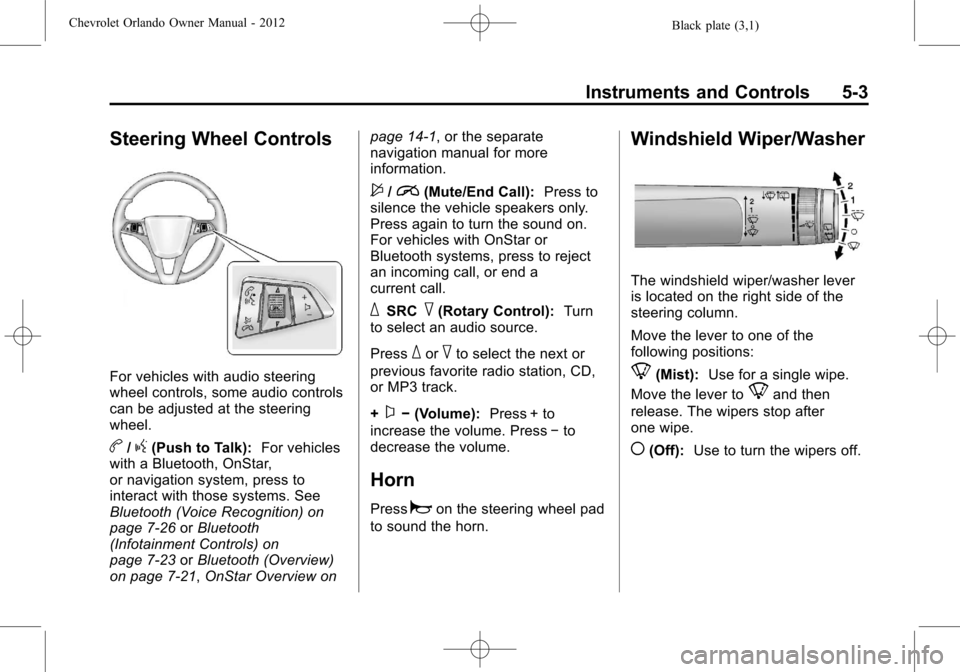
For vehicles with audio steering
wheel controls, some audio controls
can be adjusted at the steering
wheel.
b/g(Push to Talk):For vehicles
with a Bluetooth, OnStar,
or navigation system, press to
interact with those systems. See
Bluetooth (Voice Recognition) on
page 7‑26 orBluetooth
(Infotainment Controls) on
page 7‑23 orBluetooth (Overview)
on page 7‑21, OnStar Overview on page 14‑1, or the separate
navigation manual for more
information.
$/i(Mute/End Call):
Press to
silence the vehicle speakers only.
Press again to turn the sound on.
For vehicles with OnStar or
Bluetooth systems, press to reject
an incoming call, or end a
current call.
_SRC^(Rotary Control): Turn
to select an audio source.
Press
_or^to select the next or
previous favorite radio station, CD,
or MP3 track.
+
x− (Volume): Press + to
increase the volume. Press −to
decrease the volume.
Horn
Pressaon the steering wheel pad
to sound the horn.
Windshield Wiper/Washer
The windshield wiper/washer lever
is located on the right side of the
steering column.
Move the lever to one of the
following positions:
8(Mist): Use for a single wipe.
Move the lever to
8and then
release. The wipers stop after
one wipe.
((Off): Use to turn the wipers off.
Page 117 of 378
Black plate (13,1)Chevrolet Orlando Owner Manual - 2012
Instruments and Controls 5-13
The light turns off when the engine
is started. If it does not, have the
vehicle serviced by your dealer.
If the light stays on, or comes on
while driving, there could be a
problem with the electrical charging
system. Have it checked by your
dealer. Driving while this light is on
could drain the battery.
If a short distance must be driven
with the light on, be sure to turn off
all accessories, such as the radio
and air conditioner.
Malfunction
Indicator Lamp
A computer system called OBD II
(On-Board Diagnostics-Second
Generation) monitors the operation
of the vehicle to ensure emissions
are at acceptable levels, to produce
a cleaner environment. This light
comes on when the vehicle is
placed in ON/RUN, as a check to
show it is working. If it does not,have the vehicle serviced by your
dealer. See
Ignition Positions on
page 9‑15 for more information.
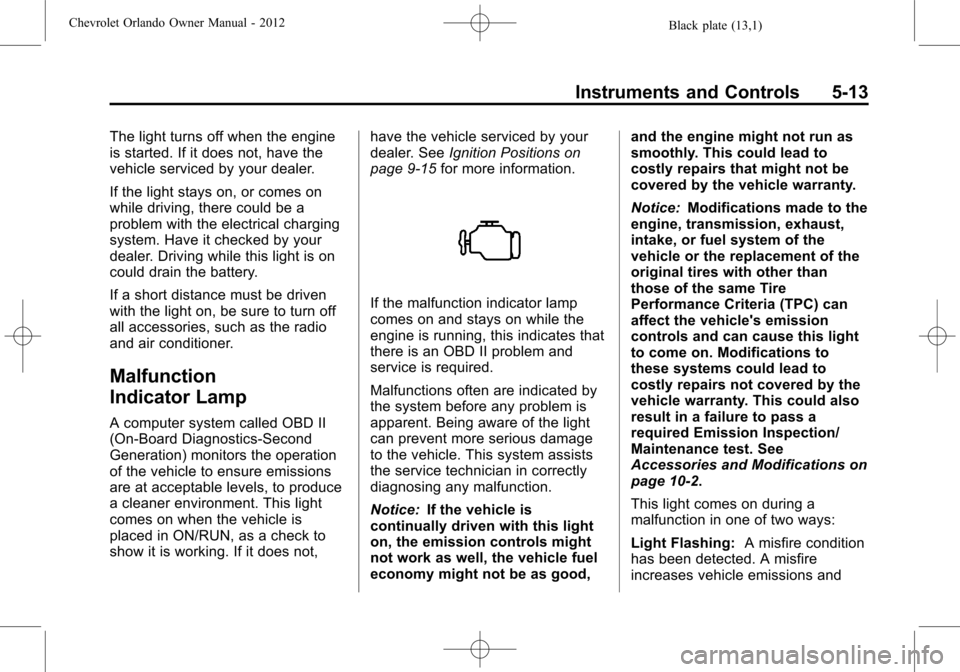
If the malfunction indicator lamp
comes on and stays on while the
engine is running, this indicates that
there is an OBD II problem and
service is required.
Malfunctions often are indicated by
the system before any problem is
apparent. Being aware of the light
can prevent more serious damage
to the vehicle. This system assists
the service technician in correctly
diagnosing any malfunction.
Notice:If the vehicle is
continually driven with this light
on, the emission controls might
not work as well, the vehicle fuel
economy might not be as good, and the engine might not run as
smoothly. This could lead to
costly repairs that might not be
covered by the vehicle warranty.
Notice:
Modifications made to the
engine, transmission, exhaust,
intake, or fuel system of the
vehicle or the replacement of the
original tires with other than
those of the same Tire
Performance Criteria (TPC) can
affect the vehicle's emission
controls and can cause this light
to come on. Modifications to
these systems could lead to
costly repairs not covered by the
vehicle warranty. This could also
result in a failure to pass a
required Emission Inspection/
Maintenance test. See
Accessories and Modifications on
page 10‑2.
This light comes on during a
malfunction in one of two ways:
Light Flashing: A misfire condition
has been detected. A misfire
increases vehicle emissions and
Page 130 of 378
Black plate (26,1)Chevrolet Orlando Owner Manual - 2012
5-26 Instruments and Controls
Vehicle Messages
Vehicle Messages (Base
Level)
DIC messages display when the
status of the vehicle has changed
and action may be needed to
correct the condition. Multiple
messages appear one after another.
Press any of the DIC buttons on the
turn signal lever to acknowledge
and clear them from the display.
More urgent messages cannot be
cleared from the DIC display. All
messages should be taken
seriously. Clearing messages will
not correct the problem.
On the base level cluster, vehicle
messages appear as code numbers.
25:Left front turn indicator failure
26: Left rear turn indicator failure
27: Right front turn indicator failure
28: Right rear turn indicator failure 35:
Replace battery in radio remote
control
75: Service air conditioner
79: Engine oil low —Add oil
81: Service transmission
82: Change engine oil soon
84: Engine power is reduced
95: Service airbag
134: Park assist fault —Clean
bumper
136: Service parking assist
Vehicle Messages
(Uplevel)
DIC messages display when the
status of the vehicle has changed
and action may be needed to
correct the condition. Multiple
messages appear one after another.
Press any of the DIC buttons on the
turn signal lever to acknowledge
and clear them from the display. More urgent messages cannot
be cleared from the DIC display.
All messages should be taken
seriously. Clearing messages will
not correct the problem.
On the uplevel cluster, vehicle
messages are displayed as text.
The messages and information
about them follow.
Battery Voltage and
Charging Messages
BATTERY SAVER ACTIVE
This message displays when the
vehicle has detected that the battery
voltage is dropping beyond a
reasonable point. The battery saver
system starts reducing certain
features of the vehicle that you may
be able to notice. At the point that
features are disabled, this message
is displayed. It means that the
vehicle is trying to save the charge
in the battery. Turn off unnecessary
accessories to allow the battery to
recharge.
Page 147 of 378
Black plate (1,1)Chevrolet Orlando Owner Manual - 2012
Infotainment System 7-1
Infotainment
System
Introduction
Infotainment . . . . . . . . . . . . . . . . . . . 7-1
Theft-Deterrent Feature . . . . . . . 7-2
Overview (Base Radio) . . . . . . . 7-2
Overview (Uplevel Radio) . . . . . 7-4
Operation . . . . . . . . . . . . . . . . . . . . . 7-5
Radio
AM-FM Radio . . . . . . . . . . . . . . . . 7-10
Satellite Radio . . . . . . . . . . . . . . . 7-12
Radio Reception . . . . . . . . . . . . . 7-15
Satellite Radio Antenna . . . . . . 7-16
Multi-Band Antenna . . . . . . . . . . 7-16
Audio Players
CD Player . . . . . . . . . . . . . . . . . . . 7-16
Auxiliary Devices . . . . . . . . . . . . 7-18
Phone
Bluetooth (Overview) . . . . . . . . 7-21
Bluetooth (InfotainmentControls) . . . . . . . . . . . . . . . . . . . 7-23
Bluetooth (Voice Recognition) . . . . . . . . . . . . . . . 7-26
Trademarks and License
Agreements
Trademarks and LicenseAgreements . . . . . . . . . . . . . . . . 7-32
Introduction
Infotainment
Read the following pages to
become familiar with the audio
system's features.
{WARNING
Taking your eyes off the road for
extended periods could cause a
crash resulting in injury or death
to you or others. Do not give
extended attention to infotainment
tasks while driving.
This system provides access to
many audio and non‐audio listings.
To minimize taking your eyes off the
road while driving, do the following
while the vehicle is parked:
.Become familiar with the
operation and controls of the
audio system.
Page 151 of 378
Black plate (5,1)Chevrolet Orlando Owner Manual - 2012
Infotainment System 7-5
I. AS
.Radio: Opens the
autostore stations list.
J. BAND
.Changes the band while
listening to the radio.
.Selects the radio when
listening to a different
audio source.
K. CD/AUX
.Selects the CD player or
an external audio source.
L. CONFIG
.Opens the settings menu.
M.
5\>
.Opens the phone
main menu.
.Mutes the audio system.
N. FAV
.Radio: Opens the
favorites list. O. BACK
.Menu: Moves one
level back.
.Character Input: Deletes
the last character.
P. MENU
.Turn to open menus,
highlight menu items,
or set numeric values
while in a menu.
.Press to select menu
items.
.Radio: Manually selects
radio stations.
.CD: Selects tracks.
Operation
Controls
The infotainment system is operated
by using the pushbuttons,
multifunction knobs, menus shown
on the display, and steering wheel
controls, if equipped.
Turning the System On or Off
O(Volume/Power): Press to turn
the system on and off.
Automatic Switch-Off
If the infotainment system has been
turned on after the ignition is turned
off, the system will turn off
automatically after 10 minutes.
Volume Control
O(Volume/Power): Turn to adjust
the volume.
5/>(Phone/Mute): Press5/>to mute the infotainment system.
Press
5/>again, or turn theO
knob to cancel mute.
Menu System (Base Level)
The menu system for the base level
infotainment system appears on the
top half of the display screen.