brake light CHEVROLET ORLANDO 2013 1.G User Guide
[x] Cancel search | Manufacturer: CHEVROLET, Model Year: 2013, Model line: ORLANDO, Model: CHEVROLET ORLANDO 2013 1.GPages: 372, PDF Size: 6.71 MB
Page 207 of 372
Black plate (27,1)Chevrolet Orlando Owner Manual - 2013 - CRC - 6/5/12
Driving and Operating 9-27
Parking Brake
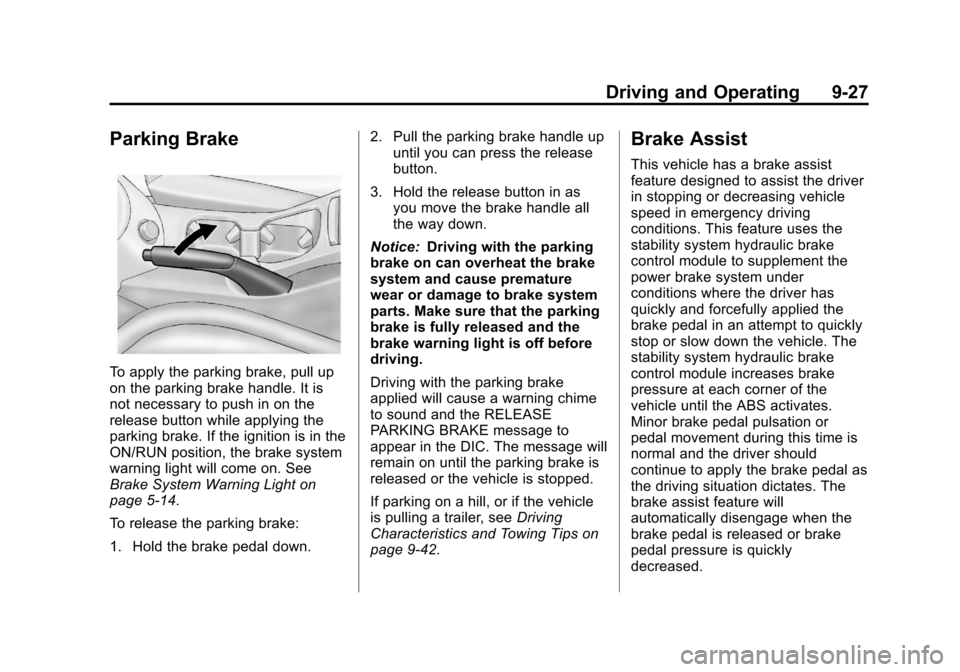
To apply the parking brake, pull up
on the parking brake handle. It is
not necessary to push in on the
release button while applying the
parking brake. If the ignition is in the
ON/RUN position, the brake system
warning light will come on. See
Brake System Warning Light on
page 5‑14.
To release the parking brake:
1. Hold the brake pedal down.2. Pull the parking brake handle up
until you can press the release
button.
3. Hold the release button in as you move the brake handle all
the way down.
Notice: Driving with the parking
brake on can overheat the brake
system and cause premature
wear or damage to brake system
parts. Make sure that the parking
brake is fully released and the
brake warning light is off before
driving.
Driving with the parking brake
applied will cause a warning chime
to sound and the RELEASE
PARKING BRAKE message to
appear in the DIC. The message will
remain on until the parking brake is
released or the vehicle is stopped.
If parking on a hill, or if the vehicle
is pulling a trailer, see Driving
Characteristics and Towing Tips on
page 9‑42.
Brake Assist
This vehicle has a brake assist
feature designed to assist the driver
in stopping or decreasing vehicle
speed in emergency driving
conditions. This feature uses the
stability system hydraulic brake
control module to supplement the
power brake system under
conditions where the driver has
quickly and forcefully applied the
brake pedal in an attempt to quickly
stop or slow down the vehicle. The
stability system hydraulic brake
control module increases brake
pressure at each corner of the
vehicle until the ABS activates.
Minor brake pedal pulsation or
pedal movement during this time is
normal and the driver should
continue to apply the brake pedal as
the driving situation dictates. The
brake assist feature will
automatically disengage when the
brake pedal is released or brake
pedal pressure is quickly
decreased.
Page 208 of 372
Black plate (28,1)Chevrolet Orlando Owner Manual - 2013 - CRC - 6/5/12
9-28 Driving and Operating
Ride Control Systems
Traction Control
System (TCS)
The vehicle has a Traction Control
System (TCS) that limits wheel spin.
On a front-wheel-drive vehicle, the
system operates if it senses that
one or both of the front wheels are
spinning or beginning to lose
traction. When this happens, the
system brakes the spinning
wheel(s), and/or reduces engine
power to limit wheel spin.
The system may be heard or felt
while it is working, but this is
normal.
TCS is on whenever the vehicle is
started. To limit wheel spin,
especially in slippery road
conditions, the system should
always be left on. But, TCS can be
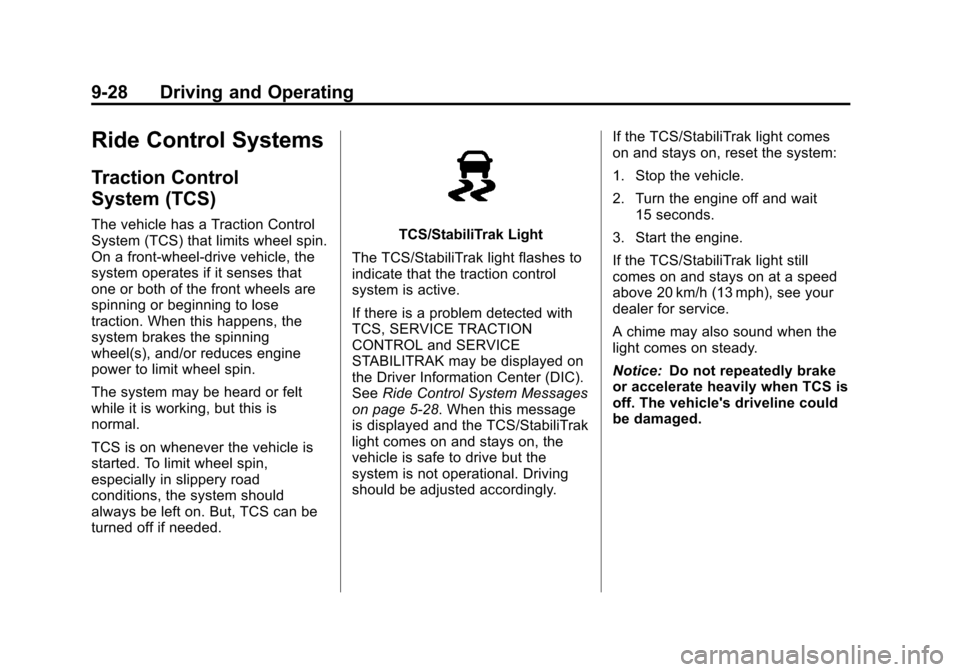
turned off if needed.TCS/StabiliTrak Light
The TCS/StabiliTrak light flashes to
indicate that the traction control
system is active.
If there is a problem detected with
TCS, SERVICE TRACTION
CONTROL and SERVICE
STABILITRAK may be displayed on
the Driver Information Center (DIC).
See Ride Control System Messages
on page 5‑28. When this message
is displayed and the TCS/StabiliTrak
light comes on and stays on, the
vehicle is safe to drive but the
system is not operational. Driving
should be adjusted accordingly. If the TCS/StabiliTrak light comes
on and stays on, reset the system:
1. Stop the vehicle.
2. Turn the engine off and wait
15 seconds.
3. Start the engine.
If the TCS/StabiliTrak light still
comes on and stays on at a speed
above 20 km/h (13 mph), see your
dealer for service.
A chime may also sound when the
light comes on steady.
Notice: Do not repeatedly brake
or accelerate heavily when TCS is
off. The vehicle's driveline could
be damaged.
Page 209 of 372
Black plate (29,1)Chevrolet Orlando Owner Manual - 2013 - CRC - 6/5/12
Driving and Operating 9-29
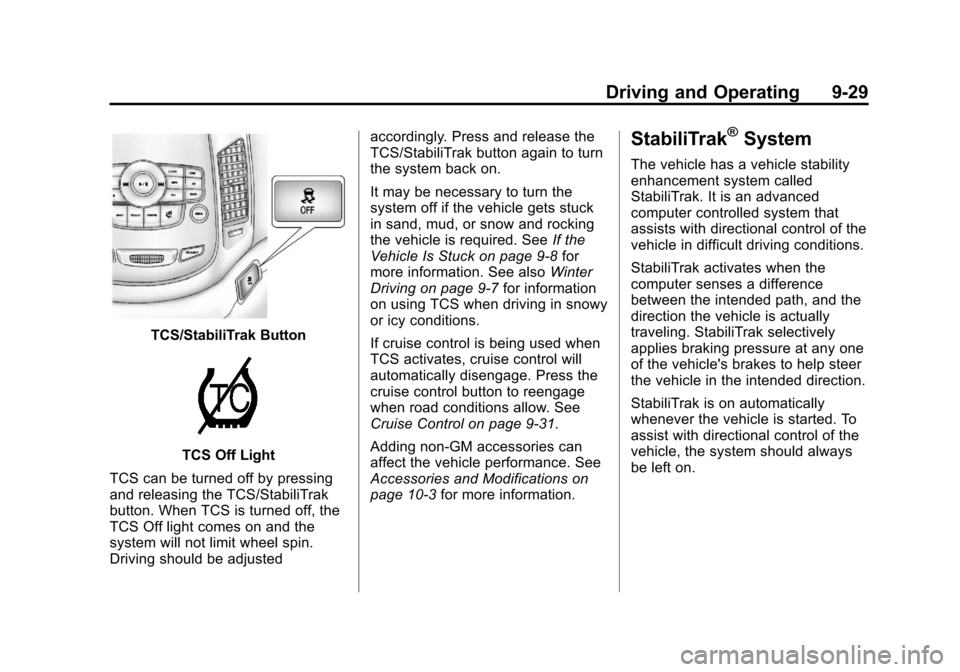
TCS/StabiliTrak Button
TCS Off Light
TCS can be turned off by pressing
and releasing the TCS/StabiliTrak
button. When TCS is turned off, the
TCS Off light comes on and the
system will not limit wheel spin.
Driving should be adjusted accordingly. Press and release the
TCS/StabiliTrak button again to turn
the system back on.
It may be necessary to turn the
system off if the vehicle gets stuck
in sand, mud, or snow and rocking
the vehicle is required. See
If the
Vehicle Is Stuck on page 9‑8 for
more information. See also Winter
Driving on page 9‑7 for information
on using TCS when driving in snowy
or icy conditions.
If cruise control is being used when
TCS activates, cruise control will
automatically disengage. Press the
cruise control button to reengage
when road conditions allow. See
Cruise Control on page 9‑31.
Adding non‐GM accessories can
affect the vehicle performance. See
Accessories and Modifications on
page 10‑3 for more information.
StabiliTrak®System
The vehicle has a vehicle stability
enhancement system called
StabiliTrak. It is an advanced
computer controlled system that
assists with directional control of the
vehicle in difficult driving conditions.
StabiliTrak activates when the
computer senses a difference
between the intended path, and the
direction the vehicle is actually
traveling. StabiliTrak selectively
applies braking pressure at any one
of the vehicle's brakes to help steer
the vehicle in the intended direction.
StabiliTrak is on automatically
whenever the vehicle is started. To
assist with directional control of the
vehicle, the system should always
be left on.
Page 210 of 372
Black plate (30,1)Chevrolet Orlando Owner Manual - 2013 - CRC - 6/5/12
9-30 Driving and Operating
TCS/StabiliTrak Light
When the stability control system
activates, the TCS/StabiliTrak light
flashes on the instrument panel.
This also occurs when traction
control is activated. A noise may
be heard or vibration may be felt in
the brake pedal. This is normal.
Continue to steer the vehicle in the
intended direction.
If there is a problem detected
with StabiliTrak, SERVICE
STABILITRAK is displayed on the
Driver Information Center (DIC).
See Ride Control System Messages
on page 5‑28. When this message
is displayed and/or the TCS/
StabiliTrak light comes on and stays
on, the vehicle is safe to drive but
the system is not operational.
Driving should be adjusted
accordingly. If the TCS/StabiliTrak light comes
on and stays on, reset the system:
1. Stop the vehicle.
2. Turn the engine off and wait
15 seconds.
3. Start the engine.
If the TCS/StabiliTrak light still
comes on and stays on at a speed
above 20 km/h (13 mph), see your
dealer for service.
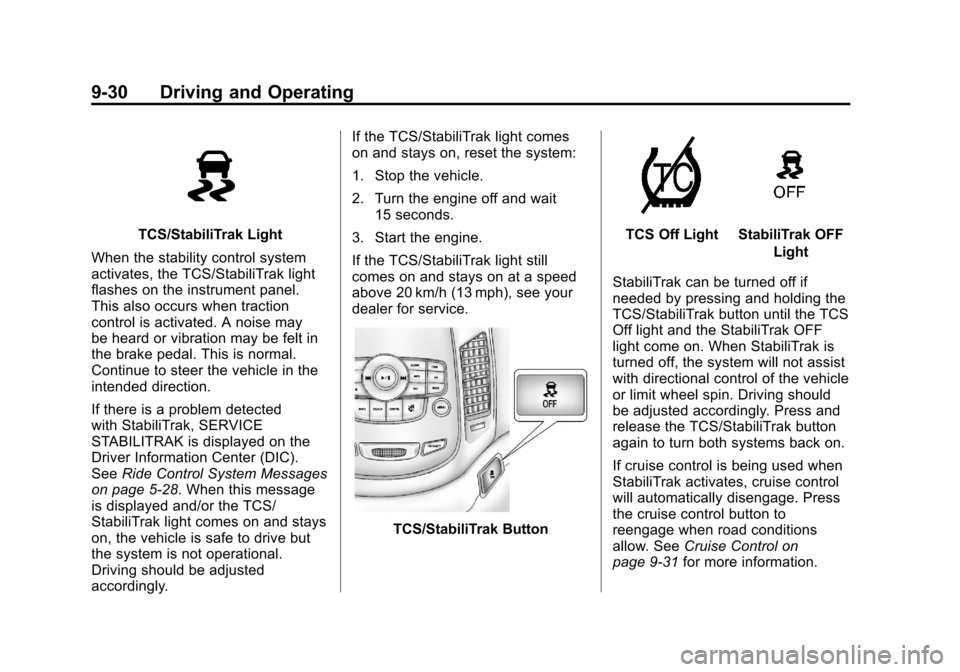
TCS/StabiliTrak Button
TCS Off LightStabiliTrak OFF Light
StabiliTrak can be turned off if
needed by pressing and holding the
TCS/StabiliTrak button until the TCS
Off light and the StabiliTrak OFF
light come on. When StabiliTrak is
turned off, the system will not assist
with directional control of the vehicle
or limit wheel spin. Driving should
be adjusted accordingly. Press and
release the TCS/StabiliTrak button
again to turn both systems back on.
If cruise control is being used when
StabiliTrak activates, cruise control
will automatically disengage. Press
the cruise control button to
reengage when road conditions
allow. See Cruise Control on
page 9‑31 for more information.
Page 213 of 372
Black plate (33,1)Chevrolet Orlando Owner Manual - 2013 - CRC - 6/5/12
Driving and Operating 9-33
Ending Cruise Control
There are three ways to end cruise
control:
.To disengage cruise control,
step lightly on the brake pedal or
clutch for a manual transmission.
.Press*on the steering wheel.
.To turn off cruise control, press1on the steering wheel.
Erasing Speed Memory
The cruise control set speed is
erased from memory if
1is pressed
or if the ignition is turned off.
Object Detection
Systems
Ultrasonic Parking Assist
For vehicles with the Ultrasonic
Rear Parking Assist (URPA) system,
it assists the driver with parking and
avoiding objects while in
R (Reverse). URPA operates at
speeds less than 8 km/h (5 mph),
and the sensors on the rear bumper
detect objects up to 2.5 m (8 ft)
behind the vehicle, and at least
20 cm (8 in) off the ground.
{WARNING
The URPA system does not
detect children, pedestrians,
bicyclists, animals, or objects
below the bumper or that are too
close or too far from the vehicle.
It is not available at speeds
greater than 8 km/h (5 mph). To
prevent injury, death, or vehicle
(Continued)
WARNING (Continued)
damage, even with URPA, always
check the area around the vehicle
and check all mirrors before
backing.
How the System Works
URPA comes on automatically when
the shift lever is moved into
R (Reverse). A single tone sounds
to indicate the system is working.
URPA operates only at speeds less
than 8 km/h (5 mph).
An obstacle is indicated by audible
beeps. The interval between the
beeps becomes shorter as the
vehicle gets closer to the obstacle.
When the distance is less than
30 cm (12 in) the beeping is a
continuous tone for five seconds.
Page 247 of 372
Black plate (19,1)Chevrolet Orlando Owner Manual - 2013 - CRC - 6/5/12
Vehicle Care 10-19
Brakes
This vehicle has disc brakes. Disc
brake pads have built-in wear
indicators that make a high-pitched
warning sound when the brake pads
are worn and new pads are needed.
The sound can come and go or be
heard all the time the vehicle is
moving, except when applying the
brake pedal firmly.
{WARNING
The brake wear warning sound
means that soon the brakes will
not work well. That could lead to
a crash. When the brake wear
warning sound is heard, have the
vehicle serviced.
Notice: Continuing to drive with
worn-out brake pads could result
in costly brake repair. Some driving conditions or climates
can cause a brake squeal when the
brakes are first applied or lightly
applied. This does not mean
something is wrong with the brakes.
Properly torqued wheel nuts are
necessary to help prevent brake
pulsation. When tires are rotated,
inspect brake pads for wear and
evenly tighten wheel nuts in the
proper sequence to torque
specifications in
Capacities and
Specifications on page 12‑2.
Brake linings should always be
replaced as complete axle sets.
Brake Pedal Travel
See your dealer if the brake pedal
does not return to normal height,
or if there is a rapid increase in
pedal travel. This could be a sign
that brake service might be
required.
Brake Adjustment
Every time the brakes are applied,
with or without the vehicle moving,
the brakes adjust for wear.
Replacing Brake System Parts
The braking system on a vehicle is
complex. Its many parts have to be
of top quality and work well together
if the vehicle is to have really good
braking. The vehicle was designed
and tested with top-quality brake
parts. When parts of the braking
system are replaced, be sure to get
new, approved replacement parts.
If this is not done, the brakes might
not work properly. For example,
installing disc brake pads that are
wrong for the vehicle, can change
the balance between the front and
rear brakes —for the worse. The
braking performance expected can
change in many other ways if the
wrong replacement brake parts are
installed.
Page 248 of 372
Black plate (20,1)Chevrolet Orlando Owner Manual - 2013 - CRC - 6/5/12
10-20 Vehicle Care
Brake Fluid
The brake master cylinder and, on
manual transmission vehicles, the
clutch hydraulic system use the
same reservoir. SeeEngine
Compartment Overview on
page 10‑6 for the location of the
reservoir. The reservoir is filled with
DOT 4 brake fluid.
There are only two reasons why the
brake fluid level in the reservoir
might go down:
.The brake fluid level goes down
because of normal brake lining
wear. When new linings are
installed, the fluid level goes
back up.
.A fluid leak in the brake/clutch
hydraulic system can also cause
a low fluid level. Have the brake/ clutch hydraulic system fixed,
since a leak means that sooner
or later the brakes will not
work well.
Do not top off the brake/clutch fluid.
Adding fluid does not correct a leak.
If fluid is added when the linings are
worn, there will be too much fluid
when new brake linings are
installed. Add or remove fluid, as
necessary, only when work is done
on the brake/clutch hydraulic
system.
{WARNING
If too much brake fluid is added, it
can spill on the engine and burn,
if the engine is hot enough. You
or others could be burned, and
the vehicle could be damaged.
Add brake fluid only when work is
done on the brake/clutch
hydraulic system.
Checking Brake Fluid
The brake/clutch fluid can be
checked without taking off the cap
by looking at the brake/clutch fluid
reservoir.
The fluid level should be above
MIN. If it is not, have the brake/
clutch hydraulic system checked to
see if there is a leak.
After work is done on the brake/
clutch hydraulic system, make sure
the level is above MIN but not over
the MAX mark.
When the brake/clutch fluid falls to a
low level, the brake warning light
comes on. See Brake System
Warning Light on page 5‑14.
What to Add
Use only new DOT 4 brake fluid
from a sealed container. It is
recommended that the brake/clutch
hydraulic system be flushed and
refilled with new DOT 4 fluid at a
regular maintenance service every
Page 261 of 372
Black plate (33,1)Chevrolet Orlando Owner Manual - 2013 - CRC - 6/5/12
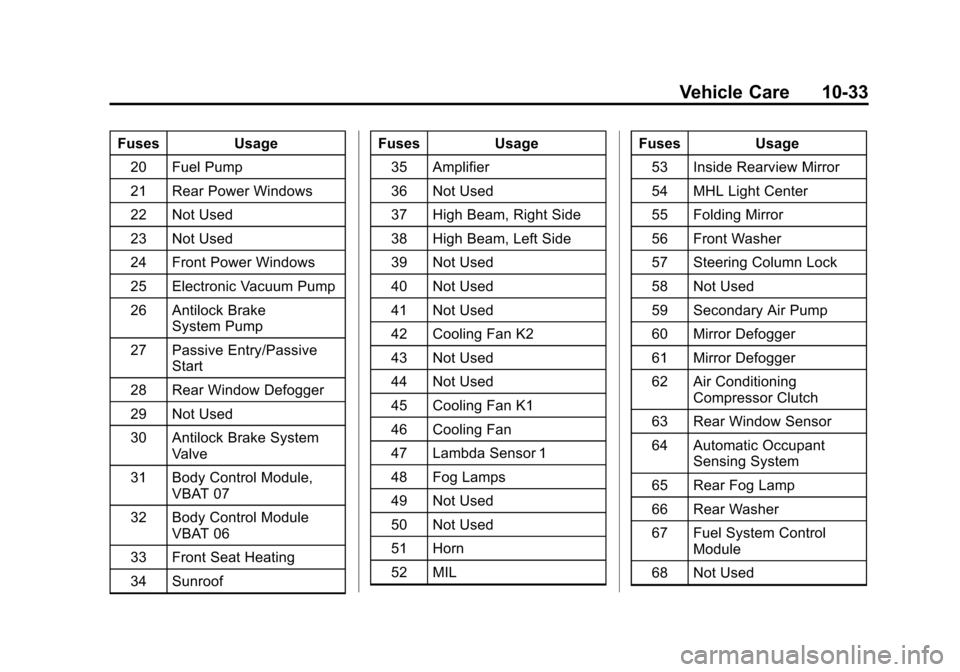
Vehicle Care 10-33
FusesUsage
20 Fuel Pump
21 Rear Power Windows
22 Not Used
23 Not Used
24 Front Power Windows
25 Electronic Vacuum Pump
26 Antilock Brake System Pump
27 Passive Entry/Passive Start
28 Rear Window Defogger
29 Not Used
30 Antilock Brake System Valve
31 Body Control Module, VBAT 07
32 Body Control Module VBAT 06
33 Front Seat Heating
34 Sunroof Fuses
Usage
35 Amplifier
36 Not Used
37 High Beam, Right Side
38 High Beam, Left Side
39 Not Used
40 Not Used
41 Not Used
42 Cooling Fan K2
43 Not Used
44 Not Used
45 Cooling Fan K1
46 Cooling Fan
47 Lambda Sensor 1
48 Fog Lamps
49 Not Used
50 Not Used
51 Horn
52 MIL Fuses
Usage
53 Inside Rearview Mirror
54 MHL Light Center
55 Folding Mirror
56 Front Washer
57 Steering Column Lock
58 Not Used
59 Secondary Air Pump
60 Mirror Defogger
61 Mirror Defogger
62 Air Conditioning Compressor Clutch
63 Rear Window Sensor
64 Automatic Occupant Sensing System
65 Rear Fog Lamp
66 Rear Washer
67 Fuel System Control Module
68 Not Used
Page 269 of 372

Black plate (41,1)Chevrolet Orlando Owner Manual - 2013 - CRC - 6/5/12
Vehicle Care 10-41
steering, power brakes, power
windows, power seats, and air
conditioning.
Aspect Ratio
:The relationship
of a tire's height to its width.
Belt
:A rubber coated layer of
cords between the plies and the
tread. Cords may be made from
steel or other reinforcing
materials.
Bead
:The tire bead contains
steel wires wrapped by steel
cords that hold the tire onto
the rim.
Bias Ply Tire
:A pneumatic tire
in which the plies are laid at
alternate angles less than
90 degrees to the centerline of
the tread.
Cold Tire Pressure
:The
amount of air pressure in a tire,
measured in kPa (kilopascal)
or psi (pounds per square inch) before a tire has built up heat
from driving. See
Tire Pressure
on page 10‑43.
Curb Weight
:The weight of a
motor vehicle with standard and
optional equipment including the
maximum capacity of fuel, oil,
and coolant, but without
passengers and cargo.
DOT Markings
:A code molded
into the sidewall of a tire
signifying that the tire is in
compliance with the U.S.
Department of Transportation
(DOT) Motor Vehicle Safety
Standards. The DOT code
includes the Tire Identification
Number (TIN), an alphanumeric
designator which can also
identify the tire manufacturer,
production plant, brand, and
date of production.
GVWR
:Gross Vehicle Weight
Rating. See Vehicle Load Limits
on page 9‑9. GAWR FRT
:Gross Axle Weight
Rating for the front axle. See
Vehicle Load Limits on page 9‑9.
GAWR RR
:Gross Axle Weight
Rating for the rear axle. See
Vehicle Load Limits on page 9‑9.
Intended Outboard Sidewall
:
The side of an asymmetrical tire,
that must always face outward
when mounted on a vehicle.
Kilopascal (kPa)
:The metric
unit for air pressure.
Light Truck (LT-Metric) Tire
:A
tire used on light duty trucks and
some multipurpose passenger
vehicles.
Load Index
:An assigned
number ranging from 1 to 279
that corresponds to the load
carrying capacity of a tire.
Page 279 of 372
Black plate (51,1)Chevrolet Orlando Owner Manual - 2013 - CRC - 6/5/12
Vehicle Care 10-51
equipped, be replaced after six
years, regardless of tread wear. The
tire manufacturer date is the last
four digits of the DOT Tire
Identification Number (TIN) which is
molded into one side of the tire
sidewall. The first two digits
represent the week (01–52) and the
last two digits, the year. For
example, the third week of the year
2010 would have a four-digit DOT
date of 0310.
Vehicle Storage
Tires age when stored normally
mounted on a parked vehicle. Park
a vehicle that will be stored for at
least a month in a cool, dry, clean
area away from direct sunlight to
slow aging. This area should be free
of grease, gasoline, or other
substances that can deteriorate
rubber.
Parking for an extended period can
cause flat spots on the tires that
may result in vibrations while
driving. When storing a vehicle forat least a month, remove the tires or
raise the vehicle to reduce the
weight from the tires.
Buying New Tires
GM has developed and matched
specific tires for the vehicle. The
original equipment tires installed
were designed to meet General
Motors Tire Performance Criteria
Specification (TPC Spec)
system rating. When
replacement tires are needed,
GM strongly recommends
buying tires with the same TPC
Spec rating.
GM's exclusive TPC Spec
system considers over a dozen
critical specifications that impact
the overall performance of the
vehicle, including brake system
performance, ride and handling,
traction control, and tire
pressure monitoring
performance. GM's TPC Spec
number is molded onto the tire's
sidewall near the tire size. If the
tires have an all-season tread
design, the TPC spec number
will be followed by MS, for mud
and snow. See
Tire Sidewall
Labeling on page 10‑38.
GM recommends replacing worn
tires in complete sets of four.
Uniform tread depth on all tires
will help to maintain the
performance of the vehicle.
Braking and handling
performance may be adversely
affected if all the tires are not
replaced at the same time.
If proper rotation and
maintenance have been done,
all four tires should wear out at
about the same time. See Tire
Rotation on page 10‑49 for
information on proper tire
rotation. However, if it is
necessary to replace only one
axle set of worn tires, place the
new tires on the rear axle.