10-8 CHEVROLET ORLANDO 2013 1.G Owners Manual
[x] Cancel search | Manufacturer: CHEVROLET, Model Year: 2013, Model line: ORLANDO, Model: CHEVROLET ORLANDO 2013 1.GPages: 372, PDF Size: 6.71 MB
Page 230 of 372
Black plate (2,1)Chevrolet Orlando Owner Manual - 2013 - CRC - 6/5/12
10-2 Vehicle Care
Tire Rotation . . . . . . . . . . . . . . . 10-49
When It Is Time for NewTires . . . . . . . . . . . . . . . . . . . . . . 10-50
Buying New Tires . . . . . . . . . . . 10-51
Different Size Tires and Wheels . . . . . . . . . . . . . . . . . . . 10-53
Uniform Tire Quality Grading . . . . . . . . . . . . . . . . . . . 10-53
Wheel Alignment and Tire Balance . . . . . . . . . . . . . . . . . . . 10-55
Wheel Replacement . . . . . . . . 10-55
Tire Chains . . . . . . . . . . . . . . . . . 10-56
If a Tire Goes Flat . . . . . . . . . . 10-56
Tire Sealant and Compressor Kit . . . . . . . . . . . 10-58
Storing the Tire Sealant and Compressor Kit . . . . . . . . . . . 10-65
Tire Changing . . . . . . . . . . . . . . 10-65
Full-Size Spare Tire . . . . . . . . 10-72Jump Starting
Jump Starting . . . . . . . . . . . . . . 10-73
Towing
Towing the Vehicle . . . . . . . . . 10-75
Recreational Vehicle Towing . . . . . . . . . . . . . . . . . . . . 10-76
Appearance Care
Exterior Care . . . . . . . . . . . . . . . 10-78
Interior Care . . . . . . . . . . . . . . . . 10-82
Floor Mats . . . . . . . . . . . . . . . . . . 10-85
General Information
For service and parts needs, visit
your dealer. You will receive
genuine GM parts and GM-trained
and supported service people.
Genuine GM parts have one of
these marks:
Page 236 of 372
Black plate (8,1)Chevrolet Orlando Owner Manual - 2013 - CRC - 6/5/12
10-8 Vehicle Care
{WARNING
The engine oil dipstick handle
may be hot; it could burn you.
Use a towel or glove to touch the
dipstick handle.
2. Pull out the dipstick and clean it with a paper towel or cloth, then
push it back in all the way.
Remove it again, keeping the tip
down, and check the level.
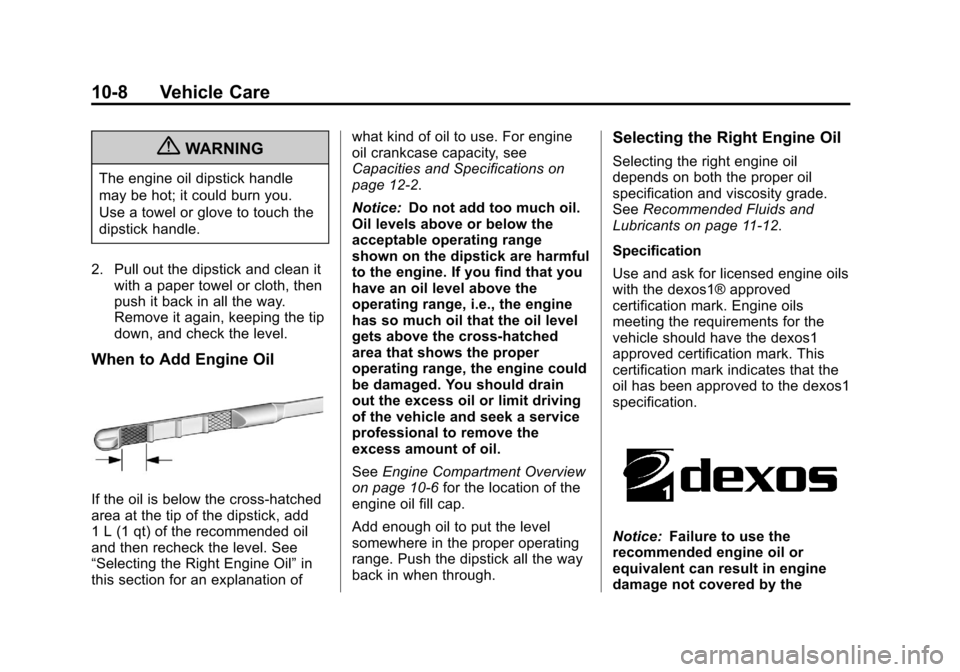
When to Add Engine Oil
If the oil is below the cross-hatched
area at the tip of the dipstick, add
1 L (1 qt) of the recommended oil
and then recheck the level. See
“Selecting the Right Engine Oil” in
this section for an explanation of what kind of oil to use. For engine
oil crankcase capacity, see
Capacities and Specifications on
page 12‑2.
Notice:
Do not add too much oil.
Oil levels above or below the
acceptable operating range
shown on the dipstick are harmful
to the engine. If you find that you
have an oil level above the
operating range, i.e., the engine
has so much oil that the oil level
gets above the cross-hatched
area that shows the proper
operating range, the engine could
be damaged. You should drain
out the excess oil or limit driving
of the vehicle and seek a service
professional to remove the
excess amount of oil.
See Engine Compartment Overview
on page 10‑6 for the location of the
engine oil fill cap.
Add enough oil to put the level
somewhere in the proper operating
range. Push the dipstick all the way
back in when through.
Selecting the Right Engine Oil
Selecting the right engine oil
depends on both the proper oil
specification and viscosity grade.
See Recommended Fluids and
Lubricants on page 11‑12.
Specification
Use and ask for licensed engine oils
with the dexos1® approved
certification mark. Engine oils
meeting the requirements for the
vehicle should have the dexos1
approved certification mark. This
certification mark indicates that the
oil has been approved to the dexos1
specification.
Notice: Failure to use the
recommended engine oil or
equivalent can result in engine
damage not covered by the
Page 308 of 372
Black plate (80,1)Chevrolet Orlando Owner Manual - 2013 - CRC - 6/5/12
10-80 Vehicle Care
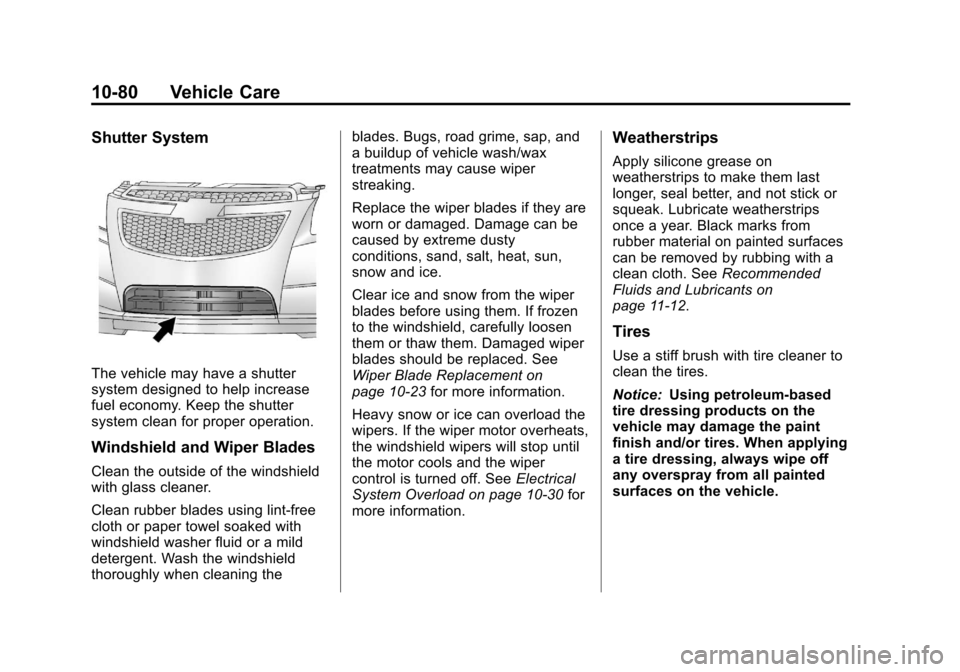
Shutter System
The vehicle may have a shutter
system designed to help increase
fuel economy. Keep the shutter
system clean for proper operation.
Windshield and Wiper Blades
Clean the outside of the windshield
with glass cleaner.
Clean rubber blades using lint-free
cloth or paper towel soaked with
windshield washer fluid or a mild
detergent. Wash the windshield
thoroughly when cleaning theblades. Bugs, road grime, sap, and
a buildup of vehicle wash/wax
treatments may cause wiper
streaking.
Replace the wiper blades if they are
worn or damaged. Damage can be
caused by extreme dusty
conditions, sand, salt, heat, sun,
snow and ice.
Clear ice and snow from the wiper
blades before using them. If frozen
to the windshield, carefully loosen
them or thaw them. Damaged wiper
blades should be replaced. See
Wiper Blade Replacement on
page 10‑23
for more information.
Heavy snow or ice can overload the
wipers. If the wiper motor overheats,
the windshield wipers will stop until
the motor cools and the wiper
control is turned off. See Electrical
System Overload on page 10‑30 for
more information.
Weatherstrips
Apply silicone grease on
weatherstrips to make them last
longer, seal better, and not stick or
squeak. Lubricate weatherstrips
once a year. Black marks from
rubber material on painted surfaces
can be removed by rubbing with a
clean cloth. See Recommended
Fluids and Lubricants on
page 11‑12.
Tires
Use a stiff brush with tire cleaner to
clean the tires.
Notice: Using petroleum-based
tire dressing products on the
vehicle may damage the paint
finish and/or tires. When applying
a tire dressing, always wipe off
any overspray from all painted
surfaces on the vehicle.
Page 309 of 372
Black plate (81,1)Chevrolet Orlando Owner Manual - 2013 - CRC - 6/5/12
Vehicle Care 10-81
Wheels and Trim—Aluminum
or Chrome
Use a soft, clean cloth with mild
soap and water to clean the wheels.
After rinsing thoroughly with clean
water, dry with a soft, clean towel.
A wax may then be applied.
Notice: Chrome wheels and other
chrome trim may be damaged if
the vehicle is not washed after
driving on roads that have been
sprayed with magnesium,
calcium, or sodium chloride.
These chlorides are used on
roads for conditions such as ice
and dust. Always wash the
chrome with soap and water after
exposure.
Notice: To avoid surface damage,
do not use strong soaps,
chemicals, abrasive polishes,
cleaners, brushes, or cleaners
that contain acid on aluminum or
chrome-plated wheels. Use only
approved cleaners. Also, never
drive a vehicle with aluminum or
chrome-plated wheels through an automatic car wash that uses
silicone carbide tire cleaning
brushes. Damage could occur
and the repairs would not be
covered by the vehicle warranty.
Steering, Suspension, and
Chassis Components
Visually inspect front and rear
suspension and steering system for
damaged, loose, or missing parts or
signs of wear. Inspect the power
steering for proper hook-up, binding,
leaks, cracks, chafing, etc. Visually
check constant velocity joints,
rubber boots, and axle seals for
leaks.
Body Component Lubrication
Lubricate all key lock cylinders,
hood hinges, liftgate hinges, and
steel fuel door hinge unless the
components are plastic. Applying
silicone grease on weatherstrips
with a clean cloth will make them
last longer, seal better, and not stick
or squeak.
Underbody Maintenance
Use plain water to flush dirt and
debris from the vehicle's underbody.
Your dealer or an underbody car
washing system can do this. If not
removed, rust and corrosion can
develop.
Sheet Metal Damage
If the vehicle is damaged and
requires sheet metal repair or
replacement, make sure the body
repair shop applies anti-corrosion
material to parts repaired or
replaced to restore corrosion
protection.
Original manufacturer replacement
parts will provide the corrosion
protection while maintaining the
vehicle warranty.
Page 310 of 372
Black plate (82,1)Chevrolet Orlando Owner Manual - 2013 - CRC - 6/5/12
10-82 Vehicle Care
Finish Damage
Quickly repair minor chips and
scratches with touch-up materials
available from your dealer to avoid
corrosion. Larger areas of finish
damage can be corrected in your
dealer's body and paint shop.
Chemical Paint Spotting
Airborne pollutants can fall upon
and attack painted vehicle surfaces
causing blotchy, ring-shaped
discolorations, and small, irregular
dark spots etched into the paint
surface.
Interior Care
To prevent dirt particle abrasions,
regularly clean the vehicle's interior.
Immediately remove any soils. Note
that newspapers or dark garments
that can transfer color to home
furnishings can also permanently
transfer color to the vehicle's
interior.Use a soft bristle brush to remove
dust from knobs and crevices on the
instrument cluster. Using a mild
soap solution, immediately remove
hand lotions, sunscreen, and insect
repellent from all interior surfaces or
permanent damage may result.
Your dealer may have products for
cleaning the interior. Use cleaners
specifically designed for the
surfaces being cleaned to prevent
permanent damage. Apply all
cleaners directly to the cleaning
cloth. Do not spray cleaners directly
on any switches or controls.
Cleaners should be removed
quickly. Never allow cleaners to
remain on the surface being
cleaned for extended periods
of time.
Cleaners may contain solvents that
can become concentrated in the
interior. Before using cleaners, read
and adhere to all safety instructions
on the label. While cleaning the
interior, maintain adequate
ventilation by opening the doors and
windows.To prevent damage, do not clean
the interior using the following
cleaners or techniques:
.Never use a razor or any other
sharp object to remove a soil
from any interior surface.
.Never use a brush with stiff
bristles.
.Never rub any surface
aggressively or with excessive
pressure.
.Do not use laundry detergents
or dishwashing soaps with
degreasers. For liquid cleaners,
use approximately 20 drops
per 3.78 L (1 gal) of water.
A concentrated soap solution will
leave a residue that creates
streaks and attracts dirt. Do not
use solutions that contain strong
or caustic soap.
.Do not heavily saturate the
upholstery when cleaning.
.Do not use solvents or cleaners
containing solvents.
Page 311 of 372
Black plate (83,1)Chevrolet Orlando Owner Manual - 2013 - CRC - 6/5/12
Vehicle Care 10-83
Interior Glass
To clean, use a terry cloth fabric
dampened with water. Wipe droplets
left behind with a clean dry cloth.
Commercial glass cleaners may be
used, if necessary, after cleaning
the interior glass with plain water.
Notice:To prevent scratching,
never use abrasive cleaners on
automotive glass. Abrasive
cleaners or aggressive cleaning
may damage the rear window
defogger.
Notice: Cleaning the windshield
with water during the first three to
six months of ownership will
reduce tendency to fog.
Speaker Covers
Vacuum around a speaker cover
gently, so that the speaker will not
be damaged. Clean spots with just
water and mild soap.
Coated Moldings
Coated moldings should be cleaned.
.When lightly soiled, wipe with a
sponge or soft lint-free cloth
dampened with water.
.When heavily soiled, use warm
soapy water.
Fabric/Carpet/Suede
Start by vacuuming the surface
using a soft brush attachment. If a
rotating brush attachment is being
used during vacuuming, only use it
on the floor carpet. Before cleaning,
gently remove as much of the soil
as possible using one of the
following techniques:
.Gently blot liquids with a paper
towel. Continue blotting until no
more soil can be removed.
.For solid soils, remove as much
as possible prior to vacuuming. To clean:
1. Saturate a clean lint-free
colorfast cloth with water or club
soda. Microfiber cloth is
recommended to prevent lint
transfer to the fabric or carpet.
2. Remove excess moisture by gently wringing until water does
not drip from the cleaning cloth.
3. Start on the outside edge of the soil and gently rub toward the
center. Fold the cleaning cloth to
a clean area frequently to
prevent forcing the soil in to the
fabric.
4. Continue gently rubbing the soiled area until there is no
longer any color transfer from
the soil to the cleaning cloth.
5. If the soil is not completely removed, use a mild soap
solution followed only by club
soda or plain water.
Page 312 of 372
Black plate (84,1)Chevrolet Orlando Owner Manual - 2013 - CRC - 6/5/12
10-84 Vehicle Care
If the soil is not completely
removed, it may be necessary to
use a commercial upholstery
cleaner or spot lifter. Test a small
hidden area for colorfastness before
using a commercial upholstery
cleaner or spot lifter. If ring
formation occurs, clean the entire
fabric or carpet.
Following the cleaning process, a
paper towel can be used to blot
excess moisture.
Cleaning High Gloss Surfaces
and Vehicle Information and
Radio Displays
For vehicles with high gloss
surfaces or vehicle displays, use a
microfiber cloth to wipe surfaces.
Before wiping the surface with the
microfiber cloth, use a soft bristle
brush to remove dirt that could
scratch the surface. Then use the
microfiber cloth by gently rubbing to
clean. Never use window cleaners
or solvents. Periodically hand wash
the microfiber cloth separately,using mild soap. Do not use bleach
or fabric softener. Rinse thoroughly
and air dry before next use.
Notice:
Do not attach a device
with a suction cup to the display.
This may cause damage and
would not be covered by the
warranty.
Instrument Panel, Leather,
Vinyl, & Other Plastic Surfaces
Use a soft microfiber cloth
dampened with water to remove
dust and loose dirt. For a more
thorough cleaning, use a soft
microfiber cloth dampened with a
mild soap solution.
Notice: Soaking or saturating
leather, especially perforated
leather, as well as other interior
surfaces, may cause permanent
damage. Wipe excess moisture
from these surfaces after
cleaning and allow them to dry
naturally. Never use heat, steam,
spot lifters, or spot removers. Do
not use cleaners that contain
silicone or wax-based products. Cleaners containing these
solvents can permanently change
the appearance and feel of leather
or soft trim and are not
recommended.
Do not use cleaners that increase
gloss, especially on the instrument
panel. Reflected glare can decrease
visibility through the windshield
under certain conditions.
Notice:
Use of air fresheners may
cause permanent damage to
plastics and painted surfaces.
If an air freshener comes in
contact with any plastic or
painted surface in the vehicle,
blot immediately and clean with a
soft cloth dampened with a mild
soap solution. Damage caused by
air fresheners would not be
covered by the vehicle warranty.
Cargo Cover and
Convenience Net
Wash with warm water and mild
detergent. Do not use chlorine
bleach. Rinse with cold water, and
then dry completely.
Page 313 of 372
Black plate (85,1)Chevrolet Orlando Owner Manual - 2013 - CRC - 6/5/12
Vehicle Care 10-85
Care of Safety Belts
Keep belts clean and dry.
{WARNING
Do not bleach or dye safety belts.
It may severely weaken them. In
a crash, they might not be able to
provide adequate protection.
Clean safety belts only with mild
soap and lukewarm water.
Floor Mats
{WARNING
If a floor mat is the wrong size or
is not properly installed, it can
interfere with the pedals.
Interference with the pedals can
cause unintended acceleration
and/or increased stopping
distance which can cause a crash
and injury. Make sure the floor
mat does not interfere with the
pedals.Use the following guidelines for
proper floor mat usage.
.The original equipment floor
mats were designed for your
vehicle. If the floor mats need
replacing, it is recommended
that GM certified floor mats be
purchased. Non-GM floor mats
may not fit properly and may
interfere with the accelerator or
brake pedal. Always check that
the floor mats do not interfere
with the pedals.
.Use the floor mat with the
correct side up. Do not turn
it over.
.Do not place anything on top of
the driver side floor mat.
.Use only a single floor mat on
the driver side.
.Do not place one floor mat on
top of another.
The driver side floor mat is held in
place by a button-type retainer.
Removing and Replacing the
Floor Mats
1. Pull up on the rear of the floor mat to unlock the retainer and
remove.
2. Reinstall by lining up the floor mat retainer opening over the
carpet retainer and snap into
position.
3. Make sure the floor mat is properly secured and verify that
it does not interfere with the
pedals.
Page 314 of 372

Black plate (86,1)Chevrolet Orlando Owner Manual - 2013 - CRC - 6/5/12
10-86 Vehicle Care
2NOTES
Page 361 of 372

Black plate (1,1)Chevrolet Orlando Owner Manual - 2013 - CRC - 6/5/12
INDEX i-1
A
Accessories andModifications . . . . . . . . . . . . . . . . . 10-3
Accessory Power . . . . . . . . . . . . . . 9-18
Add-On Electrical Equipment . . . . . . . . . . . . . . . . . . . 9-47
Additional Information
OnStar
®. . . . . . . . . . . . . . . . . . . . . . 14-5
Air Cleaner/Filter, Engine . . . . . 10-11
Air Conditioning . . . . . . . . . . . . . . . . 8-3
Air Vents . . . . . . . . . . . . . . . . . . . . . . . 8-6
Airbag System Check . . . . . . . . . . . . . . . . . . . . . . . . 3-31
How Does an AirbagRestrain? . . . . . . . . . . . . . . . . . . . 3-28
What Makes an Airbag
Inflate? . . . . . . . . . . . . . . . . . . . . . . 3-28
What Will You See after an Airbag Inflates? . . . . . . . . . . . . . 3-29
When Should an Airbag
Inflate? . . . . . . . . . . . . . . . . . . . . . . 3-27
Where Are the Airbags? . . . . . . 3-26 Airbags
Adding Equipment to the
Vehicle . . . . . . . . . . . . . . . . . . . . . . 3-30
Readiness Light . . . . . . . . . . . . . . 5-11
Servicing Airbag-Equipped Vehicles . . . . . . . . . . . . . . . . . . . . . 3-30
System Check . . . . . . . . . . . . . . . . 3-24
Alarm Vehicle Security . . . . . . . . . . . . . . . 2-9
AM-FM Radio . . . . . . . . . . . . . . . . . . . 7-7
Antenna Multi-band . . . . . . . . . . . . . . . . . . . . 7-12
Satellite Radio . . . . . . . . . . . . . . . . 7-12
Antilock Brake System (ABS) . . . . . . . . . . . . . . . . 9-26
Warning Light . . . . . . . . . . . . . . . . . 5-15
Appearance Care Exterior . . . . . . . . . . . . . . . . . . . . . 10-78
Interior . . . . . . . . . . . . . . . . . . . . . . 10-82
Armrest Front Seat . . . . . . . . . . . . . . . . . . . . . 3-6
Ashtrays . . . . . . . . . . . . . . . . . . . . . . . . 5-7
Assistance Program, Roadside . . . . . . . . . . . . . . . . . . . . . 13-5
Audio Players . . . . . . . . . . . . . . . . . 7-13
CD . . . . . . . . . . . . . . . . . . . . . . . . . . . 7-13 Audio System
Radio Reception . . . . . . . . . . . . . . 7-12
Theft-Deterrent Feature . . . . . . . . 7-2
Automatic Climate Control System . . . . . . . . 8-3
Door Locks . . . . . . . . . . . . . . . . . . . . 2-7
Headlamp System . . . . . . . . . . . . . 6-3
Transmission . . . . . . . . . . . . . . . . . 9-21
Transmission Fluid . . . . . . . . . 10-10
Automatic Transmission Manual Mode . . . . . . . . . . . . . . . . . 9-23
Shift Lock Control
Function Check . . . . . . . . . . . 10-22
Auxiliary Devices . . . . . . . . . . . . . . . . . . . . . . . 7-15
B
Battery . . . . . . . . . . . . . . . . . . . . . . . 10-21Jump Starting . . . . . . . . . . . . . . . 10-73
Power Protection . . . . . . . . . . . . . . 6-7
Voltage and ChargingMessages . . . . . . . . . . . . . . . . . . . 5-25
Blade Replacement, Wiper . . . 10-23
Bluetooth . . . . . . . . . . 7-18, 7-19, 7-23
Brake
System Warning Light . . . . . . . . 5-14