four CHEVROLET ORLANDO 2013 Owners Manual
[x] Cancel search | Manufacturer: CHEVROLET, Model Year: 2013, Model line: ORLANDO, Model: CHEVROLET ORLANDO 2013Pages: 372, PDF Size: 6.71 MB
Page 81 of 372
Black plate (35,1)Chevrolet Orlando Owner Manual - 2013 - CRC - 6/5/12
Seats and Restraints 3-35
WARNING (Continued)
seat, always move the front
passenger seat as far back as it
will go.
Q: What are the different types ofadd-on child restraints?
A: Add-on child restraints, which
are purchased by the vehicle
owner, are available in four basic
types. Selection of a particular
restraint should take into
consideration not only the child's weight, height, and age but also
whether or not the restraint will
be compatible with the motor
vehicle in which it will be used.
For most basic types of child
restraints, there are many
different models available. When
purchasing a child restraint, be
sure it is designed to be used in
a motor vehicle. If it is, the
restraint will have a label saying
that it meets federal motor
vehicle safety standards.
The restraint manufacturer's
instructions that come with the
restraint state the weight and
height limitations for a particular
child restraint. In addition, there
are many kinds of restraints
available for children with
special needs.
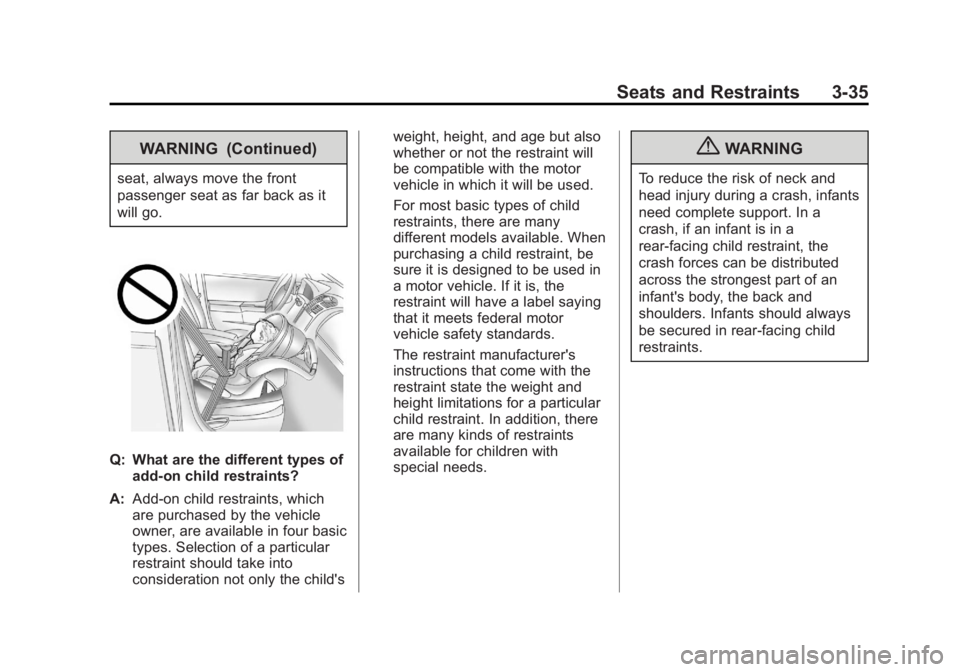
{WARNING
To reduce the risk of neck and
head injury during a crash, infants
need complete support. In a
crash, if an infant is in a
rear-facing child restraint, the
crash forces can be distributed
across the strongest part of an
infant's body, the back and
shoulders. Infants should always
be secured in rear-facing child
restraints.
Page 98 of 372
Black plate (4,1)Chevrolet Orlando Owner Manual - 2013 - CRC - 6/5/12
4-4 Storage
Lashing Eyes
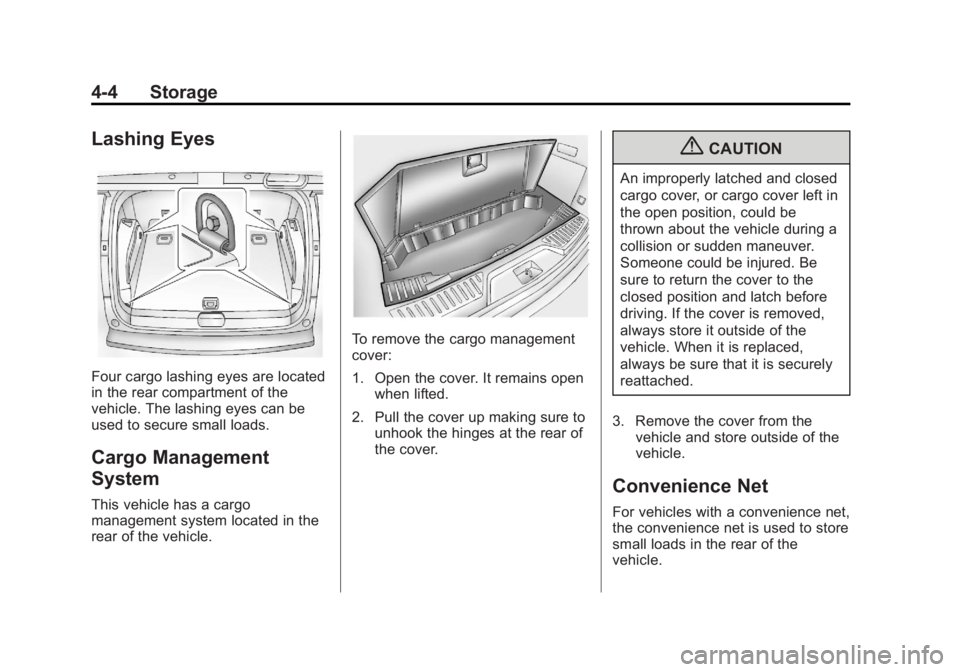
Four cargo lashing eyes are located
in the rear compartment of the
vehicle. The lashing eyes can be
used to secure small loads.
Cargo Management
System
This vehicle has a cargo
management system located in the
rear of the vehicle.
To remove the cargo management
cover:
1. Open the cover. It remains openwhen lifted.
2. Pull the cover up making sure to unhook the hinges at the rear of
the cover.
{CAUTION
An improperly latched and closed
cargo cover, or cargo cover left in
the open position, could be
thrown about the vehicle during a
collision or sudden maneuver.
Someone could be injured. Be
sure to return the cover to the
closed position and latch before
driving. If the cover is removed,
always store it outside of the
vehicle. When it is replaced,
always be sure that it is securely
reattached.
3. Remove the cover from the vehicle and store outside of the
vehicle.
Convenience Net
For vehicles with a convenience net,
the convenience net is used to store
small loads in the rear of the
vehicle.
Page 100 of 372
Black plate (6,1)Chevrolet Orlando Owner Manual - 2013 - CRC - 6/5/12
4-6 Storage
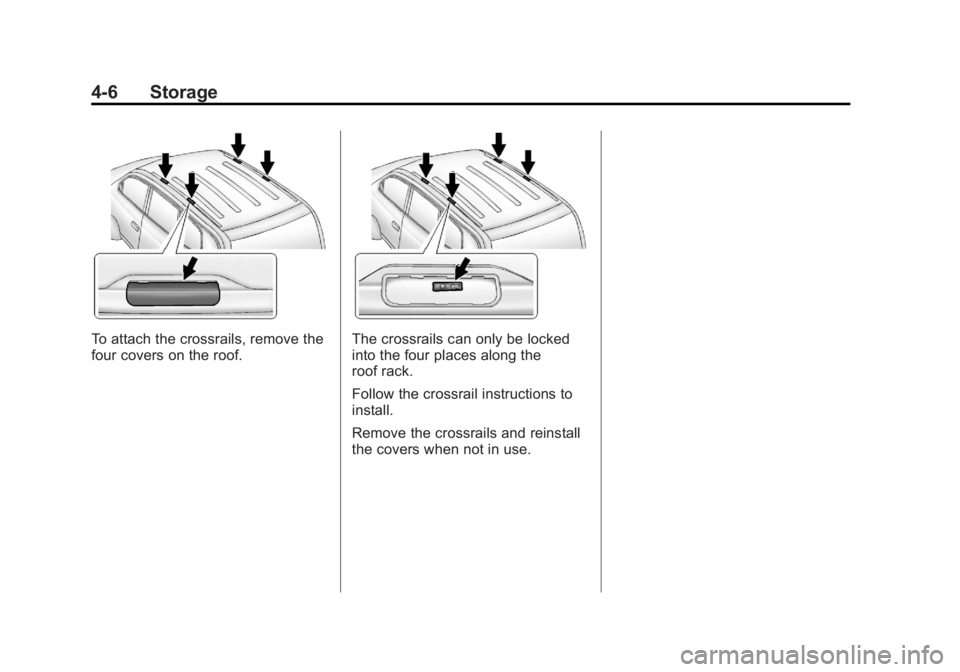
To attach the crossrails, remove the
four covers on the roof.The crossrails can only be locked
into the four places along the
roof rack.
Follow the crossrail instructions to
install.
Remove the crossrails and reinstall
the covers when not in use.
Page 109 of 372
Black plate (9,1)Chevrolet Orlando Owner Manual - 2013 - CRC - 6/5/12
Instruments and Controls 5-9
Speedometer
The speedometer shows the
vehicle's speed in either kilometers
per hour (km/h) or miles per
hour (mph).
Odometer
The odometer shows how far the
vehicle has been driven, in either
kilometers or miles.
This vehicle has a tamper-resistant
odometer. The digital odometer will
read 99999.9 if it is turned back.
If the vehicle needs a new odometer
installed, it must be set to the
mileage total of the old odometer.
If that is not possible, then it must
be set at zero and a label must be
put on the driver door to show the
old mileage reading when the new
odometer was installed.
Tachometer
The tachometer displays the engine
speed in revolutions per
minute (rpm).Notice:
If the engine is operated
with the tachometer in the shaded
warning area, the vehicle could
be damaged, and the damages
would not be covered by the
vehicle warranty. Do not operate
the engine with the tachometer in
the shaded warning area.
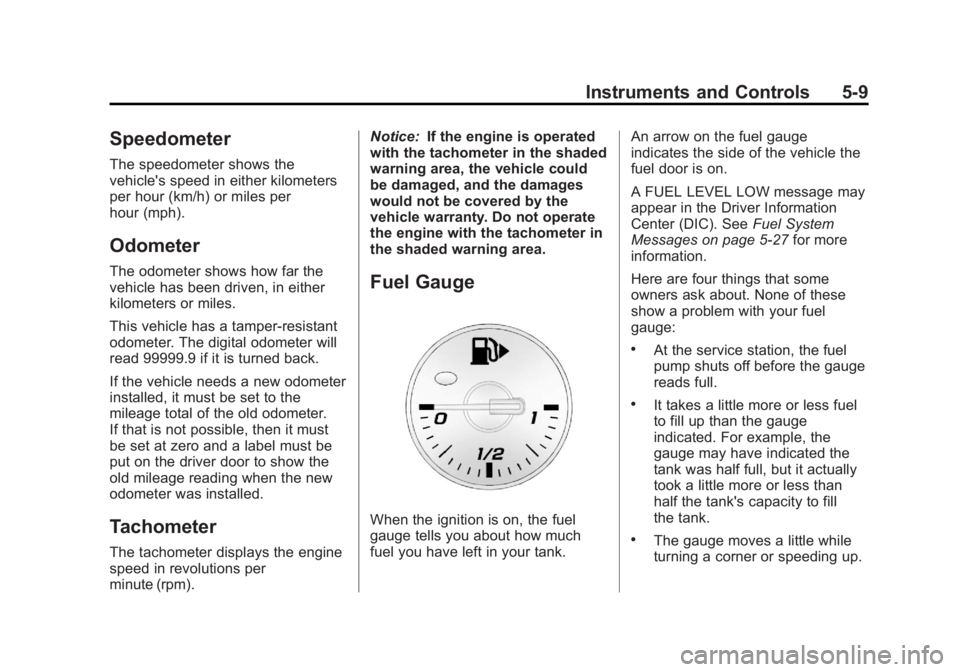
Fuel Gauge
When the ignition is on, the fuel
gauge tells you about how much
fuel you have left in your tank. An arrow on the fuel gauge
indicates the side of the vehicle the
fuel door is on.
A FUEL LEVEL LOW message may
appear in the Driver Information
Center (DIC). See
Fuel System
Messages on page 5‑27 for more
information.
Here are four things that some
owners ask about. None of these
show a problem with your fuel
gauge:
.At the service station, the fuel
pump shuts off before the gauge
reads full.
.It takes a little more or less fuel
to fill up than the gauge
indicated. For example, the
gauge may have indicated the
tank was half full, but it actually
took a little more or less than
half the tank's capacity to fill
the tank.
.The gauge moves a little while
turning a corner or speeding up.
Page 123 of 372
Black plate (23,1)Chevrolet Orlando Owner Manual - 2013 - CRC - 6/5/12
Instruments and Controls 5-23
Fuel Used
This display shows the approximate
liters (L) or gallons (gal) of fuel that
have been used since last reset.
The fuel used can be reset by
pressing the SET/CLR button while
the Fuel Used display is showing.
Vehicle Information Menu
Items
Press MENU on the turn signal
lever until the Vehicle Information
menu is displayed. Use
w/xto
scroll through the menu items. Not
all items are available on every
vehicle. The following is a list of all
of the possible menu items:
.Units
.Tire Pressure
.Remaining Oil Life
.Battery Voltage
.Blank Display Units
Move
w/xto change between
metric or US when the Unit display
is active. Press SET/CLR to confirm
the setting. On some models, you
will have to select 1, 2, or 3 for the
Unit display. 1 is Imperial units, 2 is
US units, and 3 is metric units. This
will change the displays on the
cluster and DIC to the type of
measurements you select.
Tire Pressure
The display may show a vehicle
with the approximate pressures of
all four tires. Tire pressure is
displayed in either kilopascal (kPa)
or in pounds per square inch (psi).
On some models, this display only
allows for matching of the TPMS
sensors. In this case, the display
will show TIRE LEARN. See Tire
Pressure Monitor System on
page 10‑44 andTire Pressure
Monitor Operation on page 10‑45 for
more information. Remaining Oil Life
This display shows an estimate of
the oil's remaining useful life.
If REMAINING OIL LIFE 99% is
displayed, that means 99% of the
current oil life remains. On some
models, this display is shown
as
:%.
When the remaining oil life is low,
the CHANGE ENGINE OIL SOON
message, or code 82, will appear on
the display. See Engine Oil
Messages on page 5‑26 and
“Vehicle Messages (Base Level)”
following. The oil should be
changed as soon as possible. See
Engine Oil on page 10‑7. In addition
to the engine oil life system
monitoring the oil life, additional
maintenance is recommended in the
Maintenance Schedule in this
manual. See Maintenance Schedule
on page 11‑2 for more information.
Page 135 of 372
Black plate (1,1)Chevrolet Orlando Owner Manual - 2013 - CRC - 6/5/12
Lighting 6-1
Lighting
Exterior Lighting
Exterior Lamp Controls . . . . . . . . 6-1
Headlamp High/Low-BeamChanger . . . . . . . . . . . . . . . . . . . . . 6-2
Flash-to-Pass . . . . . . . . . . . . . . . . . 6-2
Daytime Running Lamps (DRL) . . . . . . . . . . . . . . . . 6-2
Automatic Headlamp System . . . . . . . . . . . . . . . . . . . . . . 6-3
Hazard Warning Flashers . . . . . 6-4
Turn and Lane-Change Signals . . . . . . . . . . . . . . . . . . . . . . 6-4
Front Fog Lamps . . . . . . . . . . . . . . 6-5
Interior Lighting
Instrument Panel Illumination Control . . . . . . . . . . . . . . . . . . . . . . 6-6
Courtesy Lamps . . . . . . . . . . . . . . 6-6
Dome Lamps . . . . . . . . . . . . . . . . . 6-6
Reading Lamps . . . . . . . . . . . . . . . 6-6
Lighting Features
Entry Lighting . . . . . . . . . . . . . . . . . 6-7
Exit Lighting . . . . . . . . . . . . . . . . . . . 6-7
Battery Power Protection . . . . . . 6-7
Exterior Lighting
Exterior Lamp Controls
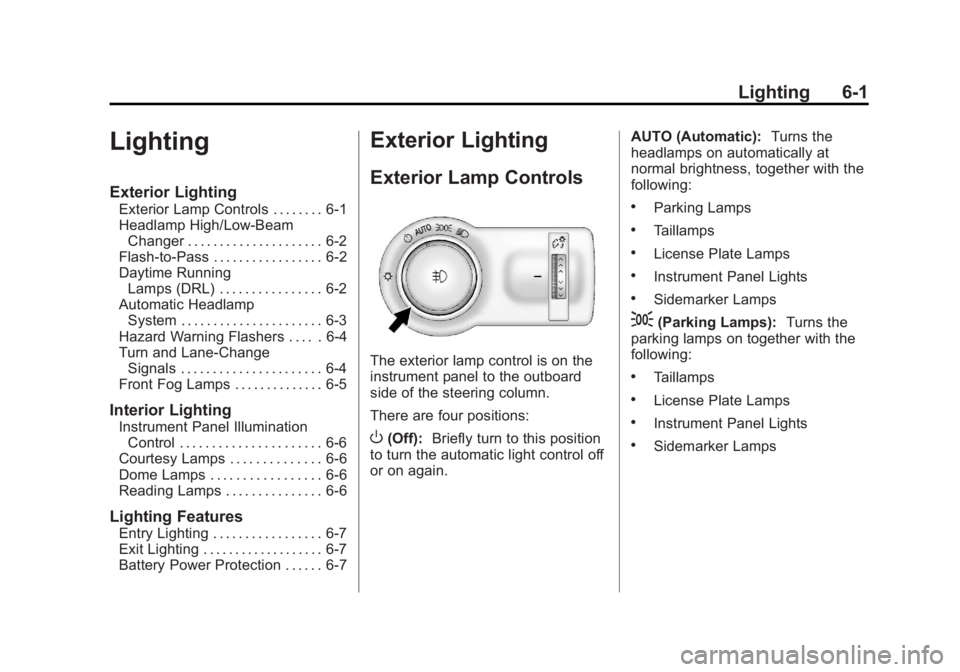
The exterior lamp control is on the
instrument panel to the outboard
side of the steering column.
There are four positions:
O(Off): Briefly turn to this position
to turn the automatic light control off
or on again. AUTO (Automatic):
Turns the
headlamps on automatically at
normal brightness, together with the
following:
.Parking Lamps
.Taillamps
.License Plate Lamps
.Instrument Panel Lights
.Sidemarker Lamps
;(Parking Lamps): Turns the
parking lamps on together with the
following:
.Taillamps
.License Plate Lamps
.Instrument Panel Lights
.Sidemarker Lamps
Page 162 of 372
Black plate (20,1)Chevrolet Orlando Owner Manual - 2013 - CRC - 6/5/12
7-20 Infotainment System
.Up to five cell phones can be
paired to the Bluetooth system.
.The pairing process is disabled
when the vehicle is moving.
.Pairing only needs to be
completed once, unless the
pairing information on the cell
phone changes or the cell phone
is deleted from the system.
.Only one paired cell phone can
be connected to the Bluetooth
system at a time.
.If multiple paired cell phones are
within range of the system, the
system connects to the first
available paired cell phone in the
order that they were first paired
to the system. To link to a
different paired phone, see
“Linking to a Different Phone”
later in this section.
Pairing a Phone
1. Press the CONFIG button.
2. Select Phone Settings.
3. Select Bluetooth. 4. Select Pair Device (Phone).
A four-digit Personal
Identification Number (PIN)
appears on the display. The PIN
is used in Step 6.
5. Start the pairing process on the cell phone to be paired to the
vehicle. See the cell phone
manufacturer's user guide for
information on this process.
6. Locate the device named “Your
Vehicle” in the list on the cell
phone. Follow the instructions
on the cell phone to enter the
PIN provided in Step 4. After the
PIN is successfully entered, the
system prompts you to provide a
name for the paired cell phone.
This name will be used to
indicate which phones are
paired and connected to the
vehicle. The system responds
with “
successfully paired” after the
pairing process is complete.
7. Repeat Steps 1 through 6 to pair additional phones. Listing All Paired and Connected
Phones
1. Press the CONFIG button.
2. Select Phone Settings.
3. Select Bluetooth.
4. Select Device List.
Deleting a Paired Phone
1. Press the CONFIG button.
2. Select Phone Settings.
3. Select Bluetooth.
4. Select Device List.
5. Select the phone to delete and
follow the on screen prompts.
Linking to a Different Phone
To link to a different phone, the new
phone must be in the vehicle and
available to be connected to the
Bluetooth system before the
process is started.
1. Press the CONFIG button.
2. Select Phone Settings.
3. Select Bluetooth.
Page 165 of 372
Black plate (23,1)Chevrolet Orlando Owner Manual - 2013 - CRC - 6/5/12
Infotainment System 7-23
Bluetooth (Voice
Recognition)
Using Voice Recognition
To use voice recognition, press
the
b/gbutton located on the
steering wheel. Use the commands
below for the various voice features.
For additional information, say
“Help” while you are in a voice
recognition menu.
Pairing
A Bluetooth-enabled cell phone
must be paired to the Bluetooth
system and then connected to the
vehicle before it can be used. See
your cell phone manufacturer's user
guide for Bluetooth functions before
pairing the cell phone. If a Bluetooth
phone is not connected, calls will be
made using OnStar Hands-Free
Calling, if available. See OnStar
Overview on page 14‑1 for more
information. Pairing Information
.A Bluetooth phone with MP3
capability cannot be paired to
the vehicle as a phone and an
MP3 player at the same time.
.Up to five cell phones can be
paired to the Bluetooth system.
.The pairing process is disabled
when the vehicle is moving.
.Pairing only needs to be
completed once, unless the
pairing information on the cell
phone changes or the cell phone
is deleted from the system.
.Only one paired cell phone can
be connected to the Bluetooth
system at a time.
.If multiple paired cell phones are
within range of the system, the
system connects to the first
available paired cell phone in the
order that they were first paired
to the system. To link to a
different paired phone, see
“Linking to a Different Phone”
later in this section.Pairing a Phone
1. Press
b/g. The system
responds “Ready,”followed by
a tone.
2. Say “Bluetooth.”
3. Say “Pair.”The system responds
with instructions and a four-digit
Personal Identification Number
(PIN). The PIN is used in Step 5.
4. Start the pairing process on the cell phone that you want to pair.
For help with this process, see
your cell phone manufacturer's
user guide.
5. Locate the device named “Your
Vehicle” in the list on the cell
phone. Follow the instructions
on the cell phone to enter the
PIN provided in Step 3. After the
PIN is successfully entered, the
system prompts you to provide a
name for the paired cell phone.
This name will be used to
indicate which phones are
paired and connected to the
vehicle. The system responds
Page 194 of 372
Black plate (14,1)Chevrolet Orlando Owner Manual - 2013 - CRC - 6/5/12
9-14 Driving and Operating
.Between the first 1 000 km
(600 mi) and 5 000 km
(3,000 mi), heavy
acceleration in lower gears
can be used. Vehicle speeds
above 110 km/h (68 mph)
should be limited to
five minutes per use.
.Avoid making hard stops for
the first 322 km (200 mi) or
so. During this time the new
brake linings are not yet
broken in. Hard stops with
new linings can mean
premature wear and earlier
replacement. Follow this
breaking-in guideline every
time you get new brake
linings.
.Do not tow a trailer during
break-in. SeeDriving
Characteristics and Towing
Tips on page 9‑42 for the
trailer towing capabilities of
your vehicle and more
information. Following break‐in, engine speed
and load can be gradually
increased.
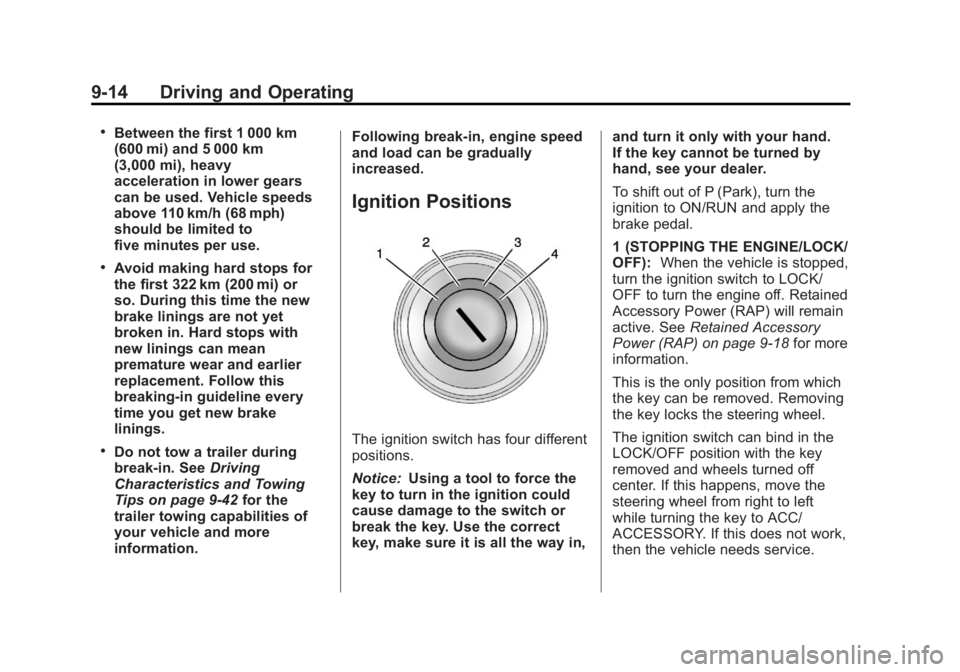
Ignition Positions
The ignition switch has four different
positions.
Notice:
Using a tool to force the
key to turn in the ignition could
cause damage to the switch or
break the key. Use the correct
key, make sure it is all the way in, and turn it only with your hand.
If the key cannot be turned by
hand, see your dealer.
To shift out of P (Park), turn the
ignition to ON/RUN and apply the
brake pedal.
1 (STOPPING THE ENGINE/LOCK/
OFF):
When the vehicle is stopped,
turn the ignition switch to LOCK/
OFF to turn the engine off. Retained
Accessory Power (RAP) will remain
active. See Retained Accessory
Power (RAP) on page 9‑18 for more
information.
This is the only position from which
the key can be removed. Removing
the key locks the steering wheel.
The ignition switch can bind in the
LOCK/OFF position with the key
removed and wheels turned off
center. If this happens, move the
steering wheel from right to left
while turning the key to ACC/
ACCESSORY. If this does not work,
then the vehicle needs service.
Page 197 of 372
Black plate (17,1)Chevrolet Orlando Owner Manual - 2013 - CRC - 6/5/12
Driving and Operating 9-17
The vehicle has a
Computer-Controlled Cranking
System. This feature assists in
starting the engine and protects
components. If the ignition key is
turned to the START position,
and then released when the
engine begins cranking, the
engine will continue cranking for
a few seconds or until the
vehicle starts. If the engine does
not start and the key is held in
START for many seconds,
cranking will be stopped after
15 seconds to prevent cranking
motor damage. To prevent gear
damage, this system also
prevents cranking if the engine
is already running. Engine
cranking can be stopped by
turning the ignition switch to
ACC/ACCESSORY or
LOCK/OFF.Notice:
Cranking the engine for
long periods of time, by returning
the key to the START position
immediately after cranking has
ended, can overheat and damage
the cranking motor, and drain the
battery. Wait at least 15 seconds
between each try, to let the
cranking motor cool down.
2. If the engine does not start after
five to 10 seconds, especially in
very cold weather (below −18°C
or 0°F), it could be flooded with
too much gasoline. Try pushing
the accelerator pedal all the way
to the floor and holding it there
as you hold the key in START
for up to a maximum of
15 seconds. Wait at least
15 seconds between each try, to
allow the cranking motor to cool
down. When the engine starts,
let go of the key or button, and
the accelerator. If the vehicle
starts briefly but then stops
again, do the same thing. This
clears the extra gasoline from
the engine. Do not race the engine immediately after starting
it. Operate the engine and
transmission gently until the oil
warms up and lubricates all
moving parts.
Engine Heater
The engine heater can help in cold
weather conditions at or below
−18°C (0°F) for easier starting and
better fuel economy during engine
warm-up. Plug in the heater at least
four hours before starting the
vehicle. An internal thermostat in
the plug-end of the cord will prevent
engine heater operation at
temperatures above
−18°C (0°F).
To Use The Engine Heater
1. Turn off the engine.
2. Open the hood and unwrap the
electrical cord stored near the air
cleaner.
3. Plug it into a normal, grounded 110-volt AC outlet.