CD player CHEVROLET ORLANDO 2014 1.G Infotainment Manual
[x] Cancel search | Manufacturer: CHEVROLET, Model Year: 2014, Model line: ORLANDO, Model: CHEVROLET ORLANDO 2014 1.GPages: 98, PDF Size: 0.99 MB
Page 1 of 98

Black plate (1,1)Chevrolet Orlando Infotainment System (GMNA-Localizing-Canada-
6081467) - 2014 - CRC - 6/13/13
2014 Chevrolet Orlando Infotainment SystemM
Infotainment System. . . . . .3
Introduction. . . . . . . . . . . . . . . . .3
Infotainment . . . . . . . . . . . . . . . . . . . . 3
Overview . . . . . . . . . . . . . . . . . . . . . . . 4
Steering Wheel Controls . . . . . . . 8
Using the System . . . . . . . . . . . . . . 9
Software Updates . . . . . . . . . . . . . 15
Radio . . . . . . . . . . . . . . . . . . . . . . .15
AM-FM Radio . . . . . . . . . . . . . . . . . 15
Radio Data System (RDS) . . . . 18
Satellite Radio . . . . . . . . . . . . . . . . 18
Radio Reception . . . . . . . . . . . . . . 24
Quick Info . . . . . . . . . . . . . . . . . . . . . 25
Pandora Internet Radio . . . . . . . 25
Stitcher Internet Radio . . . . . . . . 30
Pictures . . . . . . . . . . . . . . . . . . . . . . . 35
Audio Players . . . . . . . . . . . . .36
CD Player . . . . . . . . . . . . . . . . . . . . . 36
USB . . . . . . . . . . . . . . . . . . . . . . . . . . 37
Auxiliary Devices . . . . . . . . . . . . . . 44
Bluetooth Audio . . . . . . . . . . . . . . . 45
Navigation . . . . . . . . . . . . . . . . .46
Using the Navigation System . . . . . . . . . . . . . . . . . . . . . . 46
Maps . . . . . . . . . . . . . . . . . . . . . . . . . . 49
Navigation Symbols . . . . . . . . . . . 50
Destination . . . . . . . . . . . . . . . . . . . . 52
OnStar
®Destination
Download . . . . . . . . . . . . . . . . . . . . 62
Configure Menu . . . . . . . . . . . . . . . 63
Global Positioning System (GPS) . . . . . . . . . . . . . . . 69
Vehicle Positioning . . . . . . . . . . . . 70
Problems with Route Guidance . . . . . . . . . . . . . . . . . . . . 70
If the System Needs Service . . . . . . . . . . . . . . . . . . . . . . 71
Map Data Updates . . . . . . . . . . . . 71
Database Coverage Explanations . . . . . . . . . . . . . . . . . 72
Voice Recognition . . . . . . . .72
Bluetooth Phone/
Devices . . . . . . . . . . . . . . . . . . .
79
Bluetooth . . . . . . . . . . . . . . . . . . . . . 79
Text Messaging . . . . . . . . . . . . . . . 87
Trademarks and License Agreements . . . . . . . . . . . . . .
89
Index . . . . . . . . . . . . . . . . . . . . . i-1
Page 7 of 98
Black plate (7,1)Chevrolet Orlando Infotainment System (GMNA-Localizing-Canada-
6081467) - 2014 - CRC - 6/13/13
Infotainment System 7
19. BACK
20.
X(Eject)
21. MENU/SEL (Menu/Select)
Infotainment Control Buttons
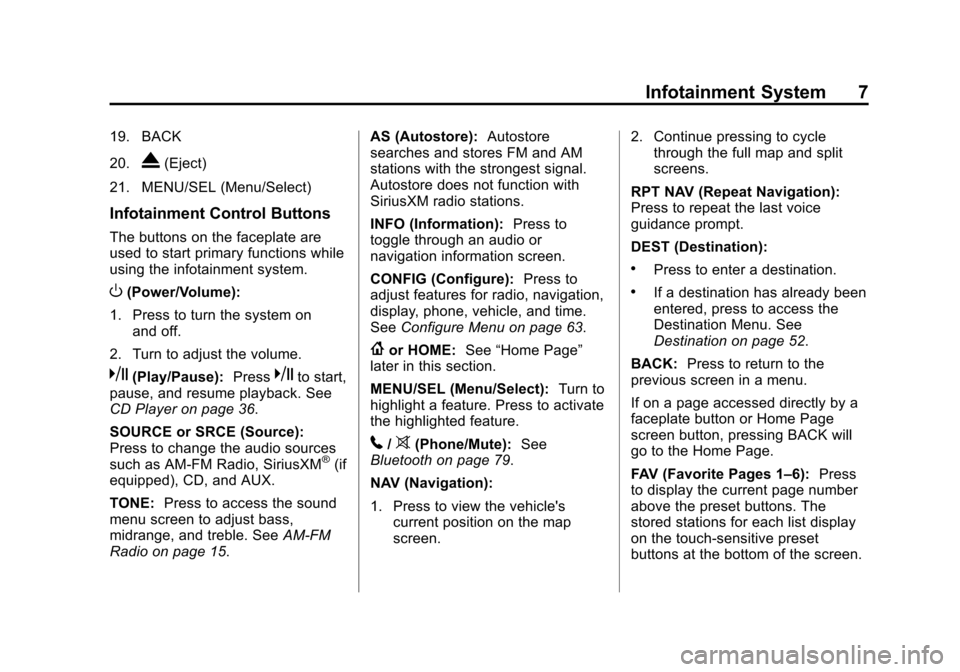
The buttons on the faceplate are
used to start primary functions while
using the infotainment system.
O(Power/Volume):
1. Press to turn the system on and off.
2. Turn to adjust the volume.
k(Play/Pause): Presskto start,
pause, and resume playback. See
CD Player on page 36.
SOURCE or SRCE (Source):
Press to change the audio sources
such as AM-FM Radio, SiriusXM
®(if
equipped), CD, and AUX.
TONE: Press to access the sound
menu screen to adjust bass,
midrange, and treble. See AM-FM
Radio on page 15. AS (Autostore):
Autostore
searches and stores FM and AM
stations with the strongest signal.
Autostore does not function with
SiriusXM radio stations.
INFO (Information): Press to
toggle through an audio or
navigation information screen.
CONFIG (Configure): Press to
adjust features for radio, navigation,
display, phone, vehicle, and time.
See Configure Menu on page 63.
{or HOME: See“Home Page”
later in this section.
MENU/SEL (Menu/Select): Turn to
highlight a feature. Press to activate
the highlighted feature.
5/>(Phone/Mute): See
Bluetooth on page 79.
NAV (Navigation):
1. Press to view the vehicle's current position on the map
screen. 2. Continue pressing to cycle
through the full map and split
screens.
RPT NAV (Repeat Navigation):
Press to repeat the last voice
guidance prompt.
DEST (Destination):
.Press to enter a destination.
.If a destination has already been
entered, press to access the
Destination Menu. See
Destination on page 52.
BACK: Press to return to the
previous screen in a menu.
If on a page accessed directly by a
faceplate button or Home Page
screen button, pressing BACK will
go to the Home Page.
FAV (Favorite Pages 1–6): Press
to display the current page number
above the preset buttons. The
stored stations for each list display
on the touch-sensitive preset
buttons at the bottom of the screen.
Page 8 of 98
Black plate (8,1)Chevrolet Orlando Infotainment System (GMNA-Localizing-Canada-
6081467) - 2014 - CRC - 6/13/13
8 Infotainment System
The number of preset FAV lists can
be changed in the
Configuration Menu.
d(Next/Fast Forward):
1. Press to seek the next track.
2. Press and hold to fast forward through a track.
3. Release the button to return to playing speed. See CD Player
on page 36.
4. For AM, FM, or SiriusXM (if equipped), press to seek to the
next strong station.
g(Previous/Reverse):
1. Press to seek to the beginning of the current or previous track.
If the track has been playing for
less than five seconds, it seeks
the previous track. If longer than
five seconds, the current track
starts from the beginning. 2. Press and hold to quickly
reverse through a track. Release
the button to return to playing
speed. See CD Player on
page 36.
3. For AM, FM, or SiriusXM (if equipped), press to seek to the
previous strong station.
Preset Buttons (1–6): The preset
buttons numbered one through six
can be used to select stored AM,
FM, and SiriusXM (if equipped)
stations.
Eight-Way Selector Arrows:
Press the arrows to navigate
the map.
CLOCK: Press to set the time.
X(Eject):Press to eject a disc
from the CD player. See CD Player
on page 36.
Touch Screen Buttons
Touch screen buttons are on the
screen and highlighted when a
feature is available. Some toggle
screen buttons highlight when active
and gray out when inactive.
Steering Wheel Controls
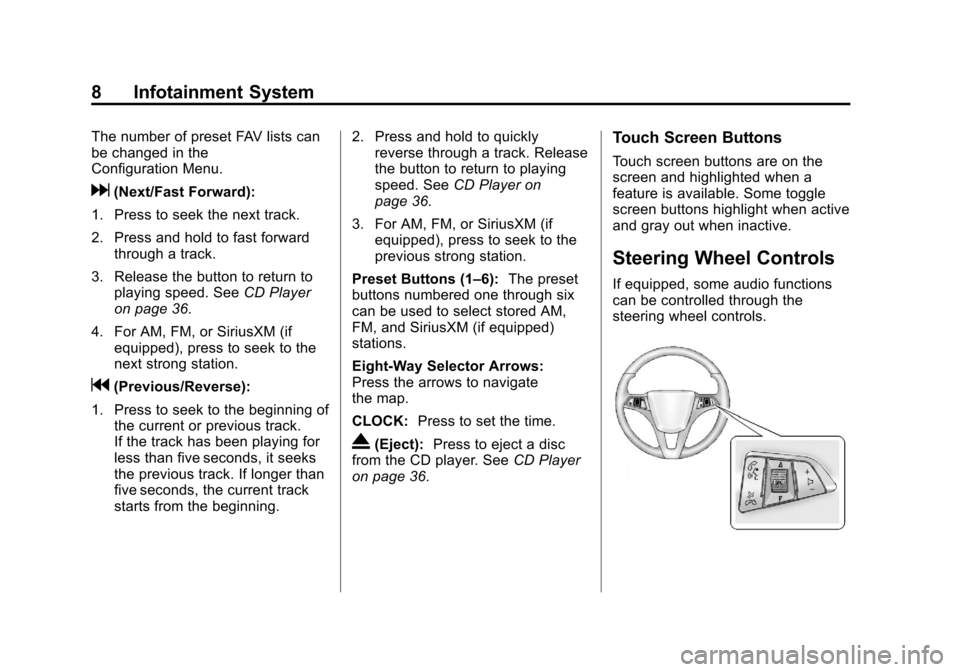
If equipped, some audio functions
can be controlled through the
steering wheel controls.
Page 10 of 98
Black plate (10,1)Chevrolet Orlando Infotainment System (GMNA-Localizing-Canada-
6081467) - 2014 - CRC - 6/13/13
10 Infotainment System
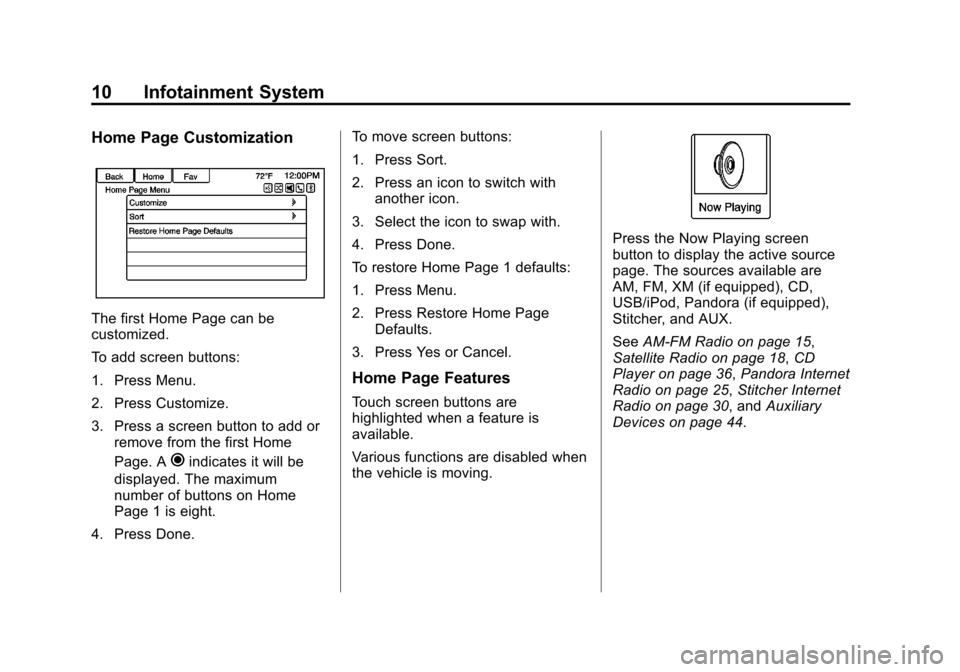
Home Page Customization
The first Home Page can be
customized.
To add screen buttons:
1. Press Menu.
2. Press Customize.
3. Press a screen button to add orremove from the first Home
Page. A
hindicates it will be
displayed. The maximum
number of buttons on Home
Page 1 is eight.
4. Press Done. To move screen buttons:
1. Press Sort.
2. Press an icon to switch with
another icon.
3. Select the icon to swap with.
4. Press Done.
To restore Home Page 1 defaults:
1. Press Menu.
2. Press Restore Home Page Defaults.
3. Press Yes or Cancel.
Home Page Features
Touch screen buttons are
highlighted when a feature is
available.
Various functions are disabled when
the vehicle is moving.
Press the Now Playing screen
button to display the active source
page. The sources available are
AM, FM, XM (if equipped), CD,
USB/iPod, Pandora (if equipped),
Stitcher, and AUX.
See AM-FM Radio on page 15,
Satellite Radio on page 18, CD
Player on page 36, Pandora Internet
Radio on page 25, Stitcher Internet
Radio on page 30, and Auxiliary
Devices on page 44.
Page 12 of 98
Black plate (12,1)Chevrolet Orlando Infotainment System (GMNA-Localizing-Canada-
6081467) - 2014 - CRC - 6/13/13
12 Infotainment System
Press the FM screen button to
display the FM main page and play
the current or last tuned FM station.
SeeAM-FM Radio on page 15.
Press the AM screen button to
display the AM main page and play
the current or last tuned AM station.
SeeAM-FM Radio on page 15.
Press the XM screen button (if
equipped) to display the XM main
page and play the current or last
tuned SiriusXM channel. See
AM-FM Radio on page 15 and
Satellite Radio on page 18.
Press the Pandora screen button
(if equipped) to display the
Pandora home page and stream
personalized radio stations based
on artists, songs, genres, and
comedians. See Pandora Internet
Radio on page 25.
Press the Stitcher screen button
(if equipped) to display the Stitcher
home page and stream news,
sports, and entertainment shows
through the audio system. See
Stitcher Internet Radio on page 30.
Press the CD screen button to
display the CD main page and play
the current or last CD track
selected. See CD Player on
page 36.
Page 36 of 98
Black plate (36,1)Chevrolet Orlando Infotainment System (GMNA-Localizing-Canada-
6081467) - 2014 - CRC - 6/13/13
36 Infotainment System
Audio Players
CD Player
The CD player is capable of playing:
.Most audio CDs
.CD-R
.CD-RW
.MP3, unprotected WMA, and
AAC formats
When playing any compatible
recordable disc, the sound quality
may be reduced due to the disc, the
method of recording, the quality of
the music recorded, or how the disc
has been handled.
There may be increased skipping,
difficulty reading recorded tracks,
finding tracks, and/or loading and
ejecting. If these problems occur,
check the disc for damage or try a
known good disc. To avoid damage to the CD player:
.Do not use scratched or
damaged discs.
.Do not apply labels to discs. The
labels could get caught in the
player.
.Insert only one disc at a time.
.Keep the loading slot free of
foreign materials, liquids, and
debris.
.Use a marking pen to label the
top of the disc.
Loading and Ejecting Discs
To load a disc:
1. Turn the vehicle on.
2. Insert a disc into the slot, right
side up. The player pulls it in the
rest of the way. If the disc is
damaged or improperly loaded,
there is an error and the disc
ejects.
The disc automatically plays once
loaded. Press
Xto eject a disc from the
CD player. If the disc is not removed
within a short period of time, it is
automatically pulled back into the
player.
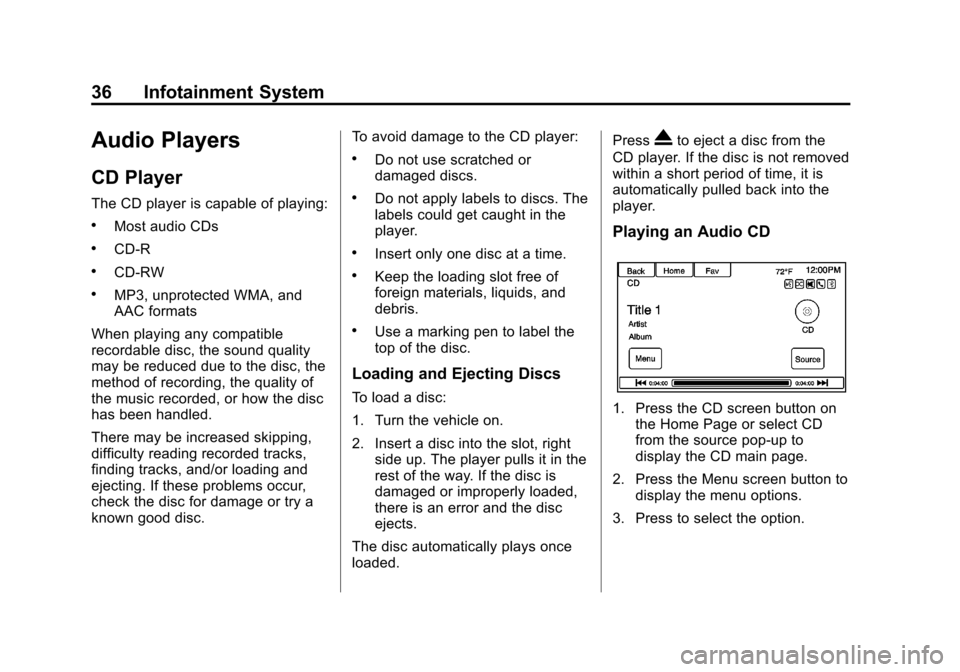
Playing an Audio CD
1. Press the CD screen button on the Home Page or select CD
from the source pop-up to
display the CD main page.
2. Press the Menu screen button to display the menu options.
3. Press to select the option.
Page 37 of 98
Black plate (37,1)Chevrolet Orlando Infotainment System (GMNA-Localizing-Canada-
6081467) - 2014 - CRC - 6/13/13
Infotainment System 37
On the CD main page, the track
number displays and the Song,
Artist, and Album information
displays when available.
Use the following radio controls to
play the disc:
k(Play/Pause):Use to pause or
resume play.
g(Previous/Reverse):
.Press to seek to the beginning of
the current or previous track.
If the track has been playing for
less than five seconds, it seeks
to the previous track. If longer
than five seconds, the current
track starts from the beginning.
.Press and hold to fast reverse
through a track. Release the
button to return to playing
speed. Elapsed time displays.
l(Next/Fast Forward):
.Press to seek to the next track.
.Press and hold to fast forward
through a track. Release the
button to return to playing
speed. Elapsed time displays.
MENU/SEL Knob: Turn to the right
or left to select the next or previous
track. Press this knob to select from
the list. If a track is selected from
the menu, the system plays the
track and returns to the CD screen.
Error Messages
If Disc Error displays and/or the disc
comes out, it could be due to:
.The disc has an invalid or
unknown format.
.The disc is very hot. Try the disc
again when the temperature
returns to normal.
.The road is very rough. Try the
disc again when the road is
smoother.
.The disc is dirty, scratched, wet,
or upside down.
.The air is very humid. Try the
disc again later.
.There was a problem while
burning the disc.
.The label is caught in the CD
player.
If the CD is not playing correctly, try
a known good CD.
If any error continues, contact your
dealer.
USB
Playing from a USB
A USB mass storage or Certified
Windows Vista®/Media Transfer
Protocol (MTP) device can be
connected to the USB port.
The USB port is in the center stack
behind the radio..
The USB icon displays when the
USB device is connected.
Page 39 of 98
Black plate (39,1)Chevrolet Orlando Infotainment System (GMNA-Localizing-Canada-
6081467) - 2014 - CRC - 6/13/13
Infotainment System 39
If no cover art is found Gracenote
will use generic genre graphics or
images of artists.
More Like This
The Gracenote database contains
attributes for Music, such as genre,
era of music, region, artist type,
mood, etc. Use this to create a
playlist of up to 30 songs "more
like" the currently listened to song.
This playlist will be stored in the
Playlist Menu when the device is
reconnected. If songs are removed
from the device, the system will
simply skip over those songs and
play the next available song.
Use the touch screen or voice
recognition to create a More Like
This Playlist. See“Voice
Recognition Commands” inVoice
Recognition on page 72.
Gracenote Indexing
While Gracenote is indexing,
infotainment features are available
including selecting music from the
menu. Voice recognition music will not be available until the radio has
completed indexing the device.
Devices with more music may take
longer to index. The device will
index when plugged into the radio
for the first time. When Indexing is
removed from the screen, the radio
is ready to support music search.
On the next connection or ignition
cycle, Indexing will show briefly on
the screen. The radio is searching
for changes to the device and
preparing the music list. If there are
no changes, the voice recognition
music search will be available.
The radio will index and store two
devices with up to 10,000 songs on
each device.
USB MP3 Player and USB Drives
.The USB MP3 players and USB
drives connected must comply
with the USB Mass Storage
Class specification (USB MSC).
.Hard disk drives are not
supported.
.The radio will not be able to play
back write-protected music.
.File systems supported: FAT32,
NTFS, Linux, and HFS+.
.The following restrictions apply
for the data stored on a USB
MP3 player or USB device:
‐
Maximum folder structure
depth: eight levels.
‐ Maximum number of MP3/
WMA files that can be
displayed: 10,000.
‐ Playlist entries must be in the
form of relative paths.
‐ The system attribute for
folders/files that contain audio
data must not be set.
To play a USB device, do one of the
following:
.Connect the USB and it begins
to play.
.Press the Now Playing screen
button on the Home Page.
.Press SOURCE, SRCE, or SRC
on the steering wheel controls to
scroll until the USB source
screen is available.
Page 44 of 98
Black plate (44,1)Chevrolet Orlando Infotainment System (GMNA-Localizing-Canada-
6081467) - 2014 - CRC - 6/13/13
44 Infotainment System
iPhone, iPod Touch, and iPad
Troubleshooting
When an iPhone, iPod touch,
or iPad are connected through USB
and Bluetooth, the audio may not be
heard when the iPod source on the
radio is selected. If a phone call is
received while listening to the iPod
source and there is no audio for the
iPod after the source, then go to the
Airplay icon on the device and
select dock connector or disconnect
and reconnect the dock connector
on the device.
Some functionality may differ based
on the operating system version on
the device.
USB Troubleshooting
If the device is not being recognized
or the music is missing screen
information, restore the radio
defaults:
1. Press CONFIG.
2. Press Vehicle Settings.3. Press Return to Factory
Settings.
4. Press Yes.
Bluetooth Audio and Voice
Recognition
See Bluetooth Audio on page 45
and Voice Recognition on page 72
for information using voice
recognition with Bluetooth audio.
Make sure all devices have the
latest software downloaded.
Auxiliary Devices
This vehicle has an auxiliary input
jack in the center stack behind the
radio. Possible auxiliary audio
sources include:
.Laptop computer
.MP3 player
.Tape player This jack is not an audio output. Do
not plug headphones into the
auxiliary input jack. Set up any
auxiliary device while the vehicle is
in P (Park).
Connect a 3.5 mm (1/8 in) cable
from the auxiliary device to the
auxiliary input jack. When a device
is connected, the system
automatically begins playing audio
from the device over the vehicle
speakers.
If an auxiliary device has already
been connected, but a different
source is currently active, do one of
the following:
.Press SOURCE, SRCE, or SRC
on the steering wheel controls to
scroll all of the available audio
source screens, until the AUX
source screen is selected.
.Say
“Play Front AUX” using
voice recognition to play the
auxiliary device . See Voice
Recognition on page 72.
Page 45 of 98
Black plate (45,1)Chevrolet Orlando Infotainment System (GMNA-Localizing-Canada-
6081467) - 2014 - CRC - 6/13/13
Infotainment System 45
Bluetooth Audio
If equipped, music may be played
from a paired Bluetooth device. See
“Pairing a Phone/Device”under
Bluetooth on page 79.
To play music through a Bluetooth
device:
1. Power on the device, pair, and connect the device.
2. Music can be launched by doing one of the following:
.Press the Bluetooth Audio
screen button on the
Home Page.
.Press SOURCE or SRCE
until Bluetooth Audio is
selected.
.Press the SRC button on
the steering wheel controls
until Bluetooth Audio is
selected. See Steering
Wheel Controls on page 8.
.Use voice recognition. See
Voice Recognition on
page 72. The music can be controlled by
either the infotainment controls or
the controls on the device.
When a phone is connected to the
system through Bluetooth Audio, the
phone notifications and sounds may
not be heard on the phone until
Bluetooth is disconnected.
Notification features may vary based
on the phone. Check the phone
manufacturer
’s information for
notification support.
Bluetooth Audio Menu
Press the Menu screen button and
the following may display:
Shuffle: Press the MENU/SEL
knob to turn shuffle on or off. Not all
devices support the shuffle feature.
When selecting Bluetooth audio, the
Bluetooth device internal music
player may not open depending on
the status of the device. All devices
launch and play back audio
differently. Make sure the correct
audio source is playing on the
device for Bluetooth audio playback on the radio. When the vehicle is
not moving, use the device to begin
playback.
When selecting Bluetooth audio as
a source, the radio may source to
the Bluetooth Audio Paused screen
with no audio playing. Press play on
the device or press
kto begin
playback. This may happen
depending on how the device
communicates over Bluetooth.
Some phones support sending
Bluetooth music information to
display on the radio. When the radio
receives this information, it will
check to see if any album art is
available and display it.
When playing music on the radio
from a Bluetooth device, make sure
the Bluetooth device is unlocked
and the intended music application
is showing on the home screen.
For iPhone/iPod touch and iPad
devices, Bluetooth Audio will not
work if the device is connected
through the USB and Bluetooth at
the same time.