low beam CHEVROLET ORLANDO 2015 Owners Manual
[x] Cancel search | Manufacturer: CHEVROLET, Model Year: 2015, Model line: ORLANDO, Model: CHEVROLET ORLANDO 2015Pages: 372, PDF Size: 6.71 MB
Page 5 of 372
Black plate (5,1)Chevrolet Orlando Owner Manual - 2013 - CRC - 6/5/12
Introduction v
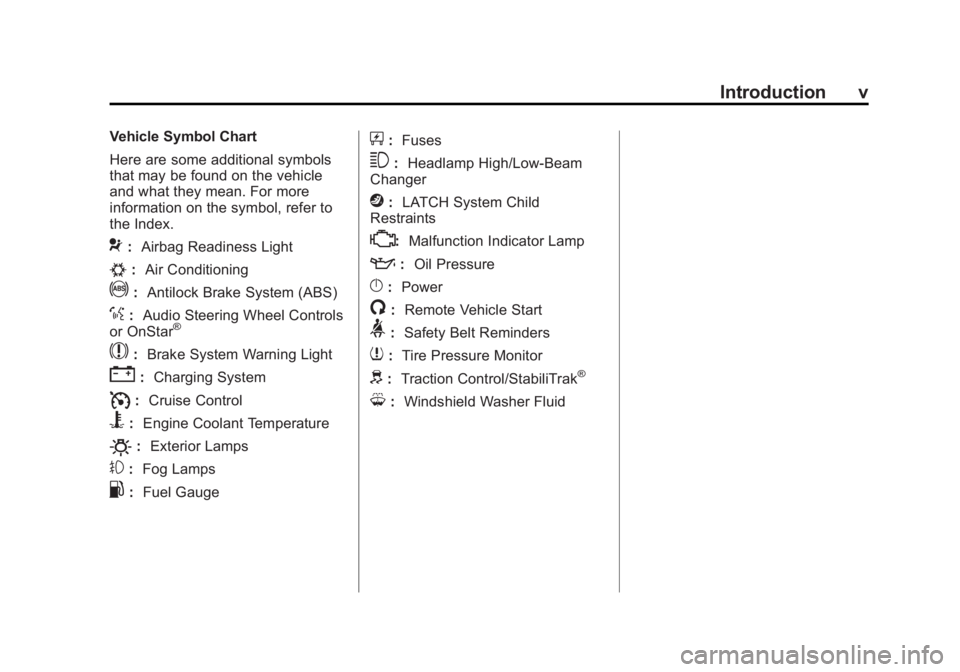
Vehicle Symbol Chart
Here are some additional symbols
that may be found on the vehicle
and what they mean. For more
information on the symbol, refer to
the Index.
9:Airbag Readiness Light
#:Air Conditioning
!:Antilock Brake System (ABS)
%:Audio Steering Wheel Controls
or OnStar®
$: Brake System Warning Light
":Charging System
I:Cruise Control
B: Engine Coolant Temperature
O:Exterior Lamps
#:Fog Lamps
.: Fuel Gauge
+:Fuses
3: Headlamp High/Low-Beam
Changer
j: LATCH System Child
Restraints
*: Malfunction Indicator Lamp
::Oil Pressure
}:Power
/:Remote Vehicle Start
>:Safety Belt Reminders
7:Tire Pressure Monitor
d:Traction Control/StabiliTrak®
M:Windshield Washer Fluid
Page 9 of 372
Black plate (3,1)Chevrolet Orlando Owner Manual - 2013 - CRC - 6/5/12
In Brief 1-3
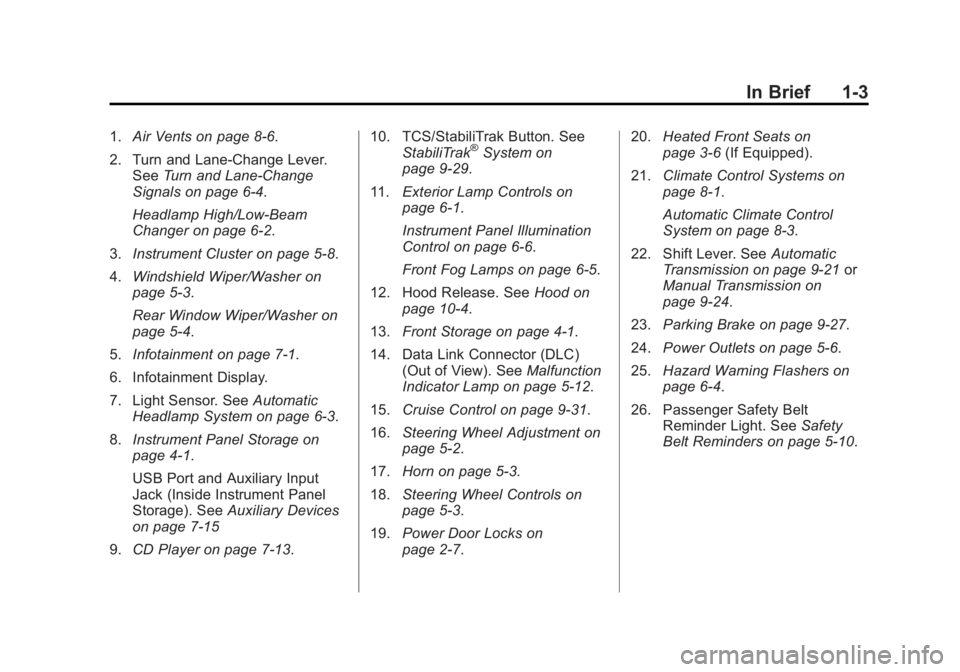
1.Air Vents on page 8‑6.
2. Turn and Lane-Change Lever. See Turn and Lane-Change
Signals on page 6‑4.
Headlamp High/Low-Beam
Changer on page 6‑2.
3. Instrument Cluster on page 5‑8.
4. Windshield Wiper/Washer on
page 5‑3.
Rear Window Wiper/Washer on
page 5‑4.
5. Infotainment on page 7‑1.
6. Infotainment Display.
7. Light Sensor. See Automatic
Headlamp System on page 6‑3.
8. Instrument Panel Storage on
page 4‑1.
USB Port and Auxiliary Input
Jack (Inside Instrument Panel
Storage). See Auxiliary Devices
on page 7‑15
9. CD Player on page 7‑13. 10. TCS/StabiliTrak Button. See
StabiliTrak®System on
page 9‑29.
11. Exterior Lamp Controls on
page 6‑1.
Instrument Panel Illumination
Control on page 6‑6.
Front Fog Lamps on page 6‑5.
12. Hood Release. See Hood on
page 10‑4.
13. Front Storage on page 4‑1.
14. Data Link Connector (DLC) (Out of View). See Malfunction
Indicator Lamp on page 5‑12.
15. Cruise Control on page 9‑31.
16. Steering Wheel Adjustment on
page 5‑2.
17. Horn on page 5‑3.
18. Steering Wheel Controls on
page 5‑3.
19. Power Door Locks on
page 2‑7. 20.
Heated Front Seats on
page 3‑6 (If Equipped).
21. Climate Control Systems on
page 8‑1.
Automatic Climate Control
System on page 8‑3.
22. Shift Lever. See Automatic
Transmission on page 9‑21 or
Manual Transmission on
page 9‑24.
23. Parking Brake on page 9‑27.
24. Power Outlets on page 5‑6.
25. Hazard Warning Flashers on
page 6‑4.
26. Passenger Safety Belt Reminder Light. See Safety
Belt Reminders on page 5‑10.
Page 101 of 372
Black plate (1,1)Chevrolet Orlando Owner Manual - 2013 - CRC - 6/5/12
Instruments and Controls 5-1
Instruments and
Controls
Controls
Steering Wheel Adjustment . . . 5-2
Steering Wheel Controls . . . . . . 5-3
Horn . . . . . . . . . . . . . . . . . . . . . . . . . . 5-3
Windshield Wiper/Washer . . . . . 5-3
Rear Window Wiper/Washer . . . . . . . . . . . . . . . . . . . . . . 5-4
Compass . . . . . . . . . . . . . . . . . . . . . 5-5
Clock . . . . . . . . . . . . . . . . . . . . . . . . . 5-5
Power Outlets . . . . . . . . . . . . . . . . . 5-6
Cigarette Lighter . . . . . . . . . . . . . . 5-6
Ashtrays . . . . . . . . . . . . . . . . . . . . . . 5-7
Warning Lights, Gauges, and
Indicators
Warning Lights, Gauges, and Indicators . . . . . . . . . . . . . . . . . . . . 5-7
Instrument Cluster . . . . . . . . . . . . 5-8
Speedometer . . . . . . . . . . . . . . . . . 5-9
Odometer . . . . . . . . . . . . . . . . . . . . . 5-9
Tachometer . . . . . . . . . . . . . . . . . . . 5-9
Fuel Gauge . . . . . . . . . . . . . . . . . . . 5-9
Engine Coolant Temperature
Gauge . . . . . . . . . . . . . . . . . . . . . . 5-10 Safety Belt Reminders . . . . . . . 5-10
Airbag Readiness Light . . . . . . 5-11
Charging System Light . . . . . . . 5-11
Malfunction
Indicator Lamp . . . . . . . . . . . . . 5-12
Service Vehicle Soon Light . . . . . . . . . . . . . . . . . . . . . . . 5-14
Brake System Warning Light . . . . . . . . . . . . . . . . . . . . . . . 5-14
Antilock Brake System (ABS) Warning Light . . . . . . . . . . . . . . 5-15
Up-Shift Light . . . . . . . . . . . . . . . . 5-16
Power Steering Warning Light . . . . . . . . . . . . . . . . . . . . . . . 5-16
Traction Off Light . . . . . . . . . . . . 5-16
StabiliTrak
®OFF Light . . . . . . . 5-17
Traction Control System (TCS)/StabiliTrak
®Light . . . . 5-17
Tire Pressure Light . . . . . . . . . . 5-17
Engine Oil Pressure Light . . . . 5-18
Low Fuel Warning Light . . . . . . 5-18
Security Light . . . . . . . . . . . . . . . . 5-19
Reduced Engine Power Light . . . . . . . . . . . . . . . . . . . . . . . 5-19
High-Beam On Light . . . . . . . . . 5-19
Daytime Running Lamps (DRL) Indicator Light . . . . . . . 5-20
Front Fog Lamp Light . . . . . . . . 5-20 Lamps On Reminder . . . . . . . . . 5-20
Cruise Control Light . . . . . . . . . 5-20
Door Ajar Light . . . . . . . . . . . . . . 5-21
Information Displays
Driver Information
Center (DIC) . . . . . . . . . . . . . . . 5-21
Vehicle Messages
Vehicle Messages . . . . . . . . . . . 5-24
Battery Voltage and ChargingMessages . . . . . . . . . . . . . . . . . . 5-25
Brake System Messages . . . . 5-25
Compass Messages . . . . . . . . . 5-25
Cruise Control Messages . . . . 5-25
Door Ajar Messages . . . . . . . . . 5-25
Engine Cooling System Messages . . . . . . . . . . . . . . . . . . 5-26
Engine Oil Messages . . . . . . . . 5-26
Engine Power Messages . . . . 5-27
Fuel System Messages . . . . . . 5-27
Key and Lock Messages . . . . . 5-27
Lamp Messages . . . . . . . . . . . . . 5-27
Object Detection System Messages . . . . . . . . . . . . . . . . . . 5-28
Ride Control System Messages . . . . . . . . . . . . . . . . . . 5-28
Airbag System Messages . . . . 5-28
Security Messages . . . . . . . . . . 5-28
Page 119 of 372
Black plate (19,1)Chevrolet Orlando Owner Manual - 2013 - CRC - 6/5/12
Instruments and Controls 5-19
Security Light
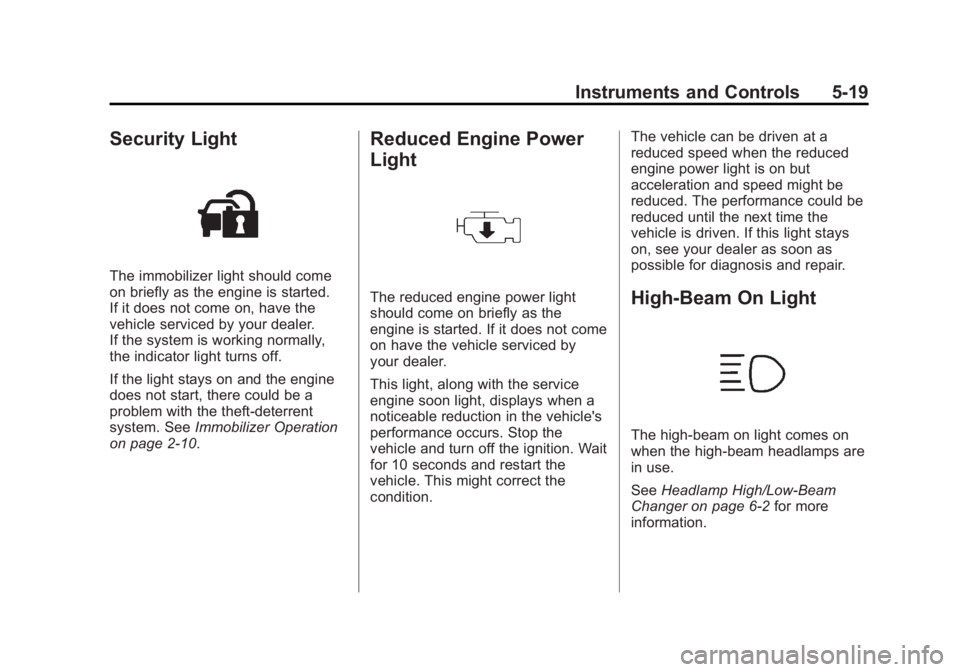
The immobilizer light should come
on briefly as the engine is started.
If it does not come on, have the
vehicle serviced by your dealer.
If the system is working normally,
the indicator light turns off.
If the light stays on and the engine
does not start, there could be a
problem with the theft-deterrent
system. SeeImmobilizer Operation
on page 2‑10.
Reduced Engine Power
Light
The reduced engine power light
should come on briefly as the
engine is started. If it does not come
on have the vehicle serviced by
your dealer.
This light, along with the service
engine soon light, displays when a
noticeable reduction in the vehicle's
performance occurs. Stop the
vehicle and turn off the ignition. Wait
for 10 seconds and restart the
vehicle. This might correct the
condition. The vehicle can be driven at a
reduced speed when the reduced
engine power light is on but
acceleration and speed might be
reduced. The performance could be
reduced until the next time the
vehicle is driven. If this light stays
on, see your dealer as soon as
possible for diagnosis and repair.High-Beam On Light
The high‐beam on light comes on
when the high-beam headlamps are
in use.
See
Headlamp High/Low-Beam
Changer on page 6‑2 for more
information.
Page 135 of 372
Black plate (1,1)Chevrolet Orlando Owner Manual - 2013 - CRC - 6/5/12
Lighting 6-1
Lighting
Exterior Lighting
Exterior Lamp Controls . . . . . . . . 6-1
Headlamp High/Low-BeamChanger . . . . . . . . . . . . . . . . . . . . . 6-2
Flash-to-Pass . . . . . . . . . . . . . . . . . 6-2
Daytime Running Lamps (DRL) . . . . . . . . . . . . . . . . 6-2
Automatic Headlamp System . . . . . . . . . . . . . . . . . . . . . . 6-3
Hazard Warning Flashers . . . . . 6-4
Turn and Lane-Change Signals . . . . . . . . . . . . . . . . . . . . . . 6-4
Front Fog Lamps . . . . . . . . . . . . . . 6-5
Interior Lighting
Instrument Panel Illumination Control . . . . . . . . . . . . . . . . . . . . . . 6-6
Courtesy Lamps . . . . . . . . . . . . . . 6-6
Dome Lamps . . . . . . . . . . . . . . . . . 6-6
Reading Lamps . . . . . . . . . . . . . . . 6-6
Lighting Features
Entry Lighting . . . . . . . . . . . . . . . . . 6-7
Exit Lighting . . . . . . . . . . . . . . . . . . . 6-7
Battery Power Protection . . . . . . 6-7
Exterior Lighting
Exterior Lamp Controls
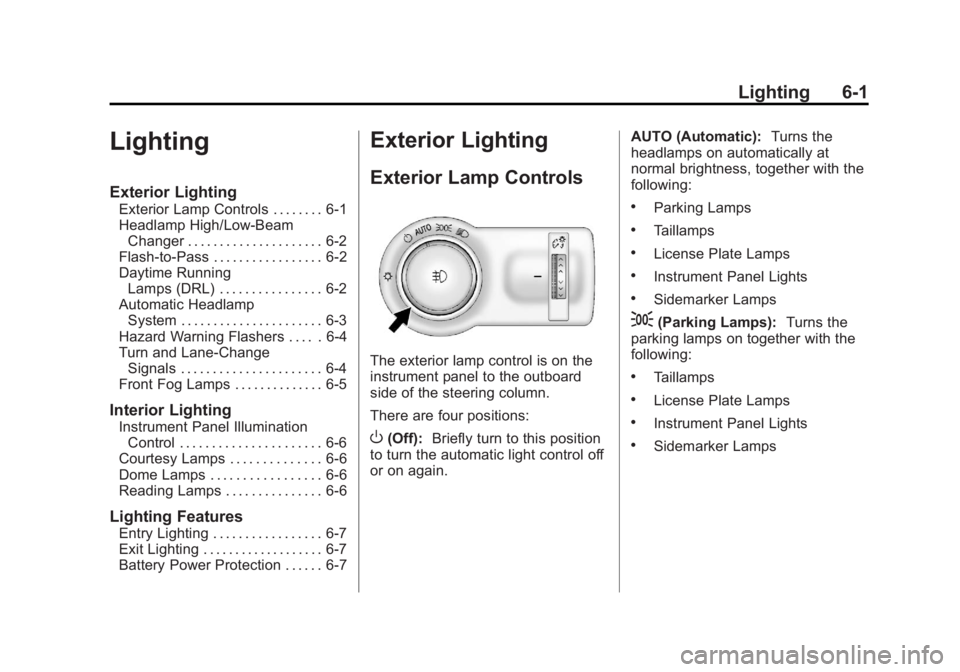
The exterior lamp control is on the
instrument panel to the outboard
side of the steering column.
There are four positions:
O(Off): Briefly turn to this position
to turn the automatic light control off
or on again. AUTO (Automatic):
Turns the
headlamps on automatically at
normal brightness, together with the
following:
.Parking Lamps
.Taillamps
.License Plate Lamps
.Instrument Panel Lights
.Sidemarker Lamps
;(Parking Lamps): Turns the
parking lamps on together with the
following:
.Taillamps
.License Plate Lamps
.Instrument Panel Lights
.Sidemarker Lamps
Page 136 of 372
Black plate (2,1)Chevrolet Orlando Owner Manual - 2013 - CRC - 6/5/12
6-2 Lighting
5(Headlamps):Turns the
headlamps on together with the
lamps listed below. A warning chime
sounds if the driver door is opened
when the ignition switch is off and
the headlamps are on.
.Parking Lamps
.Taillamps
.License Plate Lamps
.Instrument Panel Lights
.Sidemarker Lamps
#(Front Fog Lamps): For
vehicles with fog lamps, press to
turn the lamps on or off.
See Front Fog Lamps on page 6‑5.
When the lights are on,
;will be
lit. See Lamps On Reminder on
page 5‑20.
Headlamp High/
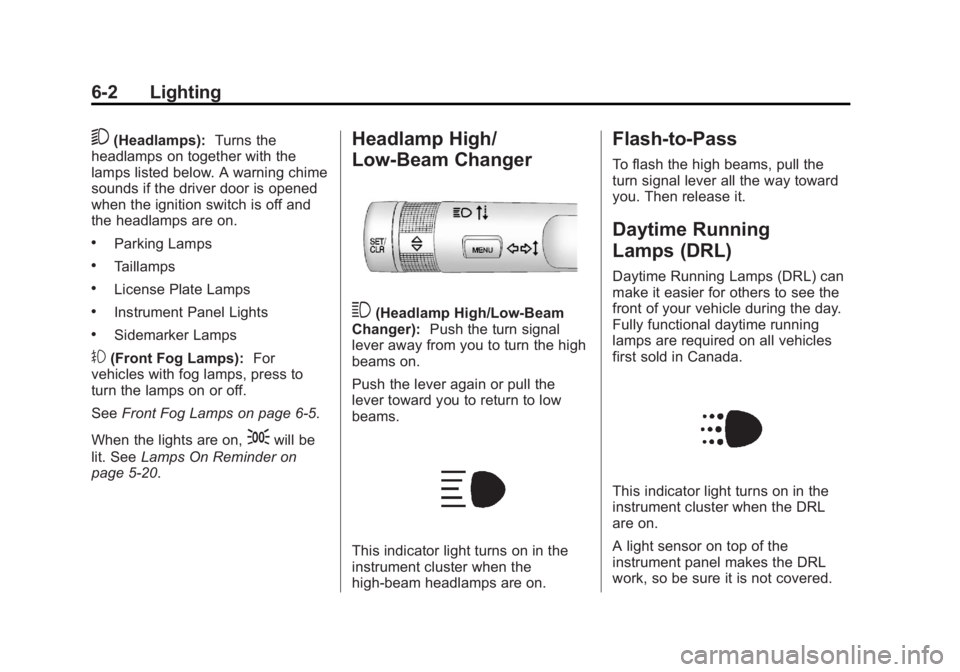
Low-Beam Changer
3(Headlamp High/Low-Beam
Changer): Push the turn signal
lever away from you to turn the high
beams on.
Push the lever again or pull the
lever toward you to return to low
beams.
This indicator light turns on in the
instrument cluster when the
high-beam headlamps are on.
Flash-to-Pass
To flash the high beams, pull the
turn signal lever all the way toward
you. Then release it.
Daytime Running
Lamps (DRL)
Daytime Running Lamps (DRL) can
make it easier for others to see the
front of your vehicle during the day.
Fully functional daytime running
lamps are required on all vehicles
first sold in Canada.
This indicator light turns on in the
instrument cluster when the DRL
are on.
A light sensor on top of the
instrument panel makes the DRL
work, so be sure it is not covered.
Page 137 of 372
Black plate (3,1)Chevrolet Orlando Owner Manual - 2013 - CRC - 6/5/12
Lighting 6-3
The DRL system makes the
low-beam headlamps come on at a
reduced brightness when the
following conditions are met:
.The ignition is in the ON/
RUN mode.
.The exterior lamps control is
in AUTO.
.The engine is running.
When the DRL are on, only the
low-beam headlamps, at a reduced
level of brightness, will be on. The
taillamps, sidemarker, instrument
panel, and other lamps will not
be on.
The headlamps automatically
change from DRL to the regular
headlamps depending on the
darkness of the surroundings. The
other lamps that come on with the
headlamps will also come on. When it is bright enough outside,
the headlamps go off and the DRL
come on.
To turn the DRL lamps off or on
again, turn the exterior lamp control
to
Oand then release. For vehicles
first sold in Canada, the DRL lamps
cannot be turned off.
Automatic Headlamp
System
When it is dark enough outside and
the exterior lamp control is in the
automatic position, the headlamps
come on automatically. See Exterior
Lamp Controls on page 6‑1.
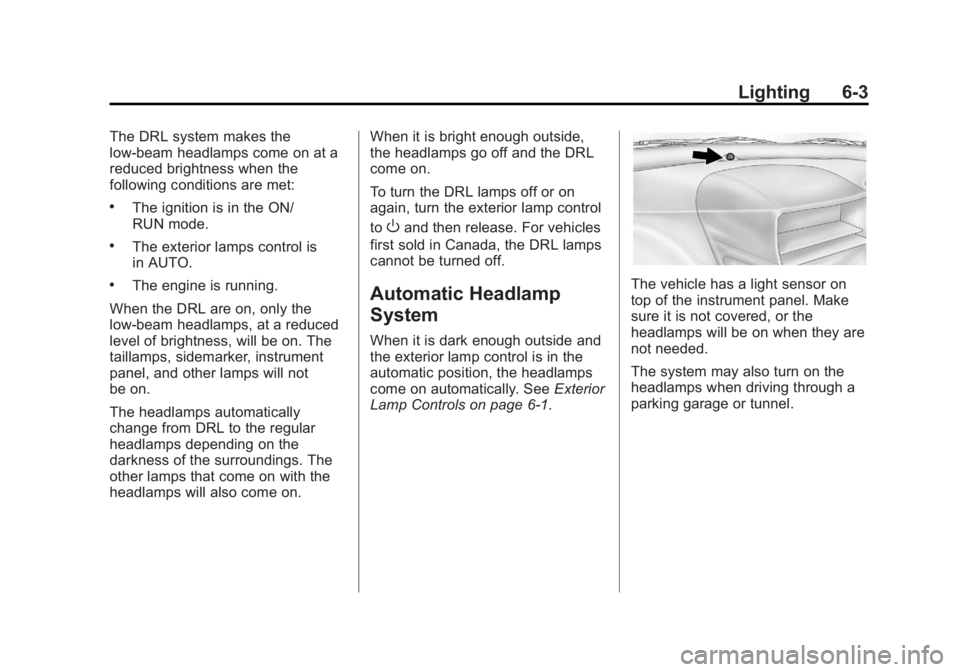
The vehicle has a light sensor on
top of the instrument panel. Make
sure it is not covered, or the
headlamps will be on when they are
not needed.
The system may also turn on the
headlamps when driving through a
parking garage or tunnel.
Page 217 of 372
Black plate (37,1)Chevrolet Orlando Owner Manual - 2013 - CRC - 6/5/12
Driving and Operating 9-37
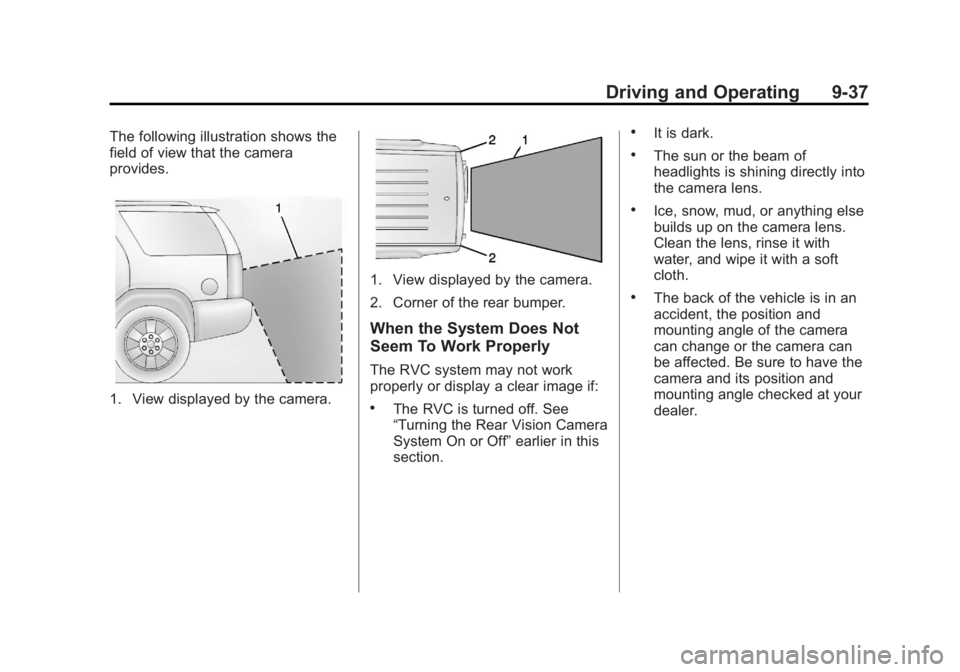
The following illustration shows the
field of view that the camera
provides.
1. View displayed by the camera.
1. View displayed by the camera.
2. Corner of the rear bumper.
When the System Does Not
Seem To Work Properly
The RVC system may not work
properly or display a clear image if:
.The RVC is turned off. See
“Turning the Rear Vision Camera
System On or Off”earlier in this
section.
.It is dark.
.The sun or the beam of
headlights is shining directly into
the camera lens.
.Ice, snow, mud, or anything else
builds up on the camera lens.
Clean the lens, rinse it with
water, and wipe it with a soft
cloth.
.The back of the vehicle is in an
accident, the position and
mounting angle of the camera
can change or the camera can
be affected. Be sure to have the
camera and its position and
mounting angle checked at your
dealer.
Page 253 of 372
Black plate (25,1)Chevrolet Orlando Owner Manual - 2013 - CRC - 6/5/12
Vehicle Care 10-25
Headlamp Aiming
Headlamp aim has been preset and
should need no further adjustment.
If the vehicle is damaged in a crash,
the headlamp aim may be affected.
If adjustment to the headlamps is
necessary, see your dealer.
Bulb Replacement
For the proper type of replacement
bulbs, seeReplacement Bulbs on
page 10‑30.
For any bulb‐changing procedure
not listed in this section, contact
your dealer.
Halogen Bulbs
{WARNING
Halogen bulbs have pressurized
gas inside and can burst if you
drop or scratch the bulb. You or
others could be injured. Be sure
to read and follow the instructions
on the bulb package.
Headlamps, Front Turn
Signal, Sidemarker, and
Parking Lamps
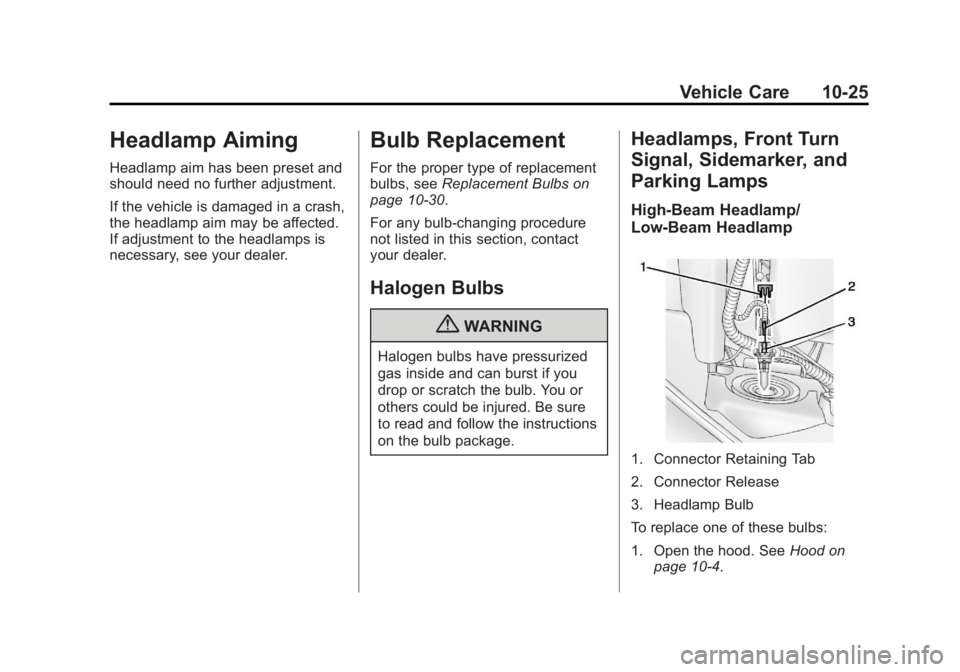
High-Beam Headlamp/
Low-Beam Headlamp
1. Connector Retaining Tab
2. Connector Release
3. Headlamp Bulb
To replace one of these bulbs:
1. Open the hood. See Hood on
page 10‑4.
Page 258 of 372
Black plate (30,1)Chevrolet Orlando Owner Manual - 2013 - CRC - 6/5/12
10-30 Vehicle Care
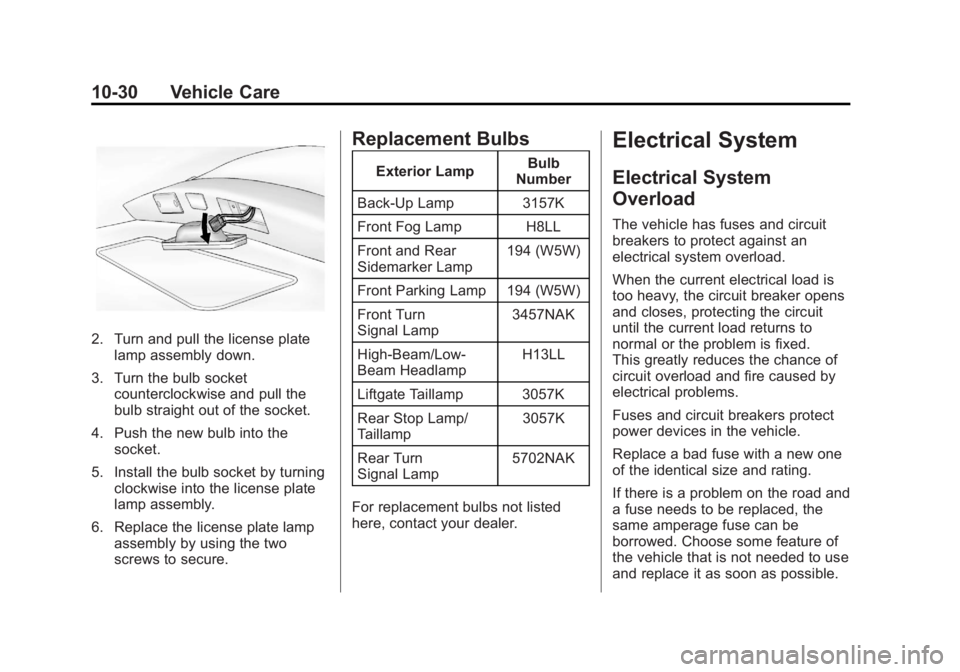
2. Turn and pull the license platelamp assembly down.
3. Turn the bulb socket counterclockwise and pull the
bulb straight out of the socket.
4. Push the new bulb into the socket.
5. Install the bulb socket by turning clockwise into the license plate
lamp assembly.
6. Replace the license plate lamp assembly by using the two
screws to secure.
Replacement Bulbs
Exterior Lamp Bulb
Number
Back-Up Lamp 3157K
Front Fog Lamp H8LL
Front and Rear
Sidemarker Lamp 194 (W5W)
Front Parking Lamp 194 (W5W)
Front Turn
Signal Lamp 3457NAK
High‐Beam/Low‐
Beam Headlamp H13LL
Liftgate Taillamp 3057K
Rear Stop Lamp/
Taillamp 3057K
Rear Turn
Signal Lamp 5702NAK
For replacement bulbs not listed
here, contact your dealer.
Electrical System
Electrical System
Overload
The vehicle has fuses and circuit
breakers to protect against an
electrical system overload.
When the current electrical load is
too heavy, the circuit breaker opens
and closes, protecting the circuit
until the current load returns to
normal or the problem is fixed.
This greatly reduces the chance of
circuit overload and fire caused by
electrical problems.
Fuses and circuit breakers protect
power devices in the vehicle.
Replace a bad fuse with a new one
of the identical size and rating.
If there is a problem on the road and
a fuse needs to be replaced, the
same amperage fuse can be
borrowed. Choose some feature of
the vehicle that is not needed to use
and replace it as soon as possible.