headlamp CHEVROLET ORLANDO 2016 Owners Manual
[x] Cancel search | Manufacturer: CHEVROLET, Model Year: 2016, Model line: ORLANDO, Model: CHEVROLET ORLANDO 2016Pages: 372, PDF Size: 6.71 MB
Page 1 of 372
Black plate (1,1)Chevrolet Orlando Owner Manual - 2013 - CRC - 6/5/12
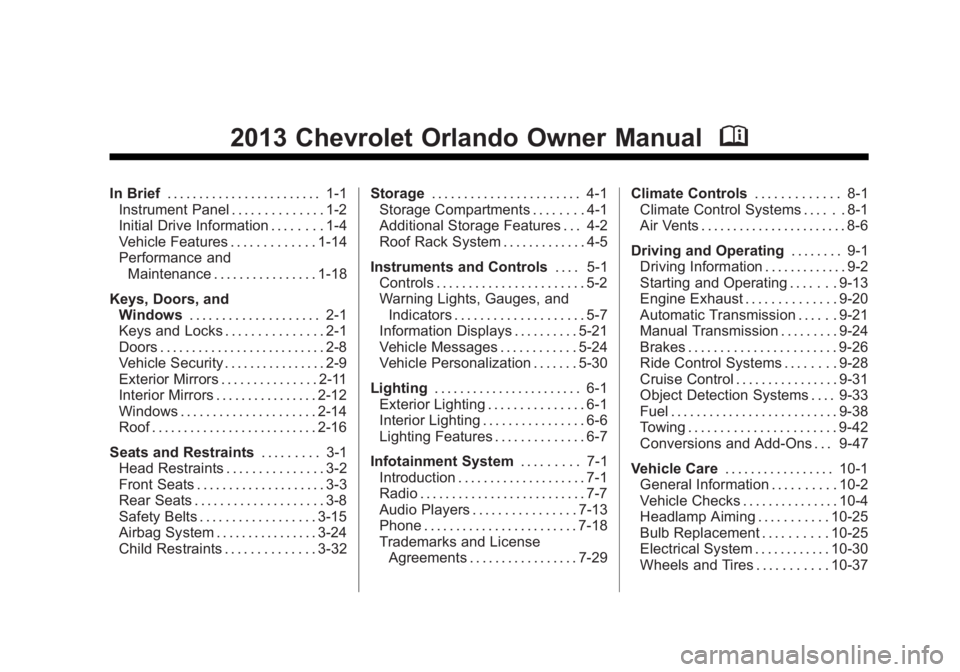
2013 Chevrolet Orlando Owner ManualM
In Brief. . . . . . . . . . . . . . . . . . . . . . . . 1-1
Instrument Panel . . . . . . . . . . . . . . 1-2
Initial Drive Information . . . . . . . . 1-4
Vehicle Features . . . . . . . . . . . . . 1-14
Performance and Maintenance . . . . . . . . . . . . . . . . 1-18
Keys, Doors, and Windows . . . . . . . . . . . . . . . . . . . . 2-1
Keys and Locks . . . . . . . . . . . . . . . 2-1
Doors . . . . . . . . . . . . . . . . . . . . . . . . . . 2-8
Vehicle Security . . . . . . . . . . . . . . . . 2-9
Exterior Mirrors . . . . . . . . . . . . . . . 2-11
Interior Mirrors . . . . . . . . . . . . . . . . 2-12
Windows . . . . . . . . . . . . . . . . . . . . . 2-14
Roof . . . . . . . . . . . . . . . . . . . . . . . . . . 2-16
Seats and Restraints . . . . . . . . . 3-1
Head Restraints . . . . . . . . . . . . . . . 3-2
Front Seats . . . . . . . . . . . . . . . . . . . . 3-3
Rear Seats . . . . . . . . . . . . . . . . . . . . 3-8
Safety Belts . . . . . . . . . . . . . . . . . . 3-15
Airbag System . . . . . . . . . . . . . . . . 3-24
Child Restraints . . . . . . . . . . . . . . 3-32 Storage
. . . . . . . . . . . . . . . . . . . . . . . 4-1
Storage Compartments . . . . . . . . 4-1
Additional Storage Features . . . 4-2
Roof Rack System . . . . . . . . . . . . . 4-5
Instruments and Controls . . . . 5-1
Controls . . . . . . . . . . . . . . . . . . . . . . . 5-2
Warning Lights, Gauges, and
Indicators . . . . . . . . . . . . . . . . . . . . 5-7
Information Displays . . . . . . . . . . 5-21
Vehicle Messages . . . . . . . . . . . . 5-24
Vehicle Personalization . . . . . . . 5-30
Lighting . . . . . . . . . . . . . . . . . . . . . . . 6-1
Exterior Lighting . . . . . . . . . . . . . . . 6-1
Interior Lighting . . . . . . . . . . . . . . . . 6-6
Lighting Features . . . . . . . . . . . . . . 6-7
Infotainment System . . . . . . . . . 7-1
Introduction . . . . . . . . . . . . . . . . . . . . 7-1
Radio . . . . . . . . . . . . . . . . . . . . . . . . . . 7-7
Audio Players . . . . . . . . . . . . . . . . 7-13
Phone . . . . . . . . . . . . . . . . . . . . . . . . 7-18
Trademarks and License Agreements . . . . . . . . . . . . . . . . . 7-29 Climate Controls
. . . . . . . . . . . . . 8-1
Climate Control Systems . . . . . . 8-1
Air Vents . . . . . . . . . . . . . . . . . . . . . . . 8-6
Driving and Operating . . . . . . . . 9-1
Driving Information . . . . . . . . . . . . . 9-2
Starting and Operating . . . . . . . 9-13
Engine Exhaust . . . . . . . . . . . . . . 9-20
Automatic Transmission . . . . . . 9-21
Manual Transmission . . . . . . . . . 9-24
Brakes . . . . . . . . . . . . . . . . . . . . . . . 9-26
Ride Control Systems . . . . . . . . 9-28
Cruise Control . . . . . . . . . . . . . . . . 9-31
Object Detection Systems . . . . 9-33
Fuel . . . . . . . . . . . . . . . . . . . . . . . . . . 9-38
Towing . . . . . . . . . . . . . . . . . . . . . . . 9-42
Conversions and Add-Ons . . . 9-47
Vehicle Care . . . . . . . . . . . . . . . . . 10-1
General Information . . . . . . . . . . 10-2
Vehicle Checks . . . . . . . . . . . . . . . 10-4
Headlamp Aiming . . . . . . . . . . . 10-25
Bulb Replacement . . . . . . . . . . 10-25
Electrical System . . . . . . . . . . . . 10-30
Wheels and Tires . . . . . . . . . . . 10-37
Page 5 of 372
Black plate (5,1)Chevrolet Orlando Owner Manual - 2013 - CRC - 6/5/12
Introduction v
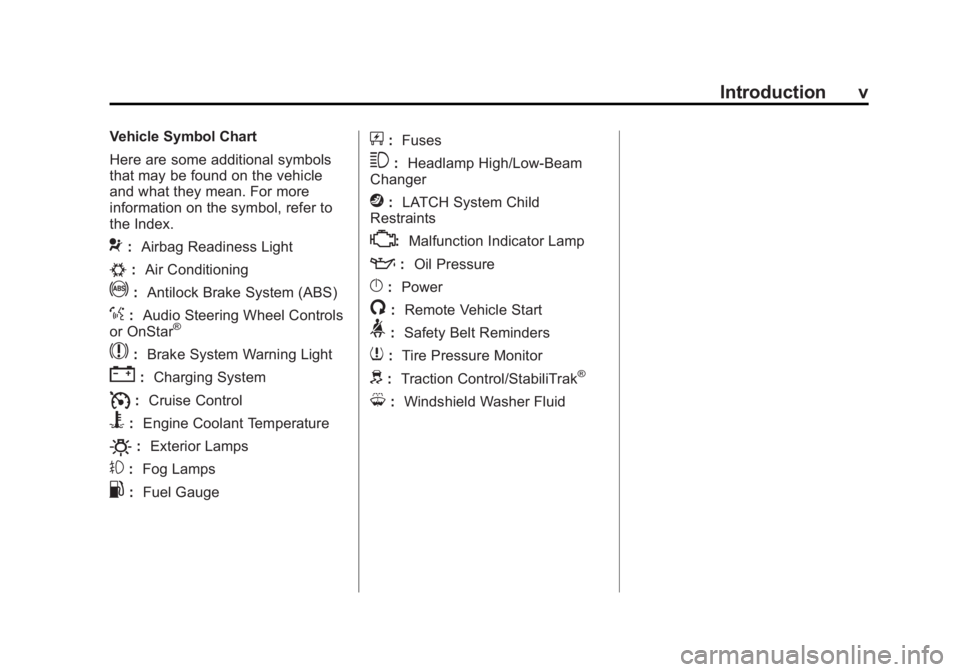
Vehicle Symbol Chart
Here are some additional symbols
that may be found on the vehicle
and what they mean. For more
information on the symbol, refer to
the Index.
9:Airbag Readiness Light
#:Air Conditioning
!:Antilock Brake System (ABS)
%:Audio Steering Wheel Controls
or OnStar®
$: Brake System Warning Light
":Charging System
I:Cruise Control
B: Engine Coolant Temperature
O:Exterior Lamps
#:Fog Lamps
.: Fuel Gauge
+:Fuses
3: Headlamp High/Low-Beam
Changer
j: LATCH System Child
Restraints
*: Malfunction Indicator Lamp
::Oil Pressure
}:Power
/:Remote Vehicle Start
>:Safety Belt Reminders
7:Tire Pressure Monitor
d:Traction Control/StabiliTrak®
M:Windshield Washer Fluid
Page 9 of 372
Black plate (3,1)Chevrolet Orlando Owner Manual - 2013 - CRC - 6/5/12
In Brief 1-3
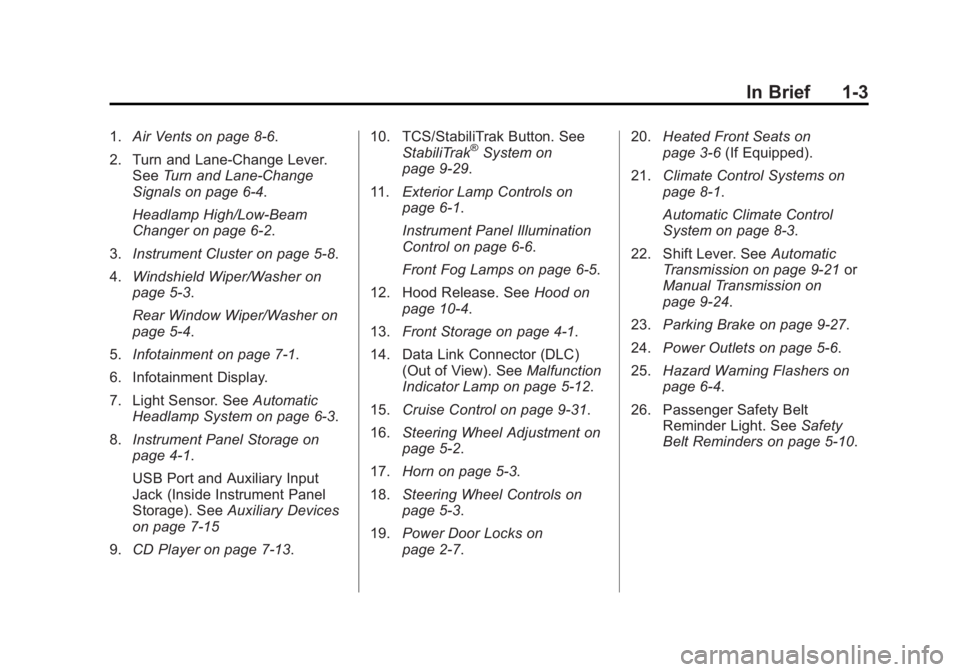
1.Air Vents on page 8‑6.
2. Turn and Lane-Change Lever. See Turn and Lane-Change
Signals on page 6‑4.
Headlamp High/Low-Beam
Changer on page 6‑2.
3. Instrument Cluster on page 5‑8.
4. Windshield Wiper/Washer on
page 5‑3.
Rear Window Wiper/Washer on
page 5‑4.
5. Infotainment on page 7‑1.
6. Infotainment Display.
7. Light Sensor. See Automatic
Headlamp System on page 6‑3.
8. Instrument Panel Storage on
page 4‑1.
USB Port and Auxiliary Input
Jack (Inside Instrument Panel
Storage). See Auxiliary Devices
on page 7‑15
9. CD Player on page 7‑13. 10. TCS/StabiliTrak Button. See
StabiliTrak®System on
page 9‑29.
11. Exterior Lamp Controls on
page 6‑1.
Instrument Panel Illumination
Control on page 6‑6.
Front Fog Lamps on page 6‑5.
12. Hood Release. See Hood on
page 10‑4.
13. Front Storage on page 4‑1.
14. Data Link Connector (DLC) (Out of View). See Malfunction
Indicator Lamp on page 5‑12.
15. Cruise Control on page 9‑31.
16. Steering Wheel Adjustment on
page 5‑2.
17. Horn on page 5‑3.
18. Steering Wheel Controls on
page 5‑3.
19. Power Door Locks on
page 2‑7. 20.
Heated Front Seats on
page 3‑6 (If Equipped).
21. Climate Control Systems on
page 8‑1.
Automatic Climate Control
System on page 8‑3.
22. Shift Lever. See Automatic
Transmission on page 9‑21 or
Manual Transmission on
page 9‑24.
23. Parking Brake on page 9‑27.
24. Power Outlets on page 5‑6.
25. Hazard Warning Flashers on
page 6‑4.
26. Passenger Safety Belt Reminder Light. See Safety
Belt Reminders on page 5‑10.
Page 16 of 372
Black plate (10,1)Chevrolet Orlando Owner Manual - 2013 - CRC - 6/5/12
1-10 In Brief
Interior Mirror
Hold the inside rearview mirror in
the center to move it for a clearer
view of behind your vehicle. Adjust
the inside rearview mirror by moving
it up and down or side to side.
Adjust the mirror to avoid glare from
the headlamps behind you. Push
the tab forward for daytime use and
pull it for nighttime use. SeeManual
Rearview Mirror on page 2‑12.
On vehicles with an automatic
dimming inside rearview mirror, the
mirror reduces glare from the
headlamps of the vehicle behind
you. The dimming feature and
indicator light come on each time
the vehicle is started. See
Automatic Dimming Rearview Mirror
on page 2‑13.
Steering Wheel
Adjustment
The vehicle may have a tilt or tilt
and telescoping steering wheel.
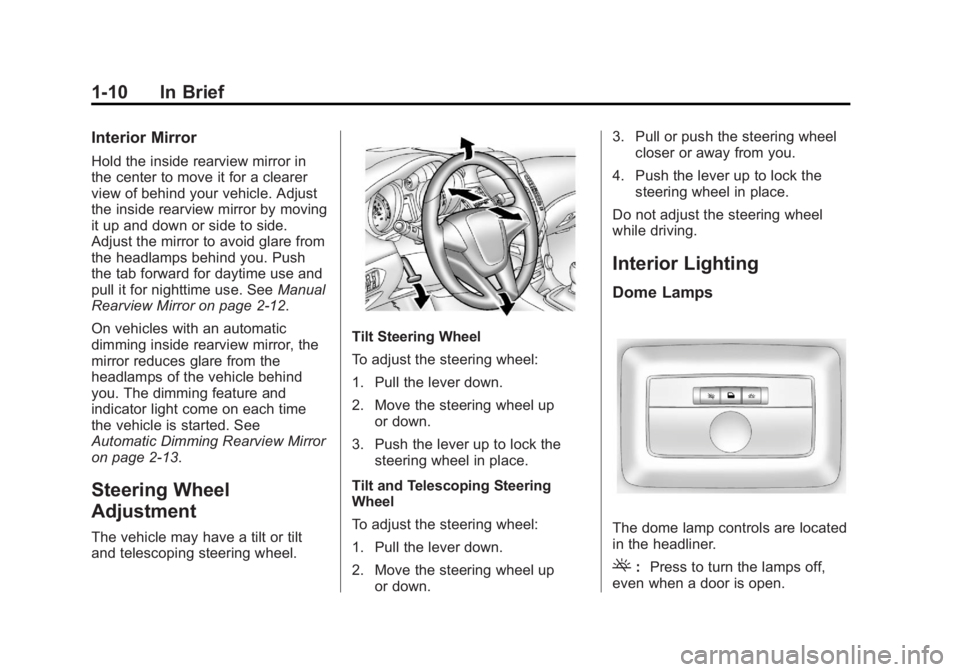
Tilt Steering Wheel
To adjust the steering wheel:
1. Pull the lever down.
2. Move the steering wheel up
or down.
3. Push the lever up to lock the steering wheel in place.
Tilt and Telescoping Steering
Wheel
To adjust the steering wheel:
1. Pull the lever down.
2. Move the steering wheel up or down. 3. Pull or push the steering wheel
closer or away from you.
4. Push the lever up to lock the steering wheel in place.
Do not adjust the steering wheel
while driving.
Interior Lighting
Dome Lamps
The dome lamp controls are located
in the headliner.
(: Press to turn the lamps off,
even when a door is open.
Page 17 of 372
Black plate (11,1)Chevrolet Orlando Owner Manual - 2013 - CRC - 6/5/12
In Brief 1-11
H:Press to turn the lamps on
automatically when a door is
opened.
': Press to turn on the dome
lamps.
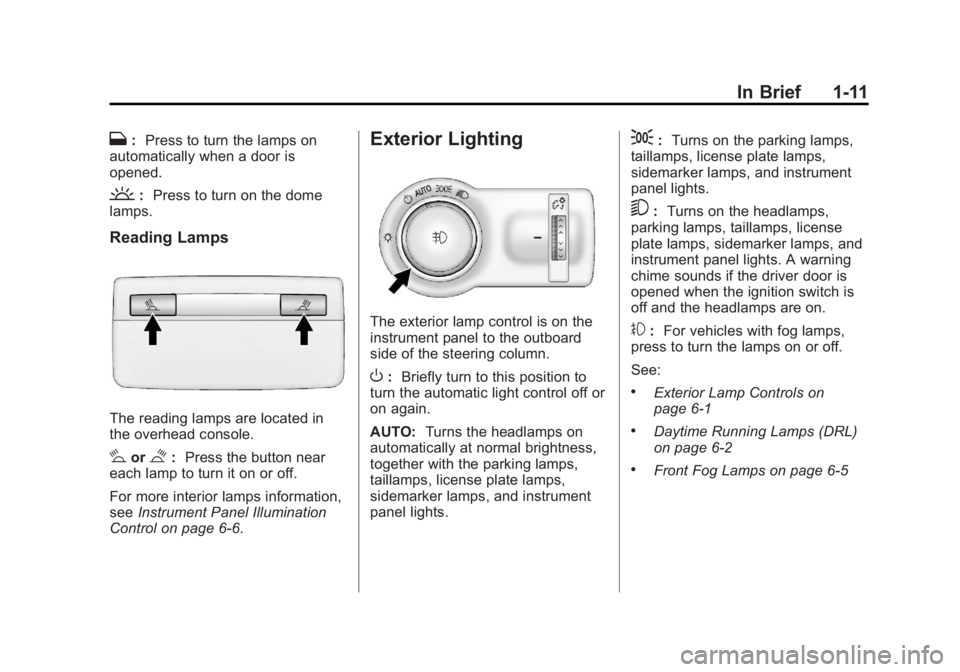
Reading Lamps
The reading lamps are located in
the overhead console.
#or$: Press the button near
each lamp to turn it on or off.
For more interior lamps information,
see Instrument Panel Illumination
Control on page 6‑6.
Exterior Lighting
The exterior lamp control is on the
instrument panel to the outboard
side of the steering column.
O: Briefly turn to this position to
turn the automatic light control off or
on again.
AUTO: Turns the headlamps on
automatically at normal brightness,
together with the parking lamps,
taillamps, license plate lamps,
sidemarker lamps, and instrument
panel lights.
;: Turns on the parking lamps,
taillamps, license plate lamps,
sidemarker lamps, and instrument
panel lights.
5: Turns on the headlamps,
parking lamps, taillamps, license
plate lamps, sidemarker lamps, and
instrument panel lights. A warning
chime sounds if the driver door is
opened when the ignition switch is
off and the headlamps are on.
#: For vehicles with fog lamps,
press to turn the lamps on or off.
See:
.Exterior Lamp Controls on
page 6‑1
.Daytime Running Lamps (DRL)
on page 6‑2
.Front Fog Lamps on page 6‑5
Page 40 of 372
Black plate (12,1)Chevrolet Orlando Owner Manual - 2013 - CRC - 6/5/12
2-12 Keys, Doors, and Windows
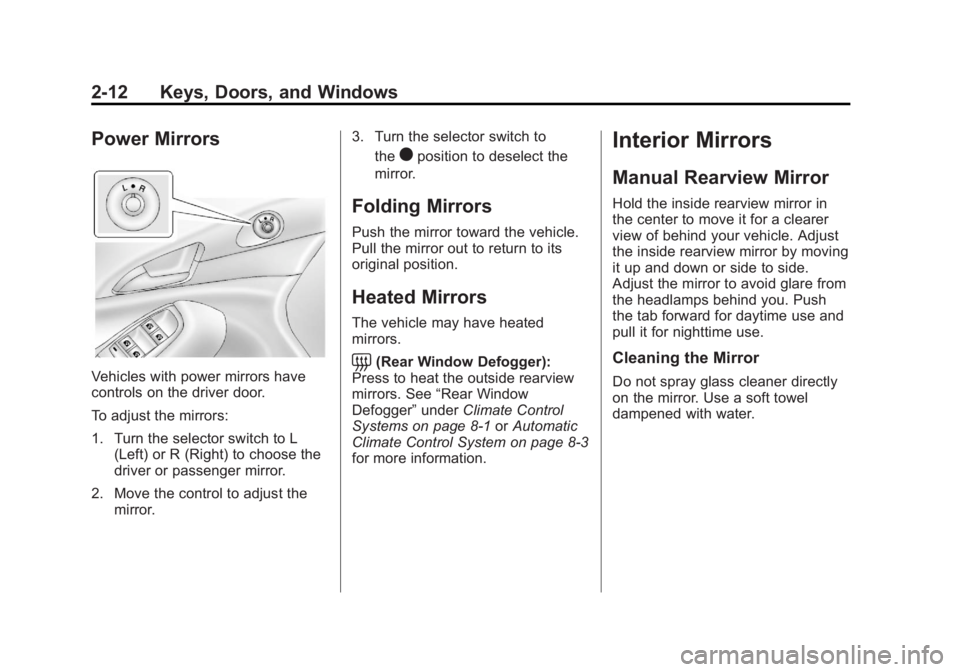
Power Mirrors
Vehicles with power mirrors have
controls on the driver door.
To adjust the mirrors:
1. Turn the selector switch to L(Left) or R (Right) to choose the
driver or passenger mirror.
2. Move the control to adjust the mirror. 3. Turn the selector switch to
the
)position to deselect the
mirror.
Folding Mirrors
Push the mirror toward the vehicle.
Pull the mirror out to return to its
original position.
Heated Mirrors
The vehicle may have heated
mirrors.
=(Rear Window Defogger):
Press to heat the outside rearview
mirrors. See “Rear Window
Defogger” underClimate Control
Systems on page 8‑1 orAutomatic
Climate Control System on page 8‑3
for more information.
Interior Mirrors
Manual Rearview Mirror
Hold the inside rearview mirror in
the center to move it for a clearer
view of behind your vehicle. Adjust
the inside rearview mirror by moving
it up and down or side to side.
Adjust the mirror to avoid glare from
the headlamps behind you. Push
the tab forward for daytime use and
pull it for nighttime use.
Cleaning the Mirror
Do not spray glass cleaner directly
on the mirror. Use a soft towel
dampened with water.
Page 41 of 372
Black plate (13,1)Chevrolet Orlando Owner Manual - 2013 - CRC - 6/5/12
Keys, Doors, and Windows 2-13
Automatic Dimming
Rearview Mirror
The vehicle may have an automatic
dimming inside rearview mirror.
Automatic dimming reduces the
glare from the headlamps of the
vehicle behind you. The dimming
feature and indicator light come on
each time the vehicle is started.
Vehicles with OnStar have three
control buttons at the bottom of the
mirror. See your dealer for more
information about OnStar and how
to subscribe to it. SeeOnStar
Overview on page 14‑1.
Cleaning the Mirror
Do not spray glass cleaner directly
on the mirror. Use a soft towel
dampened with water.
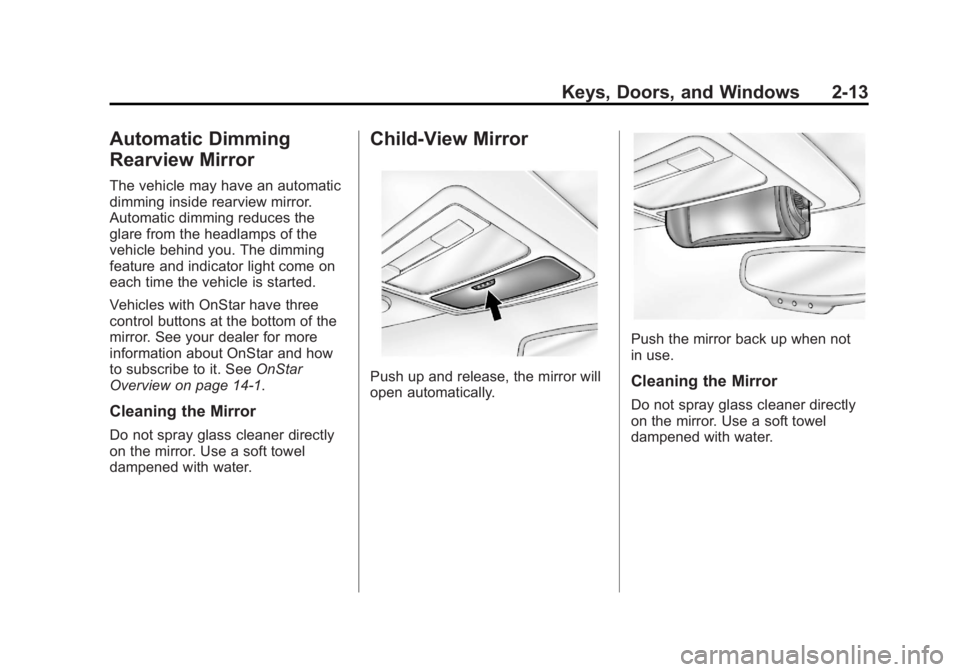
Child-View Mirror
Push up and release, the mirror will
open automatically.
Push the mirror back up when not
in use.
Cleaning the Mirror
Do not spray glass cleaner directly
on the mirror. Use a soft towel
dampened with water.
Page 119 of 372
Black plate (19,1)Chevrolet Orlando Owner Manual - 2013 - CRC - 6/5/12
Instruments and Controls 5-19
Security Light
The immobilizer light should come
on briefly as the engine is started.
If it does not come on, have the
vehicle serviced by your dealer.
If the system is working normally,
the indicator light turns off.
If the light stays on and the engine
does not start, there could be a
problem with the theft-deterrent
system. SeeImmobilizer Operation
on page 2‑10.
Reduced Engine Power
Light
The reduced engine power light
should come on briefly as the
engine is started. If it does not come
on have the vehicle serviced by
your dealer.
This light, along with the service
engine soon light, displays when a
noticeable reduction in the vehicle's
performance occurs. Stop the
vehicle and turn off the ignition. Wait
for 10 seconds and restart the
vehicle. This might correct the
condition. The vehicle can be driven at a
reduced speed when the reduced
engine power light is on but
acceleration and speed might be
reduced. The performance could be
reduced until the next time the
vehicle is driven. If this light stays
on, see your dealer as soon as
possible for diagnosis and repair.High-Beam On Light
The high‐beam on light comes on
when the high-beam headlamps are
in use.
See
Headlamp High/Low-Beam
Changer on page 6‑2 for more
information.
Page 127 of 372
Black plate (27,1)Chevrolet Orlando Owner Manual - 2013 - CRC - 6/5/12
Instruments and Controls 5-27
Engine Power Messages
ENGINE POWER IS REDUCED
This message displays when the
vehicle's engine power is reduced.
Reduced engine power can affect
the vehicle's ability to accelerate.
If this message is on, but there is no
reduction in performance, proceed
to your destination. The
performance may be reduced the
next time the vehicle is driven. The
vehicle may be driven at a reduced
speed while this message is on, but
maximum acceleration and speed
may be reduced. Anytime this
message stays on, the vehicle
should be taken to your dealer for
service as soon as possible.
Fuel System Messages
FUEL LEVEL LOW
This message displays when the
vehicle is low on fuel. Refuel as
soon as possible.
TIGHTEN GAS CAP
This message displays when the
fuel cap is not on tight. Tighten the
fuel cap.
Key and Lock Messages
REPLACE BATTERY IN
REMOTE KEY
This message displays when the
battery in the Remote Keyless Entry
(RKE) transmitter needs to be
replaced.
Lamp Messages
AUTOMATIC LIGHT
CONTROL ON
This message is displayed when the
automatic light control has been
turned on. SeeAutomatic Headlamp
System on page 6‑3.
AUTOMATIC LIGHT
CONTROL OFF
This message is displayed when the
automatic light control has been
turned off. See Automatic Headlamp
System on page 6‑3.
XXX TURN INDICATOR
FAILURE
When one of the turn signals is out,
this message displays to show
which bulb needs to be replaced.
See Bulb Replacement on
page 10‑25 andReplacement Bulbs
on page 10‑30 for more information
on turn signal bulb replacement.
TURN SIGNAL ON
This message is displayed if the
turn signal has been left on. Turn off
the turn signal.
Page 132 of 372
Black plate (32,1)Chevrolet Orlando Owner Manual - 2013 - CRC - 6/5/12
5-32 Instruments and Controls
See“Rear Window Defogger” under
Climate Control Systems on
page 8‑1 for more information.
Press the MENU knob when Auto
Rear Defog is highlighted to open
the menu. Turn the knob to highlight
On or Off. Press the knob to confirm
the selection and move back to the
last menu.
Comfort and Convenience
Select the Comfort and
Convenience menu and Chime
Volume will be displayed.
Chime Volume
This allows selection of the chime
volume level.
Press the MENU knob when Chime
Volume is highlighted. Turn the knob
to select Normal or High. Press the
BACK button to confirm and go
back to the last menu.
Collision/Detection Systems
If equipped, select the Collision/
Detection Systems menu and Park
Assist will be displayed. Park Assist
This allows the Ultrasonic Parking
Assist feature, audible only, to be
turned on or off.
Press the MENU knob when Park
Assist is highlighted. Turn the knob
to select On or Off. Press the knob
to confirm and go back to the
last menu.
Languages
Select the Language menu and the
following will be displayed:
.English
.Francais
.Espanol
Turn the MENU knob to select the
language. Press BACK to return to
the last menu.
Lighting
Select the Lighting menu and the
following will be displayed:
.Exit Lighting
.Vehicle Locator Lights Exit Lighting
This allows the selection of how
long the exterior lamps stay on
when leaving the vehicle when it is
dark outside.
Press the MENU knob when Exit
Lighting is highlighted. Turn the
knob to select Off, 30 Seconds,
1 Minute, or 2 Minutes. Press the
BACK button to confirm and go
back to the last menu.
Vehicle Locator Lights
This allows the vehicle locator lights
to be turned on or off. When on, the
headlamps and back‐up lamps will
flash when
Kon the Remote
Keyless Entry (RKE) transmitter is
pressed.
Press the MENU knob when Vehicle
Locator Lights is highlighted to open
the menu. Turn the MENU knob to
highlight On or Off. Press MENU to
select On or Off. Press the BACK
button to confirm the selection and
move back to the last menu.