radiator cap CHEVROLET ORLANDO 2016 Owners Manual
[x] Cancel search | Manufacturer: CHEVROLET, Model Year: 2016, Model line: ORLANDO, Model: CHEVROLET ORLANDO 2016Pages: 372, PDF Size: 6.71 MB
Page 233 of 372

Black plate (5,1)Chevrolet Orlando Owner Manual - 2013 - CRC - 6/5/12
Vehicle Care 10-5
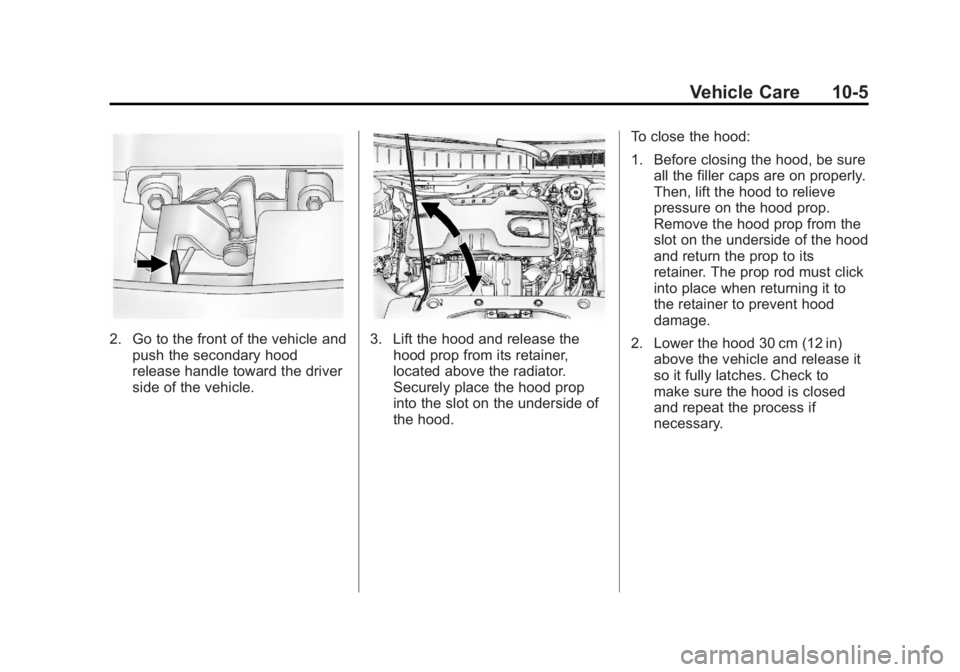
2. Go to the front of the vehicle andpush the secondary hood
release handle toward the driver
side of the vehicle.3. Lift the hood and release thehood prop from its retainer,
located above the radiator.
Securely place the hood prop
into the slot on the underside of
the hood. To close the hood:
1. Before closing the hood, be sure
all the filler caps are on properly.
Then, lift the hood to relieve
pressure on the hood prop.
Remove the hood prop from the
slot on the underside of the hood
and return the prop to its
retainer. The prop rod must click
into place when returning it to
the retainer to prevent hood
damage.
2. Lower the hood 30 cm (12 in) above the vehicle and release it
so it fully latches. Check to
make sure the hood is closed
and repeat the process if
necessary.
Page 241 of 372

Black plate (13,1)Chevrolet Orlando Owner Manual - 2013 - CRC - 6/5/12
Vehicle Care 10-13
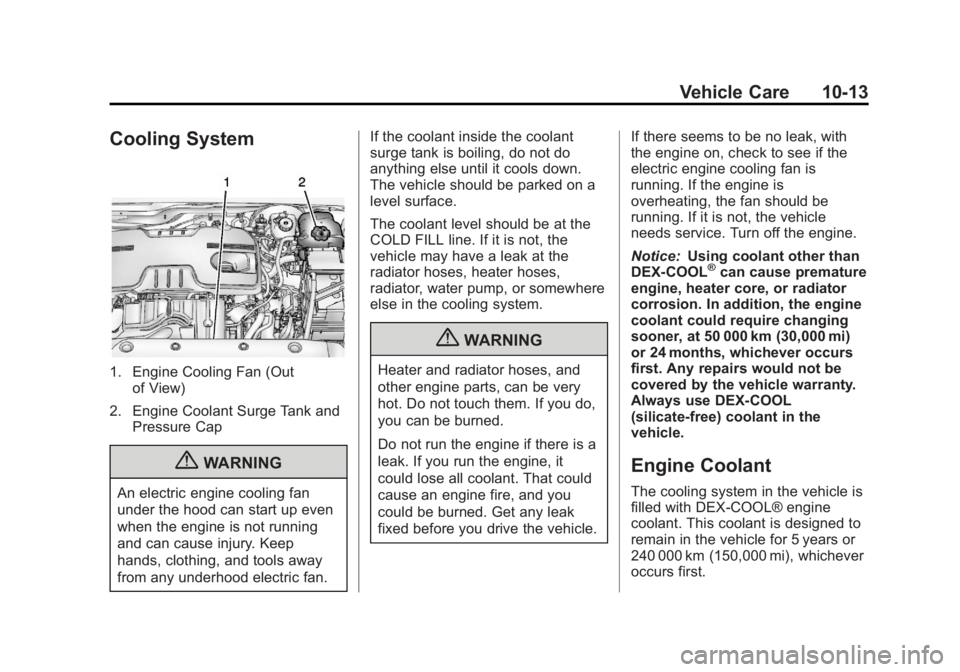
Cooling System
1. Engine Cooling Fan (Outof View)
2. Engine Coolant Surge Tank and Pressure Cap
{WARNING
An electric engine cooling fan
under the hood can start up even
when the engine is not running
and can cause injury. Keep
hands, clothing, and tools away
from any underhood electric fan. If the coolant inside the coolant
surge tank is boiling, do not do
anything else until it cools down.
The vehicle should be parked on a
level surface.
The coolant level should be at the
COLD FILL line. If it is not, the
vehicle may have a leak at the
radiator hoses, heater hoses,
radiator, water pump, or somewhere
else in the cooling system.
{WARNING
Heater and radiator hoses, and
other engine parts, can be very
hot. Do not touch them. If you do,
you can be burned.
Do not run the engine if there is a
leak. If you run the engine, it
could lose all coolant. That could
cause an engine fire, and you
could be burned. Get any leak
fixed before you drive the vehicle.
If there seems to be no leak, with
the engine on, check to see if the
electric engine cooling fan is
running. If the engine is
overheating, the fan should be
running. If it is not, the vehicle
needs service. Turn off the engine.
Notice:
Using coolant other than
DEX-COOL
®can cause premature
engine, heater core, or radiator
corrosion. In addition, the engine
coolant could require changing
sooner, at 50 000 km (30,000 mi)
or 24 months, whichever occurs
first. Any repairs would not be
covered by the vehicle warranty.
Always use DEX-COOL
(silicate-free) coolant in the
vehicle.
Engine Coolant
The cooling system in the vehicle is
filled with DEX-COOL® engine
coolant. This coolant is designed to
remain in the vehicle for 5 years or
240 000 km (150,000 mi), whichever
occurs first.
Page 244 of 372

Black plate (16,1)Chevrolet Orlando Owner Manual - 2013 - CRC - 6/5/12
10-16 Vehicle Care
Notice:In cold weather, water
can freeze and crack the engine,
radiator, heater core and other
parts. Use the recommended
coolant and the proper coolant
mixture.
1. Remove the coolant surge tank pressure cap when the cooling
system, including the coolant
surge tank pressure cap and
upper radiator hose, is no
longer hot.
Turn the pressure cap slowly
counterclockwise about
one-quarter of a turn. If you hear
a hiss, wait for that to stop. This
will allow any pressure still left to
be vented out the
discharge hose. 2. Keep turning the pressure cap
slowly, and remove it.
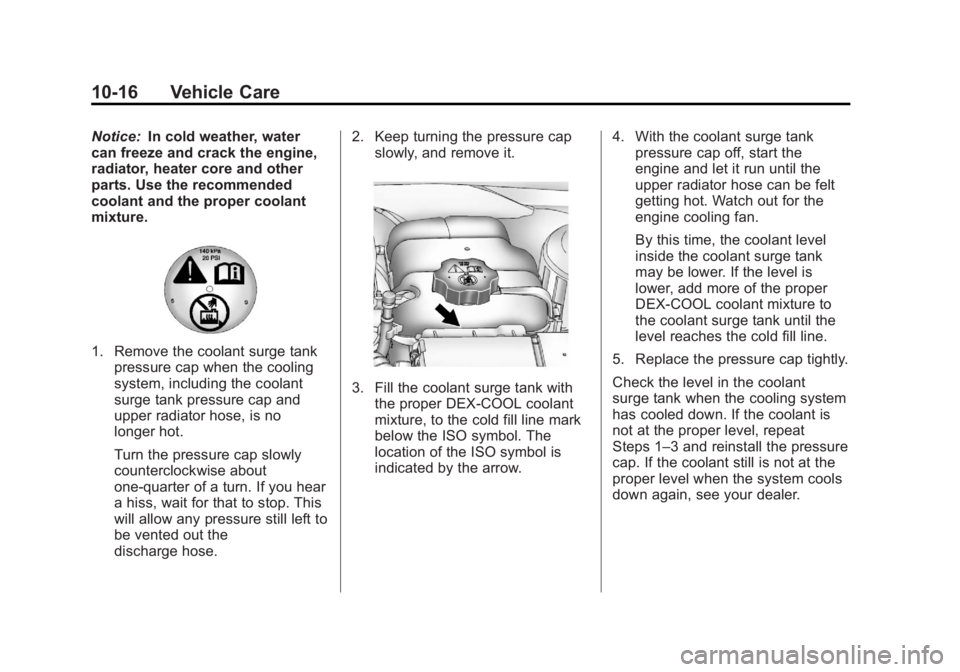
3. Fill the coolant surge tank withthe proper DEX-COOL coolant
mixture, to the cold fill line mark
below the ISO symbol. The
location of the ISO symbol is
indicated by the arrow. 4. With the coolant surge tank
pressure cap off, start the
engine and let it run until the
upper radiator hose can be felt
getting hot. Watch out for the
engine cooling fan.
By this time, the coolant level
inside the coolant surge tank
may be lower. If the level is
lower, add more of the proper
DEX-COOL coolant mixture to
the coolant surge tank until the
level reaches the cold fill line.
5. Replace the pressure cap tightly.
Check the level in the coolant
surge tank when the cooling system
has cooled down. If the coolant is
not at the proper level, repeat
Steps 1–3 and reinstall the pressure
cap. If the coolant still is not at the
proper level when the system cools
down again, see your dealer.