remove seats CHEVROLET ORLANDO 2017 Owners Manual
[x] Cancel search | Manufacturer: CHEVROLET, Model Year: 2017, Model line: ORLANDO, Model: CHEVROLET ORLANDO 2017Pages: 372, PDF Size: 6.71 MB
Page 48 of 372
Black plate (2,1)Chevrolet Orlando Owner Manual - 2013 - CRC - 6/5/12
3-2 Seats and Restraints
Head Restraints
{WARNING
With head restraints that are not
installed and adjusted properly,
there is a greater chance that
occupants will suffer a neck/
spinal injury in a crash. Do not
drive until the head restraints for
all occupants are installed and
adjusted properly.
Front Seats
The vehicle's front seats have
adjustable head restraints in the
outboard seating positions.
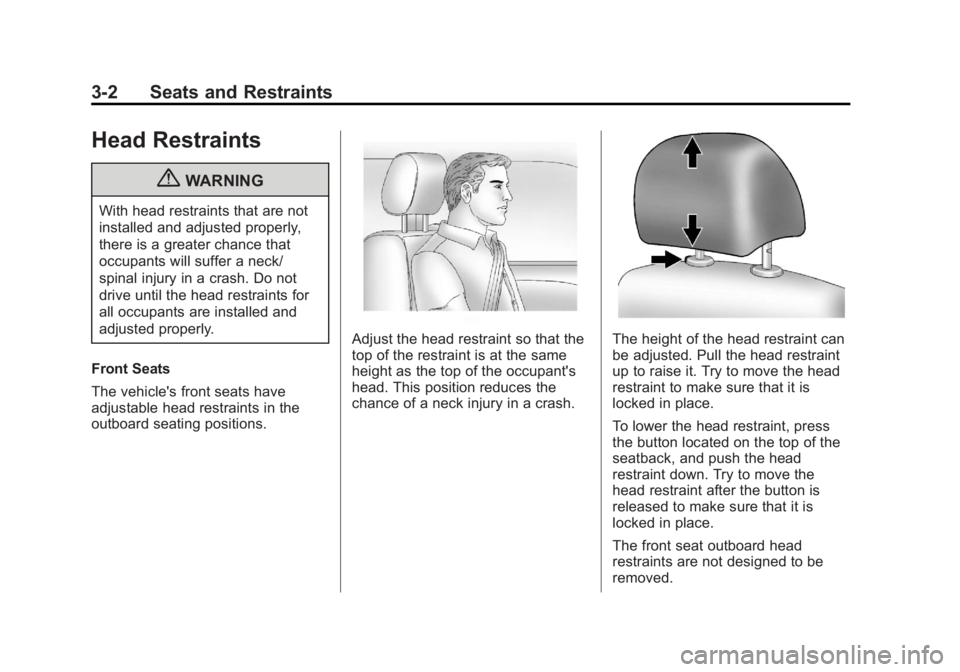
Adjust the head restraint so that the
top of the restraint is at the same
height as the top of the occupant's
head. This position reduces the
chance of a neck injury in a crash.The height of the head restraint can
be adjusted. Pull the head restraint
up to raise it. Try to move the head
restraint to make sure that it is
locked in place.
To lower the head restraint, press
the button located on the top of the
seatback, and push the head
restraint down. Try to move the
head restraint after the button is
released to make sure that it is
locked in place.
The front seat outboard head
restraints are not designed to be
removed.
Page 49 of 372
Black plate (3,1)Chevrolet Orlando Owner Manual - 2013 - CRC - 6/5/12
Seats and Restraints 3-3
Rear Seats
The vehicle's second row seats
have adjustable head restraints in
the outboard seating positions. The
vehicle's third row seats have head
restraints in the outboard seating
positions that cannot be adjusted.
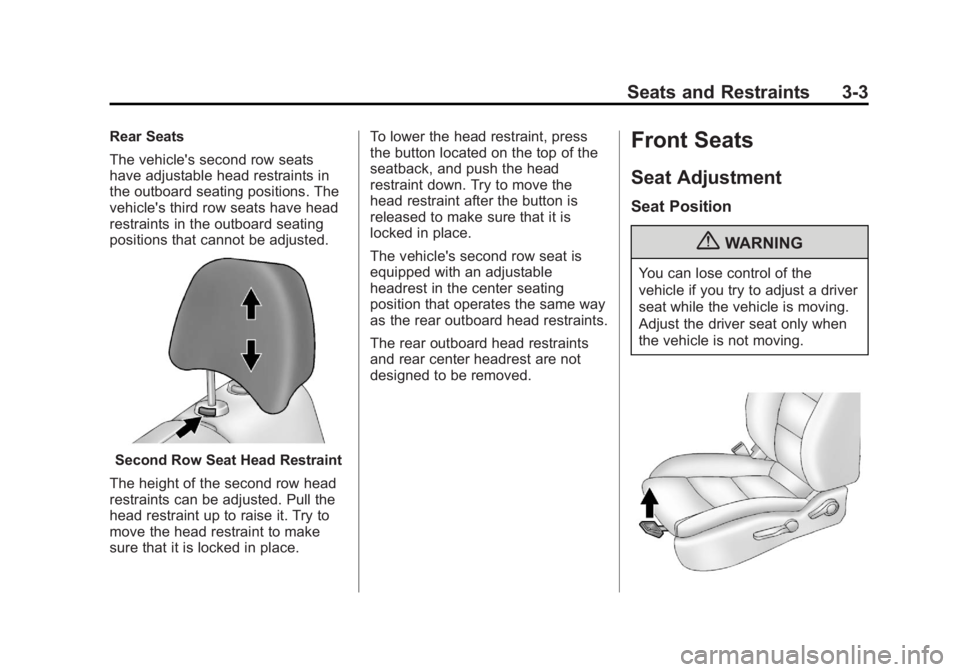
Second Row Seat Head Restraint
The height of the second row head
restraints can be adjusted. Pull the
head restraint up to raise it. Try to
move the head restraint to make
sure that it is locked in place. To lower the head restraint, press
the button located on the top of the
seatback, and push the head
restraint down. Try to move the
head restraint after the button is
released to make sure that it is
locked in place.
The vehicle's second row seat is
equipped with an adjustable
headrest in the center seating
position that operates the same way
as the rear outboard head restraints.
The rear outboard head restraints
and rear center headrest are not
designed to be removed.
Front Seats
Seat Adjustment
Seat Position
{WARNING
You can lose control of the
vehicle if you try to adjust a driver
seat while the vehicle is moving.
Adjust the driver seat only when
the vehicle is not moving.
Page 53 of 372
Black plate (7,1)Chevrolet Orlando Owner Manual - 2013 - CRC - 6/5/12
Seats and Restraints 3-7
The passenger seat may take
longer to heat up.
Remote Start Heated Seats
When it is cold outside, the heated
seats can be programmed to turn on
automatically during a remote
vehicle start. The heated seats will
be canceled when the ignition is
turned on. Press the heated seat
button to use the heated seats after
the vehicle is started.
The heated seat button lights do not
turn on during a remote start.
The temperature of an unoccupied
seat may be reduced. This is
normal.
The heated seats will not turn on
during a remote start unless the
heated seat feature is enabled in
the vehicle personalization menu.
SeeRemote Vehicle Start on
page 2‑5 andVehicle
Personalization on page 5‑30.
Folding Seatback
The front passenger seatback
folds flat.
{WARNING
If you fold the seatback forward to
carry longer objects, such as skis,
be sure any such cargo is not
near an airbag. In a crash, an
inflating airbag might force that
object toward a person. This
could cause severe injury or even
death. Secure objects away from
the area in which an airbag would
inflate. For more information, see
Where Are the Airbags? on
page 3‑26 andVehicle Load
Limits on page 9‑9.
{WARNING
Things you put on this seatback
can strike and injure people in a
sudden stop or turn, or in a crash.
Remove or secure all items
before driving.
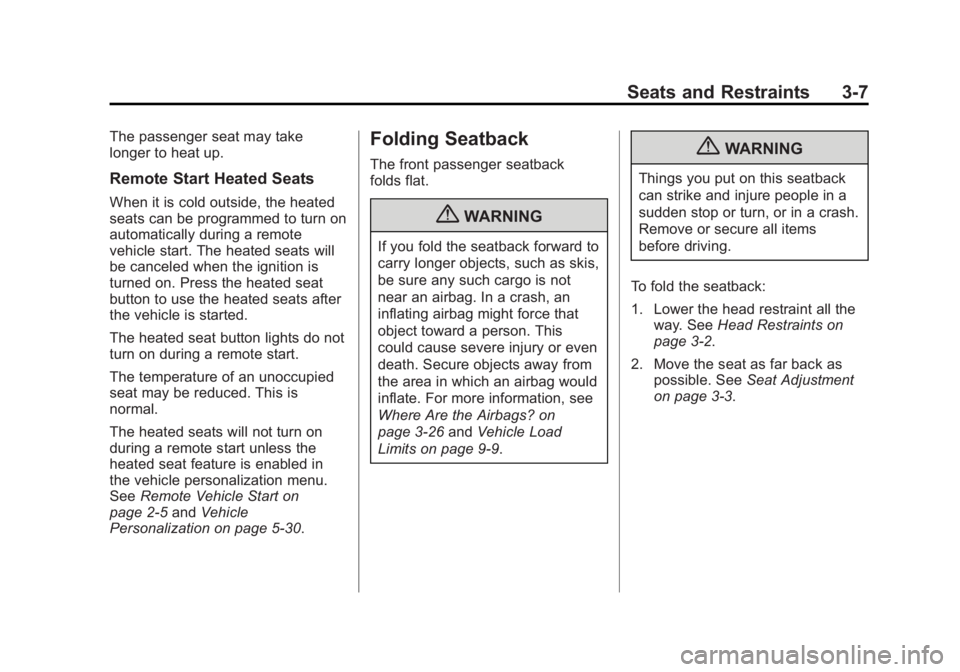
To fold the seatback:
1. Lower the head restraint all the way. See Head Restraints on
page 3‑2.
2. Move the seat as far back as possible. See Seat Adjustment
on page 3‑3.
Page 56 of 372
Black plate (10,1)Chevrolet Orlando Owner Manual - 2013 - CRC - 6/5/12
3-10 Seats and Restraints
Unfolding the Seatbacks
To return a seatback to the upright
position:
{WARNING
If either seatback is not locked, it
could move forward in a sudden
stop or crash. That could cause
injury to the person sitting there.
Always push and pull on the
seatbacks to be sure they are
locked.
1. Raise the seatback to the upright position.
2. Push and pull on the seatback to make sure it is locked in place.
{WARNING
A safety belt that is improperly
routed, not properly attached,
or twisted will not provide the
protection needed in a crash. The
(Continued)
WARNING (Continued)
person wearing the belt could be
seriously injured. After raising the
rear seatback, always check to be
sure that the safety belts are
properly routed and attached, and
are not twisted.
3. Remove the safety belt buckles from the seat cushion pockets.
Make sure the safety belts are
not twisted or caught between
the seat cushion and the
seatback.
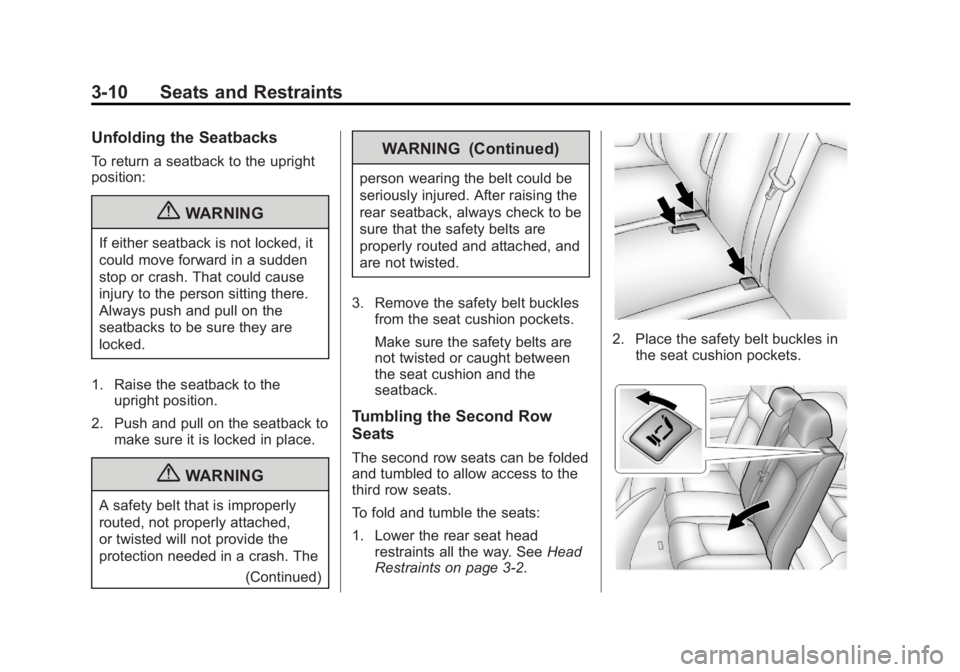
Tumbling the Second Row
Seats
The second row seats can be folded
and tumbled to allow access to the
third row seats.
To fold and tumble the seats:
1. Lower the rear seat headrestraints all the way. See Head
Restraints on page 3‑2.
2. Place the safety belt buckles in the seat cushion pockets.
Page 58 of 372
Black plate (12,1)Chevrolet Orlando Owner Manual - 2013 - CRC - 6/5/12
3-12 Seats and Restraints
{WARNING
If either seatback is not locked, it
could move forward in a sudden
stop or crash. That could cause
injury to the person sitting there.
Always push and pull on the
seatbacks to be sure they are
locked.
3. Push and pull on the seatback to make sure it is locked in place.
{WARNING
A safety belt that is improperly
routed, not properly attached,
or twisted will not provide the
protection needed in a crash. The
person wearing the belt could be
seriously injured. After raising the
rear seatback, always check to be
sure that the safety belts are
properly routed and attached, and
are not twisted. 4. Remove the safety belt buckles
from the seat cushion pockets.
Make sure the safety belts are
not twisted or caught between
the seat cushion and the
seatback.
Third Row Seats
Stowing the Seats
{WARNING
Using the third row seating
position while the second row is
folded, or folded and tumbled,
could cause injury in a sudden
stop or crash. Be sure to return
the seat to the passenger seating
position. Push and pull on the
seat to make sure it is locked into
place.
{WARNING
The hinge area of the seats must
remain clear when stowing or
unstowing the seats. Keep hands
away from the seat hinges to
avoid injury.
Notice: Folding a rear seat with
the safety belts still fastened may
cause damage to the seat or the
safety belts. Always unbuckle the
safety belts and return them to
their normal stowed position
before folding a rear seat.
To stow the seats:
1. Unbuckle the safety belts in the third row seats.
2. Open the liftgate.
Page 61 of 372
Black plate (15,1)Chevrolet Orlando Owner Manual - 2013 - CRC - 6/5/12
Seats and Restraints 3-15
WARNING (Continued)
person wearing the belt could be
seriously injured. After raising the
rear seatback, always check to be
sure that the safety belts are
properly routed and attached, and
are not twisted.
5. Remove the safety belts from the guides on the trim near the
liftgate. Make sure the safety
belts are not twisted or caught
between the seat cushion and
the seatback.
Safety Belts
This section of the manual
describes how to use safety belts
properly. It also describes some
things not to do with safety belts.
{WARNING
Do not let anyone ride where a
safety belt cannot be worn
properly. In a crash, if you or your
passenger(s) are not wearing
safety belts, injuries can be much
worse than if you are wearing
safety belts. You can be seriously
injured or killed by hitting things
inside the vehicle harder or by
being ejected from the vehicle. In
addition, anyone who is not
buckled up can strike other
passengers in the vehicle.
It is extremely dangerous to ride
in a cargo area, inside or outside
of a vehicle. In a collision,
passengers riding in these areas
(Continued)
WARNING (Continued)
are more likely to be seriously
injured or killed. Do not allow
passengers to ride in any area of
the vehicle that is not equipped
with seats and safety belts.
Always wear a safety belt, and
check that all passenger(s) are
restrained properly too.
This vehicle has indicators as a
reminder to buckle the safety belts.
See Safety Belt Reminders on
page 5‑10.
Page 64 of 372
Black plate (18,1)Chevrolet Orlando Owner Manual - 2013 - CRC - 6/5/12
3-18 Seats and Restraints
The lap-shoulder belt may lock if
you pull the belt across you very
quickly. If this happens, let the
belt go back slightly to unlock it.
Then pull the belt across you
more slowly.
If the shoulder portion of a
passenger belt is pulled out all
the way, the child restraint
locking feature may be engaged.
If this happens, let the belt go
back all the way and start again.3. Push the latch plate into thebuckle until it clicks.
When using a second row
seating position, you may need
to remove the safety belt buckle
from its storage pocket in
the seat.
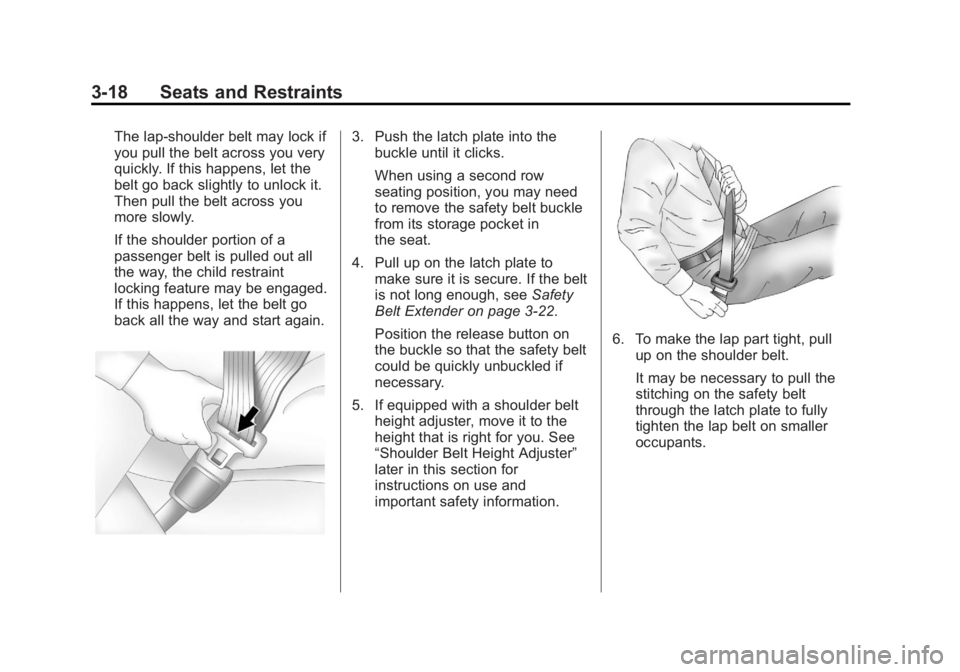
4. Pull up on the latch plate to make sure it is secure. If the belt
is not long enough, see Safety
Belt Extender on page 3‑22.
Position the release button on
the buckle so that the safety belt
could be quickly unbuckled if
necessary.
5. If equipped with a shoulder belt height adjuster, move it to the
height that is right for you. See
“Shoulder Belt Height Adjuster”
later in this section for
instructions on use and
important safety information.
6. To make the lap part tight, pull
up on the shoulder belt.
It may be necessary to pull the
stitching on the safety belt
through the latch plate to fully
tighten the lap belt on smaller
occupants.
Page 68 of 372
Black plate (22,1)Chevrolet Orlando Owner Manual - 2013 - CRC - 6/5/12
3-22 Seats and Restraints
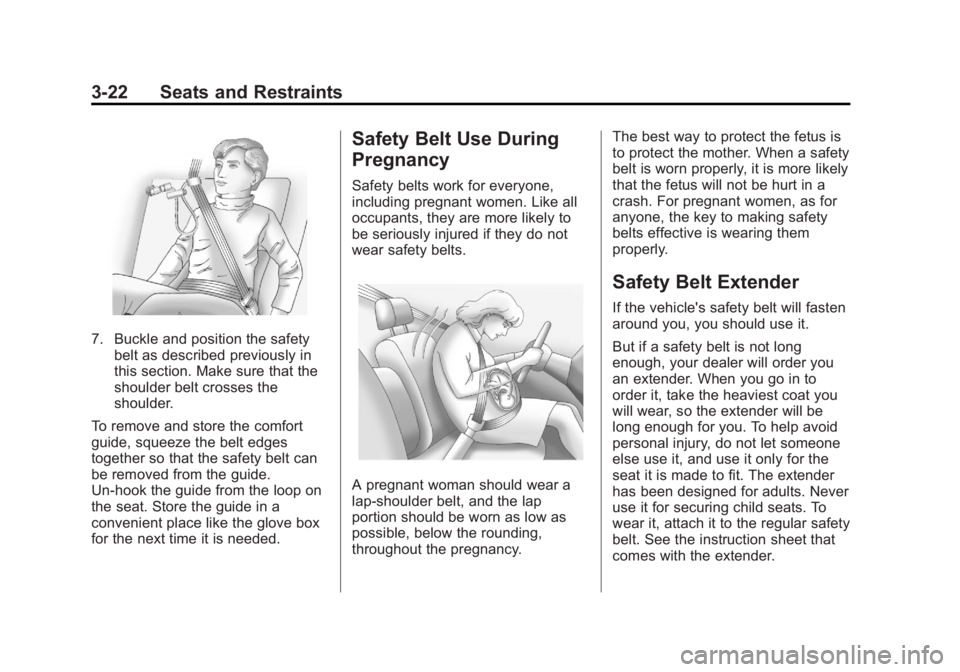
7. Buckle and position the safetybelt as described previously in
this section. Make sure that the
shoulder belt crosses the
shoulder.
To remove and store the comfort
guide, squeeze the belt edges
together so that the safety belt can
be removed from the guide.
Un-hook the guide from the loop on
the seat. Store the guide in a
convenient place like the glove box
for the next time it is needed.
Safety Belt Use During
Pregnancy
Safety belts work for everyone,
including pregnant women. Like all
occupants, they are more likely to
be seriously injured if they do not
wear safety belts.
A pregnant woman should wear a
lap-shoulder belt, and the lap
portion should be worn as low as
possible, below the rounding,
throughout the pregnancy. The best way to protect the fetus is
to protect the mother. When a safety
belt is worn properly, it is more likely
that the fetus will not be hurt in a
crash. For pregnant women, as for
anyone, the key to making safety
belts effective is wearing them
properly.
Safety Belt Extender
If the vehicle's safety belt will fasten
around you, you should use it.
But if a safety belt is not long
enough, your dealer will order you
an extender. When you go in to
order it, take the heaviest coat you
will wear, so the extender will be
long enough for you. To help avoid
personal injury, do not let someone
else use it, and use it only for the
seat it is made to fit. The extender
has been designed for adults. Never
use it for securing child seats. To
wear it, attach it to the regular safety
belt. See the instruction sheet that
comes with the extender.
Page 91 of 372
Black plate (45,1)Chevrolet Orlando Owner Manual - 2013 - CRC - 6/5/12
Seats and Restraints 3-45
that the top tether be anchored, or if
the instructions that come with the
child restraint say that the top strap
must be anchored.
In Canada, the law requires that
forward-facing child restraints have
a top tether, and that the tether be
attached.
If the child restraint does not have
the LATCH system, you will be
using the safety belt to secure the
child restraint in this position. Be
sure to follow the instructions that
came with the child restraint. Secure
the child in the child restraint when
and as the instructions say.
If more than one child restraint
needs to be installed in the rear
seat, be sure to readWhere to Put
the Restraint on page 3‑38.
1. Put the child restraint on
the seat.
For outboard second and third
row seating positions, remove
the safety belt from the guide. Do not secure the child restraint
with the safety belt routed
through the guide.
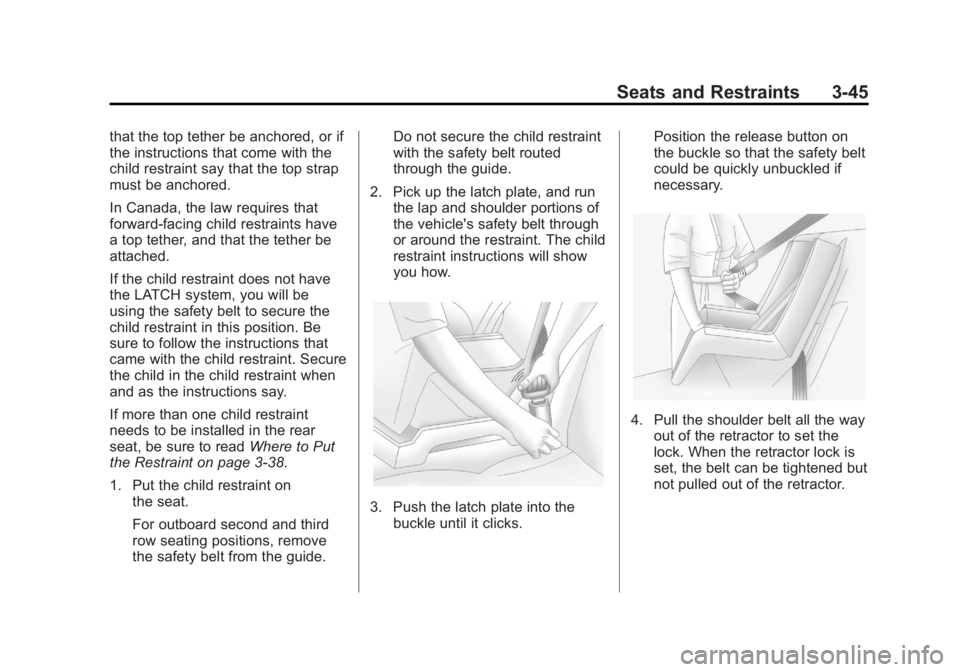
2. Pick up the latch plate, and run the lap and shoulder portions of
the vehicle's safety belt through
or around the restraint. The child
restraint instructions will show
you how.
3. Push the latch plate into thebuckle until it clicks. Position the release button on
the buckle so that the safety belt
could be quickly unbuckled if
necessary.
4. Pull the shoulder belt all the way
out of the retractor to set the
lock. When the retractor lock is
set, the belt can be tightened but
not pulled out of the retractor.
Page 92 of 372
Black plate (46,1)Chevrolet Orlando Owner Manual - 2013 - CRC - 6/5/12
3-46 Seats and Restraints
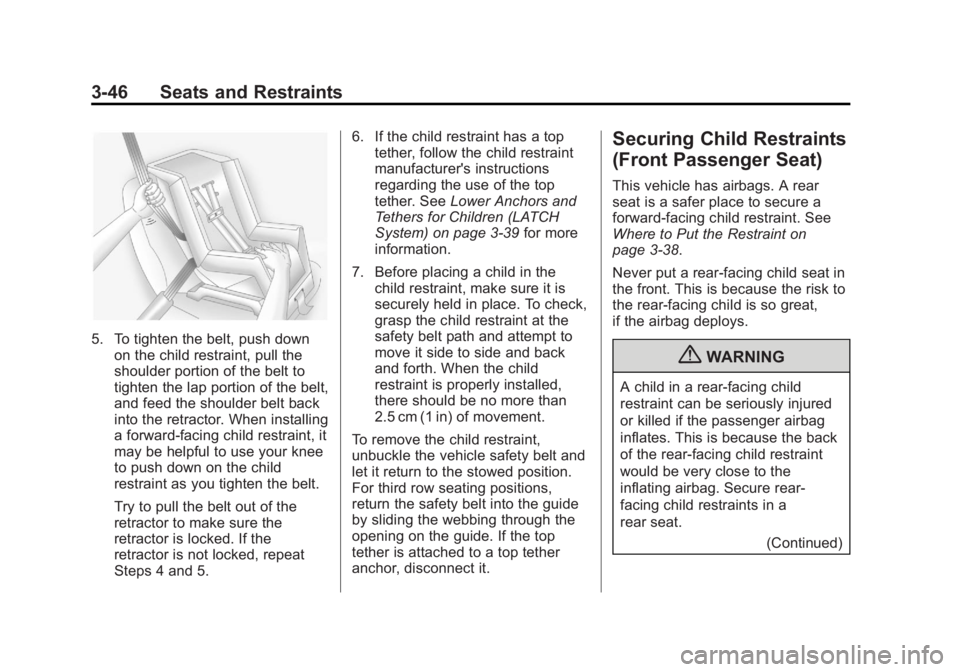
5. To tighten the belt, push downon the child restraint, pull the
shoulder portion of the belt to
tighten the lap portion of the belt,
and feed the shoulder belt back
into the retractor. When installing
a forward-facing child restraint, it
may be helpful to use your knee
to push down on the child
restraint as you tighten the belt.
Try to pull the belt out of the
retractor to make sure the
retractor is locked. If the
retractor is not locked, repeat
Steps 4 and 5. 6. If the child restraint has a top
tether, follow the child restraint
manufacturer's instructions
regarding the use of the top
tether. See Lower Anchors and
Tethers for Children (LATCH
System) on page 3‑39 for more
information.
7. Before placing a child in the child restraint, make sure it is
securely held in place. To check,
grasp the child restraint at the
safety belt path and attempt to
move it side to side and back
and forth. When the child
restraint is properly installed,
there should be no more than
2.5 cm (1 in) of movement.
To remove the child restraint,
unbuckle the vehicle safety belt and
let it return to the stowed position.
For third row seating positions,
return the safety belt into the guide
by sliding the webbing through the
opening on the guide. If the top
tether is attached to a top tether
anchor, disconnect it.
Securing Child Restraints
(Front Passenger Seat)
This vehicle has airbags. A rear
seat is a safer place to secure a
forward-facing child restraint. See
Where to Put the Restraint on
page 3‑38.
Never put a rear-facing child seat in
the front. This is because the risk to
the rear-facing child is so great,
if the airbag deploys.
{WARNING
A child in a rear-facing child
restraint can be seriously injured
or killed if the passenger airbag
inflates. This is because the back
of the rear-facing child restraint
would be very close to the
inflating airbag. Secure rear‐
facing child restraints in a
rear seat. (Continued)