check transmission fluid CHEVROLET S10 1993 2.G Owners Manual
[x] Cancel search | Manufacturer: CHEVROLET, Model Year: 1993, Model line: S10, Model: CHEVROLET S10 1993 2.GPages: 356, PDF Size: 20.85 MB
Page 200 of 356
Downloaded from www.Manualslib.com manuals search engine . li 7. --
._ . .-
. .1 ..
Your Driving and the Road
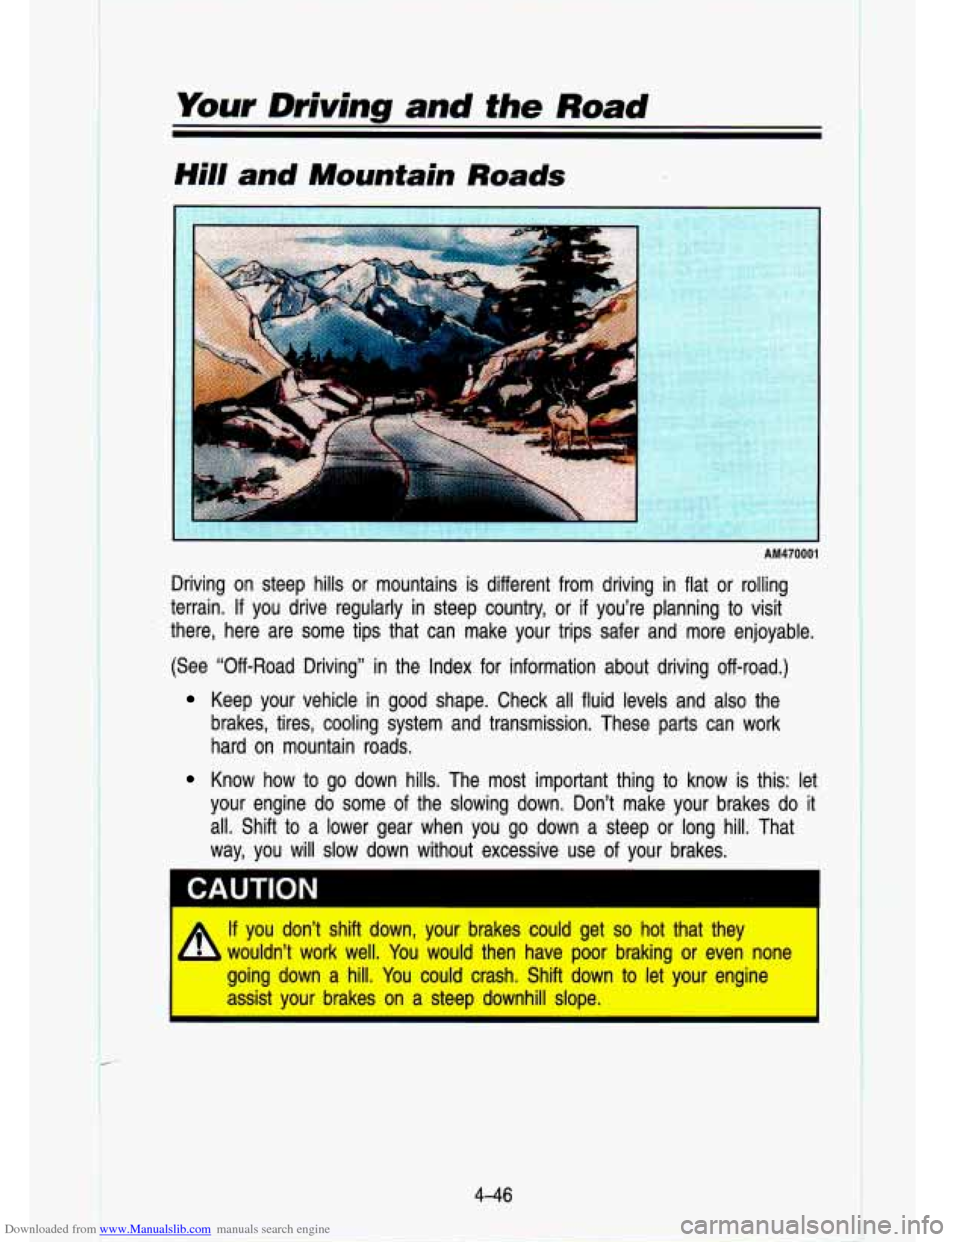
Hill and Mountain Roads
I
AM470001
Driving on steep hills or mountains is different from driving in flat or rolling
terrain.
If you drive regularly in steep country, or if you're planning to visit
there, here are some tips that can make your trips safer and \
more enjoyable.
(See "Off-Road Driving" in the Index for information about driving off-road.)
Keep your vehicle in good shape. Check all fluid levels and also the
brakes, tires, cooling system and transmission. These parts can \
work
hard on mountain roads.
Know how to go down hills. The most important thing to know is this: let
your engine do some of the slowing down. Don't make your brak\
es do
it
all. Shift to a lower gear when you go down a steep or long hill. That
way, you will
slow down without excessive use of your brakes.
If you don't shift down, your brakes could get
so hot that they
wouldn't work well. You would then have poor braking or even none
going down a hill. You could crash. Shift down to let your engine
1 assist your brakes on a steep downhill slope.
4-46
Page 216 of 356
Downloaded from www.Manualslib.com manuals search engine Your Driving and the Road
2. Let up on the brake pedal.
3. Drive slowly until the trailer is clear of the chocks.
4. Stop and have someone pick up and store the chocks.
Maintenance When Trailer Towing
Your vehicle will need service more often when you’re pulling a \
trailer. See
the Maintenance Schedule for more on this. Things that are esp\
ecially important in trailer operation are automatic transmission fluid (don’t ove\
rfill),
engine oil, axle lubricant, belt, cooling system, and brake adj\
ustment. Each of
these is covered in this manual, and the Index will help you find them
quickly.
If you’re trailering, it’s a good idea to review these sections before
you start your trip.
Check periodically to see that all hitch nuts and bolts are tight.
Trailer Light Wiring
See “Trailer Wiring Harness” in the Index.
Power Winches
If you wish to use a power winch on your vehicle, only use it when your
vehicle is stationary or anchored.
NOTICE
Use the regular brakes, set the parking brake Or UIWK ihe wheels IW keep
your vehicle from rolling.
4-62
Page 220 of 356
Downloaded from www.Manualslib.com manuals search engine 2. Get the vehicles close enough so the jumper cables can reach, but be
sure the vehicles aren’t touching each other. If they are, \
it could cause
a
ground connection you don’t want. You wouldn’t be able to start your
vehicle, and the bad grounding could damage the electrical syst\
ems.
1 CAUTION
* You could be injured if the vehicles roll. Set the parking brake \
firmly I
on each vehicle. Put an automatic transmission in P (Park) or a
manual transmission in
N (Neutral).
If you have a four-wheel-drive vehicle with a manual transfer case\
shift lever, be sure the tra-fer case is not in
N (Neut--’).
3. Turn off the ignition on both vehicles. Turn off all lights that aren’t
I
needed, and radios. This will avoid sparks and help save both \
batteries.
And it could save your radio!
4. Open the hoods and locate the batteries. Find the positive (t) arlu
negative
(-) terminals on each battery.
* Using a match near a battery can cause battery gas to explode. I
People have been hurt doing this, and some have been blinded. \
Use
a flashlight if you need more light.
You don’t need to add water to the Delco Freedom@ battery \
installer’
in every new
GM vehicle. But if a battery has filler caps, be sure thG
right amount of fluid is there.
If it is low, add water to take care of
that first.
If you don’t, explosive gas could be present.
Battery fluid contains acid that can burn you. Don’t get it on you.
If
you accidentally get it in your eyes or on your skin, flush the place
I with water and get medical help immediately.
5. Check that the jumper cables don’t have loose or missing insulation. If
they do, you could get a shock. The vehicles could be damaged, too.
5-4
I
Page 249 of 356
Downloaded from www.Manualslib.com manuals search engine Service & Appearance Care
-
Section
Here you will find information about the care of your vehicle. This part begins
with service and fuel information, and then it shows how to check important
fluid and lubricant levels. There
is also technical information about your
vehicle, and a section devoted to its appearance care.
Service
.. . . .. . . . . , . , . . r.l. .. . . .. ,. . . . . . . . . , , . . . . . . .. , . . .. , . . . . . . . . . . . . . . . . . . . . ..,. . . . . . . . . . . . . . . .=. . . . . . . . . . . . .. . .=. . . . . 6-3
Fuel
...... . .. .. . . . . ....... , .. . .. . . . . . . ... . .. ... .. ... .... .. . . . . . . ... . . .. . .. . ... ,..,, ,. .. . .. .. . .. . . .... . *. . . ., . . . .. .. .. 6-4
Checking Things Under the
Hood .................................................................,..... \
6-7
Engine Oil
I.....................1............11..........,.......,.,..I...........\
........r............. .......,. .... 6-9
Air Cleaner
..................,................................................. ...... .... ...- ......... - ..... ...... 6-14
Automatic Transmission Fluid
....... . .. . . .. . . . . .. ....-. . ... . . . . . .. .. . . . . . . . . . ... .. . . . . .. . ... . . ...... .. 6-16
Manual Transmission Fluid
....,. , . . . . ....... ... . . . .. .. . . . .. .. . .. .. . . ... . .. . . . . .. . ... . ... . . ... . . ... . . . .. 6-1 9
Hydraulic Clutch
,..........,......,....,..........I...I....I...................... ...................... ..... 6-20
Rear Axle
............ ..................... = .............I...............I..I........................ -.. ..... . .... ..... 6-21
Transfer Case
................................................,.~.....................\
..........................6-21
Front Axle .......I.............I......I.....................r..........I...r......\
............I......I.II...I...... 6-22
Engine Coolant
........................... ~ ................................. r..l ................................ 6-23
Power Steering Fluid
.....,. 3.,Iri.1111r ..................................................................... 6-27
Windshield Washer Fluid
...................................................... .................... 6-28
Brake Master Cylinder
........ . . . . .. . .... . .. .. . . . . ... . . . . .. . . . .. ..... .... . . . . . . . .. .. . . . . . .6-29
Replacing Brake System Parts
............................................................,..........,\
.. 6-30
6-1
Page 264 of 356
Downloaded from www.Manualslib.com manuals search engine Service & Appearance Care
Automatic Transmission Fluid
When to Check and Change:
A good time to check your automatic transmission fluid level is when the
engine oil is changed. Refer to the Maintenance Schedule to de\
termine when
to change your fluid. See “Scheduled Maintenance Services” \
in the Index.
How to Check:
Because this operation can be a little difficult, you may choo\
se to have this
done at a dealership Service Department.
If you
do it yourself, be sure to follow all the instructions here, or \
you could
get a false reading on the dipstick.
I NOTICE
Wait at least 30 minutes before checking the transmission fluid level if you
have been driving:
When outside temperatures are above 90°F (32°C).
At high speed for quite a while.
In heavy traffic-especially in hot weather.
While pulling a trailer.
To get the right reading, the fluid must be at normal operating \
temperature,
which is 180°F to 200°F (82°C to 93°C).
To check transmission fluid hot: Get the vehicle warmed up by driving
about
15 miles (24 km) when outside temperatures are above 50°F (10°C). If
it’s colder then 50°F (IO’C), drive the vehicle in D (3rd gear) until the
temperature gage moves and then remains steady for ten minutes.\
Then
follow the hot check procedures.
To check transmission fluid cold: A cold check is made after the vehicle
has been sitting for eight hours or more with the engine off and is used
only
as a reference. Let the engine run at idle for five minutes if outside
temperatures are
50°F (10°C) or more. If it’s colder than 50°F (lO°C), you
may have to idle the engine longer. A hot check must follow when fluid is
added during a cold check.
6-1 6
I
Page 266 of 356
Downloaded from www.Manualslib.com manuals search engine Service & Appearance Care
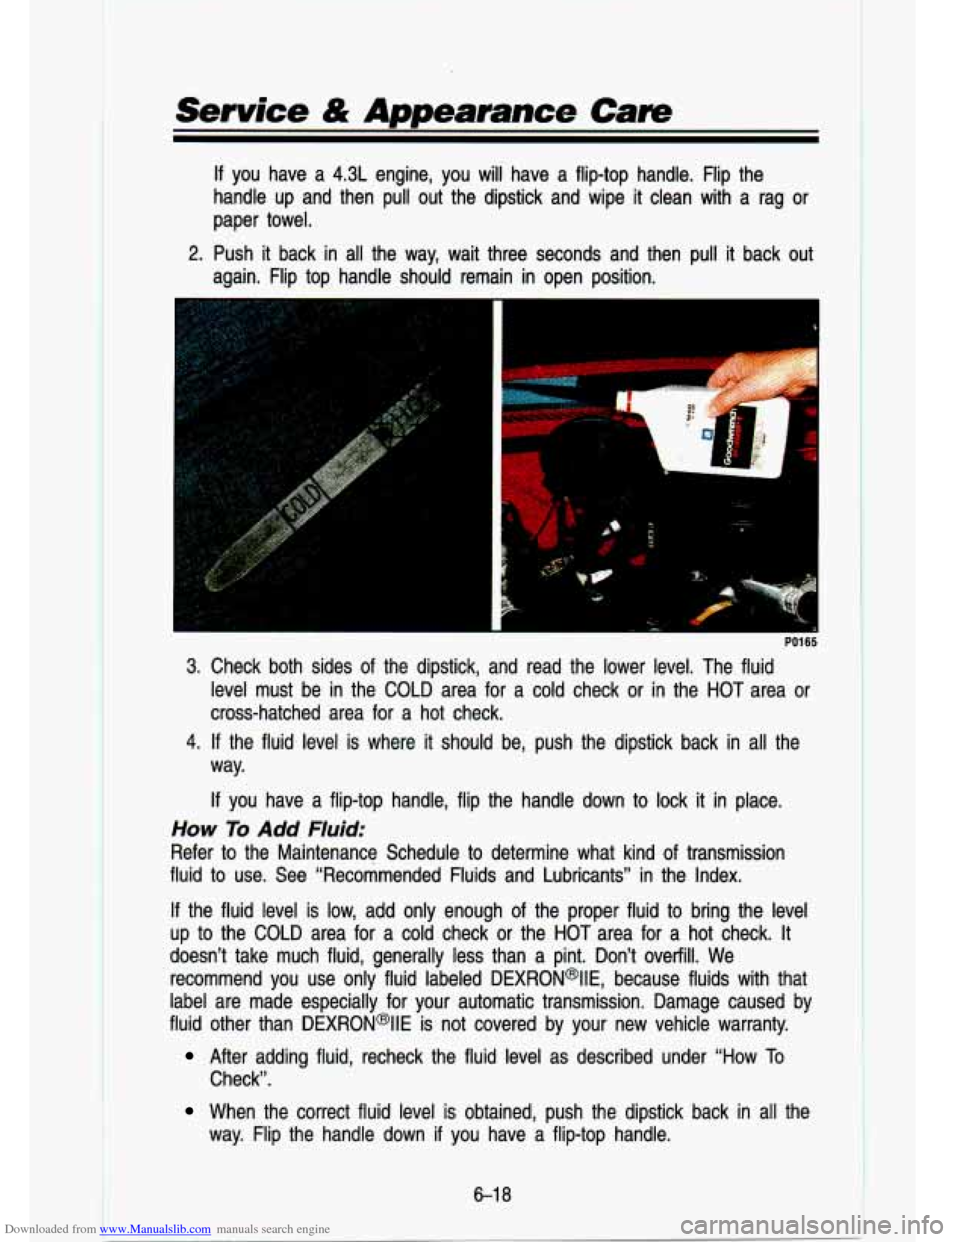
If you have a 4.3L engine, you will have a flip-top handle. Flip\
the
handle up and then pull out the dipstick and wipe it clean with a rag or
paper towel.
2. Push it back in all the way, wait three seconds and then pull it back out
again. Flip top handle should remain in open position.
c
PO1 65
3. Check both sides of the dipstick, and read the lower level. The fluid
level must be in the COLD area for a cold check or in the HOT area or
cross-hatched area for a hot check.
4.
If the fluid. level is where it should be, push the dipstick bac\
k in all the
way.
If you have a flip-top handle, flip the handle down to lock it in place.
How To Add Fluid:
Refer to the Maintenance Schedule to determine what kind of transmission
fluid to use. See “Recommended Fluids and Lubricants” in \
the Index.
If the fluid level is low, add only enough of the proper fluid to bring the level
up to the COLD area for a cold check or the HOT area for a hot c\
heck. It
doesn’t take much fluid, generally less than a pint. Don’\
t overfill. We
recommend you use only fluid labeled DEXRON@lIE, because fluids \
with that
label are made especially for your automatic transmission. Damag\
e caused by
fluid other than DEXRON@IIE is not covered by your new vehicle\
warranty.
After adding fluid, recheck the fluid level as described under \
“How To
Check”.
When the correct fluid level is obtained, push the dipstick ba\
ck in all the
way. Flip the handle down
if you have a flip-top handle.
6-1 8
1
Page 267 of 356
Downloaded from www.Manualslib.com manuals search engine Manual Transmission Fluid
When to Check:
A good time to have it checked is when the engine oil is chang\
ed. However,
the fluid in your manual transmission doesn’t require changin\
g.
How to Check:
Because this operation can be a little difficult, you may choose to have this
done at a
GM dealership Service Department.
If you do it yourself, be sure to follow all the instructions here, or \
you could
get a false reading.
Check the fluid level only when your engine is off, the vehic\
le
is parked on
level place and the transmission is cool enough for you to re\
st your fingers
on the transmission case.
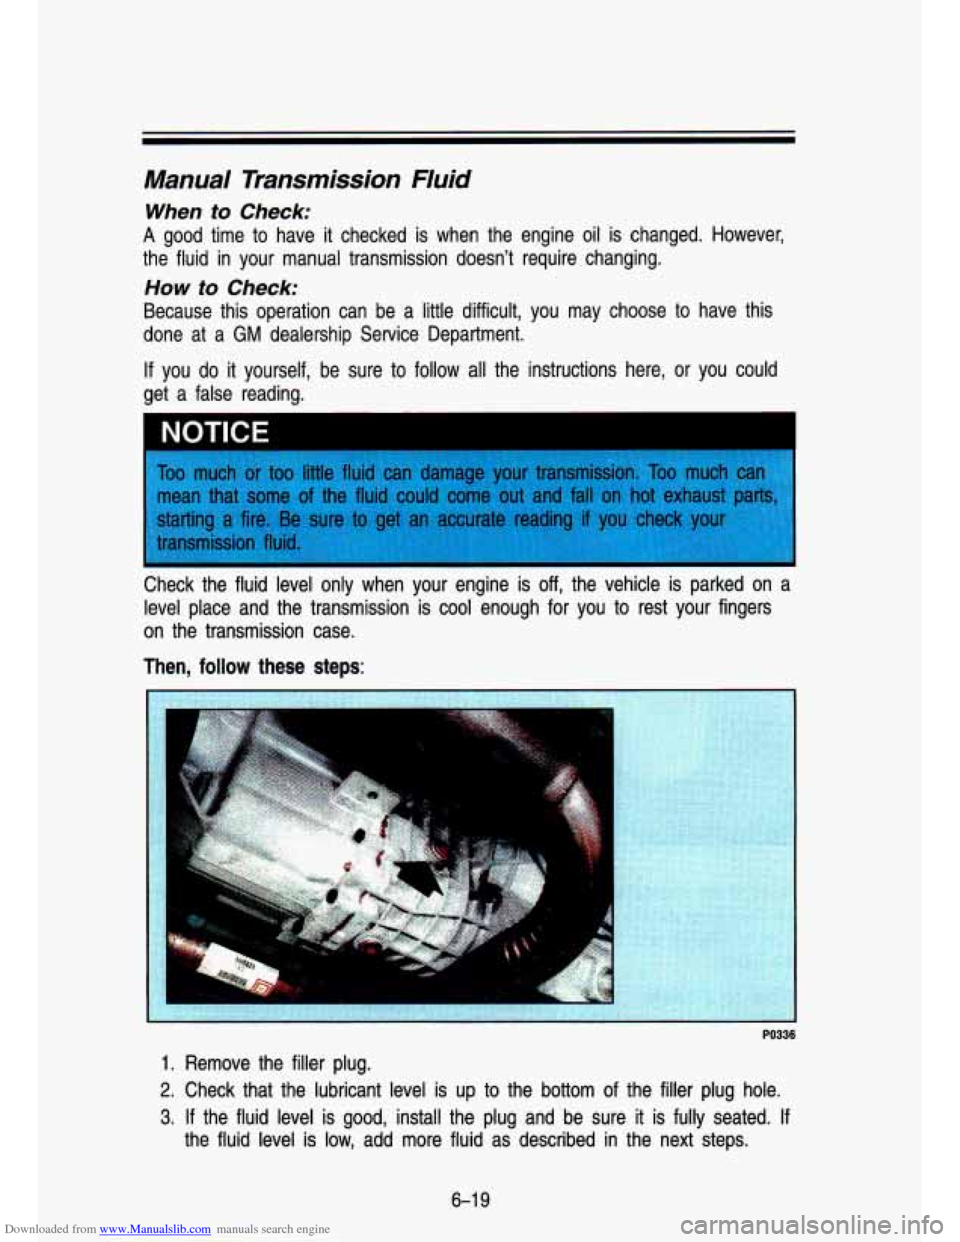
Then,
follow these steps: a
PO336
1. Remove the filler plug.
2. Check that the lubricant level
is up to the bottom of the filler plug hole.
3. If the fluid level is good, install the plug and be sure it is fully seated. If
the fluid level is low, add more fluid as described in the next steps.
6-1 9
Page 325 of 356
Downloaded from www.Manualslib.com manuals search engine 5. AIR CLEANER FILTER REPLACEMENT* -Replace at specified
intervals. Ask your dealer for the proper replacement intervals for your
driving conditions.
6. FRONT WHEEL BEARING REP1 -;< (2-WHEEL DRIVE ONLY) -Clean
and repack the front wheel bearings at each brake relining, or at the
specified interval, whichever comes first.
7. TRANSMISSION SERVICE:
Automatic Transmission -Change the transmission fluid and filter \
every 15,000 miles (25
000 km) if the vehicle is mainly driven under one or
more of these conditions:
In heavy city traffic.
Where the outside temperature regularly reaches 90°F (32°C) or
In hilly or mountainous terrain.
Frequent trailer pulling.
higher.
0 Uses such as taxi, police, delivery or other commercial service\
.
If the vehicle is not used mainly under any
of these conditions, change
the fluid and filter every 30,000 miles
(50 000 km). See “Automatic
Transmission Fluid” in the Index for more information.
Manual Transmission -Transmission fluid does not require periodic\
changing.
8. FUEL FILTER REPLACEMENT* -Replace the fuel filter at the specified
9. SPARK PLUGS REPLACEMENT* -Replace spark plugs with the type
interval
or sooner
if clogged.
listed in Section
6. See “Specification Charts” in the Index.
10. SPARK PLUG WIRE INSPECTION* -Clean wires and inspect for b\
urns, cracks or other damage. Check the wire boot fit at the distributor and \
at
the spark plugs. Replace wires as needed.
11. ENGINE TIMING CHECK AND DISTRIBUTOR CHECK* -Adjust timing to underhood label specifications. Inspect the inside and outsid\
e of the
distributor cap and rotor for cracks, carbon tracking and corro\
sion. Clean or replace as needed.
12. FUEL TANK, CAP AND LINES INSPECTION* -Inspect the fuel tan\
k, cap and lines for damage or leaks. Remove fuel cap, inspect g\
asket for
an even filler neck imprint, and any damage. Replace parts as \
needed.
* An Emission Control Service
7-9
Page 327 of 356
Downloaded from www.Manualslib.com manuals search engine Owner Checks and Services
Listed below are owner checks and services which would be made at th\
e
time period specified to help ensure proper safety, emission performance, and
dependability of your vehicle.
Be sure any necessary repairs are completed at once. Whenever \
any fluids
or lubricants are added to your vehicle, make sure they are the proper ones,
as shown in this section.
At Least Once a Month
Tire inflation pressure check -Check the tires for proper inflation. If they
are low, inflate them to the level specified on the Certification label. See
“Inflation-Tire Pressure” in the Index.
At Least Once a Year
Key lock cylinder lubrication -Lubricate key lock cylinders with\
one of the
lubricants recommended in this Section.
Transmission neutral or clutch start switch operation
-
1 CAUTION
When you are doing this check, the vehicle could move suddenly. If
it does, you or others could be injured. Follow the steps below. \
I
1. Before you start, be sure you have enough room around the veh\
icle.
2. Firmly apply both the manual parking brake. and the regular brake. See
“Brakes” and “Parking Brake” in the Index.
Do not use the accelerator
pedal.
3. Be ready to turn off the engine immediately if it starts.
4. On automatic transmission vehicles, try to start the engine in each gear.
The starter should work only in
P (Park) or N (Neutral).
On manual transmission vehicles, put the shift lever in N (Neutral), push
the clutch down halfway, and try to start the engine. The starter should
work only when the clutch is pushed down all the way to the floor.
7-1 1
Page 347 of 356
Downloaded from www.Manualslib.com manuals search engine INDEX
Section
A
Accessory Power Outlet .............. 2-53
Air Cleaner
.................................... 6-14
Air Conditioning
................... 3-6, 6-35
Fan Lever
..................................... 3-6
Function Lever
............................ 3-6
Refrigerant Capacity
................. 6-65
Temperature Lever
...................... 3-6
Antenna, Fixed Mast
................... 3-26
Antilock Brakes (See “Brakes”)
Appearance Care
.......................... 6-50
Materials
.................................... 6-56
Arbitration Program
........................ 8-3
Audio Systems
............................... 3-7
AM Radio
..................................... 3-9
AM-FM Stereo Audio Compact
Disc (CD) System
................... 3-20
AM-FM Stereo Audio System
........................ 3-1 1
AM-FM Stereo Audio System with Cassette Deck
............ >.3-13
AM-FM Stereo Audio System
with Cassette Deck and Equalizer
................................. 3-1 6
Anti-Theft System
.................... 3-23
Compact Disc Care
.................. 3-25
Automatic Transmission
............... 2-1 6
Fluid
............................................ 6-1 6
Axle
Front
........................................... 6-22
Rear
............................................ 6-2 1
A
B
Battery ........................................... 6-31
Belts (See “Safety Belts”)
Better Business Bureau Mediation
.................................... -8-3
Blizzard
.......................................... 4.53
Brakes
Adjustment
................................. 4-17
Antilock
...................................... 4-14
Fluid
........................................... 6-29
Leak Check
............................... 6-30
Master Cylinder
........................ 6-29
Parking
....................................... 2-21
Pedal Travel
.............................. 4-17
Rear Drum Brakes
................... 4-17
Replacing Parts
........................ 6-30
System Warning Light .2-66, 4-16
Trailer
......................................... 4-59
Wear Indicators
........................ 4-16
Braking
.......................................... 4-12
In Emergencies
........................ 4-17
Break-In, New Vehicle
................... 2-9
Bulb Replacement
....................... 6-31
Replacement Chart
.................. 6-63
C
Capacities and Specification
Charts
........................................ 6-61
Carbon Monoxide
... 2.26. 2.27. 4-53
Cassette Tape Player
(See “Audio Systems”)
9-1