oil pressure CHEVROLET S10 1993 2.G Owners Manual
[x] Cancel search | Manufacturer: CHEVROLET, Model Year: 1993, Model line: S10, Model: CHEVROLET S10 1993 2.GPages: 356, PDF Size: 20.85 MB
Page 14 of 356
Downloaded from www.Manualslib.com manuals search engine How To Use This Manual
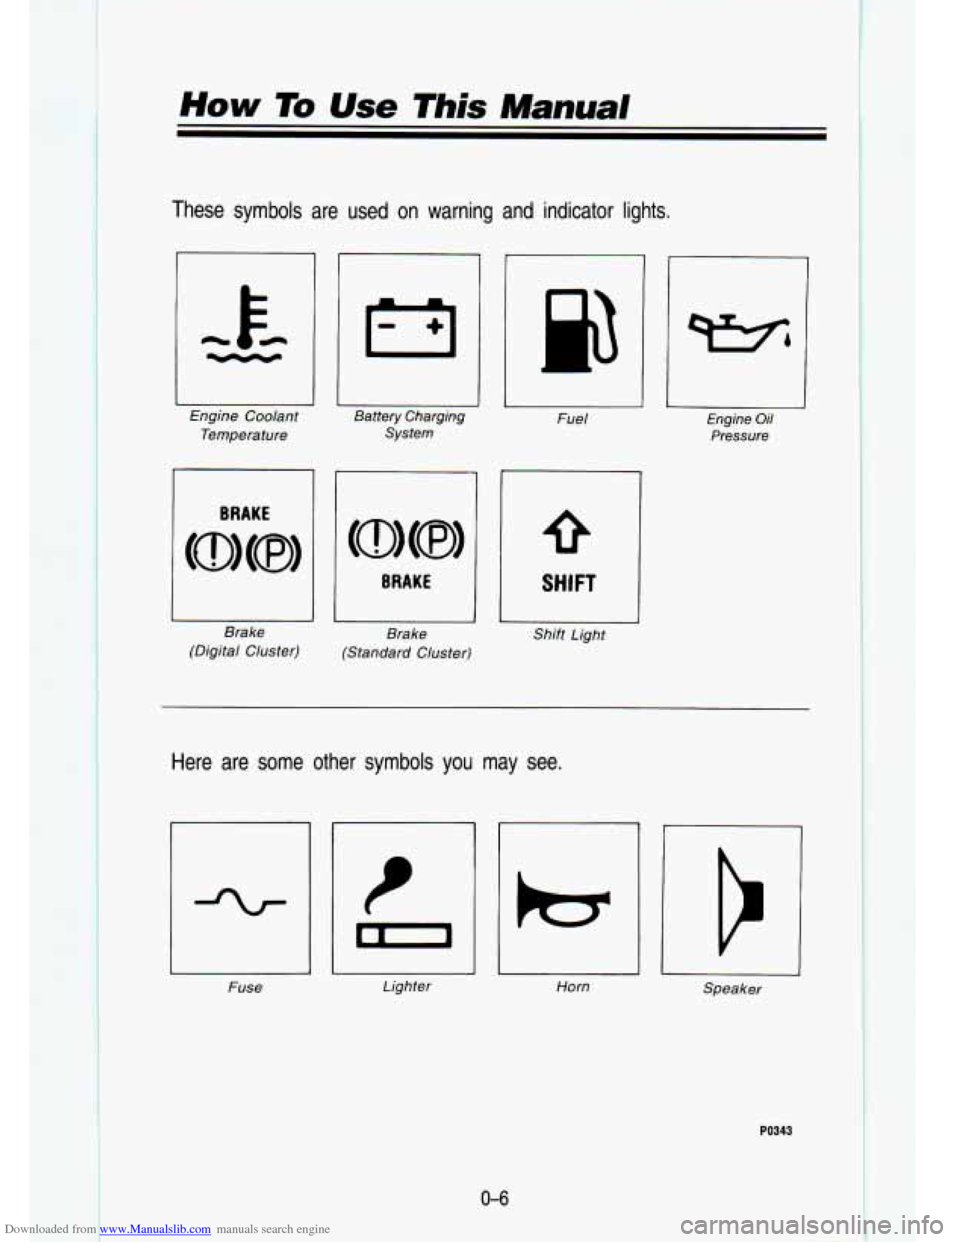
These symbols are used on warning and indicator lights.
Engine Coolant Temperature
BRAKE
Brake
(Digital Cluster)
1
I Battery Charging
System
BRAKE
Fuel Engine Oil
Pressure
SHIFT
Brake
(Standard Cluster) Shift Light
Here are some other symbols you may see.
Fuse Lighter Horn Speaker
0-6
PO343
Page 121 of 356
Downloaded from www.Manualslib.com manuals search engine Oil Pressure Gage
Standard Cluster DigM Cluster
I
-
KO276
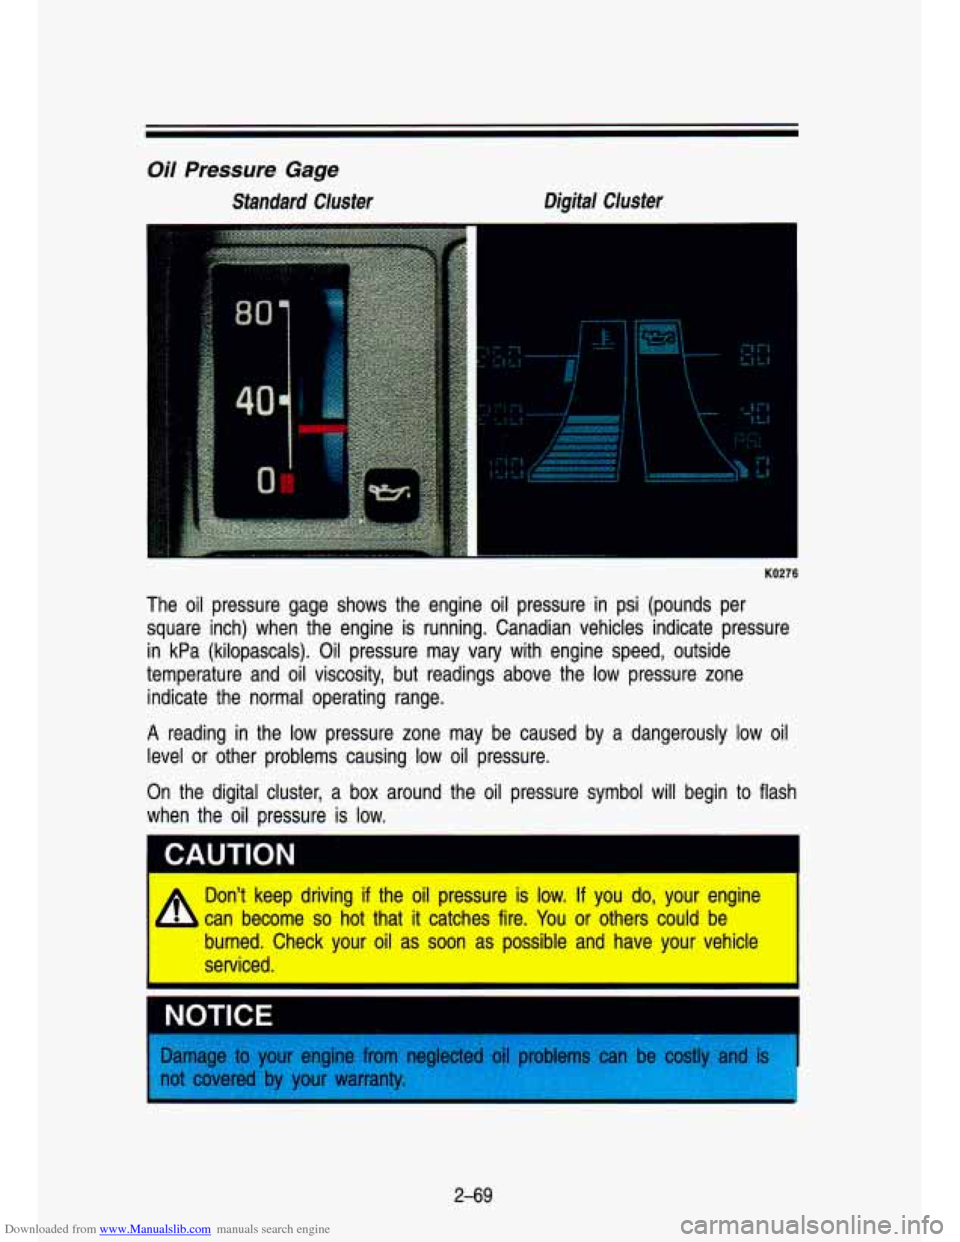
The oil pressure gage shows the engine oil pressure in psi (pounds per
square inch) when the engine is running. Canadian vehicles ind\
icate pressure in kPa (kilopascals).
Oil pressure may vary with engine speed, outside
temperature and oil viscosity, but readings above the
low pressure zone
indicate the normal operating range.
A reading in the low pressure zone may be caused by a dangerously low oil
level or other problems causing low oil pressure.
On the digital cluster, a box around the oil pressure symbol will begin to flash
when the oil pressure is low.
I
Dsln't ke'ep drivinlg if the oil pressure is l'ow. If you do, your engine
can become
so hot that it catches fire. YQU or others could be
burned. Clheck your oil as soon as possiblle and have yo'u~r vehicle
serviced.
2-69
Page 198 of 356
Downloaded from www.Manualslib.com manuals search engine Your Driving and the Road
..
C. .-, - ._ .
may tend to think you are going slower than you actually are.\
For example,
40 mph (65 km/h) might seem like only 20 mph (30 km/h). Obviously, this
could lead to serious trouble on a ramp designed for
20 mph (30 km/h)!
Driving a Long Distance
Although most long trips today are made on freeways, there are\
still many
made on regular highways.
Long-distance driving on freeways and regular highways is the s\
ame in some
ways. The trip has to be planned and the vehicle prepared, yo\
u drive at
higher-than-city speeds, and there are longer turns behind the \
wheel. You’ll
enjoy your trip more if you and your vehicle are in good shape. Here are
some tips for a successful long trip.
Before Leaving on a Long Trip
Make sure you’re ready. Try to be well rested. If you must start when you’re
not fresh-such as after a day’s work-don’t plan to make too many miles
that first part of the journey. Wear comfortable clothing and shoes you can
easily drive in.
Is your vehicle ready for a long trip? If you keep it serviced and maintained,
it’s ready to go.
If it needs service, have it done before starting out. Of
course, you’ll find experienced and able service experts in \
your vehicle’s
dealerships all across North America. They’ll be ready and w\
illing to help
if
YOU
Her1
0
need it.
ire
Some things you can check before a trip:
Windshield Washer Fluid:
Is the reservoir full? Are all windows clean
inside and outside?
Wiper Blades: Are they in good shape?
Fuel, Engine Oil, Other Fluids: Have you checked all levels?
Lights: Are they all working? Are the lenses clean?
Tires: They are vitally important to a safe, trouble-free trip.\
Is the tread
good enough for long-distance driving? Are the tires all inflat\
ed to the
recommended pressure?
Weather Forecasts: What’s the weather outlook along your rout\
e? Should you delay your trip
a short time to avoid a major storm system?
Maps:
Do you have up-to-date maps?
4-44
Page 227 of 356
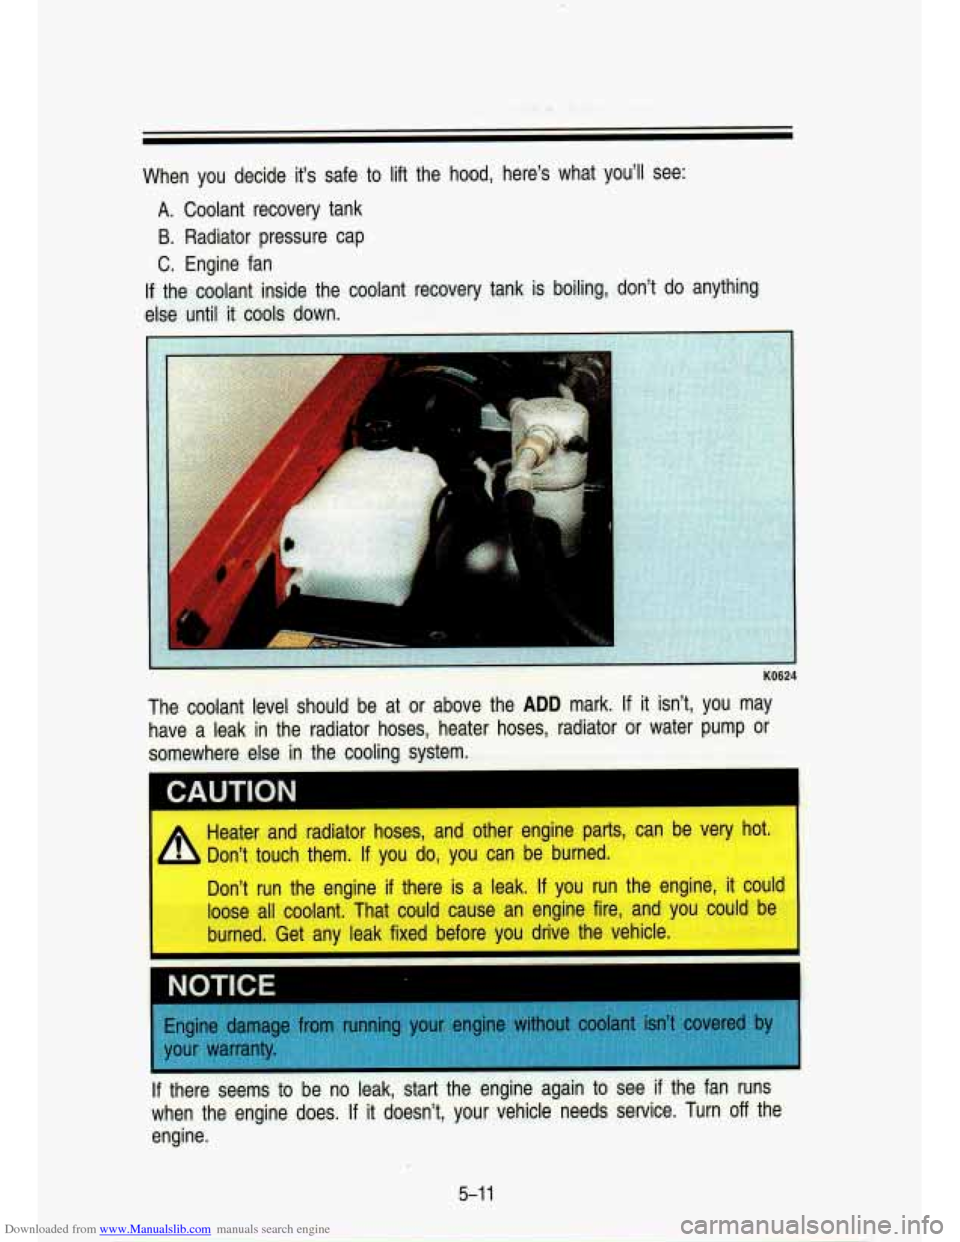
Downloaded from www.Manualslib.com manuals search engine When you decide it's safe to lift the hood, here's what you'll see:
A. Coolant recovery tank
B. Radiator pressure cap
C. Engine fan
If the coolant inside the coolant recovery tank is boiling, don't do anything
else until it cools down.
The coolant level should be at or above the
ADD mark. If it isn't, you may
have a leak in the radiator hoses, heater hoses, radiator or water pump or
somewhere else in the cooling system.
CAUTION I
Heater and radiator hoses, and other engine parts, can be very\
hot.
Don't touch them.
If you do, you can be burned.
loose all coolant. That could cause an engine fire, and you could be
burned. Get any leak fixed before you drive the vehicle. run the engine
if there is a leak. If you run the engine, it could
NOTICF
If there seems
to be no leak, start the engine again to see if the fan runs
when the engine does.
If it doesn't, your vehicle needs service. Turn off the
engine.
5-1 1
Page 228 of 356
Downloaded from www.Manualslib.com manuals search engine How to Add Coolant to the Coolant Recovery Tank
If you haven’t found a problem yet, but the coolant level isn’t at or above the
ADD mark, add a 50/50 mixture of clean water (preferably distilled) and the
proper antifreeze at the coolant recovery tank. (See “Engine\
Coolant” in the Index for more information about the proper coolant mix.)
I CAUTION
4
Adding only plain water to your cooling system can be dangerous.
Rain water,
or some other liquid, like alcohill, can boil before the
proper coolant mix
will. Your vehicle’s coolant warning system is set
for the proper coolant mix. With plain water, or the wrong mix, your
engine could get
too hot but you wouldn’t get the overheat warning.
Your engine could catch fire and you or others could be burned. Use
‘a 5Q/M mix of clean wafer and a proper antifreeze.
NOTICE
In cold weather, water can freeze and crack the en1
core and other
parts. Use the recommended coolan
*
I CAUTION
I I
You can be burned if you spill coolant on hot engine parts. Coolant
b contains ethylene glycol and it wil’l burn if the engine parts are hot
I’ enough. Don’t spill coolant on a hot engine.
When the coolant in the coolant recovery tank is at or above \
the
ADD mark,
start your vehicle.
If the overheat warning continues, there’s one more thing you c\
an try. You
can add the proper coolant mix directly to the radiator, but \
be sure the
cooling system
is cool before you do it.
A
Steam and scalding liquids from a hot cooling system can blow out
and burn you badly. They are under pressure, and if you turn the
radiator pressure cap-even a little-they can come out at high
speed. Never turn the pressure cap when the cooling system, including the radiator pressure cap, is hot. Wait for the cooling
system and radiator pressure cap
to cool if you ever have to turn
the pressure cap.
5-1 2
Page 256 of 356
Downloaded from www.Manualslib.com manuals search engine Service & Appearance Care
Hood Release
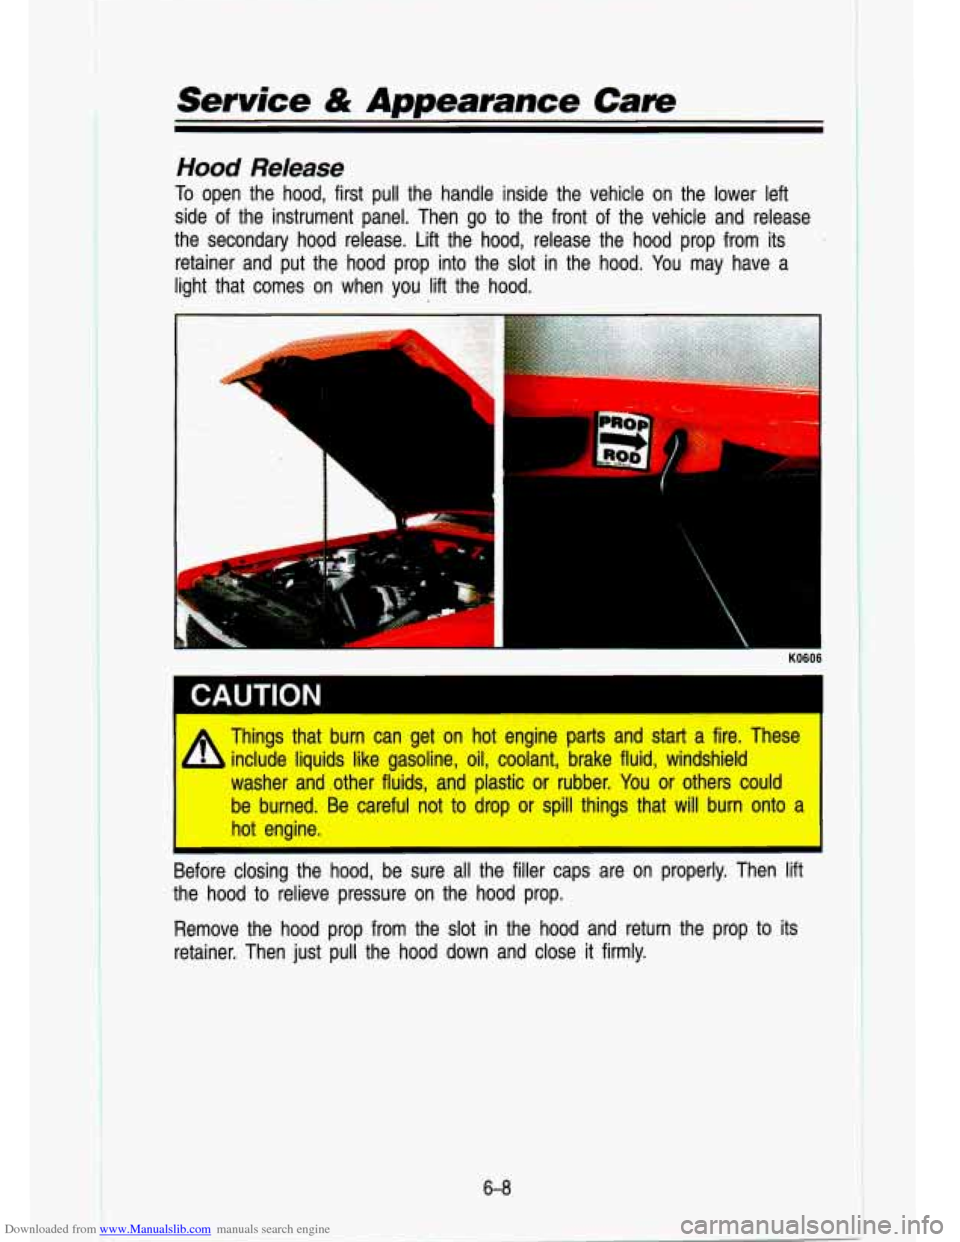
To open the hood, first pull the handle inside the vehicle on th\
e lower left
side of the instrument panel. Then
go to the front of the vehicle and release
the secondary hood release. Lift the hood, release the hood pr\
op from its
retainer and put the hood prop into the slot in the hood. You may have a
light that comes on when you lift the hood.
L
Thing's that burn can .get on hot engine parts and s'hrt a fire. These I
include liqwids like gasoline, oil, coolant, brake fluid, windshiield
washer and .other fluids, and plastic oir rubber. You or others could
be blurned. Be careful not
to drop or spill thing.s that will bum onto a
hot eng,ine.
L
Before closing the hood, be sure all the filler caps are on properly. Then lift
the hood to relieve pressure on the hood prop.
Remove the hood prop from the slot in the hood and return th\
e prop to its
retainer. Then just pull the hood down and close
it firmly.
6-8
Page 300 of 356
Downloaded from www.Manualslib.com manuals search engine Service & Appearance
Rinse the section with a clean, wet sponge.
Wipe off what’s left with a slightly damp paper towel or c\
loth.
Then dry it immediately with an air hose, a hair dryer or a heat lamp.
Wipe wlrh a clean cloth.
Using Solvent-Type Cleaner on Fabric
First, see if you have to use solvent-type cleaner at all. Some spots and
stains will clean off better with just water and mild soap.
If you need to use it, then:
Gently scrape excess soil from the trim material with a clean,\
dull knife
or scraper. Use very little cleaner, light pressure and clean cloths
(preferably cheesecloth). Cleaning should start at the outside \
of the stain,
“feathering” toward the center. Keep changing to a clean section of the
cloth.
When you clean a stain from fabric, immediately dry the area \
with an air hose, hair dryer, or heat lamp to help prevent a cleaning ring. (See
.
previous NOTICE.)
Special Cleaning Problems
Greasy or Oily Stains: Like grease, oil, butter, margarine, shoe polish, coffee
with cream, chewing gum, cosmetic creams, vegetable oils, wax c\
rayon, tar and asphalt.
Carefully scrape off excess stain.
Then follow the solvent-type instructions above.
Shoe polish, wax crayons, tar and asphalt will stain if left on a vehicle
seat fabric. They should be removed as soon as possible. Be c\
areful, because the cleaner will dissolve them and may cause them
to bleed.
Non-Greasy Stains: Like catsup, coffee (black), egg, fruit, fr\
uit juice, milk,
soft drinks, wine, vomit, urine and blood.
Carefully scrape off excess stain, then sponge the place with cool water.
If a stain remains, follow the foam-type instructions above.
6-52
i
Page 324 of 356
Downloaded from www.Manualslib.com manuals search engine Scheduled Maintenance Services
Explanation Of Scheduled Maintenance Services
Below are explanations of the services listed in the maintenance charts.
The proper fluids and lubricants to use are listed in this se\
ction. Make sure whoever services your vehicle uses these. All parts should be \
replaced and all necessary repairs done before you or anyone else drives th\
e vehicle.
1. ENGINE OIL AND OIL FILTER CHANGE* -ALWAYS USE SG OR SG/CE QUALITY, ENERGY CONSERVING
II OILS OF THE PROPER
VISCOSITY. To determine the preferred viscosity oil for your vehicle’s
engine (e.g. SAE 5W-30). See “Engine Oil” in the Index.\
2. CHASSIS LUBRICATION -Lubricate the front suspension, ball joint,
steering linkage, clutch, and transfer case shift linkage, parki\
ng brake
cable guides, propshaft splines, universal joints, brake pedal s\
prings, and
clutch pedal springs at the intervals specified on the proper \
maintenance
schedule, or at every engine oil change, whichever comes first.\
On
vehicles without hydraulic clutches, lubricate the clutch cross \
shaft every
30,000 miles
(50 000 km).
Ball joints should not be lubricated unless their temperature i\
s 10°F
(-12°C) or higher. When the weather is cold, let them war\
m up before
lubricating them or they could be damaged.
Also, be sure to check all the vehicle fluid levels at this \
time.
3. CLUTCH FORK BALL STUD LUBRICATION (4.3L ENGINES ONLY)
-Lubricate the clutch fork ball stud through the fitting on th\
e clutch housing. Lubricant must be added “sparingly” to the fittin\
g, as only
.0066
Ib. (.003 kg) is required to lubricate the ball stud surface\
. Do not add
lubricant more often than the intervals recommended in the Main\
tenance
Schedules. Too much lubricant
will damage the clutch assembly.
4. COOLING SYSTEM SERVICE* -Drain, flush and refill the system wit\
h
new coolant. See “Engine Coolant’’ in the Index for th\
e proper coolant
and mixture to use in your vehicle.
Also inspect the hoses and replace them
if they are cracked, swollen, or
deteriorated. Tighten all hose clamps. Clean the outside of the radiator
and air conditioning condenser. Wash the radiator neck. To ensure proper
operation, pressure test the radiator and cap.
* An Emission Control Service
7-8
Page 350 of 356
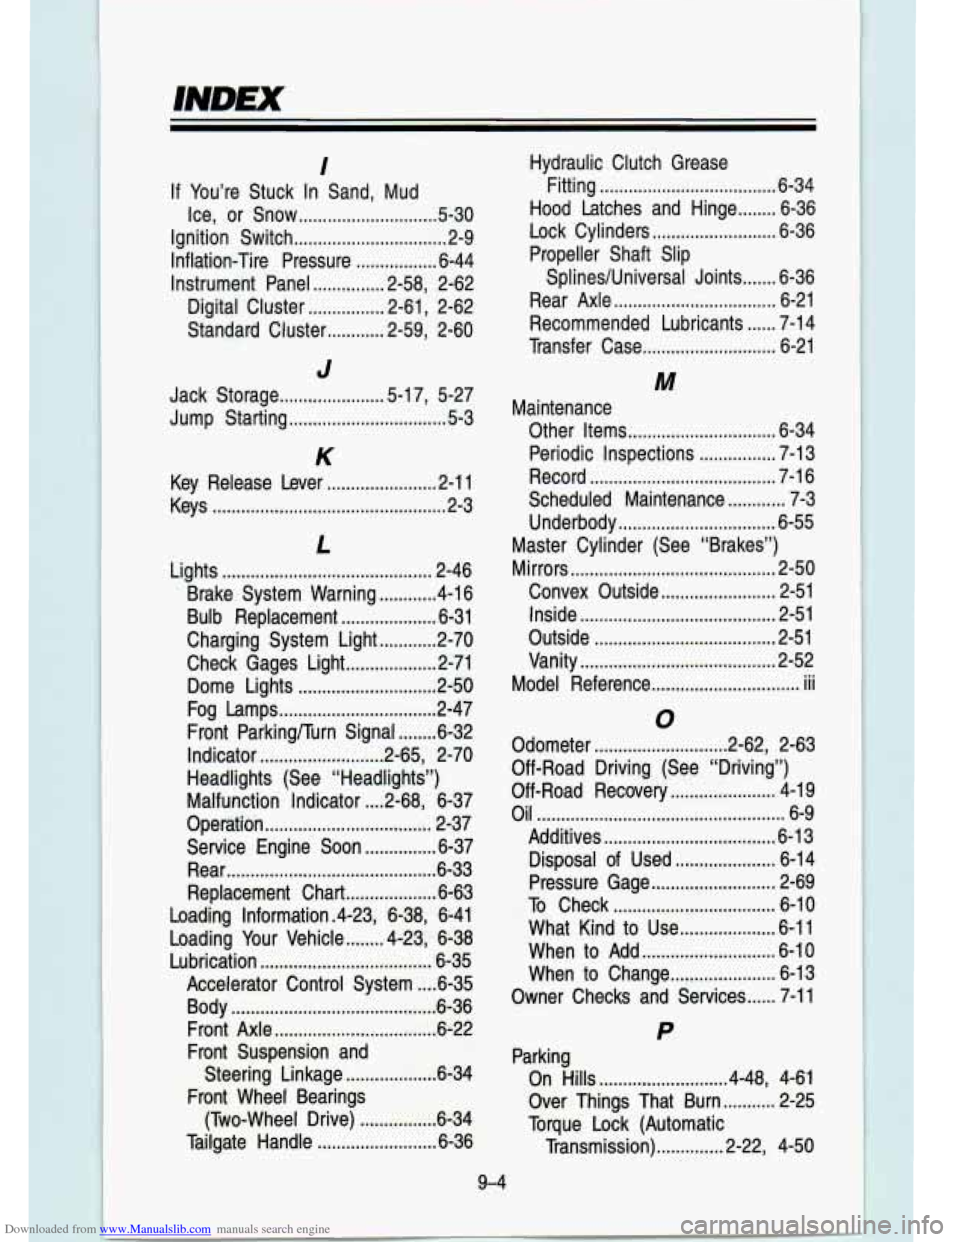
Downloaded from www.Manualslib.com manuals search engine I
If You’re Stuck In Sand. Mud
Ice. or Snow
............................. 5-30
Ignition Switch ................................ 2-9
Inflation-Tire Pressure ................. 6-44
Instrument Panel ............... 2-58, 2-62
Digital Cluster ................ 2-61, 2-62
Standard Cluster ............ 2-59, 2-60
J
Jack Storage ...................... 5-17, 5-27
Jump Starting ................................. 5-3
K
Key Release Lever ....................... 2-1 1
Keys ................................................. 2-3
L
Lights ........ ................................... 2-46
Brake System Warning ............ 4-1 6
Bulb Replacement .................... 6-31
Charging System Light ............ 2-70
Check Gages Light ................... 2-71
Dome Lights ............................. 2-50
Fog Lamps ................................. 2-47
Indicator ........................ ..2-65, 2-70
Headlights (See “Headlights”)
Malfunction Indicator
.... 2-68, 6-37
Operation ................................... 2-37
Service Engine Soon ............... 6-37
Rear ............................................ 6-33
Loading Information .4-23, 6-38, 6-41
Loading Your Vehicle ........ 4-23, 6-38
Lubrication .................................... 6-35
Front Parkingnurn Signal ........ 6-32
Replacement Chart ................... 6-63
Accelerator Control System .... 6-35
Body ........................................... .- 36
Front Axle ........................ ..... 6-22
Front Suspension and
Steering Linkage
................... 6-34
Front Wheel Bearings
(Two-Wheel Drive)
................ 6-34
Tailgate Handle ......................... 6-36
Hydraulic Clutch Grease
Fitting
..................................... 6-34
Hood Latches and Hinge ........ 6-36
Lock Cylinders .......................... 6-36
Propeller Shaft Slip
SplineslUniversal Joints
....... 6-36
Rear Axle .................................. 6-21
Recommended Lubricants ...... 7-14
Transfer Case ............................ 6-21
M
Other Items ............................... 6-34
Periodic Inspections ................ 7-13
Record ....................................... 7-16
Scheduled Maintenance ............ 7-3
Underbody ................................. 6-55
Master Cylinder (See “Brakes”)
Mirrors
........................................... 2-50
Convex Outside ........................ 2-51
inside ......................................... 2-51
Outside ...................................... 2-51
Vanity ......................................... 2-52
Model Reference ............................... iii
Maintenance
0
Odometer ............................ 2-62, 2-63
Off-Road Driving (See “Driving”)
Off-Road Recovery
...................... 4-1 9
Oil .................................................... 6-9
Additives .................................... 6-13
Disposal of Used ...................... 6-14
Pressure Gage .......................... 2-69
To Check .................................. 6-10
What Kind to Use .................... 6-11
When to Add ............................ 6-10
When to Change ...................... 6-13
Owner Checks and Services ...... 7-11
P
On Hills ........................... 4-48, 4-61
Torque Lock (Automatic
Parking
Over Things That Burn
........... 2-25
Transmission) .............. 2-22, 4-50