ECU CHEVROLET S10 1995 2.G Owners Manual
[x] Cancel search | Manufacturer: CHEVROLET, Model Year: 1995, Model line: S10, Model: CHEVROLET S10 1995 2.GPages: 354, PDF Size: 18.92 MB
Page 20 of 354
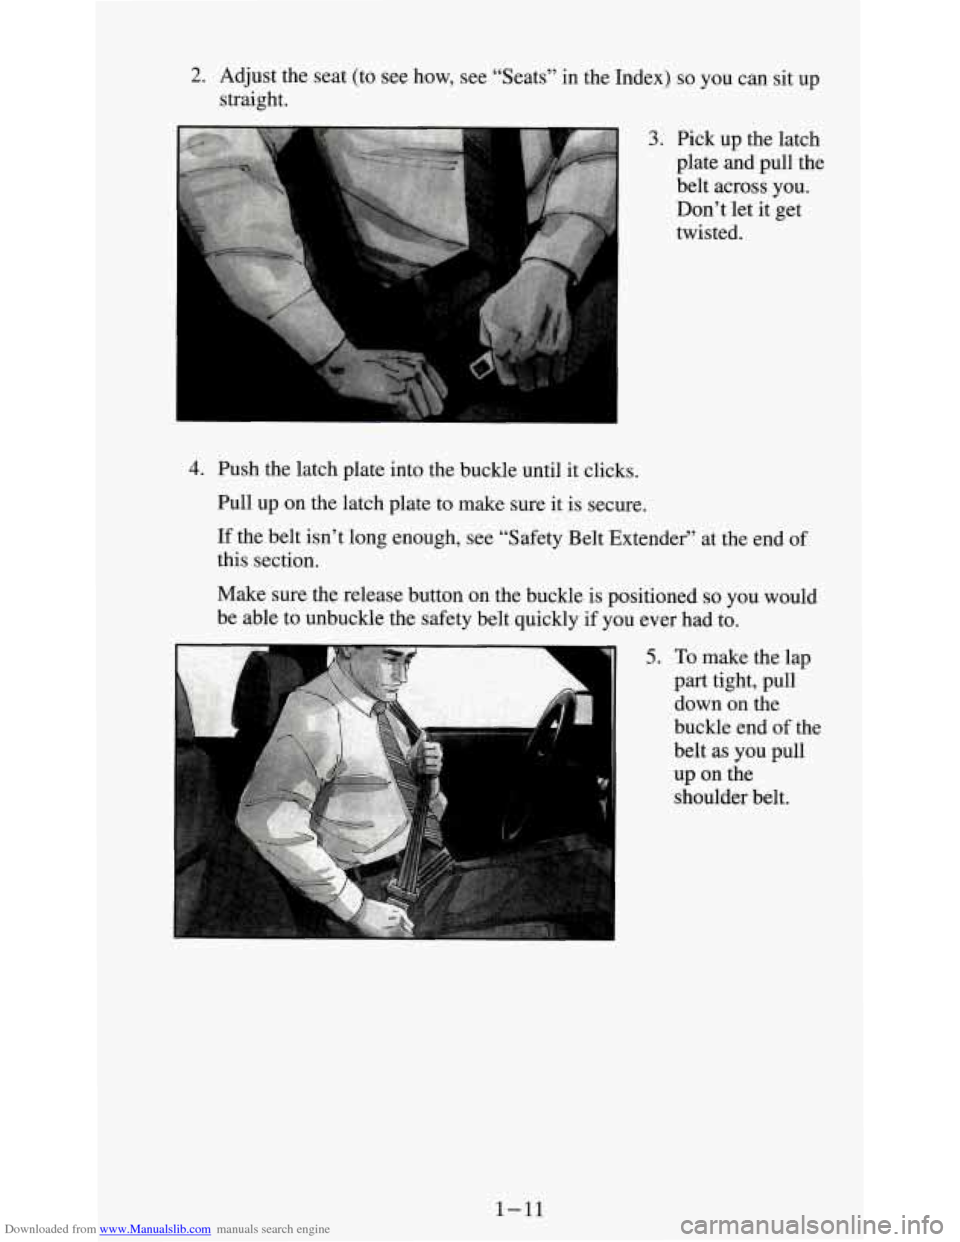
Downloaded from www.Manualslib.com manuals search engine 2. Adjust the seat (to see how, see “Seats” in the Index) SO YOU can sit UP
straight.
3. Pick up the latch
plate and pull the
belt across
you.
Don’t let it get
twisted.
I
4. Push the latch plate into the buckle until it clicks.
Pull
UP on the latch plate to make sure it is secure.
If the belt isn’t long enough, see “Safety Belt Extender” at the end of
this section.
Make sure the release button on the buckle is positioned
so you would
be able to unbuckle the safety belt quickly if
you ever had to.
5. To make the lap
part tight, pull
down on the
buckle end
of the
belt as
you pull
up on the
shoulder belt.
1-11
Page 36 of 354
Downloaded from www.Manualslib.com manuals search engine Child Restraints
Be sure to follow the instructions for the restraint. You may find these
instructions on the restraint itself or in a booklet,
or both. These restraints
use the belt system in your vehicle, but the child also has to be secured
within the restraint to help reduce the chance
of personal injury. The
instructions that come with the infant or child restraint will show you how
to do that.
The child restraint must be secured properly
in the center (except 60/40
bench seat) or right front passenger seat. If you have a 60/40 split bench
seat, you must
use the right front passenger seat.
Keep
in mind that an unsecured child restraint can move around in a
collision or sudden stop and injure people in the vehicle. Be sure to properly
secure any child restraint in your vehicle
- even when no child is in it.
Top Strap
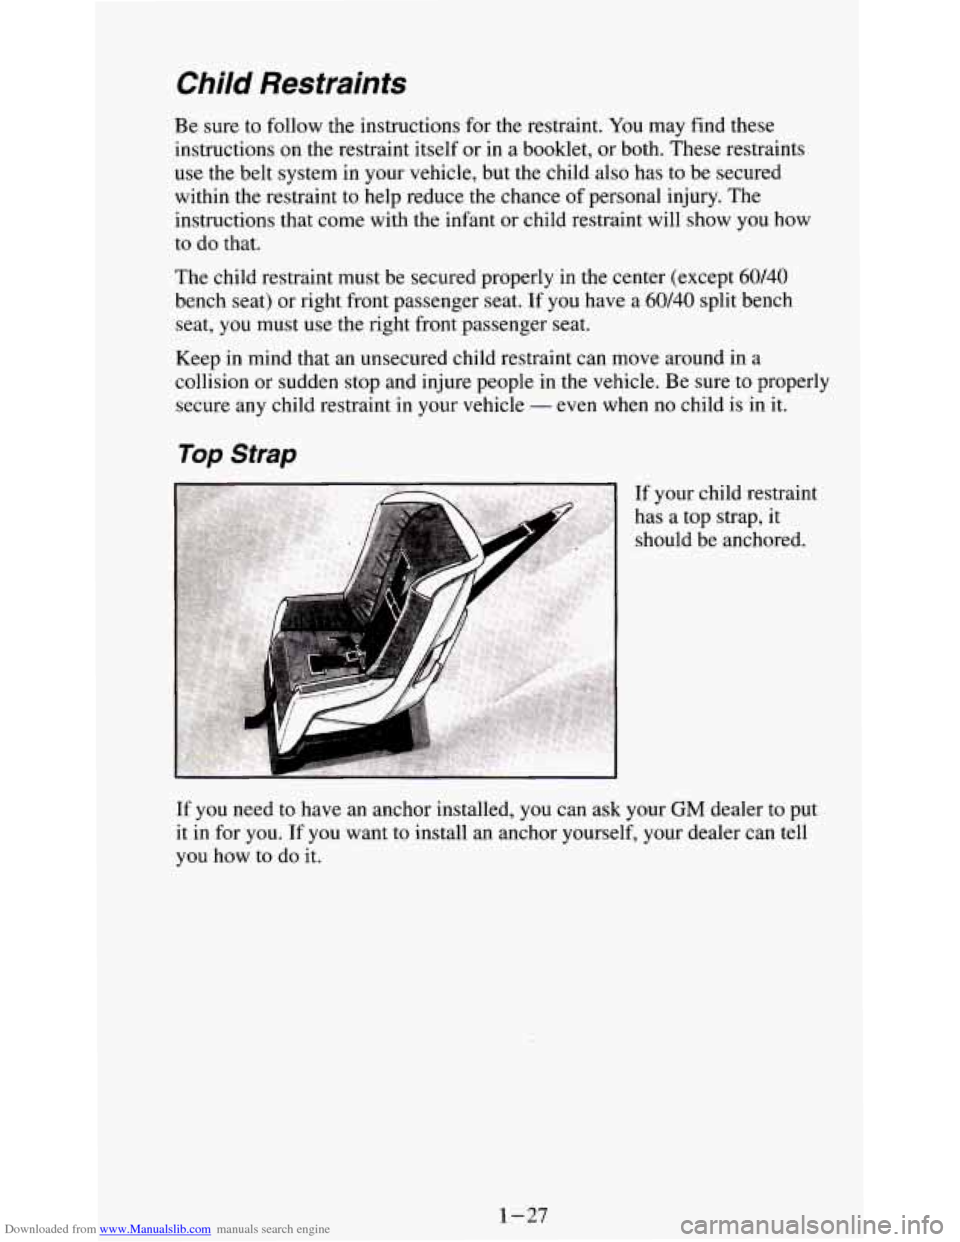
If your child restraint
has a top strap, it should be anchored.
If you need to have an anchor installed, you can ask your GM dealer to put
it in for you. If you want to install an anchor yourself, your dealer can tell
you how to do it.
1-27
Page 37 of 354
Downloaded from www.Manualslib.com manuals search engine Securing a Child Restraint in the Center Seat
Position (Except
60/40 Split Bench Seat)
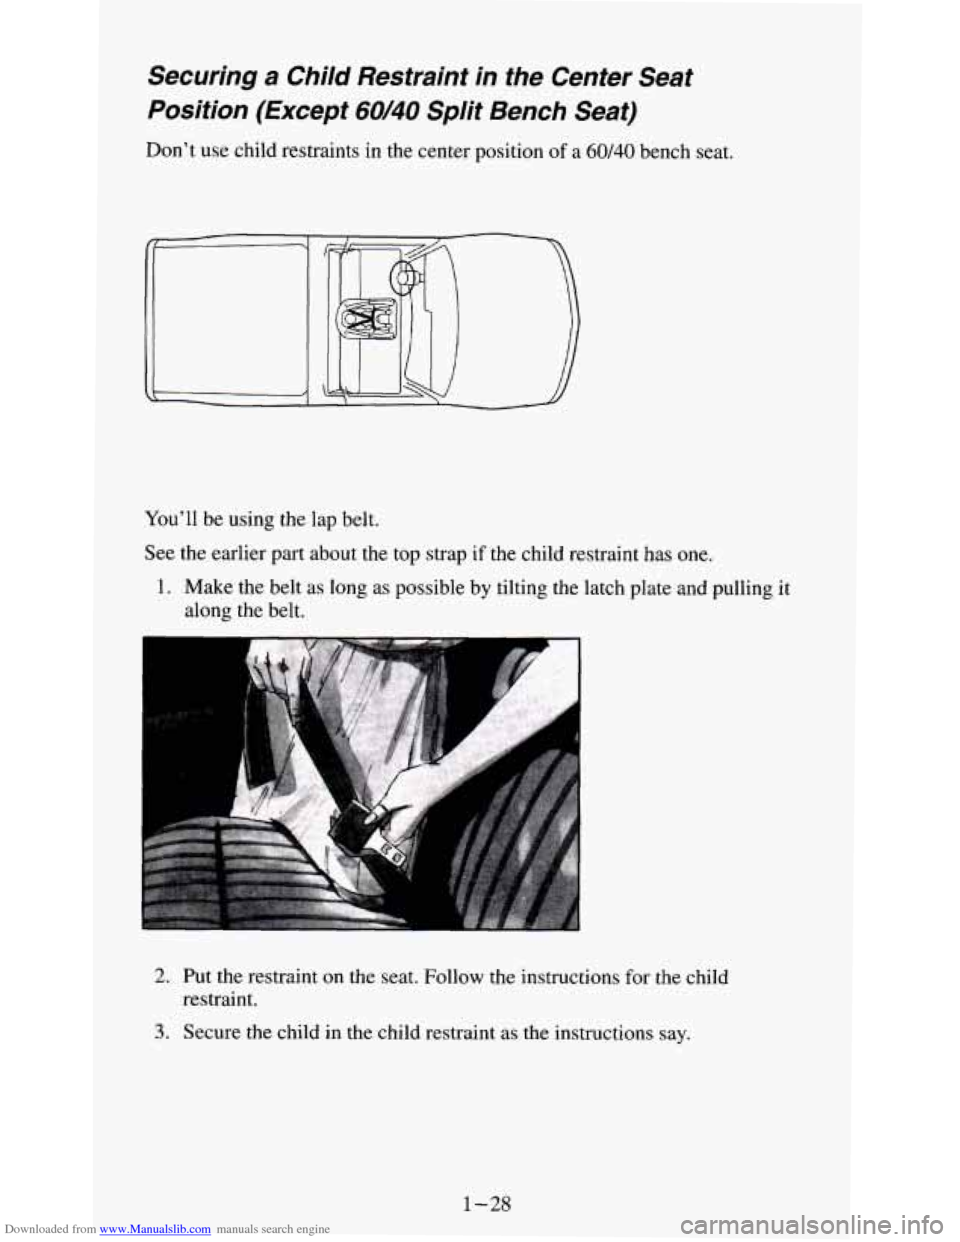
Don’t use child restraints in the center position of a 60/40 bench seat.
You’ll be using the lap belt.
See the earlier part about the top strap if the child restraint has
one.
1. Make the belt as long as possible by tilting the latch plate and pulling it
along the belt.
2. Put the restraint on the seat. Follow the instructions for the child
restraint.
3. Secure the child in the child restraint as the instructions say.
1-28
Page 38 of 354
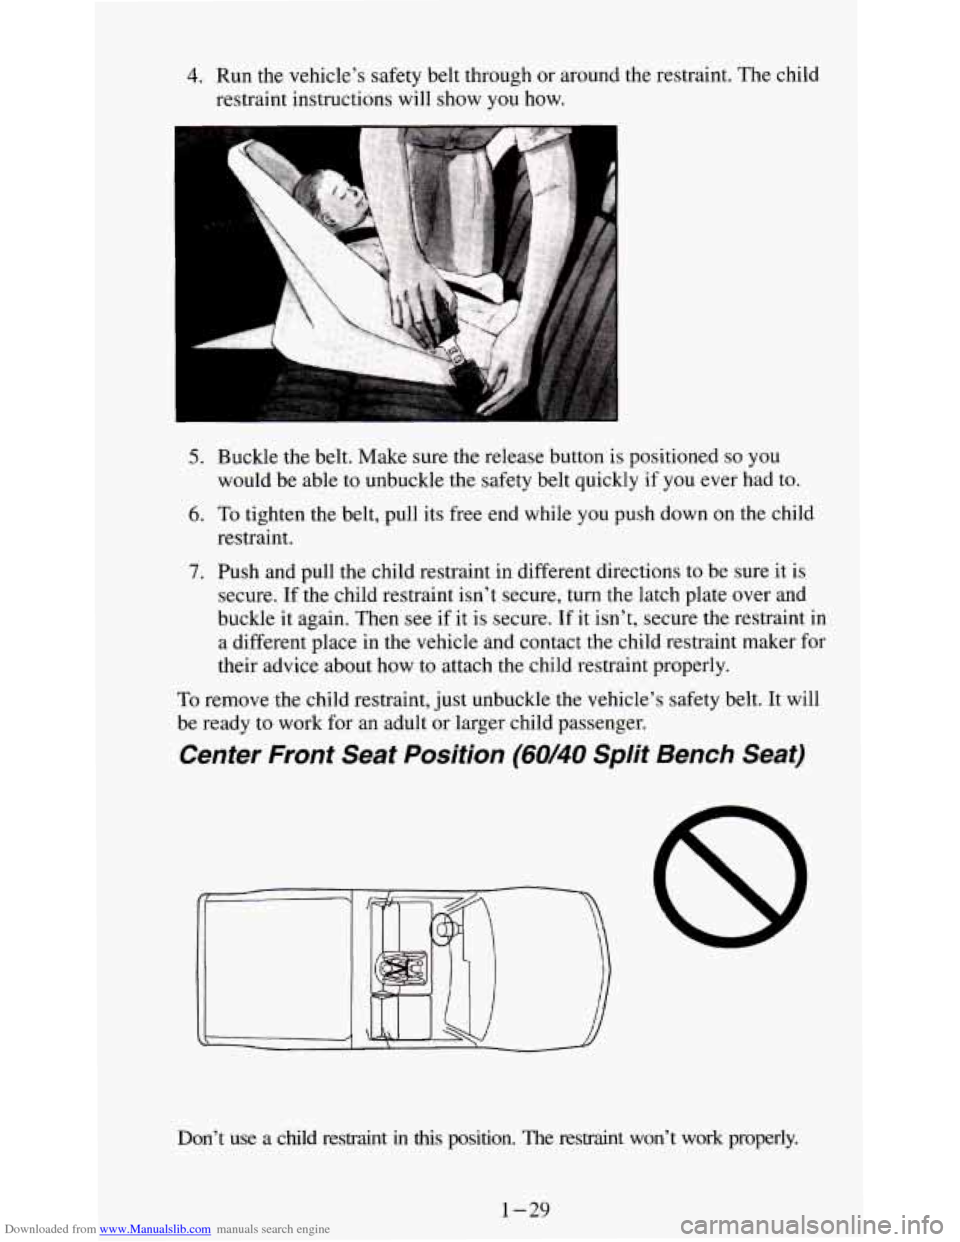
Downloaded from www.Manualslib.com manuals search engine 4. Run the vehicle’s safety belt through or around the restraint. The child
restraint instructions will show
you how.
5. Buckle the belt. Make sure the release button is positioned so you
would be able to unbuckle the safety belt quickly if you ever had to.
6. To tighten the belt, pull its free end while you push down on the child
restraint.
7. Push and pull the child restraint in different directions to be sure it is
secure. If the child restraint isn’t secure, turn the latch plate over and
buckle it again. Then
see if it is secure. If it isn’t, secure the restraint in
a different place in the vehicle and contact the child restraint maker for
their advice about how to attach the child restraint properly.
To remove the child restraint, just unbuckle the vehicle’s safety belt. It will
be ready to work for an adult or larger child passenger.
Center Front Seat Position (60/40 Split Bench Seat)
Don’t use a child restraint in this position. The restraint won’t work properly.
1-29
Page 39 of 354
Downloaded from www.Manualslib.com manuals search engine Jump Seats (Extended Cab)
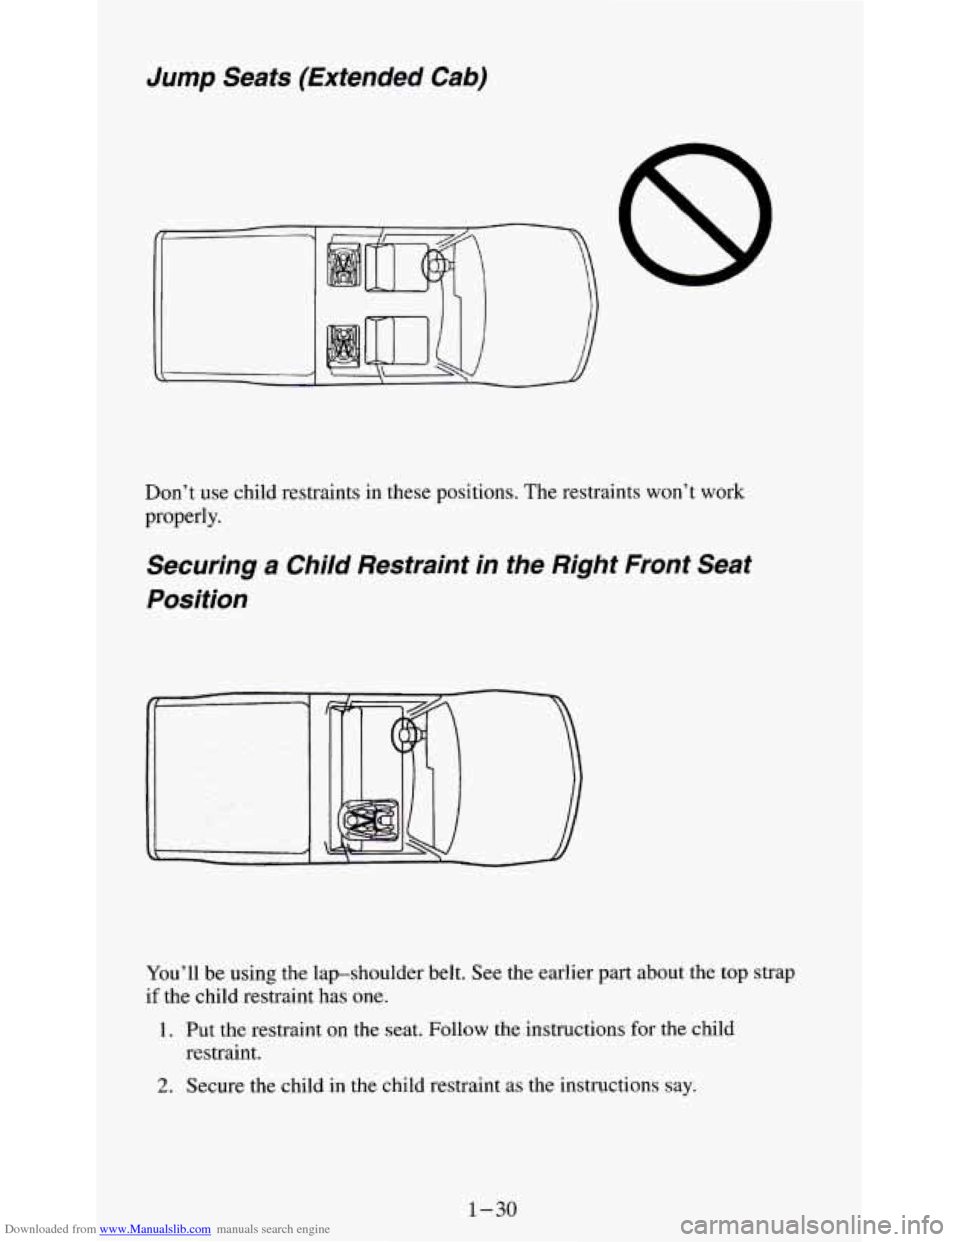
Don’t use child restraints in these positions. The restraints won’t work
properly.
Securing a Child Restraint in the Right Front Seat
Position
You’ll be using the lap-shoulder belt. See the earlier part about the top strap
if the child restraint has
one.
1. Put the restraint on the seat. Follow the instructions for the child
restraint.
2. Secure the child in the child restraint as the instructions say.
1-30
Page 41 of 354
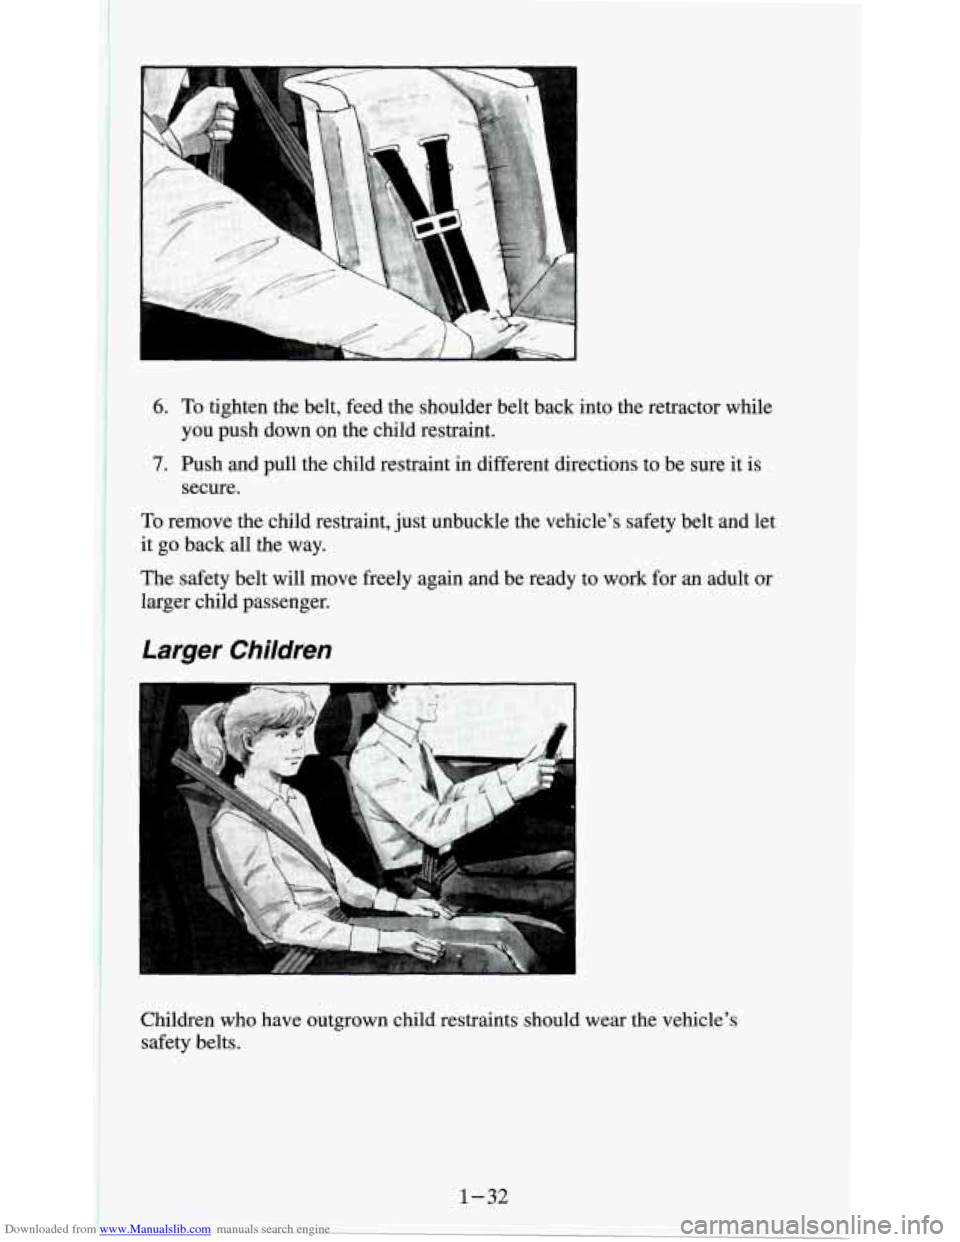
Downloaded from www.Manualslib.com manuals search engine 6. To tighten the belt, feed the shoulder belt back into the retractor while
7. Push and pull the child restraint in different directions to be sure it is
To remove the child restraint, just unbuckle the vehicle's safety belt and let
it go back all the way.
The safety belt will move freely again and be ready to work for
an adult or
larger child passenger.
you
push down on the child restraint.
secure.
Larger Children
Children who have outgrown child restraints should wear the vehicle's
safety belts.
Page 50 of 354
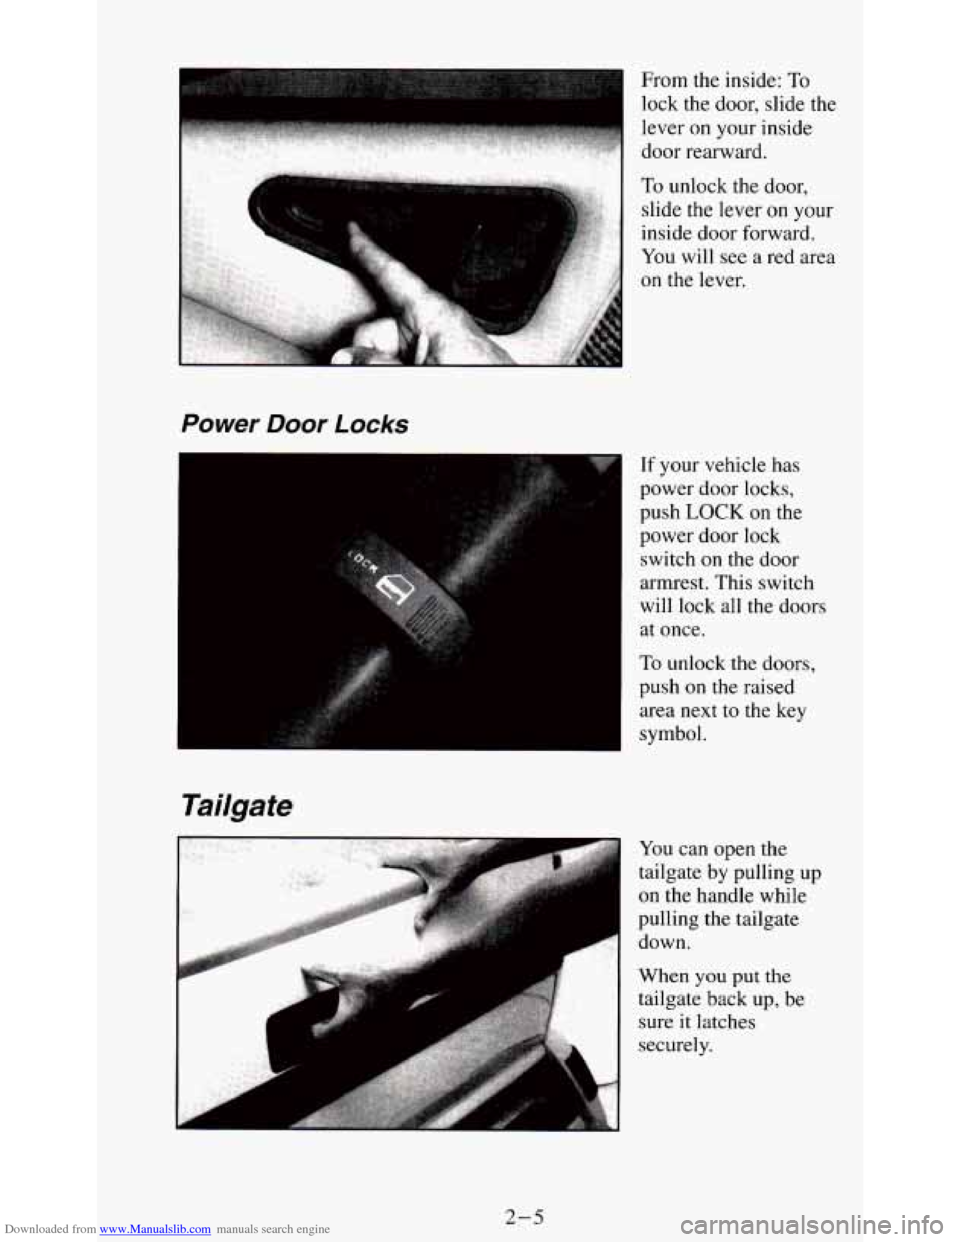
Downloaded from www.Manualslib.com manuals search engine From the inside: To
lock the door, slide the
lever
on your inside
door rearward.
Power Door Locks
I
Tailgate
If your vehicle has
power
door locks,
push LOCK on the
power door lock
switch on the door
armrest. This switch
will lock all the doors
at once.
To unlock the doors,
push
on the raised
area next to the key
symbol.
You can open the
tailgate by pulling
up
on the handle while
pulling the tailgate
down.
When
you put the
tailgate back up, be
sure it latches
securely.
2-5
Page 51 of 354
Downloaded from www.Manualslib.com manuals search engine Tailgate Removal
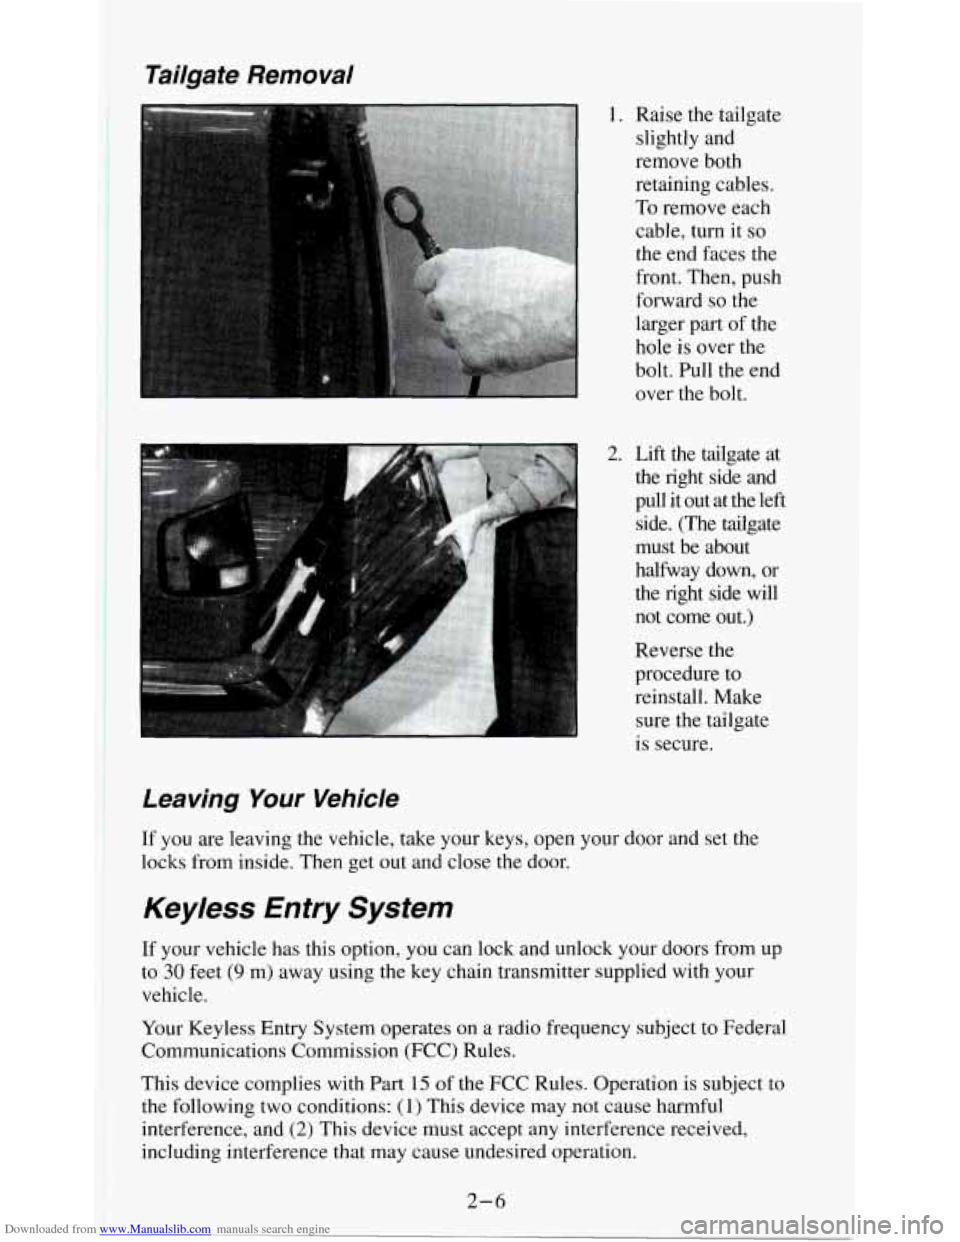
1. Raise the tailgate
slightly and
remove both
retaining cables.
To remove each
cable, turn it
so
the end faces the
front. Then, push
forward
so the
larger part of the
hole is over the
bolt. Pull the end
over the bolt.
2. Lift the tailgate at the right side and
pull it out at the left
side. (The tailgate
must be about
halfway down, or
the right side will
not come out.)
Reverse the
procedure to
reinstall. Make
sure the tailgate
is secure.
Leaving Your Vehicle
lr you are leaving the vehicle, take your keys, open your door and set the
locks from inside. Then get out and close the door.
Keyless Entry System
If your vehicle has this option, you can lock and unlock your doors from up
to
30 feet (9 m) away using the key chain transmitter supplied with your
vehicle.
Your Keyless Entry System operates on
a radio frequency subject to Federal
Communications Commission (FCC) Rules.
This device complies with Part 15 of the FCC Rules. Operation is subject to
the following
two conditions: (1) This device may not cause harmful
interference, and
(2) This device must accept any interference received,
including interference that may cause undesired operation.
2-6
Page 129 of 354
Downloaded from www.Manualslib.com manuals search engine To Lock The System:
1. Write down any 6 digit number and keep it in a safe place.
2. Turn the ignition to the ACC (Accessory) or RUN position.
3. Press the PWR knob to turn the radio off.
4. Press the 1 and 4 buttons together. Hold them down until “- - -” shows
on the display.
You are now ready to enter your secret code. Don’t wait more than
15
seconds between steps.
5. Press SET and “000” will appear on the display.
6. Press the SEEK or 4 button to make the first number appear.
7. Press SCAN to make the next two numbers agree with your code.
8. Press BAND and “000” will appear again. Now you are ready to enter
the last three digits
of your code.
9. Repeat steps 6 and 7 for the last three digits of your code.
10. Press BAND and “rEP’ will appear for 5 seconds and then “OOO” will
11. Repeat steps 6 through 10. This time “SEC” will appear - indicating
appear.
that the radio
is secure.
To Unlock The System After A Power Loss
When battery power is reapplied to a secured radio, the radio won’t turn on
and
“LOC” will appear on the display.
Enter your secret code as follows. Pause
no more than 15 seconds between
steps.
1. Turn the ignition on. (Radio off.)
2. Press the SET button. The display will show “000”.
3. Enter the six digits of the code following steps 6-9 above. The display
4. Press the BAND knob and the time appears - indicating that the
will
show the numbers as entered.
disabling sequence was successful. If the display indicates
“SEC”, the
numbers did
not match and the unit is still secured.
3-16
Page 130 of 354
Downloaded from www.Manualslib.com manuals search engine Disabling The Theft System
1.
2.
3.
4.
5.
6.
Press presets 1 and 4 for 5 seconds with ignition on and radio off. The
display will show “SEC”, indicating the unit is in the secure mode.
Press the SET button. The display will show
“000”.
Enter the first three digits of the code following steps 6 and 7 of the
preceding paragraphs (To Lock the System). The display will show the
numbers as entered.
Press the BAND knob. The radio will display
“OOO”.
Enter the second three digits of the code. The display will show the
numbers as entered.
Press the BAND knob.
If the display shows “- - - ”, the disabling
sequence was successful. The numbers matched the user-selected code
or the factory back-up code, and the unit is in the UNSECURED
mode.
If the display shows “SEC”, the disabling sequence was
unsuccessful and the numbers did not match either of the codes and the
unit will remain
in the SECURED mode.
Understanding Radio Reception
FM stereo will give you the best sound. But FM signals will reach only
about 10 to
40 miles (16 to 65 km). And, tall buildings or hills can interfere
with
FM signals, causing the sound to come and go.
The range for most AM stations is greater than for
FM, especially at night.
The longer range, however, can cause stations to interfere with each other.
AM can pick up noise from things like storms and power lines. Try reducing
the treble to reduce this noise if you ever get it.
AM Stereo means the Delco@ system can receive C-QUAM@stereo
broadcasts. Many AM stations around the count use C-QUAM@ to
produce stereo, though some do not. (C-QUAM is a registered trademark
of Motorola, Inc.) If your Delco@ system can get C-QUAM@, your
“STEREO” light will come on when you’re receiving
it.
Be aware that hearing damage from loud noise is almost undetectable until
it is too late. Your hearing can adapt to higher volumes
of sound. Sound that
seems normal can be loud and harmful to your hearing. Take precautions by
adjusting the volume control on your radio to a safe sound level before your
hearing adapts to it.
3
To help avoid hearing loss or damage:
1. Adjust the volume control to the lowest setting.
2. Increase volume slowly until you hear comfortably and clearly.
3-17