service indicator CHEVROLET S10 1995 2.G Owners Manual
[x] Cancel search | Manufacturer: CHEVROLET, Model Year: 1995, Model line: S10, Model: CHEVROLET S10 1995 2.GPages: 354, PDF Size: 18.92 MB
Page 75 of 354
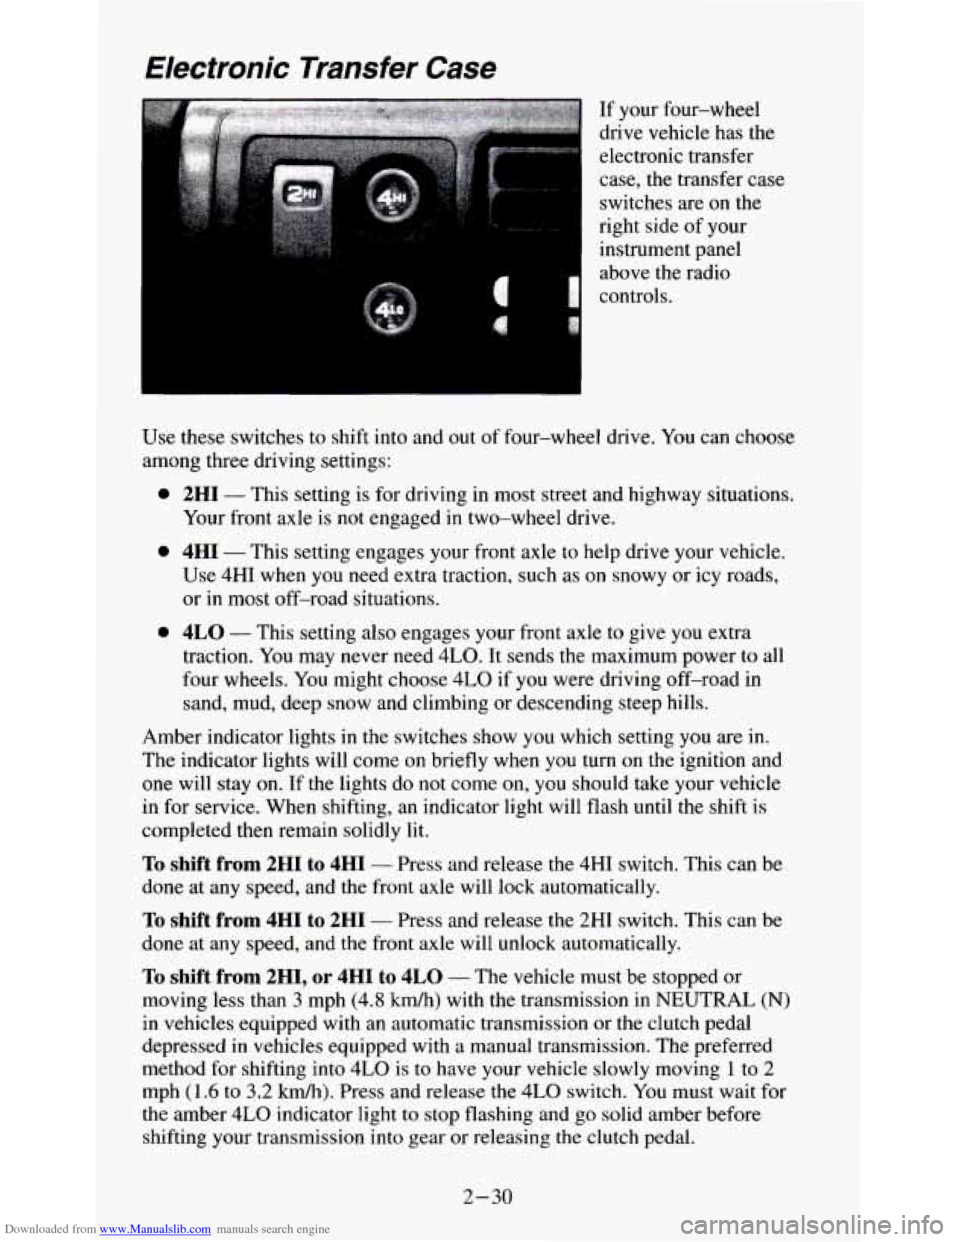
Downloaded from www.Manualslib.com manuals search engine Use these switches to shift into and out of four-wheel drive. You can choose
among three driving settings:
0
0
0
2HI - This setting is for driving in most street and highway situations.
Your front axle
is not engaged in two-wheel drive.
4HI - This setting engages your front axle to help drive your vehicle.
Use 4HI when you need extra traction, such as
on snowy or icy roads,
or
in most off-road situations.
4LO - This setting also engages your front axle to give you extra
traction. You may never need
4LO. It sends the maximum power to all
four wheels. You might choose
4LO if you were driving off-road in
sand, mud, deep snow and climbing or descending steep hills.
Amber indicator lights
in the switches show you which setting you are in.
The indicator lights will come on briefly when you turn on the ignition and
one will stay
on. If the lights do not come on, you should take your vehicle
in for service. When shifting, an indicator light will flash until the shift is
completed then remain solidly lit.
To shift from 2HI to 4HI - Press and release the 4HI switch. This can be
done at any speed, and the front axle will lock automatically.
To shift from 4HI to 2HI - Press and release the 2HI switch. This can be
done at any speed, and the front axle will unlock automatically.
To shift from 2H1, or 4HI to 4LO - The vehicle must be stopped or
moving less than
3 mph (4.8 km/h) with the transmission in NEUTRAL (N)
in vehicles equipped with an automatic transmission or the clutch pedal
depressed
in vehicles equipped with a manual transmission. The preferred
method for shifting into
4LO is to have your vehicle slowly moving 1 to 2
mph (1.6 to 3.2 kdh). Press and release the 4LO switch. You must wait for
the amber
4LO indicator light to stop flashing and go solid amber before
shifting your transmission into gear or releasing
the clutch pedal.
2-30
Page 76 of 354
Downloaded from www.Manualslib.com manuals search engine If the 4LO switch is pressed when your vehicle is in gear and/or moving, the
amber
4LO indicator light will flash for 30 seconds and not complete the
shift unless your vehicle is below
3 mph (4.8 km/h) and the transmission is
in
NEUTRAL (N) or the clutch pedal depressed.
On automatic transmission equipped vehicles:
If your transfer case does not
shift into
4L0, your transmission indicator switch may require adjustment.
With your transmission in
NEUTRAL (N), press and release the 4LO
switch. While the amber 4LO indicator light is flashing, shift your
transmission into
PARK (P).
Wait until the 4LO indicator light goes solid amber before shifting your
transmission into gear. This will get you into
4L0, but you should take your
vehicle in for service
so normal operation can be restored.
To shift from 4LO to 4HI - Your vehicle must be stopped or moving less
than
3 mph (4.8 km/h) with the transmission in NEUTRAL (N) or the clutch
pedal depressed. The preferred method for shifting out of
4LO is to have
your vehicle slowly moving
1 to 2 mph ( 1.6 to 3.2 km/h). Press and release
the
4HI switch. You must wait for the 4HI indicator light to stop flashing
and go solid amber before shifting your transmission into gear or releasing
the clutch pedal.
If the
4HI switch is pressed when your vehicle is in gear and/or moving, the
4HI indicator light will flash for 30 seconds but not complete the shift
unless the vehicle is below
3 mph (4.8 kmh) and the transmission is in
NEUTRAL (N) or the clutch pedal depressed.
On automatic transmission equipped vehicles:
If your transfer case does not
shift into
4H1, your transmission indicator switch may require adjustment.
With your transmission
in NEUTRAL (N), press and release the 4HI switch.
While the
4HI indicator light is flashing, shift your transmission into PARK
(P). Wait until the 4HI indicator light goes solid amber before shifting your
transmission into gear. This will get you into
4H1, but you should take your
vehicle in for service
so normal operation can be restored.
2-31
Page 105 of 354
Downloaded from www.Manualslib.com manuals search engine Indicator Lights
Indicator lights go on when you use your turn signals, change from low
beam headlights
to high beams, or when you use your hazard flashers. The
next few pages will also tell you about the indicator lights on your vehicle
and help
you locate them.
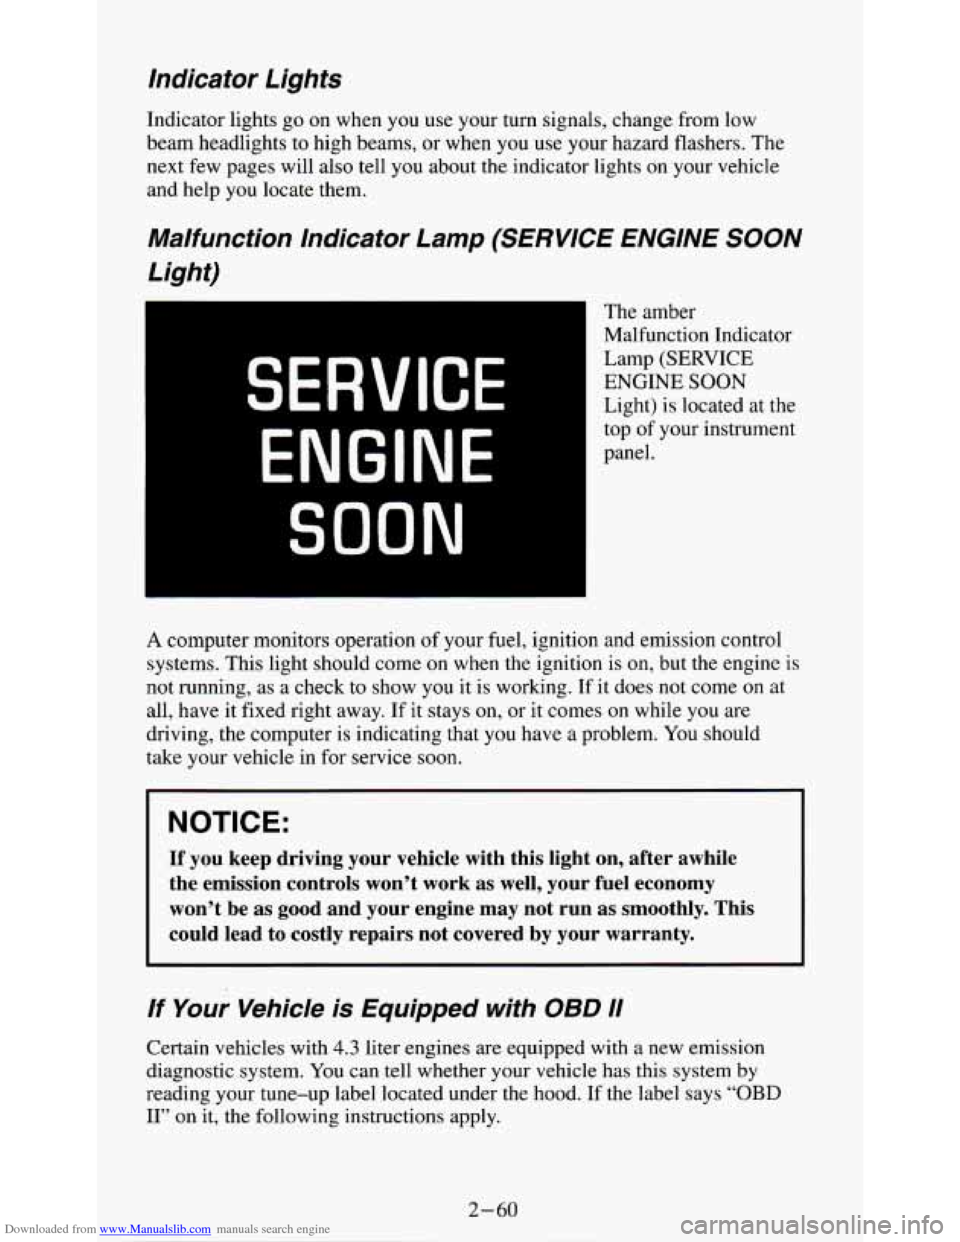
Malfunction Indicator Lamp (SERVICE ENGINE SOON
Light)
The amber
Malfunction Indicator
Lamp (SERVICE
ENGINE SOON
Light) is located at the
top of your instrument
panel.
SERVICE
ENGINE
SOON
A computer monitors operation of your fuel, ignition and emission control
systems. This light should come
on when the ignition is on, but the engine is
not running, as a check to show you it is working. If it does not come
on at
all, have it fixed right away.
If it stays on, or it comes on while you are
driving, the computer is indicating that
you have a problem. You should
take your vehicle in for service
soon.
NOTICE:
If you keep driving your vehicle with this light on, after awhile
the emission controls won’t work as well, your fuel economy
won’t be as good and your engine may not run as smoothly. This
could lead
to costly repairs not covered by your warranty.
If Your Vehicle is Equipped with OBD I1
Certain vehicles with 4.3 liter engines are equipped with a new emission
diagnostic system. You can tell whether your vehicle has this system
by
reading your tune-up label located under the hood. If the label says “OBD
11” on it, the following instructions apply.
Page 106 of 354
Downloaded from www.Manualslib.com manuals search engine Malfunction Indicator Lamp (SERVICE ENGINE SOON Light)
Your vehicle is equipped with an onboard computer which monitors
operation of the emission control system. This system is called OBD I1
(On-Board Diagnostics-Second Generation) and is intended to assure that
emissions are at acceptable levels for the life of the vehicle, helping to
produce a cleaner environment. The “SERVICE ENGINE
SOON’ light
comes on to indicate when service is required. Malfunctions often will be
indicated by
the system before any problem is apparent, which may prevent
more serious damage to your vehicle. This system is also designed to assist
your service technician in correctly diagnosing any malfunction.
The “SERVICE ENGINE
SOON, light should come on, as a check to show
you it is working, when the ignition is on and the engine is not running. This
light will also come during a malfunction in one
of two ways:
0
0
Light on steady - indicates a system malfunction has been detected.
Drive the vehicle to the dealer for service at your first opportunity.
Light flashing
- indicates a misfire has been detected which may
damage the emission control system. The damage may be reduced by
lowering the vehicle speed, reducing the amount of cargo being hauled
or trailered, avoiding hard acceleration, or by avoiding steep uphill
grades.
If these actions are effective, the light will stop flashing and
remain on steady. Drive the vehicle to a dealer for service. If the light
continues to flash, stop the vehicle. Wait for a steady light to come on,
then drive the vehicle to a dealer for service.
These following conditions also may cause the “SERVICE ENGINE
SOON” light to come on:
Low FueVOut of Fuel
- As the vehicle starts to run out of fuel the
“SERVICE ENGINE
SOON” light may come on as a result of an engine
misfire. Filling your gasoline tank should correct this condition. Make sure
to install the gas cap fully. It will require a few driving trips to turn the light
off.
Poor Quality Fuel
- Be sure to fuel your vehicle with quality fuel. Your
engine may not run efficiently on poor fuel. Poor fuel may cause stalling,
hesitation or misfire. These conditions may go away when the engine is
warned-up. However, poor quality fuel may cause the “SERVICE ENGINE
SOON, light to come on.
Have a dealer check the vehicle. If no problems are found, you may want to
change to another brand
of fuel.
Driving Through Standing Water
- Driving your vehicle through puddles
of deep standing water may result in a temporary misfire condition. This
condition will usually correct itself shortly after the electrical system dries
out. It will require a few driving trips to turn the light off.
2-61
Page 256 of 354
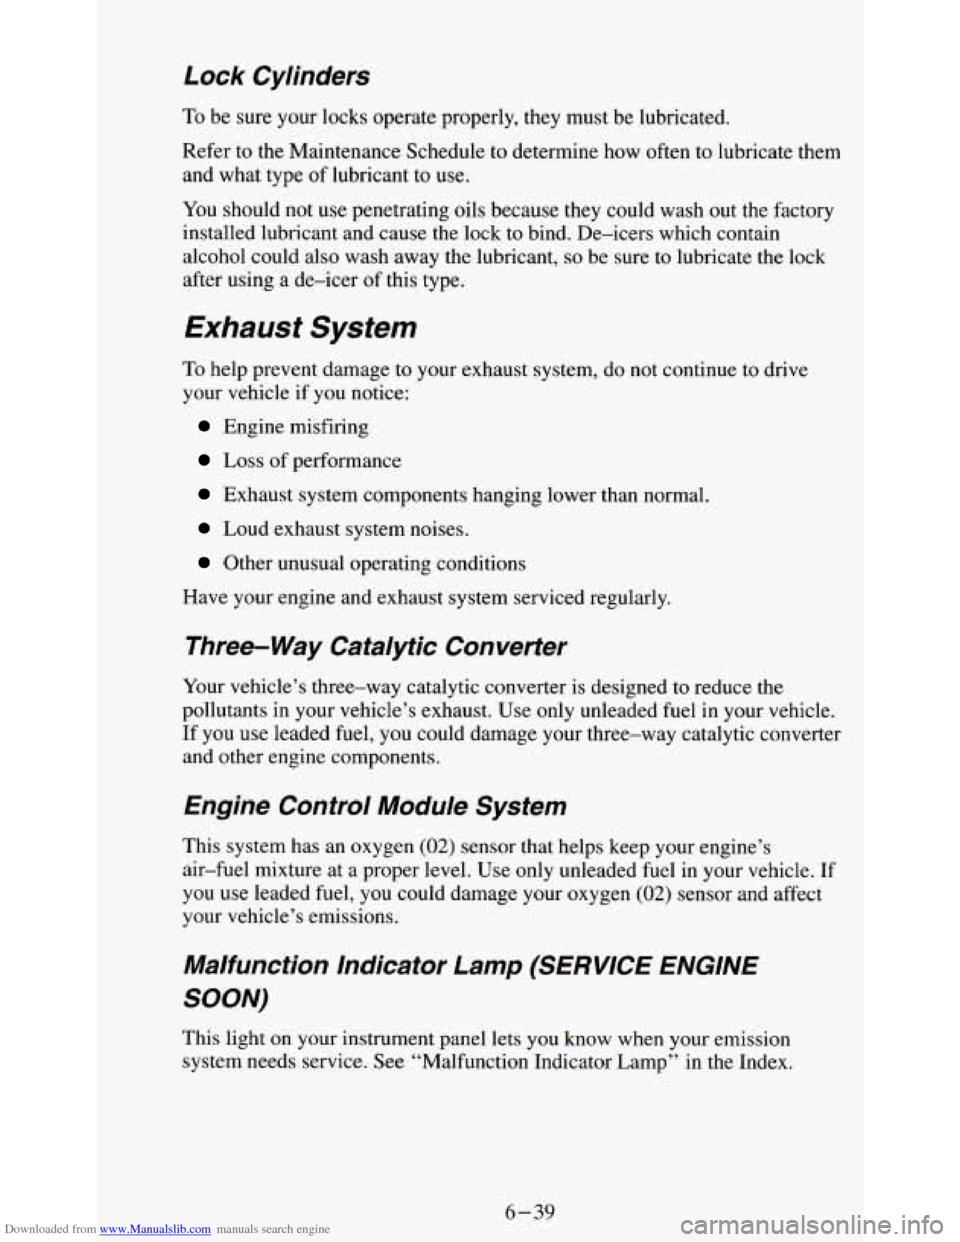
Downloaded from www.Manualslib.com manuals search engine Lock Cylinders
To be sure your locks operate properly, they must be lubricated.
Refer
to the Maintenance Schedule to determine how often to lubricate them
and what type of lubricant to use.
You should not
use penetrating oils because they could wash out the factory
installed lubricant and cause the lock to bind. De-icers which contain
alcohol could also wash away the lubricant,
so be sure to lubricate the lock
after using a de-icer of this type.
Exhaust System
To help prevent damage to your exhaust system, do not continue to drive
your vehicle if you notice:
Engine misfiring
Loss of performance
Exhaust system components hanging lower than normal.
Loud exhaust system noises.
Other unusual operating conditions
Have your engine and exhaust system serviced regularly.
Three-way Catalytic Converter
Your vehicle’s three-way catalytic converter is designed to reduce the
pollutants in your vehicle’s exhaust. Use only unleaded fuel in your vehicle.
If you use leaded fuel, you could damage your three-way catalytic converter
and other engine components.
Engine Control Module System
This system has an oxygen (02) sensor that helps keep your engine’s
air-fuel mixture at a proper level. Use only unleaded fuel in your vehicle. If
you use leaded fuel, you could damage your oxygen
(02) sensor and affect
your vehicle’s emissions.
Malfunction Indicator Lamp (SERVICE ENGINE
SOON)
This light on your instrument panel lets you know when your emission
system needs service. See “Malfunction Indicator Lamp” in the Index.
6-39
Page 260 of 354
Downloaded from www.Manualslib.com manuals search engine When it’s Time for New Tires
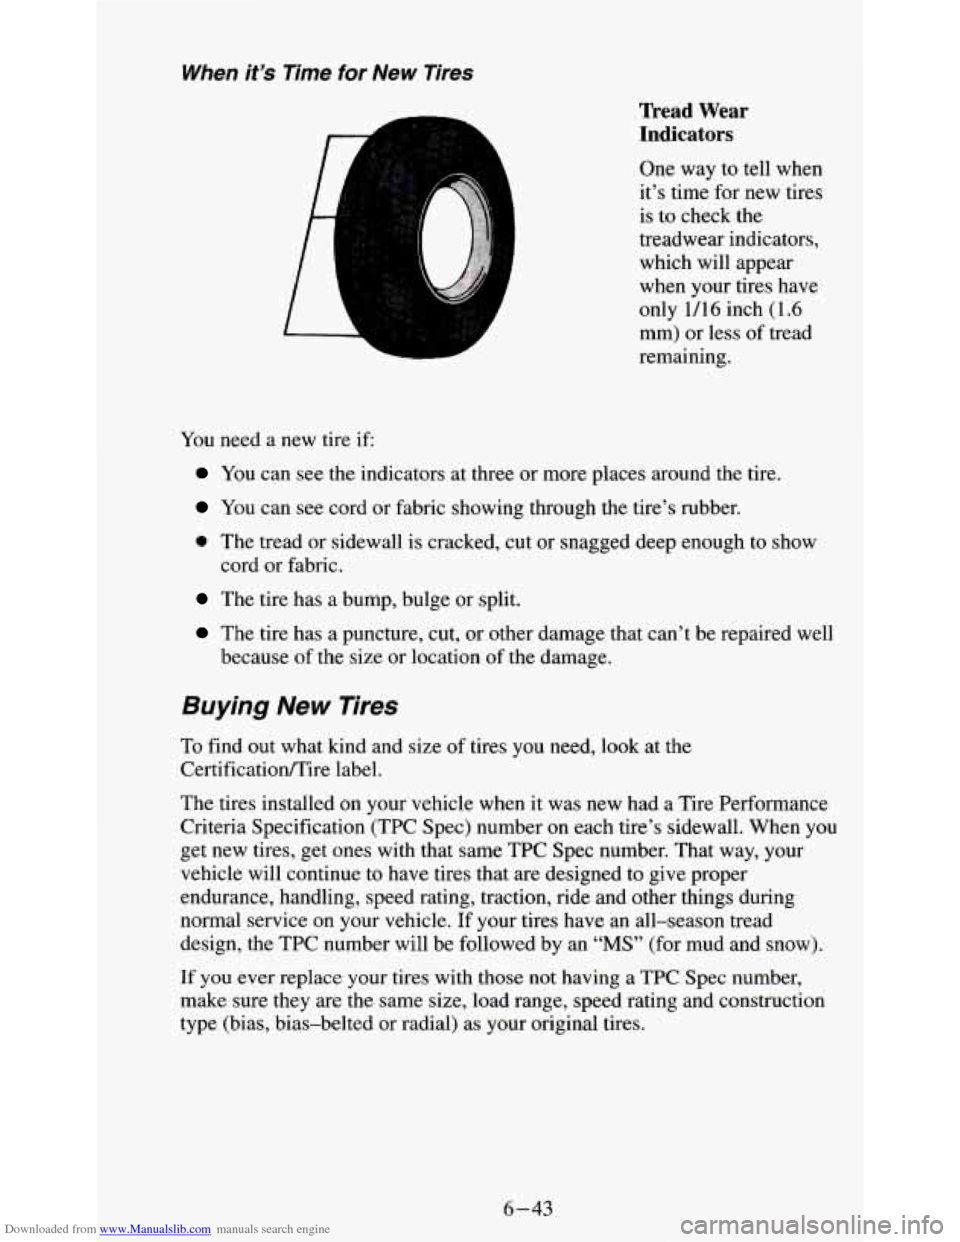
You need a new tire if:
Tread Wear
Indicators
One way to tell when
it’s time for new tires
is to check the
treadwear indicators,
which will appear
when your tires have
only
1/16 inch (1.6
mm) or less of tread
remaining.
You can see the indicators at three or more places around the tire.
You can see cord or fabric showing through the tire’s rubber.
0 The tread or sidewall is cracked, cut or snagged deep enough to show
cord or fabric.
The tire has a bump, bulge or split.
The tire has a puncture, cut, or other damage that can’t be repaired well
because
of the size or location of the damage.
Buying New Tires
To find out what kind and size of tires you need, look at the
Certificationmire label.
The tires installed on your vehicle when it was new had a Tire Performance
Criteria Specification (TPC Spec) number on each tire’s sidewall. When you
get new tires, get ones with that same TPC Spec number. That way, your
vehicle will continue to have tires that are designed
to give proper
endurance, handling, speed rating, traction, ride and other things during
normal service on your vehicle. If your tires have an all-season tread
design, the TPC number will be followed by an
“MS” (for mud and snow).
If you ever replace your tires with those not having a TPC Spec number,
make sure they are the same size, load range, speed rating and construction
type (bias, bias-belted or radial) as your original tires.
6-43
Page 281 of 354
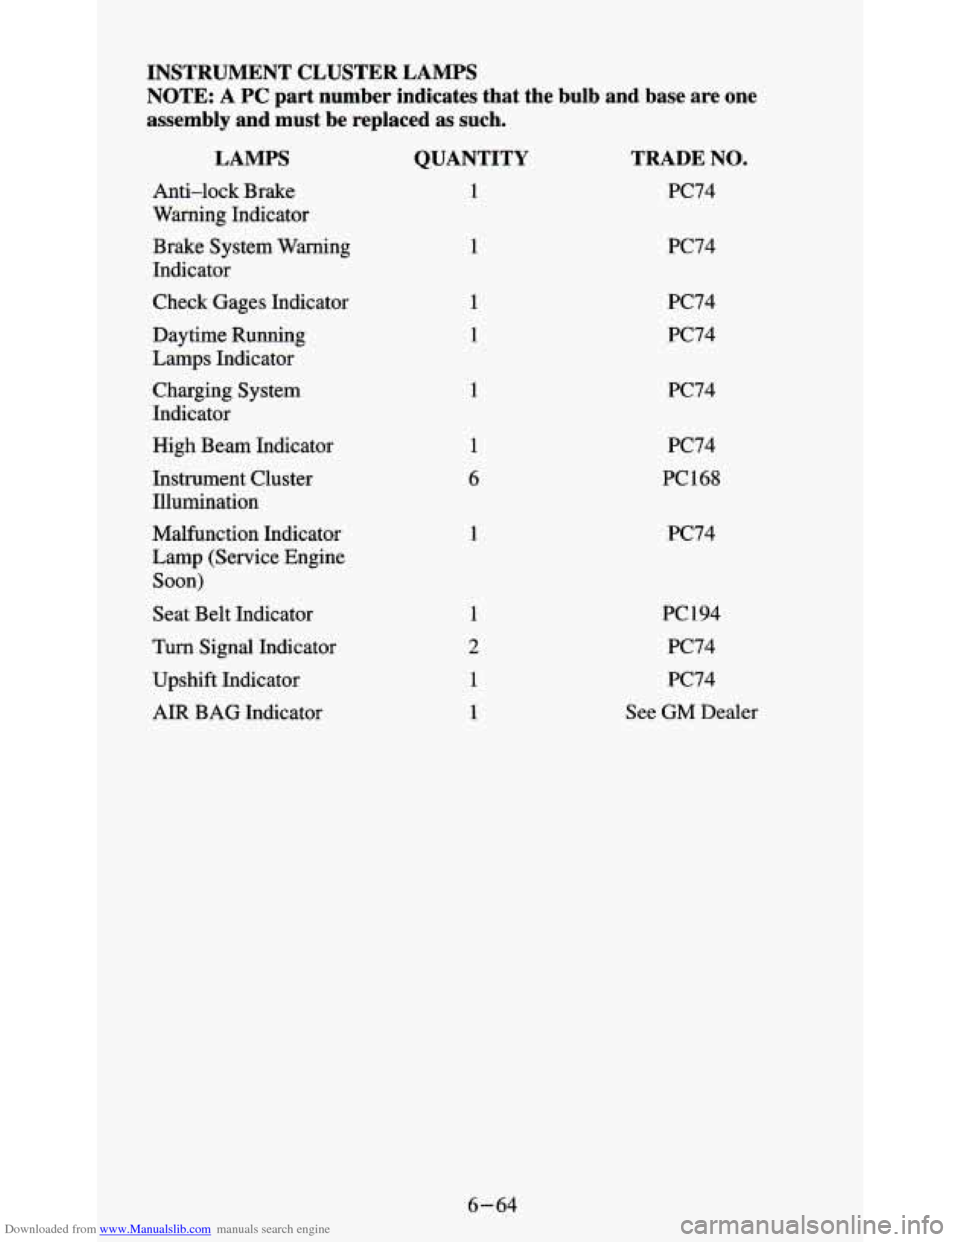
Downloaded from www.Manualslib.com manuals search engine INSTRUMENT CLUSTER LAMPS
NOTE:
A PC part number indicates that the bulb and base are one
assembly and must be replaced as such.
LAMPS
Anti-lock Brake
Warning Indicator
Brake System Warning
Indicator
Check Gages Indicator
Daytime Running
Lamps Indicator
Charging System
Indicator
High Beam Indicator
Instrument Cluster Illumination
Malfunction Indicator
Lamp (Service Engine
Soon)
Seat Belt Indicator
Turn Signal Indicator
Upshift Indicator
AIR BAG Indicator
QUANTITY
1
1
1
1
6
1
TRADE NO.
PC74
PC74
PC74
PC74
PC74
PC74
PC168
PC74
PC194 PC74
PC74
See GM Dealer
6-64
Page 347 of 354
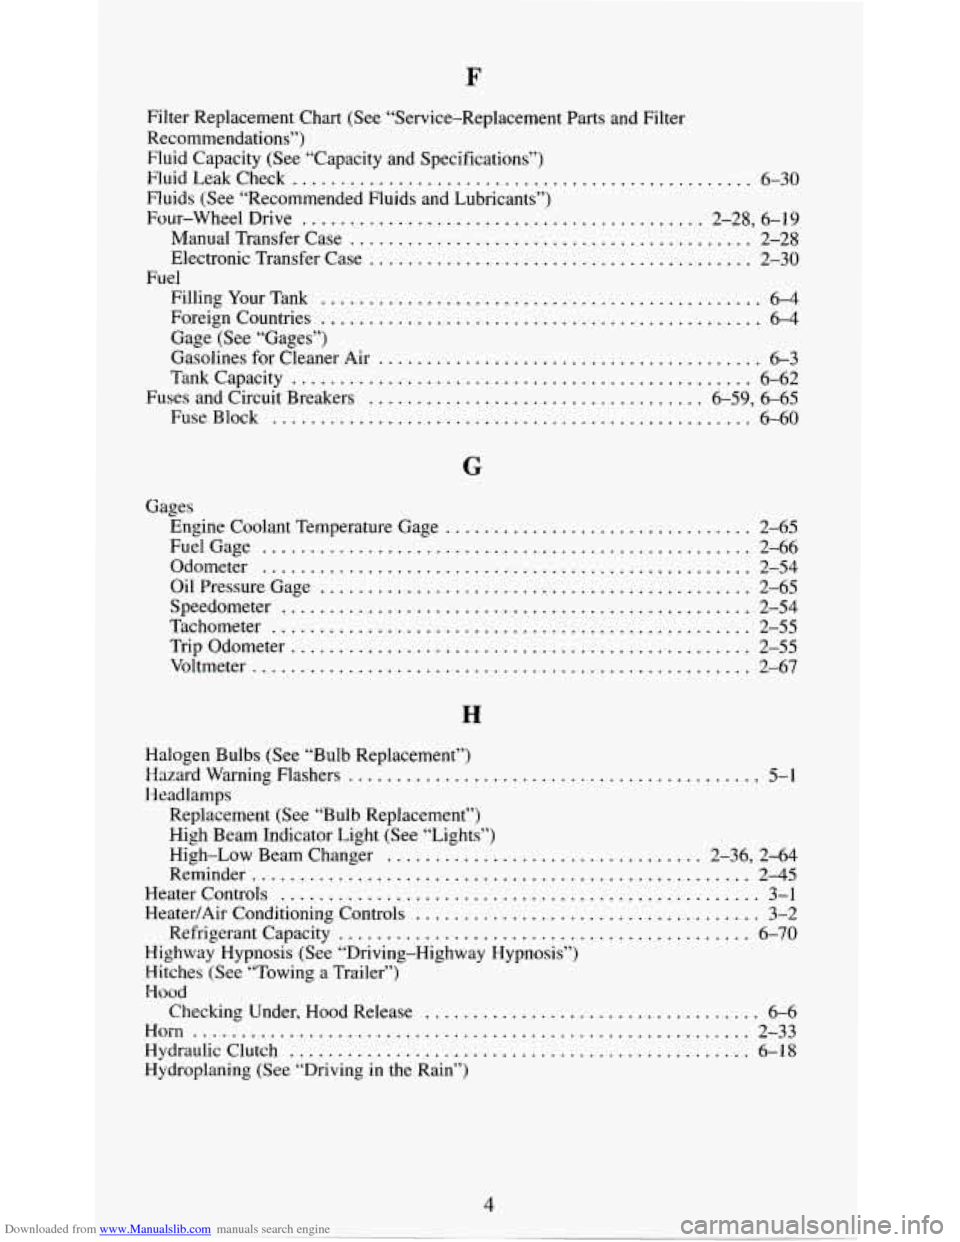
Downloaded from www.Manualslib.com manuals search engine F
Filter Replacement Chart (See “Service-Replacement Parts and Filter
Recommendations”)
Fluid Capacity (See “Capacity and Specifications”)
l;luidLeakCheck
................................................ 6-30
Fluids (See “Recommended Fluids and Lubricants”)
Four-wheel Drive
.......................................... 2-28. 6-19
Manual Transfer Case
.......................................... 2-28
Electronic Transfer Case
........................................ 2-30
FillingYourTank
.............................................. 6-4
Foreign Countries .............................................. 6-4
Gage (See “Gages”)
Gasolines for Cleaner Air
.................................... 6-3
Tankcapacity
................................................ 6-62
Fuses and Circuit Breakers
................................... 6-59, 6-65
Fuel
FuseBlock .................................................. 6-60
G
Gages
Engine Coolant Temperature Gage
................................ 2-65
FuelGage
................................................... 2-66
Odometer
................................................... 2-54
OilPressureGage
............................................. 2-65
Tachometer
.................................................. 2-55
Voltmeter
.................................................... 2-67
Speedometer
................................................. 2-54
Trip Odometer
................................................ 2-55
.............. 5-1
Halogen Bulbs (See “Bulb Replacement”)
Headlamps Hazard Warning Flashers
...........................
Replacement (See “Bulb Replacement”)
High Beam
Indicator Light (See “Lights”)
High-Low Beam Changer
................................. 2.36, 2.64
Reminder
.................................................... 2-45
Heater Controls
.................................................. 3-1
Heater/Air Conditioning Controls
.................................... 3-2
Refrigerant Capacity
........................................... 6-70
Highway Hypnosis (See “Driving-Highway Hypnosis”)
Hitches (See “Towing a Trailer”)
Wood
Horn ......................................... ............. 2-33
HydraulicClutch
................................................ 6-18
Hydroplaning (See “Driving in the Rain”)
Checking
Under, Hood Release
................................... 6-6
4
Page 348 of 354
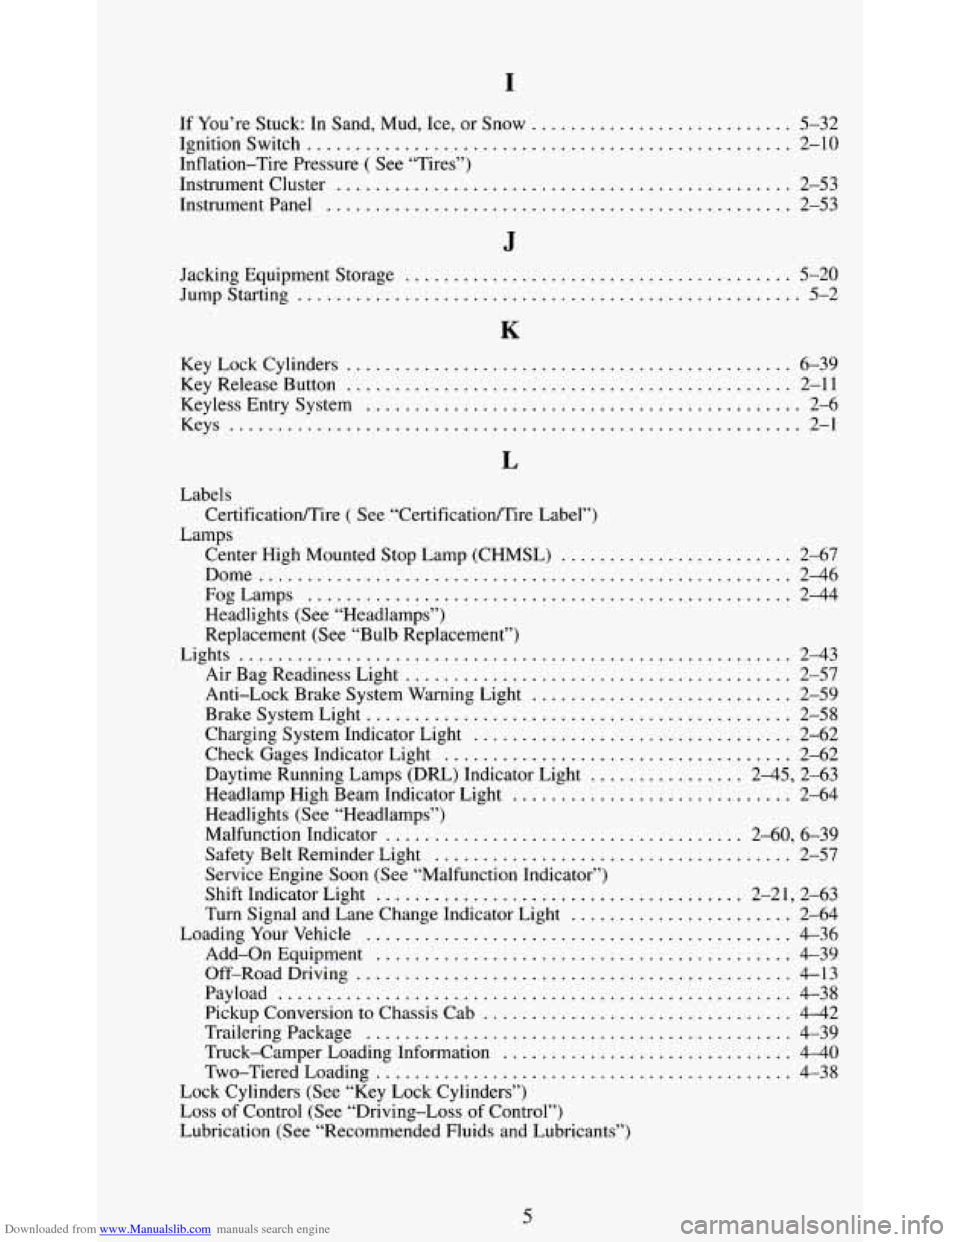
Downloaded from www.Manualslib.com manuals search engine I
If You’re Stuck: In Sand. Mud. Ice. or Snow ........................... 5-32
Ignitionswitch
.................................................. 2-10
Inflation-Tire Pressure
( See “Tires”)
Instrument Cluster
............................................... 2-53
Instrumentpanel
................................................ 2-53
Jacking Equipment Storage
........................................ 5-20
Jumpstarting .................................................... 5-2
K
KeyLockCylinders .............................................. 6-39
Key Release Button
.............................................. 2-11
Keyless Entry System
............................................. 2-6
Keys
........................................................... 2-1
L
Labels
Lamps Certificatioflire
( See “Certification/Tire Label”)
Center High Mounted
Stop Lamp (CHMSL) ........................ 2-67
Dome
....................................................... 2-46
FogLamps
.................................................. 2-44
Headlights (See “Headlamps”)
Replacement
(See “Bulb Replacement”)
Lights
......................................................... 2-43
Air Bag Readiness Light
........................................ 2-57
Anti-Lock Brake System Warning Light
........................... 2-59
BrakeSystemLight
............................................ 2-58
Charging System Indicator Light
................................. 2-62
Check Gages Indicator Light
.................................... 2-62
Daytime Running Lamps (DRL) Indicator Light
................ 2-45. 2-63
Headlamp High Beam Indicator Light
............................. 2-64
Headlights (See “Headlamps”)
Malfunction Indicator
..................................... 2-60. 6-39
Safety Belt Reminder Light
..................................... 2-57
Service Engine Soon (See “Malfunction Indicator”) Shift Indicator Light
...................................... 2-21. 2-63
Turn Signal and Lane Change Indicator Light
....................... 2-64
Loading Your Vehicle
............................................ 4-36
Add-on Equipment
........................................... 4-39
Off-Road Driving
............................................. 4-13
Payload ..................................................... 4-38
Pickup Conversion to Chassis Cab
................................ 4-42
TraileringPackage
............................................ 4-39
Truck-Camper Loading Information
.............................. 440
Two-Tiered Loading ........................................... 4-38
Lock Cylinders (See “Key Lock Cylinders”)
Loss of Control (See “Driving-Loss of Control”)
Lubrication (See “Recommended Fluids and Lubricants”)
5
Page 349 of 354
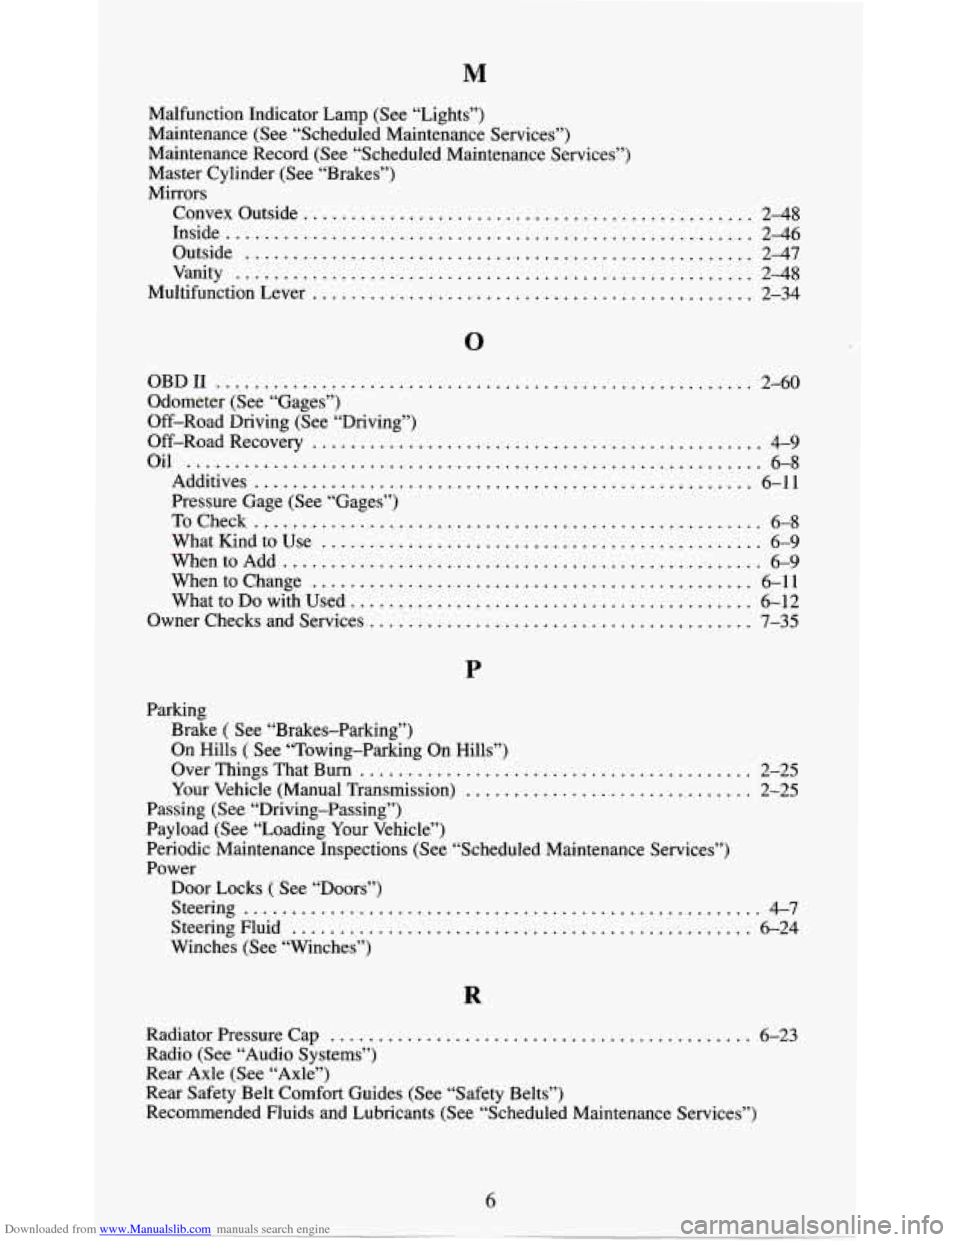
Downloaded from www.Manualslib.com manuals search engine M
Malfunction Indicator Lamp (See “Lights”)
Maintenance (See “Scheduled Maintenance Services’’)
Maintenance Record (See “Scheduled Maintenance Services”)
Master Cylinder (See “Brakes”)
Mirrors
Convexoutside
............................................... 2-48
Inside
....................................................... 2-46
Outside
..................................................... 2-47
Vanity ...................................................... 2-48
Multifunction Lever
.............................................. 2-34
OBDII ........................................................ 2-60
Odometer (See “Gages”)
Off-Road Driving (See “Driving”)
Oil
............................................................ 6-8
Additives
.................................................... 6-11
Pressure Gage (See “Gages”)
ToCheck
..................................................... 6-8
WhatKindtoUse .............................................. 6-9
WhentoAdd .................................................. 6-9
Whentochange .............................................. 6-11
What to Do with Used
.......................................... 6-12
Owner Checks and Services
........................................ 7-35
Off-Road Recovery ............................................... 4-9
P
Parking
Brake
( See “Brakes-Parking”)
On Hills
( See “Towing-Parking On Hills”)
Over Things That
Burn ......................................... 2-25
Your Vehicle (Manual Transmission)
............................ 2-25
Passing (See “Driving-Passing”)
Payload (See “Loading
Your Vehicle”)
Periodic Maintenance Inspections (See “Scheduled Maintenance Services”)
Power
Door Locks
( See “Doors”)
Steering
...................................................... 4-7
SteeringFluid ................................................ 6-24
Winches (See “Winches”)
Radiator Pressure Cap
............................................ 6-23
Radio (See “Audio Systems”)
Rear Axle (See “Axle”)
Rear Safety Belt Comfort Guides (See “Safety Belts”)
Recommended Fluids and Lubricants (See “Scheduled Maintenance Services”)