radiator cap CHEVROLET S10 2004 Owners Manual
[x] Cancel search | Manufacturer: CHEVROLET, Model Year: 2004, Model line: S10, Model: CHEVROLET S10 2004Pages: 422, PDF Size: 4.16 MB
Page 245 of 422
Service............................................................5-3
Doing Your Own Service Work.........................5-3
Adding Equipment to the Outside of Your
Vehicle......................................................5-4
Fuel................................................................5-4
Gasoline Octane............................................5-4
Gasoline Specifications....................................5-5
California Fuel...............................................5-5
Additives.......................................................5-6
Fuels in Foreign Countries...............................5-6
Filling Your Tank............................................5-7
Filling a Portable Fuel Container.......................5-9
Checking Things Under
the Hood....................................................5-10
Hood Release..............................................5-10
Engine Compartment Overview.......................5-12
Engine Oil...................................................5-13
Engine Air Cleaner/Filter................................5-18
Automatic Transmission Fluid.........................5-20
Engine Coolant.............................................5-23Radiator Pressure Cap..................................5-26
Engine Overheating.......................................5-27
Cooling System............................................5-29
Engine Fan Noise.........................................5-36
Power Steering Fluid.....................................5-36
Windshield Washer Fluid................................5-38
Brakes........................................................5-39
Battery........................................................5-43
Jump Starting...............................................5-44
Rear Axle.......................................................5-49
Four-Wheel Drive............................................5-50
Front Axle......................................................5-51
Bulb Replacement..........................................5-52
Halogen Bulbs..............................................5-52
Headlamps..................................................5-53
One-Piece Front Turn Signal Lamps................5-55
Two-Piece Front Turn Signal Lamps................5-56
Center High-Mounted Stoplamp (CHMSL).........5-57
Taillamps.....................................................5-58
Replacement Bulbs.......................................5-58
Section 5 Service and Appearance Care
5-1
Page 270 of 422
Adding Coolant
If you need more coolant, add the proper DEX-COOL®
coolant mixtureat the coolant recovery tank.
{CAUTION:
Turning the radiator pressure cap when the
engine and radiator are hot can allow steam
and scalding liquids to blow out and burn you
badly. With the coolant recovery tank, you will
almost never have to add coolant at the
radiator. Never turn the radiator pressure
cap — even a little — when the engine and
radiator are hot.
Add coolant mixture at the recovery tank, but be careful
not to spill it.
{CAUTION:
You can be burned if you spill coolant on hot
engine parts. Coolant contains ethylene glycol,
and it will burn if the engine parts are hot
enough. Do not spill coolant on a hot engine.
Occasionally check the coolant level in the radiator. For
information on how to add coolant to the radiator,
seeCooling System on page 5-29.
Radiator Pressure Cap
Notice:If the pressure cap is not tightly installed,
coolant loss and possible engine damage may
occur. Be sure the cap is properly and tightly
secured.
5-26
Page 273 of 422
Cooling System
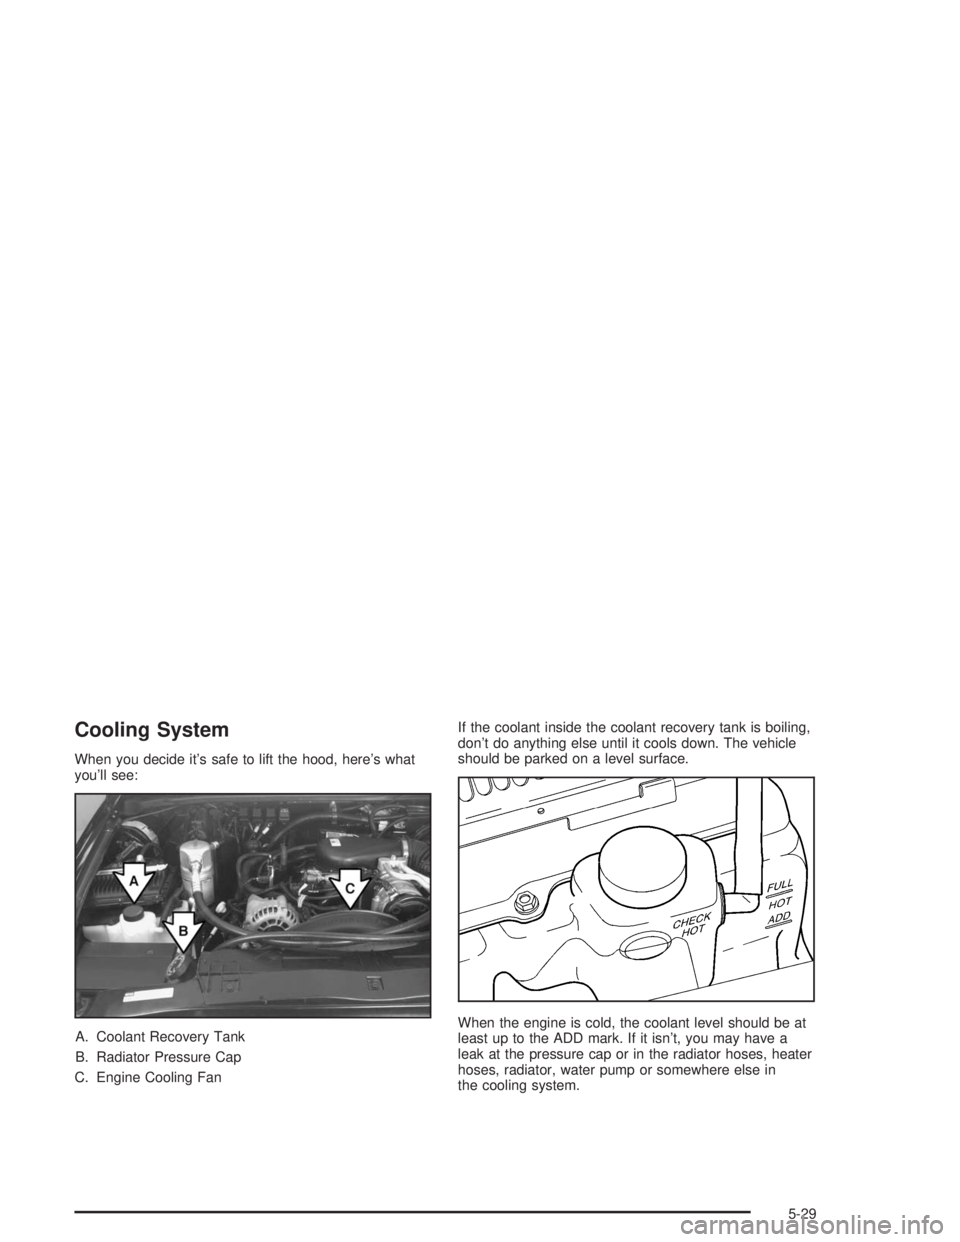
When you decide it’s safe to lift the hood, here’s what
you’ll see:
A. Coolant Recovery Tank
B. Radiator Pressure Cap
C. Engine Cooling FanIf the coolant inside the coolant recovery tank is boiling,
don’t do anything else until it cools down. The vehicle
should be parked on a level surface.
When the engine is cold, the coolant level should be at
least up to the ADD mark. If it isn’t, you may have a
leak at the pressure cap or in the radiator hoses, heater
hoses, radiator, water pump or somewhere else in
the cooling system.
5-29
Page 276 of 422
If the overheat warning continues, there’s one more
thing you can try. You can add the proper mixture
directly to the radiator, but be sure the cooling system is
cool before you do it.
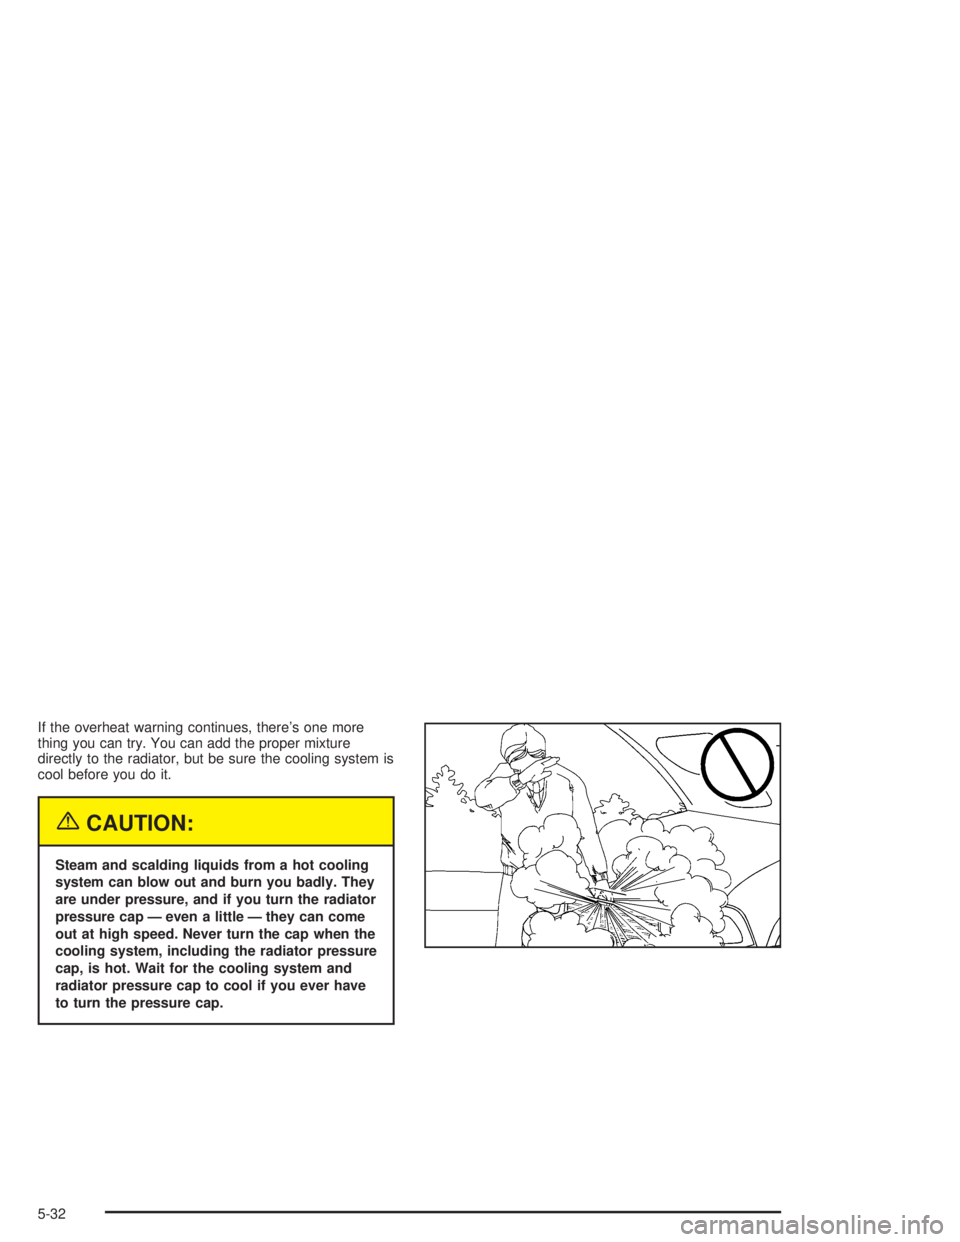
{CAUTION:
Steam and scalding liquids from a hot cooling
system can blow out and burn you badly. They
are under pressure, and if you turn the radiator
pressure cap — even a little — they can come
out at high speed. Never turn the cap when the
cooling system, including the radiator pressure
cap, is hot. Wait for the cooling system and
radiator pressure cap to cool if you ever have
to turn the pressure cap.
5-32
Page 277 of 422
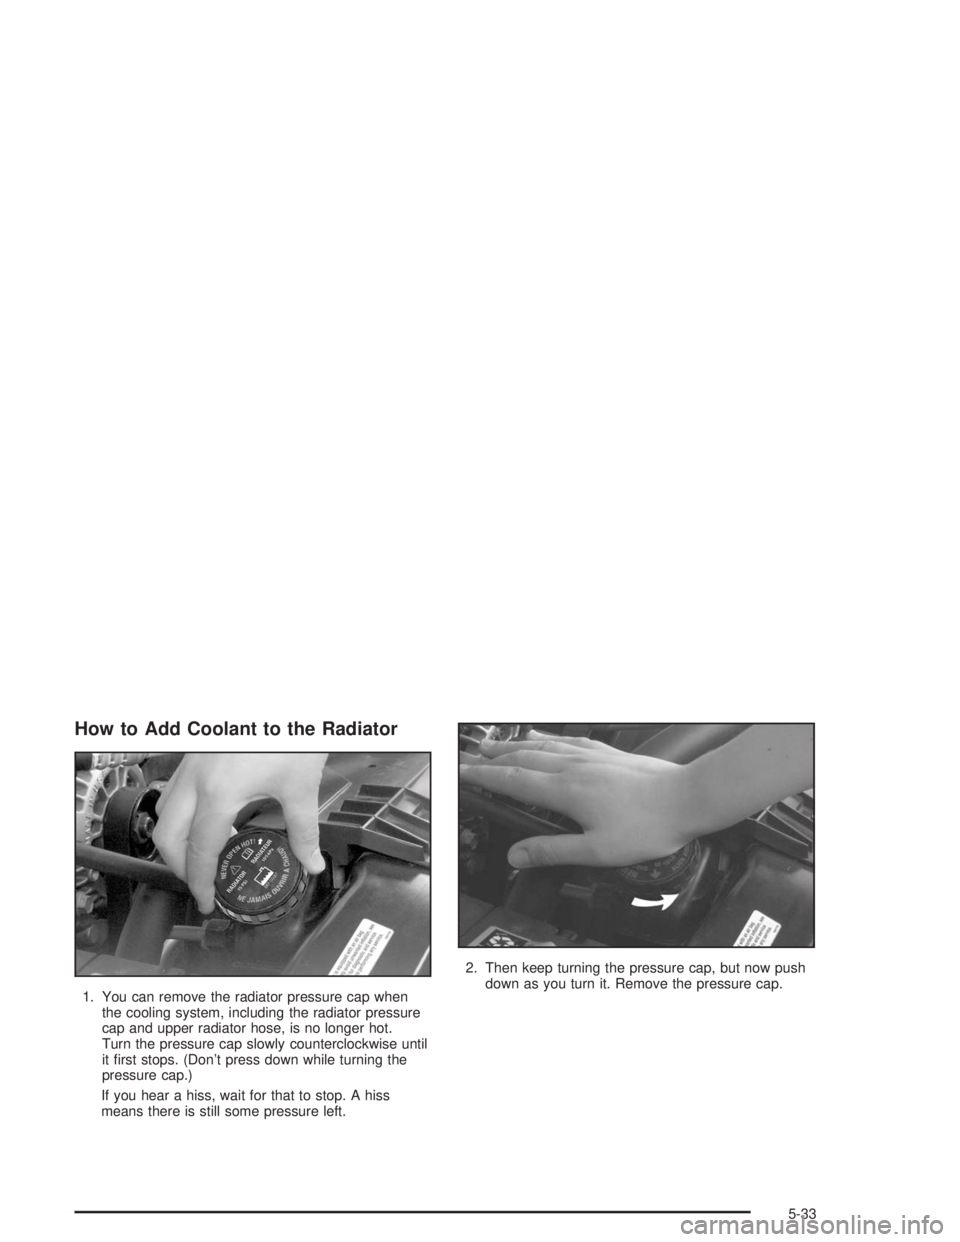
How to Add Coolant to the Radiator
1. You can remove the radiator pressure cap when
the cooling system, including the radiator pressure
cap and upper radiator hose, is no longer hot.
Turn the pressure cap slowly counterclockwise until
it first stops. (Don’t press down while turning the
pressure cap.)
If you hear a hiss, wait for that to stop. A hiss
means there is still some pressure left.2. Then keep turning the pressure cap, but now push
down as you turn it. Remove the pressure cap.
5-33
Page 278 of 422
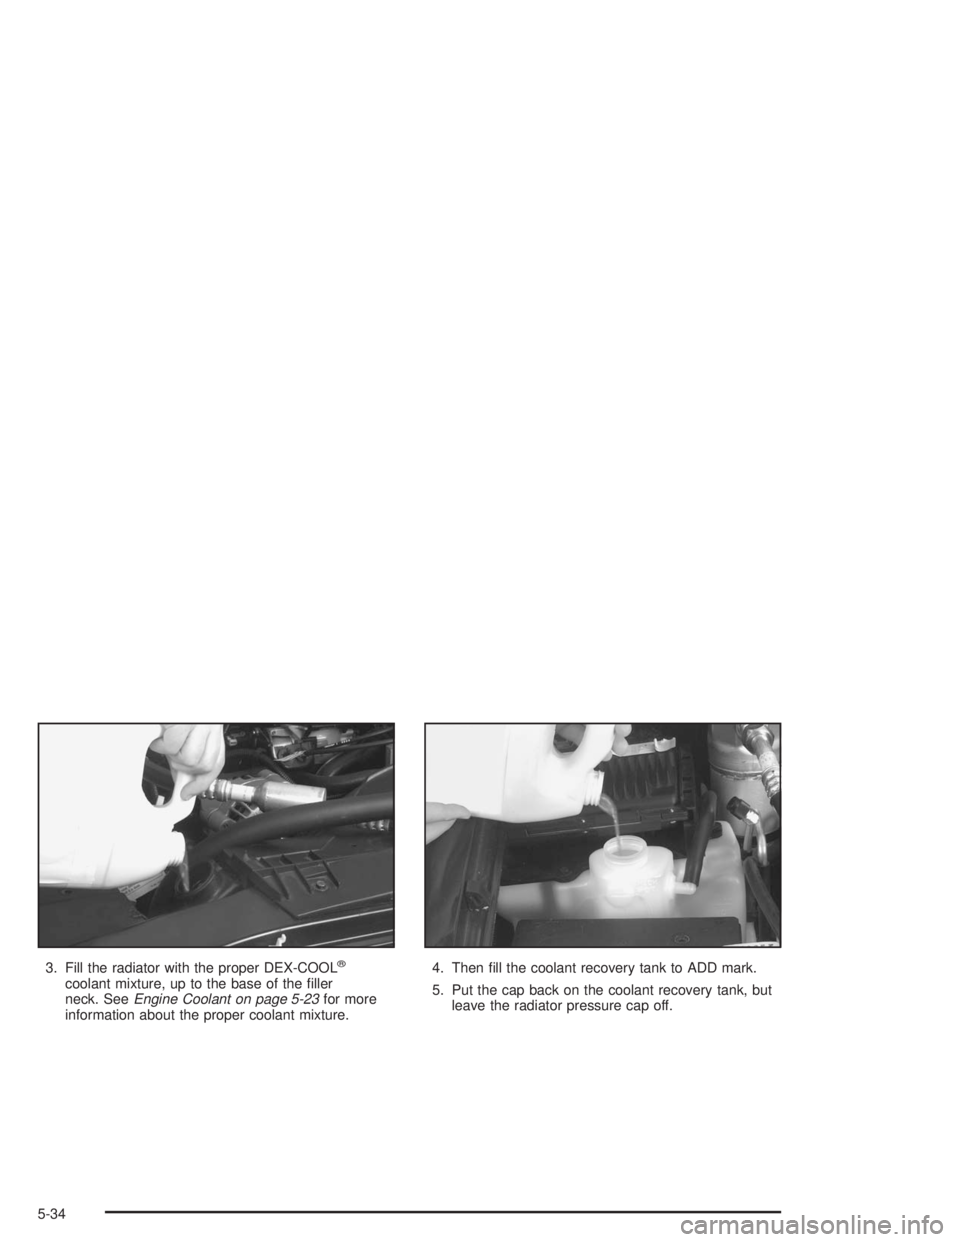
3. Fill the radiator with the proper DEX-COOL®
coolant mixture, up to the base of the filler
neck. SeeEngine Coolant on page 5-23for more
information about the proper coolant mixture.4. Then fill the coolant recovery tank to ADD mark.
5. Put the cap back on the coolant recovery tank, but
leave the radiator pressure cap off.
5-34
Page 279 of 422
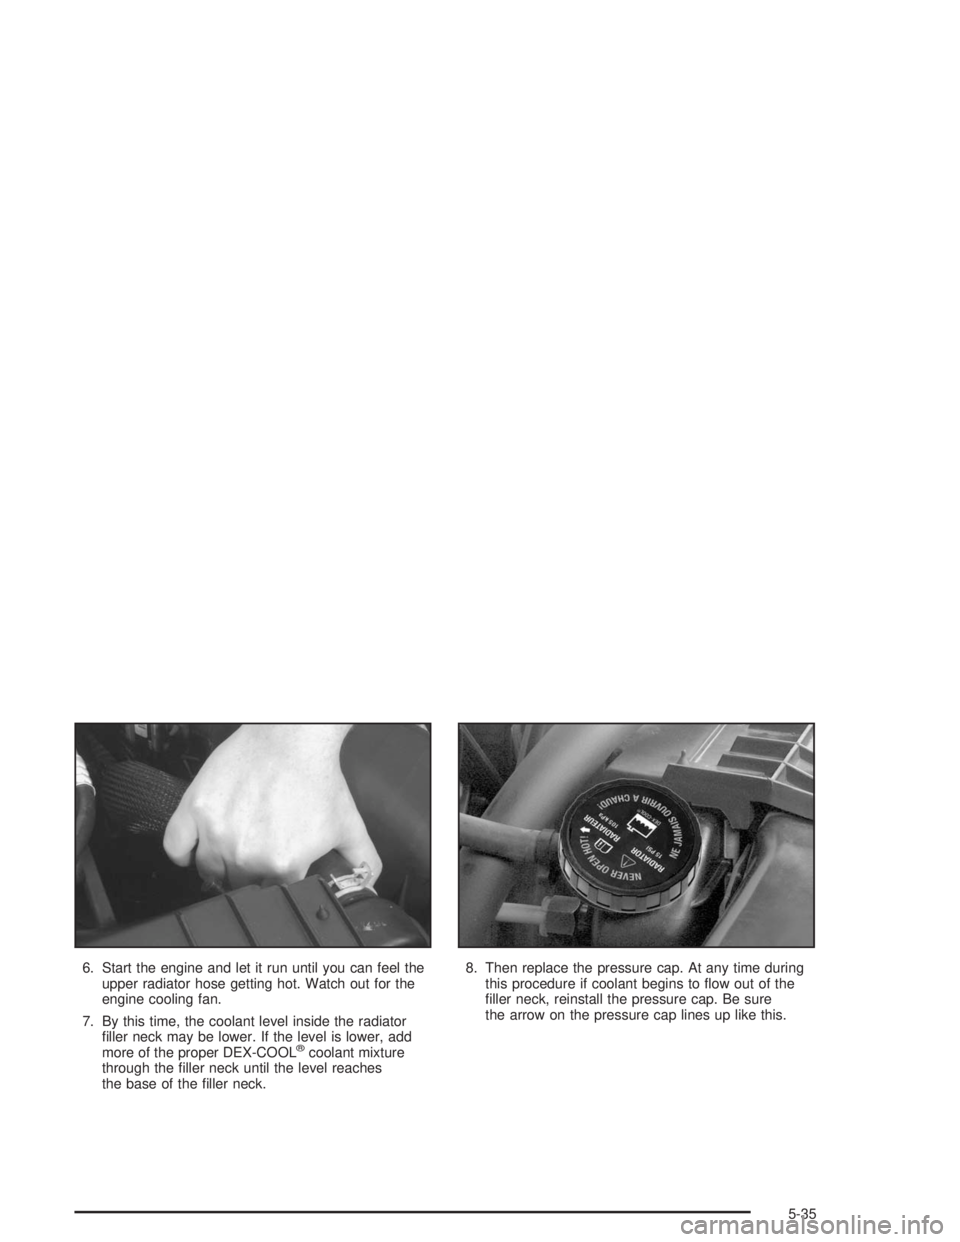
6. Start the engine and let it run until you can feel the
upper radiator hose getting hot. Watch out for the
engine cooling fan.
7. By this time, the coolant level inside the radiator
filler neck may be lower. If the level is lower, add
more of the proper DEX-COOL
®coolant mixture
through the filler neck until the level reaches
the base of the filler neck.8. Then replace the pressure cap. At any time during
this procedure if coolant begins to flow out of the
filler neck, reinstall the pressure cap. Be sure
the arrow on the pressure cap lines up like this.
5-35
Page 373 of 422

99,000 Miles (165 000 km)
❑Change engine oil and filter (or every 3 months,
whichever occurs first).An Emission Control Service.
❑Lubricate chassis components (or every 3 months,
whichever occurs first).(See footnote #.)
❑Check rear/front axle fluid level and add fluid as
needed. Check constant velocity joints and axle seals
for leaking.(See footnote **.)
100,000 Miles (166 000 km)
❑Inspect spark plug wires.An Emission Control
Service.
❑Replace spark plugs.An Emission Control Service.
❑If you have not used your vehicle under severe
service conditions listed previously and, therefore,
have not changed your automatic transmission fluid,
change both the fluid and filter.
❑Inspect Positive Crankcase Ventilation (PCV) valve.
An Emission Control Service.
150,000 Miles (240 000 km)
❑Drain, flush and refill cooling system (or every
60 months since last service, whichever occurs first).
SeeEngine Coolant on page 5-23for what to use.
Inspect hoses. Clean radiator, condenser, pressure
cap and neck. Pressure test cooling system and
pressure cap.An Emission Control Service.
❑Inspect engine accessory drive belt.An Emission
Control Service.
Long Trip/Highway Scheduled
Maintenance
The services shown in this schedule up to 100,000 miles
(166 000 km) should be repeated after 100,000 miles
(166 000 km) at the same intervals for the life of
this vehicle. The services shown at 150,000 miles
(240 000 km) should be repeated at the same interval
after 150,000 miles (240 000 km) for the life of this
vehicle.
SeePart B: Owner Checks and Services on page 6-25
andPart C: Periodic Maintenance Inspections on
page 6-30.
6-17
Page 380 of 422

❑Replace fuel filter.An Emission Control Service.
(See footnote †.)
❑Replace engine air cleaner filter. SeeEngine Air
Cleaner/Filter on page 5-18for more information.
An Emission Control Service.
❑Rotate tires. SeeTire Inspection and Rotation on
page 5-74for proper rotation pattern and additional
information.(See footnote +.)
97,500 Miles (162 500 km)
❑Change engine oil and filter (or every 12 months,
whichever occurs first).An Emission Control
Service.
❑Lubricate chassis components (or every 12 months,
whichever occurs first).(See footnote #.)
❑Check rear/front axle fluid level and add fluid as
needed. Check constant velocity joints and axle seals
for leaking.(See footnote **.)
❑Rotate tires. SeeTire Inspection and Rotation on
page 5-74for proper rotation pattern and additional
information.(See footnote +.)
100,000 Miles (166 000 km)
❑Inspect spark plug wires.An Emission Control
Service.
❑Replace spark plugs.An Emission Control Service.
❑If you have not used your vehicle under severe
service conditions listed previously and, therefore,
have not changed your automatic transmission fluid,
change both the fluid and filter.
❑Inspect Positive Crankcase Ventilation (PCV) valve.
An Emission Control Service.
150,000 Miles (240 000 km)
❑Drain, flush and refill cooling system (or every
60 months since last service, whichever occurs first).
SeeEngine Coolant on page 5-23for what to use.
Inspect hoses. Clean radiator, condenser, pressure
cap and neck. Pressure test the cooling system
and pressure cap.An Emission Control Service.
❑Inspect engine accessory drive belt.An Emission
Control Service.
6-24
Page 386 of 422
Part C: Periodic Maintenance
Inspections
Listed in this part are inspections and services which
should be performed at least twice a year (for instance,
each spring and fall).You should let your dealer’s
service department do these jobs. Make sure any
necessary repairs are completed at once.
Proper procedures to perform these services may be
found in a service manual. SeeService Publications
Ordering Information on page 7-11.
Steering, Suspension and Front
Drive Axle Boot and Seal Inspection
Inspect the front and rear suspension and steering
system for damaged, loose or missing parts, signs of
wear or lack of lubrication. Inspect the power steering
lines and hoses for proper hook-up, binding, leaks,
cracks, chafing, etc. Clean and then inspect the drive
axle boot seals for damage, tears or leakage. Replace
seals if necessary.
Exhaust System Inspection
Inspect the complete exhaust system. Inspect the body
near the exhaust system. Look for broken, damaged,
missing or out-of-position parts as well as open seams,
holes, loose connections or other conditions which
could cause a heat build-up in the floor pan or could let
exhaust fumes into the vehicle. SeeEngine Exhaust
on page 2-29.
Fuel System Inspection
Inspect the complete fuel system for damage or leaks.
Engine Cooling System Inspection
Inspect the hoses and have them replaced if they
are cracked, swollen or deteriorated. Inspect all pipes,
fittings and clamps; replace as needed. Clean the
outside of the radiator and air conditioning condenser.
To help ensure proper operation, a pressure test of
the cooling system and pressure cap is recommended
at least once a year.
6-30