CHEVROLET SILVERADO 1500 2013 Owners Manual
Manufacturer: CHEVROLET, Model Year: 2013, Model line: SILVERADO 1500, Model: CHEVROLET SILVERADO 1500 2013Pages: 542, PDF Size: 7.92 MB
Page 361 of 542
Black plate (93,1)Chevrolet Silverado Owner Manual - 2013 - crc2 - 8/13/12
Driving and Operating 9-93
Weight of the Trailering
Combination
It is important that the combination
of the tow vehicle and trailer does
not exceed any of its weight ratings
—GCWR, GVWR, RGAWR, Trailer
Weight Rating, or Tongue Weight.
The only way to be sure it is not
exceeding any of these ratings is to
weigh the tow vehicle and trailer
combination, fully loaded for the trip,
getting individual weights for each of
these items.
Towing Equipment
Hitches
The correct hitch equipment helps
maintain combination control. Many
trailers can be towed with a
weight-carrying hitch which simply
features a coupler latched to the
hitch ball, or a tow eye latched to a
pintle hook. Other trailers may
require a weight-distributing hitch
that uses spring bars to distribute
the trailer tongue weight among the
two vehicle and trailer axles. Fifth-wheel and gooseneck hitches
may also be used. See
“Weight of
the Trailer Tongue” underTrailer
Towing on page 9‑77 for rating limits
with various hitch types.
If a step-bumper hitch will be used,
the bumper could be damaged in
sharp turns. Make sure there
is ample room when turning to avoid
contact between the trailer and the
bumper.
Consider using sway controls with
any trailer. Ask a trailering
professional about sway controls or
refer to the trailer manufacturer's
recommendations and instructions.Weight-Distributing Hitch and
Adjustment
A weight distributing hitch may be
useful with some trailers. Use the
following guidelines to determine if a
weight distributing hitch should
be used.
Page 362 of 542
Black plate (94,1)Chevrolet Silverado Owner Manual - 2013 - crc2 - 8/13/12
9-94 Driving and Operating
Vehicle SeriesTrailer WeightWeight Distributing Hitch
Usage Hitch Distribution
1500 Up to 7000 lbsOptionalRefer to trailer
manufacturer ’s
recommendation
1500 7001 to 9900 lbsRequired50%
1500 Over 9900 lbsRequired100%
2500/3500 Up to 18000 lbsOptionalRefer to trailer
manufacturer ’s
recommendation
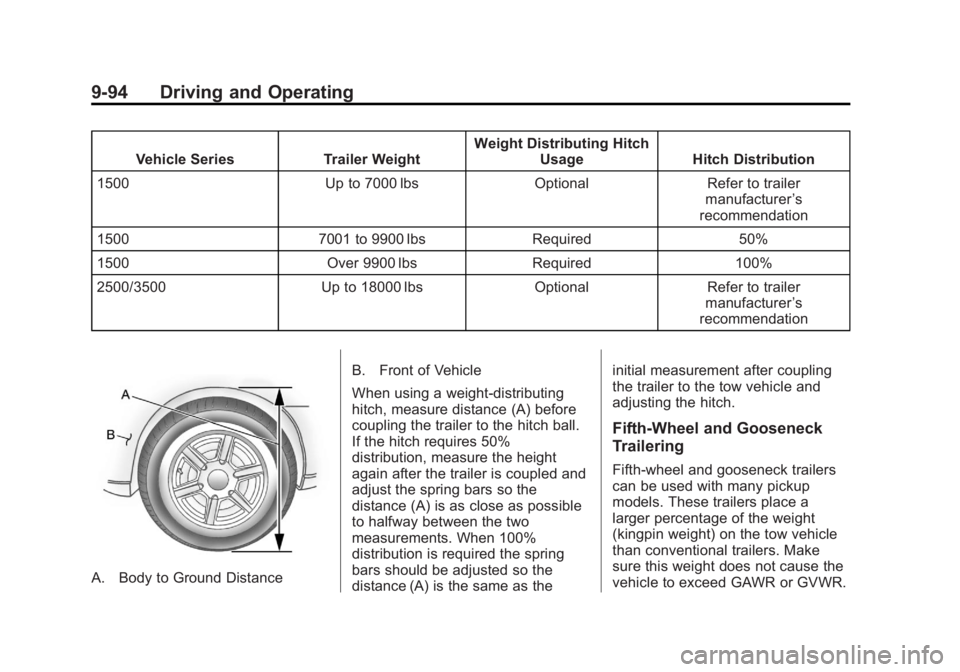
A. Body to Ground Distance B. Front of Vehicle
When using a weight-distributing
hitch, measure distance (A) before
coupling the trailer to the hitch ball.
If the hitch requires 50%
distribution, measure the height
again after the trailer is coupled and
adjust the spring bars so the
distance (A) is as close as possible
to halfway between the two
measurements. When 100%
distribution is required the spring
bars should be adjusted so the
distance (A) is the same as theinitial measurement after coupling
the trailer to the tow vehicle and
adjusting the hitch.
Fifth-Wheel and Gooseneck
Trailering
Fifth-wheel and gooseneck trailers
can be used with many pickup
models. These trailers place a
larger percentage of the weight
(kingpin weight) on the tow vehicle
than conventional trailers. Make
sure this weight does not cause the
vehicle to exceed GAWR or GVWR.
Page 363 of 542
Black plate (95,1)Chevrolet Silverado Owner Manual - 2013 - crc2 - 8/13/12
Driving and Operating 9-95
Fifth-wheel or gooseneck kingpin
weight should be 15 to 25 percent of
the trailer weight up to the maximum
amount specified in the trailering
chart for the vehicle. See“Weight of
the Trailer” underTrailer Towing on
page 9‑77 for more information.
The hitch should be located in the
pickup bed so that its centerline is
over or slightly in front of the rear
axle. Take care that it is not so far
forward that it will contact the back
of the cab in sharp turns. This is
especially important for short box
pickups. Trailer pin box extensions
and sliding fifth-wheel hitch
assemblies can help this condition.
There should be at least six inches
of clearance between the top of the
pickup box and the bottom of the
trailer shelf that extends over
the box.
Make sure the hitch is attached to
the tow vehicle frame rails. Do not
use the pickup box for support.Safety Chains
Always attach chains between the
vehicle and the trailer. Cross the
safety chains under the tongue of
the trailer to help prevent the tongue
from contacting the road if it
becomes separated from the hitch.
Instructions about safety chains
may be provided by the hitch
manufacturer or by the trailer
manufacturer. If the trailer being
towed weighs up to 2 271 kg
(5,000 lbs) with a factory-installed
step bumper, safety chains may be
attached to the attaching points on
the bumper; otherwise, safety
chains should be attached to holes
on the trailer hitch platform. Always
leave just enough slack so the
combination can turn. Never allow
safety chains to drag on the ground.
Trailer Brakes
A loaded trailer that weighs more
than 900 kg (2,000 lbs) needs to
have its own brake system that is
adequate for the weight of the
trailer. Be sure to read and follow the instructions for the trailer brakes
so they are installed, adjusted, and
maintained properly.
Do not tap into the vehicle's
hydraulic brake system.
Auxiliary Battery
The auxiliary battery provision can
be used to supply electrical power
to additional equipment that may be
added, such as a slide-in camper.
If the vehicle has this provision, this
relay will be located on the driver
side of the vehicle, next to the
underhood electrical center.
Be sure to follow the proper
installation instructions included with
any electrical equipment that is
installed.
Notice:
Leaving electrical
equipment on for extended
periods will drain the battery.
Always turn off electrical
equipment when not in use and
do not use equipment that
Page 364 of 542
Black plate (96,1)Chevrolet Silverado Owner Manual - 2013 - crc2 - 8/13/12
9-96 Driving and Operating
exceeds the maximum amperage
rating of 40 amperes for the
auxiliary battery provision.
Trailer Wiring Harness
The vehicle is equipped with one of
the following wiring harnesses for
towing a trailer or hauling a slide-in
camper.
Basic Trailer Wiring
All regular, extended cab and crew
cab pickups have a seven-wire
trailer towing harness.
For vehicles not equipped with
heavy duty trailering, the harness is
secured to the vehicle's frame
behind the spare tire mount. The
harness requires the installation of a
trailer connector, which is available
through your dealer.
If towing a light-duty trailer with a
standard four-way round pin
connector, an adapter is available
from your dealer.Heavy-DutyTrailer Wiring Harness
Package
For vehicles equipped with heavy
duty trailering, the harness
connector is mounted in the bumper.
The seven-wire harness contains
the following trailer circuits:
.Yellow: Left Stop/Turn Signal
.Dark Green: Right Stop/Turn
Signal
.Brown: Taillamps
.White: Ground
.Light Green: Back-up Lamps
.Red: Battery Feed*
.Dark Blue: Trailer Brake*
*The fuses for these two circuits are
installed in the underhood electrical
center, but the wires are not
connected. They should be
connected by your dealer or a
qualified service center. The fuse
and wire for the ITBC is factory
installed and connected if the
vehicle is equipped with an ITBC.
The fuse for the battery feed is not
required if the vehicle has an
auxiliary battery. If the vehicle does
not have an auxiliary battery, have
your dealer or authorized service
center install the required fuse.
If charging a remote (non-vehicle)
battery, press the Tow/Haul Mode
button, if equipped, located at the
end of the shift lever. This will boost
the vehicle system voltage and
properly charge the battery. If the
trailer is too light for Tow/Haul
Mode, or the vehicle is not equipped
with Tow/Haul, turn on the
Page 365 of 542
Black plate (97,1)Chevrolet Silverado Owner Manual - 2013 - crc2 - 8/13/12
Driving and Operating 9-97
headlamps as a second way to
boost the vehicle system and
charge the battery.
Camper/Fifth-Wheel Trailer Wiring
Package
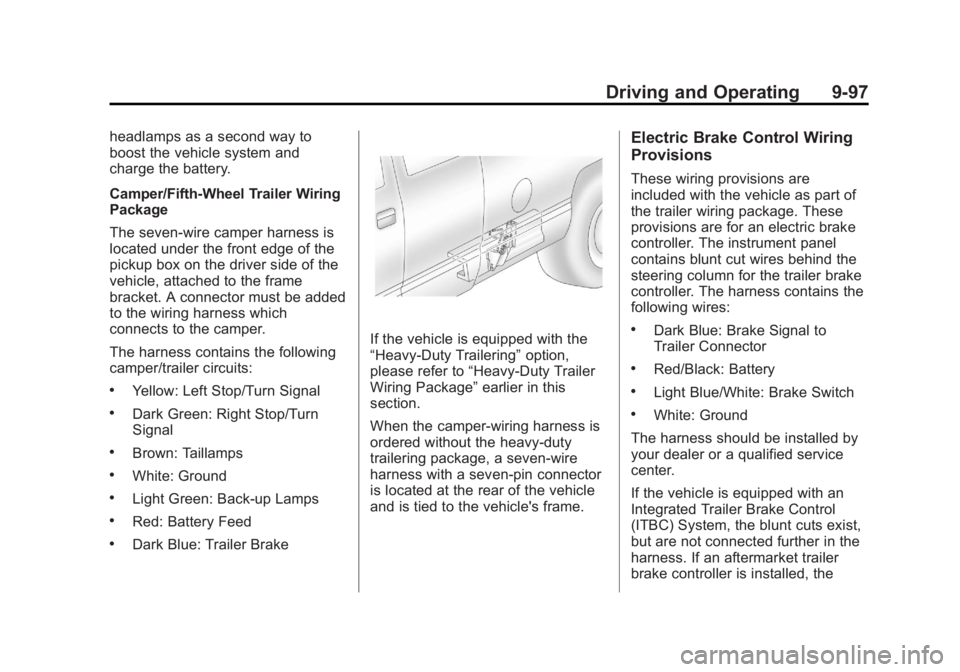
The seven-wire camper harness is
located under the front edge of the
pickup box on the driver side of the
vehicle, attached to the frame
bracket. A connector must be added
to the wiring harness which
connects to the camper.
The harness contains the following
camper/trailer circuits:
.Yellow: Left Stop/Turn Signal
.Dark Green: Right Stop/Turn
Signal
.Brown: Taillamps
.White: Ground
.Light Green: Back-up Lamps
.Red: Battery Feed
.Dark Blue: Trailer Brake
If the vehicle is equipped with the
“Heavy-Duty Trailering”option,
please refer to “Heavy-Duty Trailer
Wiring Package” earlier in this
section.
When the camper-wiring harness is
ordered without the heavy-duty
trailering package, a seven-wire
harness with a seven-pin connector
is located at the rear of the vehicle
and is tied to the vehicle's frame.
Electric Brake Control Wiring
Provisions
These wiring provisions are
included with the vehicle as part of
the trailer wiring package. These
provisions are for an electric brake
controller. The instrument panel
contains blunt cut wires behind the
steering column for the trailer brake
controller. The harness contains the
following wires:
.Dark Blue: Brake Signal to
Trailer Connector
.Red/Black: Battery
.Light Blue/White: Brake Switch
.White: Ground
The harness should be installed by
your dealer or a qualified service
center.
If the vehicle is equipped with an
Integrated Trailer Brake Control
(ITBC) System, the blunt cuts exist,
but are not connected further in the
harness. If an aftermarket trailer
brake controller is installed, the
Page 366 of 542
Black plate (98,1)Chevrolet Silverado Owner Manual - 2013 - crc2 - 8/13/12
9-98 Driving and Operating
ITBC must be disconnected. Do not
power both ITBC and aftermarket
controllers to control the trailer
brakes at the same time.
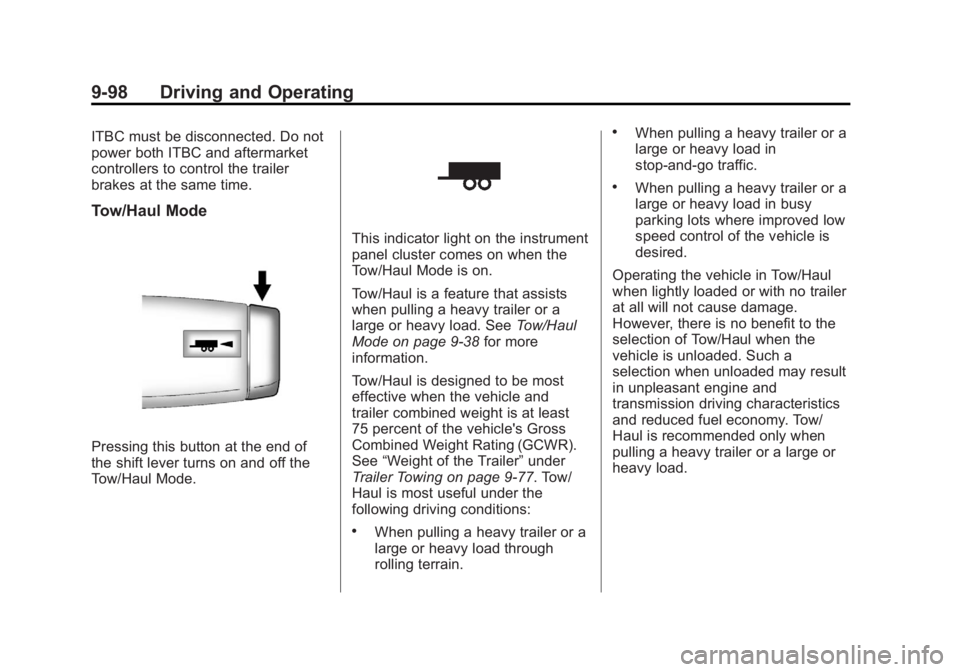
Tow/Haul Mode
Pressing this button at the end of
the shift lever turns on and off the
Tow/Haul Mode.
This indicator light on the instrument
panel cluster comes on when the
Tow/Haul Mode is on.
Tow/Haul is a feature that assists
when pulling a heavy trailer or a
large or heavy load. SeeTow/Haul
Mode on page 9‑38 for more
information.
Tow/Haul is designed to be most
effective when the vehicle and
trailer combined weight is at least
75 percent of the vehicle's Gross
Combined Weight Rating (GCWR).
See “Weight of the Trailer” under
Trailer Towing on page 9‑77. Tow/
Haul is most useful under the
following driving conditions:
.When pulling a heavy trailer or a
large or heavy load through
rolling terrain.
.When pulling a heavy trailer or a
large or heavy load in
stop-and-go traffic.
.When pulling a heavy trailer or a
large or heavy load in busy
parking lots where improved low
speed control of the vehicle is
desired.
Operating the vehicle in Tow/Haul
when lightly loaded or with no trailer
at all will not cause damage.
However, there is no benefit to the
selection of Tow/Haul when the
vehicle is unloaded. Such a
selection when unloaded may result
in unpleasant engine and
transmission driving characteristics
and reduced fuel economy. Tow/
Haul is recommended only when
pulling a heavy trailer or a large or
heavy load.
Page 367 of 542
Black plate (99,1)Chevrolet Silverado Owner Manual - 2013 - crc2 - 8/13/12
Driving and Operating 9-99
Integrated Trailer Brake
Control System
The vehicle may have an Integrated
Trailer Brake Control (ITBC) system
for electric trailer brakes.
This symbol is located on the Trailer
Brake Control Panel on vehicles
with an Integrated Trailer Brake
Control system. The power output to
the trailer brakes is based on the
amount of brake pressure being
applied by the vehicle’s brake
system. This available power output
to the trailer brakes can be adjusted
to a wide range of trailering
situations.
The ITBC system is integrated with
the vehicle’s brake, antilock brake,
and StabiliTrak (if equipped)
systems. In trailering conditions that cause the vehicle’s antilock brake or
StabiliTrak systems to activate,
power sent to the trailer's brakes will
be automatically adjusted to
minimize trailer wheel lock-up. This
does not imply that the trailer has
StabiliTrak.
The vehicle may have a Trailer
Sway Control (TSC) feature. See
Trailer Sway Control (TSC) on
page 9‑104.
The vehicle may have a Hill Start
Assist (HSA) feature. See
Hill Start
Assist (HSA) on page 9‑55.
If the vehicle’s brake, antilock brake,
or StabiliTrak systems are not
functioning properly, the ITBC
system may not be fully functional
or may not function at all. Make sure
all of these systems are fully
operational to ensure full
functionality of the ITBC system.
The ITBC system is powered
through the vehicle's electrical
system. Turning the ignition off will
also turn off the ITBC system. The ITBC system is fully functional only
when the ignition is in ON or
in RUN.
The ITBC system can only be used
with trailers with electric brakes.
{WARNING
Connecting a trailer that has a
surge, air,
or electric-over-hydraulic trailer
brake system may result in
reduced or complete loss of trailer
braking. There may be an
increase in stopping distance or
trailer instability which could
result in personal injury or
damage to the vehicle, trailer,
or other property. Use the ITBC
system only with electric brakes.
Page 368 of 542
Black plate (100,1)Chevrolet Silverado Owner Manual - 2013 - crc2 - 8/13/12
9-100 Driving and Operating
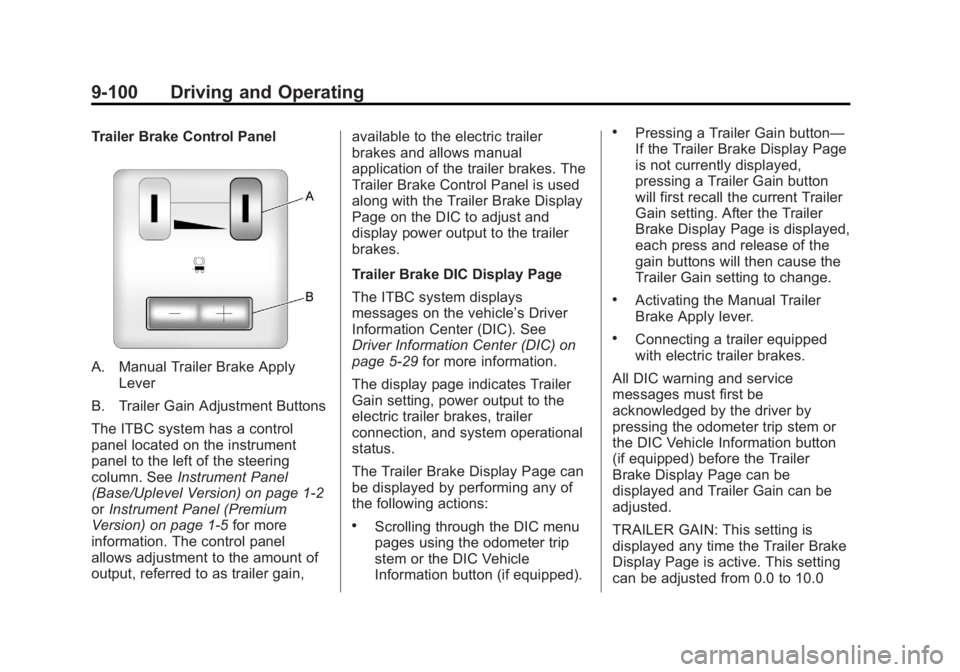
Trailer Brake Control Panel
A. Manual Trailer Brake ApplyLever
B. Trailer Gain Adjustment Buttons
The ITBC system has a control
panel located on the instrument
panel to the left of the steering
column. See Instrument Panel
(Base/Uplevel Version) on page 1‑2
or Instrument Panel (Premium
Version) on page 1‑5 for more
information. The control panel
allows adjustment to the amount of
output, referred to as trailer gain, available to the electric trailer
brakes and allows manual
application of the trailer brakes. The
Trailer Brake Control Panel is used
along with the Trailer Brake Display
Page on the DIC to adjust and
display power output to the trailer
brakes.
Trailer Brake DIC Display Page
The ITBC system displays
messages on the vehicle’s Driver
Information Center (DIC). See
Driver Information Center (DIC) on
page 5‑29
for more information.
The display page indicates Trailer
Gain setting, power output to the
electric trailer brakes, trailer
connection, and system operational
status.
The Trailer Brake Display Page can
be displayed by performing any of
the following actions:
.Scrolling through the DIC menu
pages using the odometer trip
stem or the DIC Vehicle
Information button (if equipped).
.Pressing a Trailer Gain button—
If the Trailer Brake Display Page
is not currently displayed,
pressing a Trailer Gain button
will first recall the current Trailer
Gain setting. After the Trailer
Brake Display Page is displayed,
each press and release of the
gain buttons will then cause the
Trailer Gain setting to change.
.Activating the Manual Trailer
Brake Apply lever.
.Connecting a trailer equipped
with electric trailer brakes.
All DIC warning and service
messages must first be
acknowledged by the driver by
pressing the odometer trip stem or
the DIC Vehicle Information button
(if equipped) before the Trailer
Brake Display Page can be
displayed and Trailer Gain can be
adjusted.
TRAILER GAIN: This setting is
displayed any time the Trailer Brake
Display Page is active. This setting
can be adjusted from 0.0 to 10.0
Page 369 of 542
Black plate (101,1)Chevrolet Silverado Owner Manual - 2013 - crc2 - 8/13/12
Driving and Operating 9-101
with either a trailer connected or
disconnected. To adjust the Trailer
Gain, press one of the Trailer Gain
adjustment buttons located on the
Trailer Brake Control Panel. Press
and hold a gain button to cause the
Trailer Gain to continuously adjust.
To turn the output to the trailer off,
adjust the Trailer Gain setting to
0.0 (zero).
0.0 (zero) gain is the factory default
setting. To properly adjust trailer
gain, see“Trailer Gain Adjustment
Procedure” later in this section.
TRAILER OUTPUT: This is
displayed any time a trailer with
electric brakes is connected. Output
to the electric brakes is based on
the amount of vehicle braking
present and relative to the Trailer
Gain setting. Output is displayed
from 0 to 10 bars for each gain
setting.
Non-hybrid vehicles with Trailer
Sway Control (TSC) or Hill Start
Assist (HSA), output to the electric
trailer brakes may be displayed when the systems are active. See
Trailer Sway Control (TSC) on
page 9‑104
andHill Start Assist
(HSA) on page 9‑55.
The Trailer Output will indicate “- - -
- - -” on the Trailer Brake Display
Page whenever the following occur:
.No trailer is connected
.A trailer without electric brakes
is connected (no DIC message
is displayed)
.A trailer with electric brakes has
become disconnected (a
CHECK TRAILER WIRING
message will also be displayed
on the DIC)
.There is a fault present in the
wiring to the electric trailer
brakes (a CHECK TRAILER
WIRING message will also be
displayed on the DIC)
.There is a fault in the ITBC
system (a SERVICE TRAILER
BRAKE SYSTEM message will
also be displayed in the DIC) Manual Trailer Brake Apply
The Manual Trailer Brake Apply
Lever is located on the Trailer Brake
Control Panel and is used to apply
the trailer
’s electric brakes
independent of the vehicle’s brakes.
This lever is used in the Trailer Gain
Adjustment Procedure to properly
adjust the power output to the trailer
brakes. Sliding the lever to the left
will apply only the trailer brakes.
The power output to the trailer is
indicated in the Trailer Brake
Display Page on the DIC. If the
vehicle’s service brakes are applied
while using the Manual Trailer Brake
Apply Lever, the trailer output power
will be the greater of the two.
The trailer's and the vehicle's brake
lamps will come on when either
vehicle braking or manual trailer
brakes are applied.
Page 370 of 542
Black plate (102,1)Chevrolet Silverado Owner Manual - 2013 - crc2 - 8/13/12
9-102 Driving and Operating
Trailer Gain Adjustment Procedure
Trailer Gain should be set for a
specific trailering condition and must
be adjusted any time vehicle
loading, trailer loading, or road
surface conditions change.
Setting the Trailer Gain properly is
needed for the best trailer stopping
performance. A trailer that is
over-gained may result in locked
trailer brakes. A trailer that is
under-gained may result in not
enough trailer braking. Both of these
conditions may result in poorer
stopping and stability of the vehicle
and trailer.
Use the following procedure to
correctly adjust Trailer Gain for each
towing condition:
1. Make sure the trailer brakes arein proper working condition.
2. Connect a properly loaded trailer to the vehicle and make all
necessary mechanical and electrical connections. See
Vehicle Load Limits on
page 9‑15
for more information.
3. After the electrical connection is made to a trailer equipped with
electric brakes:
.A TRAILER CONNECTED
message will be briefly
displayed on the DIC.
.The Trailer Brake Display
Page will appear on the
DIC showing TRAILER
GAIN and TRAILER
OUTPUT.
.In the Trailer Output display
on the DIC, “- - - - - -”will
disappear if there is no
error present. Connecting a
trailer without electric
brakes will not clear the six
dashed lines.
4. Adjust the Trailer Gain by using the gain adjustment (+ / -)
buttons on the Trailer Brake
Control Panel. 5. Drive the vehicle with the trailer
attached on a level road surface
representative of the towing
condition and free of traffic at
about 32 to 40 km/h (20 to
25 mph) and fully apply the
Manual Trailer Brake Apply
Lever.
Adjusting trailer gain at speeds
lower than 32 to 40 km/h (20 to
25 mph) may result in an
incorrect gain setting.
6. Adjust the Trailer Gain to just below the point of trailer wheel
lock-up, indicated by trailer
wheel squeal or tire smoke when
a trailer wheel locks.
Trailer wheel lock-up may not
occur if towing a heavily loaded
trailer. In this case, adjust the
Trailer Gain to the highest
allowable setting for the towing
condition.