seat adjustment CHEVROLET SILVERADO 1500 2013 Owners Manual
[x] Cancel search | Manufacturer: CHEVROLET, Model Year: 2013, Model line: SILVERADO 1500, Model: CHEVROLET SILVERADO 1500 2013Pages: 542, PDF Size: 7.92 MB
Page 7 of 542
Black plate (1,1)Chevrolet Silverado Owner Manual - 2013 - crc2 - 8/13/12
In Brief 1-1
In Brief
Instrument Panel
Instrument Panel (Base/UplevelVersion) . . . . . . . . . . . . . . . . . . . . . 1-2
Instrument Panel (Premium Version) . . . . . . . . . . . . . . . . . . . . . 1-5
Initial Drive Information
Initial Drive Information . . . . . . . . 1-7
Remote Keyless Entry (RKE)System . . . . . . . . . . . . . . . . . . . . . . 1-7
Remote Vehicle Start . . . . . . . . . 1-8
Door Locks . . . . . . . . . . . . . . . . . . . 1-8
Windows . . . . . . . . . . . . . . . . . . . . . . 1-9
Seat Adjustment . . . . . . . . . . . . . 1-10
Memory Features . . . . . . . . . . . . 1-12
Heated and Ventilated Seats . . . . . . . . . . . . . . . . . . . . . . . 1-12
Head Restraint Adjustment . . . . . . . . . . . . . . . . . 1-13 Safety Belts . . . . . . . . . . . . . . . . . . 1-13
Passenger Sensing
System . . . . . . . . . . . . . . . . . . . . . 1-13
Mirror Adjustment . . . . . . . . . . . . 1-14
Steering Wheel Adjustment . . . . . . . . . . . . . . . . . 1-16
Throttle and Brake Pedal Adjustment . . . . . . . . . . . . . . . . . 1-16
Interior Lighting . . . . . . . . . . . . . . 1-17
Exterior Lighting . . . . . . . . . . . . . 1-17
Windshield Wiper/Washer . . . . 1-18
Climate Controls . . . . . . . . . . . . . 1-18
Transmission . . . . . . . . . . . . . . . . 1-21
Four-Wheel Drive . . . . . . . . . . . . 1-22
Vehicle Features
Radio(s) . . . . . . . . . . . . . . . . . . . . . 1-24
Satellite Radio . . . . . . . . . . . . . . . 1-25
Portable Audio Devices . . . . . . 1-25
Bluetooth
®. . . . . . . . . . . . . . . . . . . 1-26
Steering Wheel Controls . . . . . 1-26
Cruise Control . . . . . . . . . . . . . . . 1-27 Navigation System . . . . . . . . . . . 1-27
Driver Information
Center (DIC) . . . . . . . . . . . . . . . 1-27
Rear Vision Camera (RVC) . . . . . . . . . . . . . 1-28
Ultrasonic Parking Assist . . . . 1-28
Power Outlets . . . . . . . . . . . . . . . 1-29
Universal Remote System . . . 1-29
Sunroof . . . . . . . . . . . . . . . . . . . . . . 1-29
Performance and Maintenance
StabiliTrak®System . . . . . . . . . 1-31
Tire Pressure Monitor . . . . . . . . 1-31
Engine Oil Life System . . . . . . 1-32
Fuel E85 (85% Ethanol) . . . . . 1-32
Driving for Better Fuel Economy . . . . . . . . . . . . . . . . . . . 1-32
Roadside Assistance Program . . . . . . . . . . . . . . . . . . . . 1-33
OnStar
®. . . . . . . . . . . . . . . . . . . . . 1-33
Page 16 of 542
Black plate (10,1)Chevrolet Silverado Owner Manual - 2013 - crc2 - 8/13/12
1-10 In Brief
.Pull the switch to close the
window.
The power sliding rear window
cannot be operated manually.
Seat Adjustment
Manual Seats
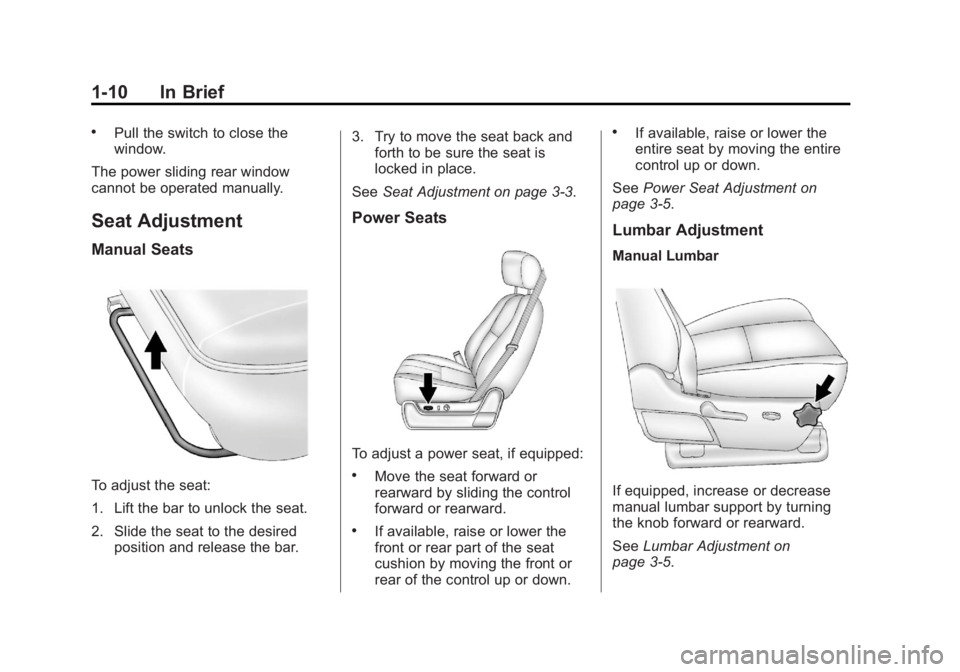
To adjust the seat:
1. Lift the bar to unlock the seat.
2. Slide the seat to the desired position and release the bar. 3. Try to move the seat back and
forth to be sure the seat is
locked in place.
See Seat Adjustment on page 3‑3.
Power Seats
To adjust a power seat, if equipped:
.Move the seat forward or
rearward by sliding the control
forward or rearward.
.If available, raise or lower the
front or rear part of the seat
cushion by moving the front or
rear of the control up or down.
.If available, raise or lower the
entire seat by moving the entire
control up or down.
See Power Seat Adjustment on
page 3‑5.
Lumbar Adjustment
Manual Lumbar
If equipped, increase or decrease
manual lumbar support by turning
the knob forward or rearward.
See Lumbar Adjustment on
page 3‑5.
Page 17 of 542

Black plate (11,1)Chevrolet Silverado Owner Manual - 2013 - crc2 - 8/13/12
In Brief 1-11
Power Lumbar
To adjust the power lumbar support,
if equipped:
.On vehicles with two-way
lumbar, press and hold the top
or bottom of the control to
increase or decrease lumbar
support.
.On vehicles with four-way
lumbar, press and hold the front
or rear of the control to increase
or decrease lumbar support.To raise or lower the height of
the support, press and hold the
top or bottom of the control.
See Lumbar Adjustment on
page 3‑5.
Reclining Seatbacks
Manual Reclining Seatbacks
To recline a manual seatback:
1. Lift the lever. 2. Move the seatback to the
desired position, and then
release the lever to lock the
seatback in place.
3. Push and pull on the seatback to make sure it is locked.
To return the seatback to the upright
position:
1. Lift the lever fully without applying pressure to the
seatback, and the seatback will
return to the upright position.
2. Push and pull on the seatback to make sure it is locked.
See Reclining Seatbacks on
page 3‑6.
Page 19 of 542
Black plate (13,1)Chevrolet Silverado Owner Manual - 2013 - crc2 - 8/13/12
In Brief 1-13
J:Press to heat the seat and
seatback.
Press the button once for the
highest setting. With each press of
the button, the seat will change to
the next lower setting, and then to
the off setting. The lights indicate
three for the highest setting and one
for the lowest.
See Heated and Ventilated Front
Seats on page 3‑9.
Head Restraint
Adjustment
Do not drive until the head restraints
for all occupants are installed and
adjusted properly.
To achieve a comfortable seating
position, change the seatback
recline angle as little as necessary
while keeping the seat and the head
restraint height in the proper
position.
See Head Restraints on page 3‑2
and Seat Adjustment on page 3‑3.
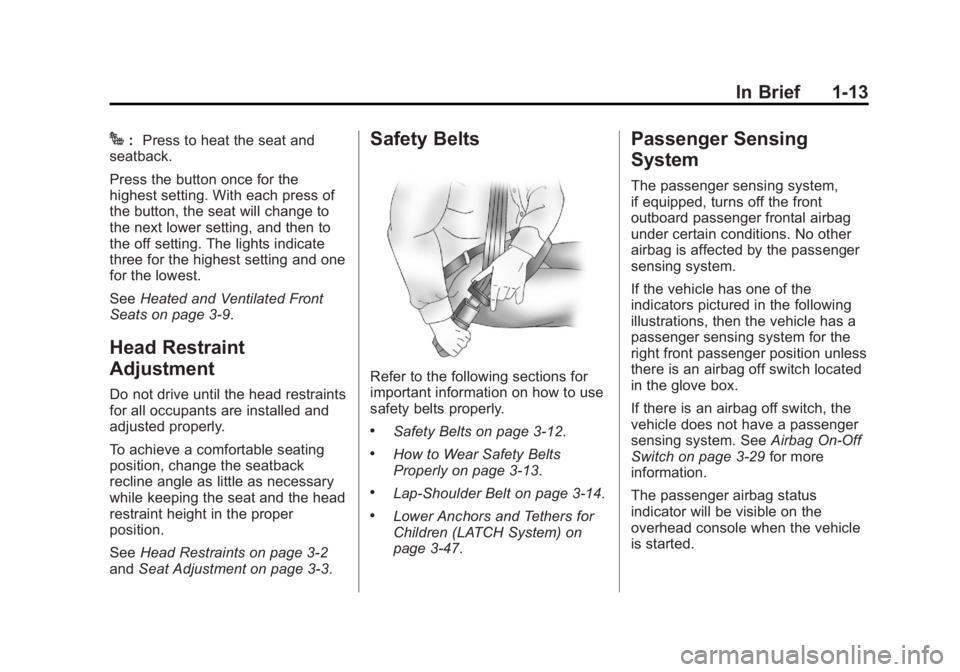
Safety Belts
Refer to the following sections for
important information on how to use
safety belts properly.
.Safety Belts on page 3‑12.
.How to Wear Safety Belts
Properly on page 3‑13.
.Lap-Shoulder Belt on page 3‑14.
.Lower Anchors and Tethers for
Children (LATCH System) on
page 3‑47.
Passenger Sensing
System
The passenger sensing system,
if equipped, turns off the front
outboard passenger frontal airbag
under certain conditions. No other
airbag is affected by the passenger
sensing system.
If the vehicle has one of the
indicators pictured in the following
illustrations, then the vehicle has a
passenger sensing system for the
right front passenger position unless
there is an airbag off switch located
in the glove box.
If there is an airbag off switch, the
vehicle does not have a passenger
sensing system. See Airbag On-Off
Switch on page 3‑29 for more
information.
The passenger airbag status
indicator will be visible on the
overhead console when the vehicle
is started.
Page 20 of 542
Black plate (14,1)Chevrolet Silverado Owner Manual - 2013 - crc2 - 8/13/12
1-14 In Brief
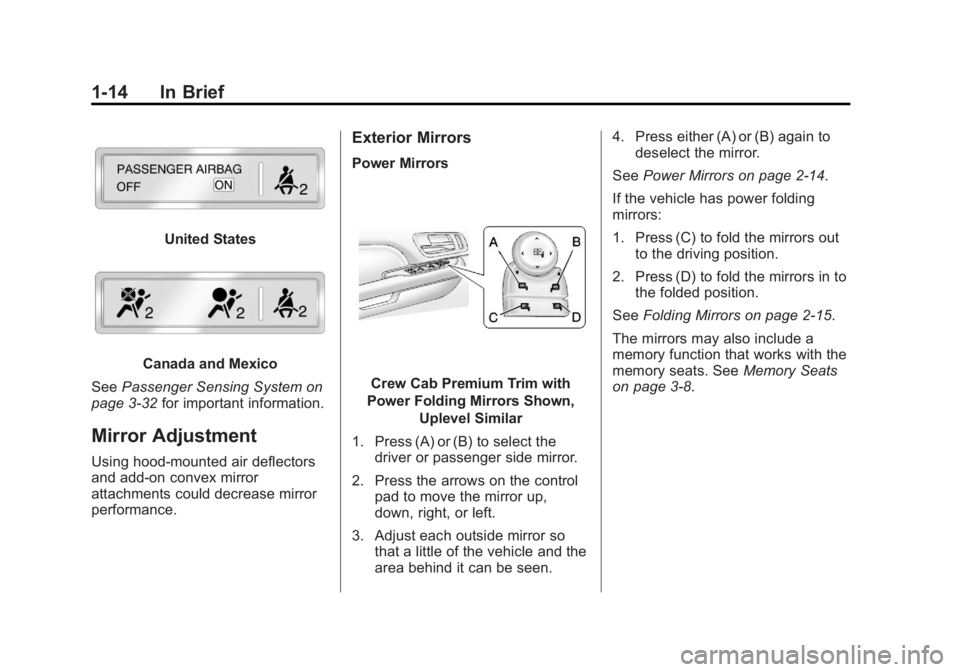
United States
Canada and Mexico
See Passenger Sensing System on
page 3‑32 for important information.
Mirror Adjustment
Using hood-mounted air deflectors
and add-on convex mirror
attachments could decrease mirror
performance.
Exterior Mirrors
Power Mirrors
Crew Cab Premium Trim with
Power Folding Mirrors Shown, Uplevel Similar
1. Press (A) or (B) to select the driver or passenger side mirror.
2. Press the arrows on the control pad to move the mirror up,
down, right, or left.
3. Adjust each outside mirror so that a little of the vehicle and the
area behind it can be seen. 4. Press either (A) or (B) again to
deselect the mirror.
See Power Mirrors on page 2‑14.
If the vehicle has power folding
mirrors:
1. Press (C) to fold the mirrors out to the driving position.
2. Press (D) to fold the mirrors in to the folded position.
See Folding Mirrors on page 2‑15.
The mirrors may also include a
memory function that works with the
memory seats. See Memory Seats
on page 3‑8.
Page 63 of 542
Black plate (1,1)Chevrolet Silverado Owner Manual - 2013 - crc2 - 8/13/12
Seats and Restraints 3-1
Seats and
Restraints
Head Restraints
Head Restraints . . . . . . . . . . . . . . . 3-2
Front Seats
Seat Adjustment . . . . . . . . . . . . . . 3-3
Center Seat . . . . . . . . . . . . . . . . . . . 3-5
Power Seat Adjustment . . . . . . . 3-5
Lumbar Adjustment . . . . . . . . . . . 3-5
Reclining Seatbacks . . . . . . . . . . 3-6
Memory Seats . . . . . . . . . . . . . . . . 3-8
Heated and Ventilated FrontSeats . . . . . . . . . . . . . . . . . . . . . . . . 3-9
Rear Seats
Rear Seats (Extended CabFull Bench) . . . . . . . . . . . . . . . . . 3-11
Rear Seats (All Split Bench and Hybrid Full Bench) . . . . . 3-11
Safety Belts
Safety Belts . . . . . . . . . . . . . . . . . . 3-12
How to Wear Safety BeltsProperly . . . . . . . . . . . . . . . . . . . . 3-13 Lap-Shoulder Belt . . . . . . . . . . . 3-14
Safety Belt Use During
Pregnancy . . . . . . . . . . . . . . . . . . 3-19
Lap Belt . . . . . . . . . . . . . . . . . . . . . 3-19
Safety Belt Extender . . . . . . . . . 3-20
Safety System Check . . . . . . . . 3-20
Safety Belt Care . . . . . . . . . . . . . 3-21
Replacing Safety Belt System Parts after a Crash . . . . . . . . . 3-21
Airbag System
Airbag System . . . . . . . . . . . . . . . 3-22
Where Are the Airbags? . . . . . 3-24
When Should an AirbagInflate? . . . . . . . . . . . . . . . . . . . . . 3-25
What Makes an Airbag Inflate? . . . . . . . . . . . . . . . . . . . . . 3-27
How Does an Airbag Restrain? . . . . . . . . . . . . . . . . . . . 3-27
What Will You See after an Airbag Inflates? . . . . . . . . . . . . 3-28
Airbag On-Off Switch . . . . . . . . 3-29
Passenger Sensing System . . . . . . . . . . . . . . . . . . . . . 3-32
Servicing the Airbag-Equipped Vehicle . . . . . . . . . . . . . . . . . . . . . 3-36 Adding Equipment to the
Airbag-Equipped Vehicle . . . 3-37
Airbag System Check . . . . . . . . 3-38
Replacing Airbag System Parts after a Crash . . . . . . . . . 3-38
Child Restraints
Older Children . . . . . . . . . . . . . . . 3-39
Infants and Young
Children . . . . . . . . . . . . . . . . . . . . 3-41
Child Restraint Systems . . . . . 3-43
Where to Put the Restraint . . . 3-45
Lower Anchors and Tethers for Children (LATCH
System) . . . . . . . . . . . . . . . . . . . . 3-47
Replacing LATCH System Parts After a Crash . . . . . . . . . 3-55
Securing Child Restraints (Rear Seat Position) . . . . . . . . 3-55
Securing Child Restraints (Center Front Seat
Position) . . . . . . . . . . . . . . . . . . . 3-58
Securing Child Restraints (Right Front Seat
Position) . . . . . . . . . . . . . . . . . . . 3-58
Page 65 of 542
Black plate (3,1)Chevrolet Silverado Owner Manual - 2013 - crc2 - 8/13/12
Seats and Restraints 3-3
Rear Seats
The rear seat has adjustable
headrests in the outboard seating
positions.
The height of the headrest can be
adjusted. Pull the headrest up to
raise it. To lower the headrest, push
down on the headrest.
Rear outboard headrests are not
designed to be removed.
Front Seats
Seat Adjustment
{WARNING
You can lose control of the
vehicle if you try to adjust a driver
seat while the vehicle is moving.
Adjust the driver seat only when
the vehicle is not moving.
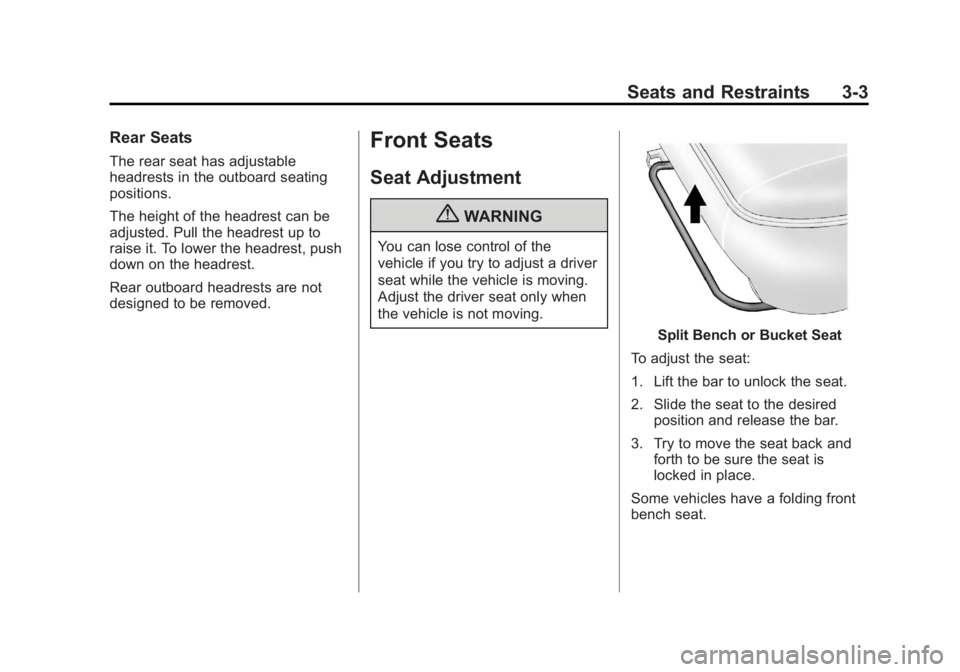
Split Bench or Bucket Seat
To adjust the seat:
1. Lift the bar to unlock the seat.
2. Slide the seat to the desired position and release the bar.
3. Try to move the seat back and forth to be sure the seat is
locked in place.
Some vehicles have a folding front
bench seat.
Page 67 of 542
Black plate (5,1)Chevrolet Silverado Owner Manual - 2013 - crc2 - 8/13/12
Seats and Restraints 3-5
Reverse the steps to raise the
seatback. Push and pull on the
seatback to make sure the seatback
is locked in the upright position
before driving. Make sure the safety
belts are not twisted or caught in the
seatback.
Center Seat
If equipped, the center front
seatback doubles as an armrest and
cupholder/storage area for the driver
and passenger when the center
front seat is not used. Do not use it
as a seating position when the
seatback is folded down.
Power Seat Adjustment
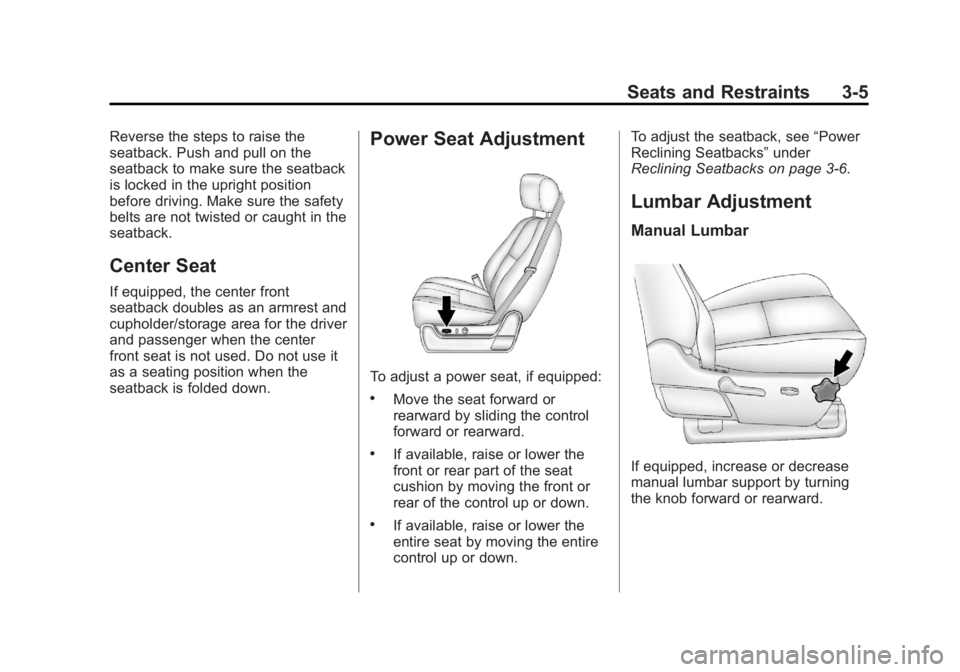
To adjust a power seat, if equipped:
.Move the seat forward or
rearward by sliding the control
forward or rearward.
.If available, raise or lower the
front or rear part of the seat
cushion by moving the front or
rear of the control up or down.
.If available, raise or lower the
entire seat by moving the entire
control up or down.To adjust the seatback, see
“Power
Reclining Seatbacks” under
Reclining Seatbacks on page 3‑6.
Lumbar Adjustment
Manual Lumbar
If equipped, increase or decrease
manual lumbar support by turning
the knob forward or rearward.
Page 78 of 542
Black plate (16,1)Chevrolet Silverado Owner Manual - 2013 - crc2 - 8/13/12
3-16 Seats and Restraints
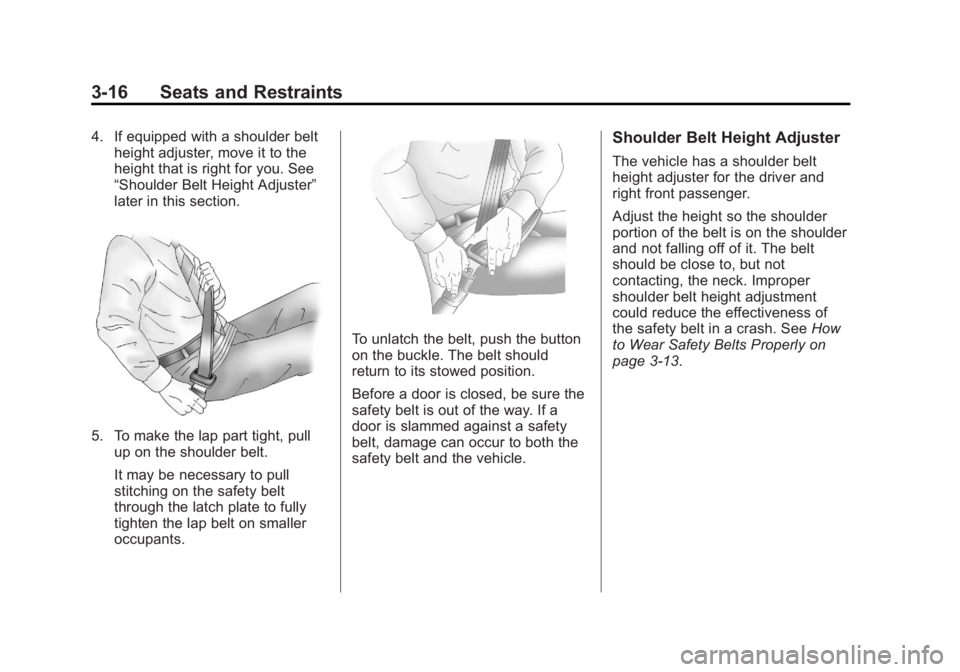
4. If equipped with a shoulder beltheight adjuster, move it to the
height that is right for you. See
“Shoulder Belt Height Adjuster”
later in this section.
5. To make the lap part tight, pull
up on the shoulder belt.
It may be necessary to pull
stitching on the safety belt
through the latch plate to fully
tighten the lap belt on smaller
occupants.
To unlatch the belt, push the button
on the buckle. The belt should
return to its stowed position.
Before a door is closed, be sure the
safety belt is out of the way. If a
door is slammed against a safety
belt, damage can occur to both the
safety belt and the vehicle.
Shoulder Belt Height Adjuster
The vehicle has a shoulder belt
height adjuster for the driver and
right front passenger.
Adjust the height so the shoulder
portion of the belt is on the shoulder
and not falling off of it. The belt
should be close to, but not
contacting, the neck. Improper
shoulder belt height adjustment
could reduce the effectiveness of
the safety belt in a crash. See How
to Wear Safety Belts Properly on
page 3‑13.
Page 292 of 542
Black plate (24,1)Chevrolet Silverado Owner Manual - 2013 - crc2 - 8/13/12
9-24 Driving and Operating
breaking-in guideline every
time you get new brake
linings.
.Do not tow a trailer during
break-in. SeeTrailer Towing
on page 9‑77 for the trailer
towing capabilities of the
vehicle and more
information.
Following break‐in, engine speed
and load can be gradually
increased.
Adjustable Throttle and
Brake Pedal
On vehicles with this feature, you
can change the position of the
throttle and brake pedals.
No adjustment to the pedals can be
made when the vehicle is in
R (Reverse) or while using cruise
control.
The control used to adjust the
pedals is located on the instrument
panel below the climate control
system.
Press the bottom of the control to
move the pedals closer. Press the
top of the control to move the
pedals away.
Before you start driving, fully press
the brake pedal to confirm the
adjustment is right for you. While
driving, make only small
adjustments.
The vehicle may have a memory
function which lets pedal settings be
saved and recalled. See Memory
Seats on page 3‑8.
Ignition Positions
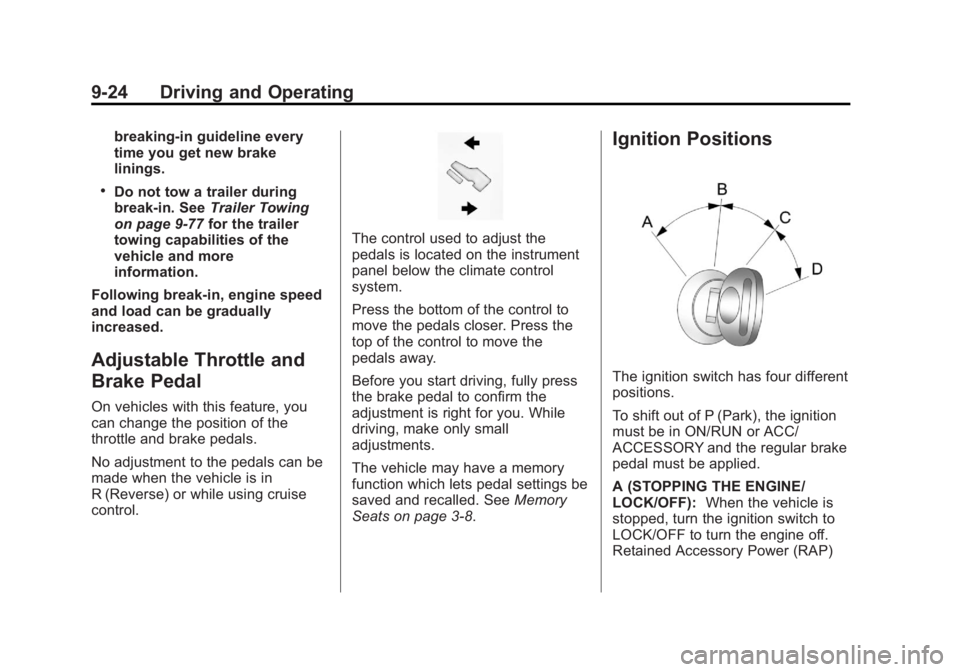
The ignition switch has four different
positions.
To shift out of P (Park), the ignition
must be in ON/RUN or ACC/
ACCESSORY and the regular brake
pedal must be applied.
A (STOPPING THE ENGINE/
LOCK/OFF): When the vehicle is
stopped, turn the ignition switch to
LOCK/OFF to turn the engine off.
Retained Accessory Power (RAP)