height CHEVROLET SILVERADO 1500 2015 Owners Manual
[x] Cancel search | Manufacturer: CHEVROLET, Model Year: 2015, Model line: SILVERADO 1500, Model: CHEVROLET SILVERADO 1500 2015Pages: 551, PDF Size: 6.87 MB
Page 18 of 551
Black plate (11,1)Chevrolet 2015i Silverado Owner Manual (GMNA-Localizing-U.S./Canada/
Mexico-8425172) - 2015 - CRC - 6/20/14
In Brief 1-11
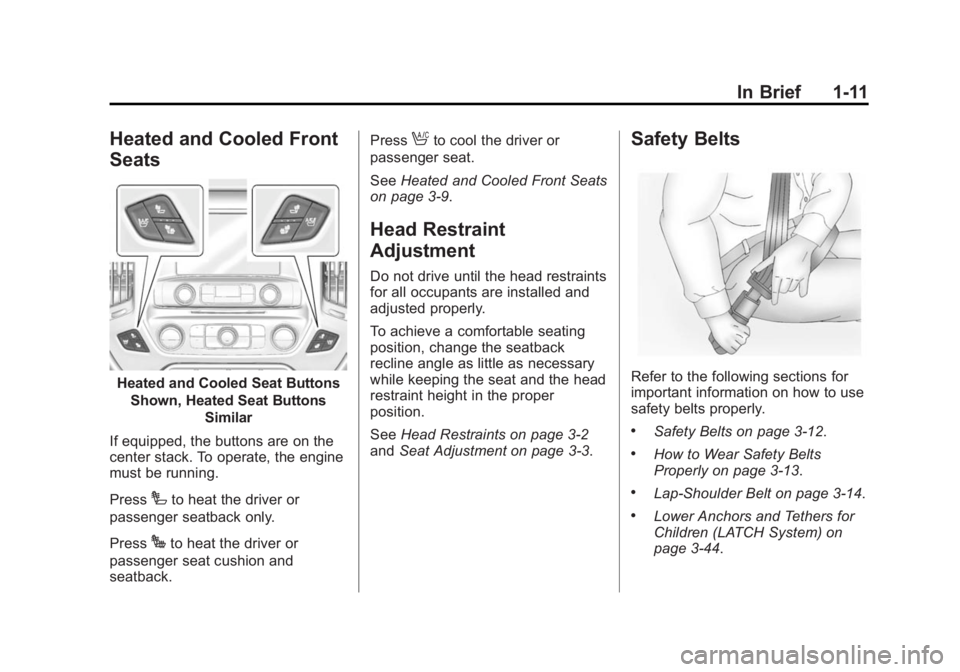
Heated and Cooled Front
Seats
Heated and Cooled Seat ButtonsShown, Heated Seat Buttons Similar
If equipped, the buttons are on the
center stack. To operate, the engine
must be running.
Press
Ito heat the driver or
passenger seatback only.
Press
Jto heat the driver or
passenger seat cushion and
seatback. Press
Ato cool the driver or
passenger seat.
See Heated and Cooled Front Seats
on page 3-9.
Head Restraint
Adjustment
Do not drive until the head restraints
for all occupants are installed and
adjusted properly.
To achieve a comfortable seating
position, change the seatback
recline angle as little as necessary
while keeping the seat and the head
restraint height in the proper
position.
See Head Restraints on page 3-2
and Seat Adjustment on page 3-3.
Safety Belts
Refer to the following sections for
important information on how to use
safety belts properly.
.Safety Belts on page 3-12.
.How to Wear Safety Belts
Properly on page 3-13.
.Lap-Shoulder Belt on page 3-14.
.Lower Anchors and Tethers for
Children (LATCH System) on
page 3-44.
Page 65 of 551
Black plate (2,1)Chevrolet 2015i Silverado Owner Manual (GMNA-Localizing-U.S./Canada/
Mexico-8425172) - 2015 - CRC - 6/20/14
3-2 Seats and Restraints
Head Restraints
Front Seats
The vehicle’s front seats have
adjustable head restraints in the
outboard seating positions.
{Warning
With head restraints that are not
installed and adjusted properly,
there is a greater chance that
occupants will suffer a neck/
spinal injury in a crash. Do not
drive until the head restraints for
all occupants are installed and
adjusted properly.
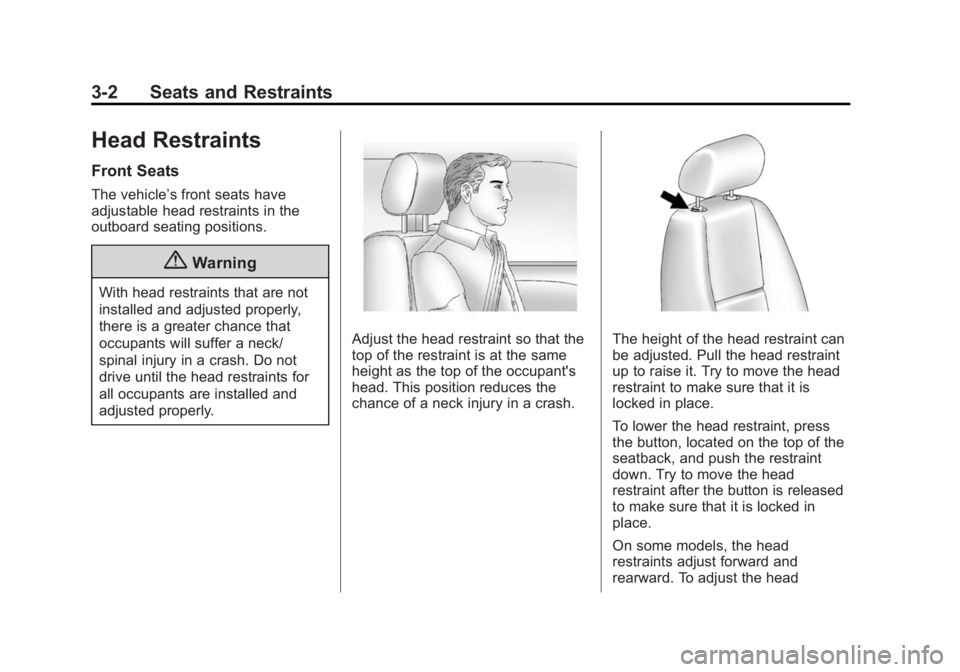
Adjust the head restraint so that the
top of the restraint is at the same
height as the top of the occupant's
head. This position reduces the
chance of a neck injury in a crash.The height of the head restraint can
be adjusted. Pull the head restraint
up to raise it. Try to move the head
restraint to make sure that it is
locked in place.
To lower the head restraint, press
the button, located on the top of the
seatback, and push the restraint
down. Try to move the head
restraint after the button is released
to make sure that it is locked in
place.
On some models, the head
restraints adjust forward and
rearward. To adjust the head
Page 66 of 551
Black plate (3,1)Chevrolet 2015i Silverado Owner Manual (GMNA-Localizing-U.S./Canada/
Mexico-8425172) - 2015 - CRC - 6/20/14
Seats and Restraints 3-3
restraint forward, grasp the head
restraint and pull forward to the
desired locking position. To adjust
the head restraint rearward, grasp
the head restraint and pull forward
fully until the mechanism releases
and allows the head restraint to
return to the full rear position.
The front seat outboard head
restraints are not removable.
Rear Seats
The rear seat has adjustable
headrests in the outboard seating
positions.
The height of the headrest can be
adjusted. Pull the headrest up to
raise it. To lower the headrest, push
the headrest down.
If you are installing a child restraint
in the rear seat, see“Securing a
Child Restraint Designed for the
LATCH System” underLower
Anchors and Tethers for Children
(LATCH System) on page 3-44.
Front Seats
Seat Adjustment
{Warning
You can lose control of the
vehicle if you try to adjust a driver
seat while the vehicle is moving.
Adjust the driver seat only when
the vehicle is not moving.
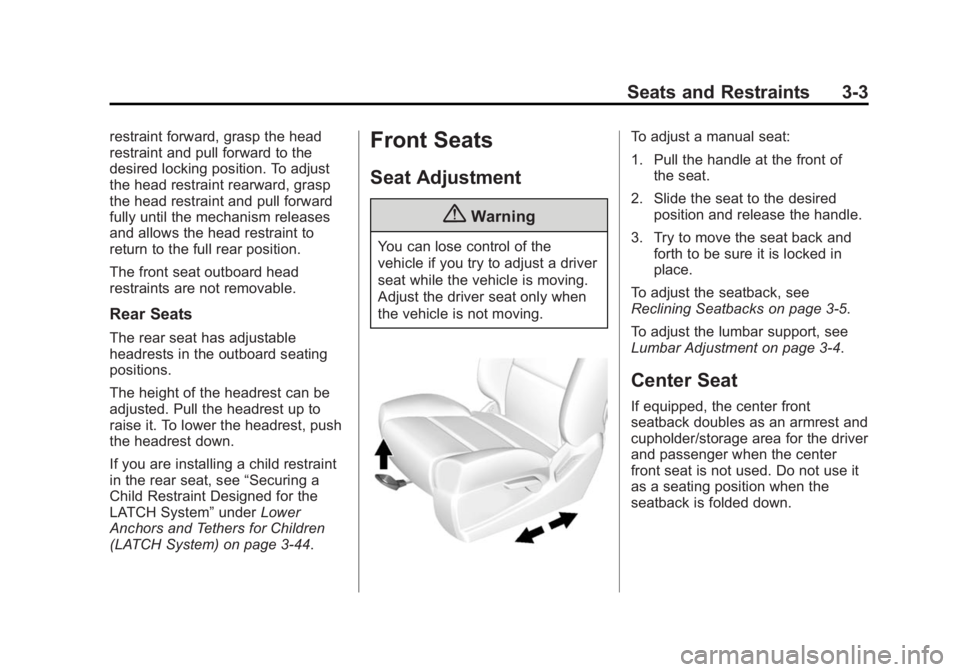
To adjust a manual seat:
1. Pull the handle at the front of
the seat.
2. Slide the seat to the desired position and release the handle.
3. Try to move the seat back and forth to be sure it is locked in
place.
To adjust the seatback, see
Reclining Seatbacks on page 3-5.
To adjust the lumbar support, see
Lumbar Adjustment on page 3-4.
Center Seat
If equipped, the center front
seatback doubles as an armrest and
cupholder/storage area for the driver
and passenger when the center
front seat is not used. Do not use it
as a seating position when the
seatback is folded down.
Page 79 of 551
Black plate (16,1)Chevrolet 2015i Silverado Owner Manual (GMNA-Localizing-U.S./Canada/
Mexico-8425172) - 2015 - CRC - 6/20/14
3-16 Seats and Restraints
4. If equipped with a shoulder beltheight adjuster, move it to the
height that is right for you. See
“Shoulder Belt Height Adjuster”
later in this section for
instructions on use and
important safety information.
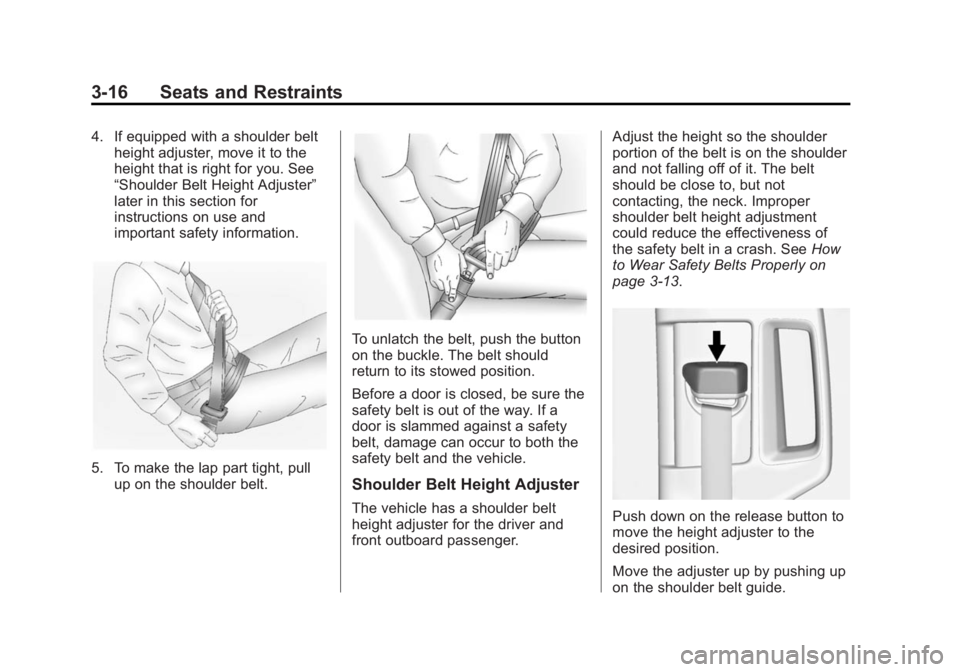
5. To make the lap part tight, pull
up on the shoulder belt.
To unlatch the belt, push the button
on the buckle. The belt should
return to its stowed position.
Before a door is closed, be sure the
safety belt is out of the way. If a
door is slammed against a safety
belt, damage can occur to both the
safety belt and the vehicle.
Shoulder Belt Height Adjuster
The vehicle has a shoulder belt
height adjuster for the driver and
front outboard passenger. Adjust the height so the shoulder
portion of the belt is on the shoulder
and not falling off of it. The belt
should be close to, but not
contacting, the neck. Improper
shoulder belt height adjustment
could reduce the effectiveness of
the safety belt in a crash. See
How
to Wear Safety Belts Properly on
page 3-13.Push down on the release button to
move the height adjuster to the
desired position.
Move the adjuster up by pushing up
on the shoulder belt guide.
Page 97 of 551
Black plate (34,1)Chevrolet 2015i Silverado Owner Manual (GMNA-Localizing-U.S./Canada/
Mexico-8425172) - 2015 - CRC - 6/20/14
3-34 Seats and Restraints
operates. We recommend that you
not use seat covers or other
aftermarket equipment except when
approved by GM for your specific
vehicle. SeeAdding Equipment to
the Airbag-Equipped Vehicle on
page 3-34 for more information
about modifications that can affect
how the system operates.
The on indicator may be lit if an
object, such as a briefcase,
handbag, grocery bag, laptop,
or other electronic device, is put on
an unoccupied seat. If this is not
desired, remove the object from
the seat.
{Warning
Stowing of articles under the
passenger seat or between the
passenger seat cushion and
seatback may interfere with the
proper operation of the passenger
sensing system.
Servicing the
Airbag-Equipped Vehicle
Airbags affect how the vehicle
should be serviced. There are parts
of the airbag system in several
places around the vehicle. Your
dealer and the service manual have
information about servicing the
vehicle and the airbag system. To
purchase a service manual, see
Service Publications Ordering
Information on page 13-11.
{Warning
For up to 10 seconds after the
vehicle is turned off and the
battery is disconnected, an airbag
can still inflate during improper
service. You can be injured if you
are close to an airbag when it
inflates. Avoid yellow connectors.
They are probably part of the
airbag system. Be sure to follow
(Continued)
Warning (Continued)
proper service procedures, and
make sure the person performing
work for you is qualified to do so.
Adding Equipment to the
Airbag-Equipped Vehicle
Adding accessories that change the
vehicle's frame, bumper system,
height, front end, or side sheet
metal, may keep the airbag system
from working properly. The
operation of the airbag system can
also be affected by changing or
moving any parts of the front seats,
safety belts, the airbag sensing and
diagnostic module, steering wheel,
instrument panel, roof-rail airbag
modules, ceiling headliner or pillar
garnish trim, overhead console,
front sensors, side impact sensors,
or airbag wiring.
Page 100 of 551
Black plate (37,1)Chevrolet 2015i Silverado Owner Manual (GMNA-Localizing-U.S./Canada/
Mexico-8425172) - 2015 - CRC - 6/20/14
Seats and Restraints 3-37
The manufacturer instructions that
come with the booster seat state the
weight and height limitations for that
booster. Use a booster seat with a
lap-shoulder belt until the child
passes the fit test below:
.Sit all the way back on the seat.
Do the knees bend at the seat
edge? If yes, continue. If no,
return to the booster seat.
.Buckle the lap-shoulder belt.
Does the shoulder belt rest on
the shoulder? If yes, continue.
If no, try using the rear safety
belt comfort guide, if available.
See“Rear Safety Belt Comfort
Guides” underLap-Shoulder Belt
on page 3-14. If a comfort guide
is not available, or if the
shoulder belt still does not rest
on the shoulder, then return to
the booster seat.
.Does the lap belt fit low and
snug on the hips, touching the
thighs? If yes, continue. If no,
return to the booster seat.
.Can proper safety belt fit be
maintained for the length of the
trip? If yes, continue. If no,
return to the booster seat.
If you have the choice, a child
should sit in a position with a
lap-shoulder belt and get the
additional restraint a shoulder
belt can provide.
Q: What is the proper way to wear safety belts?
A: An older child should wear a
lap-shoulder belt and get the
additional restraint a shoulder
belt can provide. The shoulder
belt should not cross the face or
neck. The lap belt should fit
snugly below the hips, just
touching the top of the thighs.
This applies belt force to the
child's pelvic bones in a crash.
It should never be worn over the
abdomen, which could cause
severe or even fatal internal
injuries in a crash. Also see
“Rear Safety Belt Comfort
Guides” underLap-Shoulder Belt on
page 3-14.
According to accident statistics,
children are safer when properly
restrained in a rear seating position.
In a crash, children who are not
buckled up can strike other people
who are buckled up, or can be
thrown out of the vehicle. Older
children need to use safety belts
properly.
{Warning
Never allow more than one child
to wear the same safety belt. The
safety belt cannot properly spread
the impact forces. In a crash, they
can be crushed together and
seriously injured. A safety belt
must be used by only one person
at a time.
Page 103 of 551
Black plate (40,1)Chevrolet 2015i Silverado Owner Manual (GMNA-Localizing-U.S./Canada/
Mexico-8425172) - 2015 - CRC - 6/20/14
3-40 Seats and Restraints
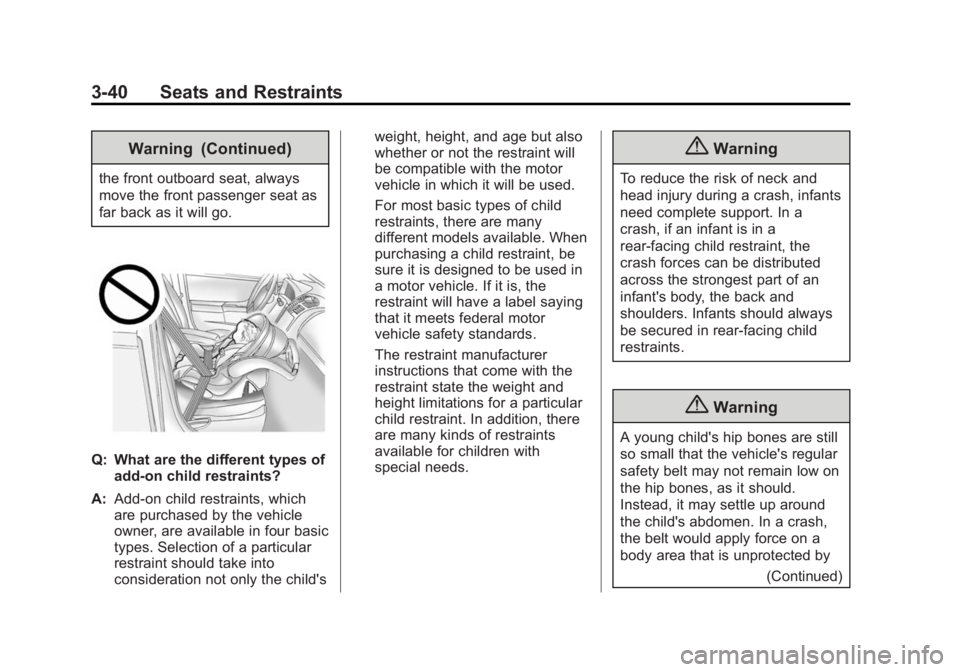
Warning (Continued)
the front outboard seat, always
move the front passenger seat as
far back as it will go.
Q: What are the different types ofadd-on child restraints?
A: Add-on child restraints, which
are purchased by the vehicle
owner, are available in four basic
types. Selection of a particular
restraint should take into
consideration not only the child's weight, height, and age but also
whether or not the restraint will
be compatible with the motor
vehicle in which it will be used.
For most basic types of child
restraints, there are many
different models available. When
purchasing a child restraint, be
sure it is designed to be used in
a motor vehicle. If it is, the
restraint will have a label saying
that it meets federal motor
vehicle safety standards.
The restraint manufacturer
instructions that come with the
restraint state the weight and
height limitations for a particular
child restraint. In addition, there
are many kinds of restraints
available for children with
special needs.
{Warning
To reduce the risk of neck and
head injury during a crash, infants
need complete support. In a
crash, if an infant is in a
rear-facing child restraint, the
crash forces can be distributed
across the strongest part of an
infant's body, the back and
shoulders. Infants should always
be secured in rear-facing child
restraints.
{Warning
A young child's hip bones are still
so small that the vehicle's regular
safety belt may not remain low on
the hip bones, as it should.
Instead, it may settle up around
the child's abdomen. In a crash,
the belt would apply force on a
body area that is unprotected by
(Continued)
Page 293 of 551
Black plate (20,1)Chevrolet 2015i Silverado Owner Manual (GMNA-Localizing-U.S./Canada/
Mexico-8425172) - 2015 - CRC - 6/20/14
9-20 Driving and Operating
When using this upper load
platform, be sure the load is
securely tied down to prevent it
from shifting. The load's center
of gravity should be positioned
in a zone over the rear axle. The
zone is located in the area
between the front of each wheel
well and the rear of each wheel
well. The center of gravity height
must not extend above the top
of the pickup box flareboard.
Any load that extends beyond
the vehicle's taillamp area must
be properly marked according to
local laws and regulations.
Remember not to exceed the
Gross Axle Weight
Rating (GAWR) of the front or
rear axle.Add-On Equipment
When carrying removable items,
a limit on how many people
carried inside the vehicle may
be necessary. Be sure to weigh
the vehicle before buying and
installing the new equipment.
{Caution
Overloading the vehicle may
cause damage. Repairs would not
be covered by the vehicle
warranty. Do not overload the
vehicle.
Remember not to exceed the
Gross Axle Weight
Rating (GAWR) of the front or
rear axle.
* Equipment
Maximum
Weight
Ladder Rack
and Cargo 340 kg (750 lb)
Cross Toolbox
and Cargo 181 kg (400 lb)
Side Boxes
and Cargo 113 kg per
side (250 lb
per side)
* The combined weight for all
rail-mounted equipment should
not exceed 454 kg (1,000 lb).
Page 364 of 551
Black plate (91,1)Chevrolet 2015i Silverado Owner Manual (GMNA-Localizing-U.S./Canada/
Mexico-8425172) - 2015 - CRC - 6/20/14
Driving and Operating 9-91
Vehicle SeriesTrailer WeightWeight Distributing Hitch
Usage Hitch Distribution
1500 Up to 3175 kg (7,000 lb) OptionalRefer to trailer
manufacturer ’s
recommendation
1500 Over 3175 kg (7,000 lb) Required50%
2500/3500 Up to 8165 kg (18,000 lb) OptionalRefer to trailer
manufacturer ’s
recommendation
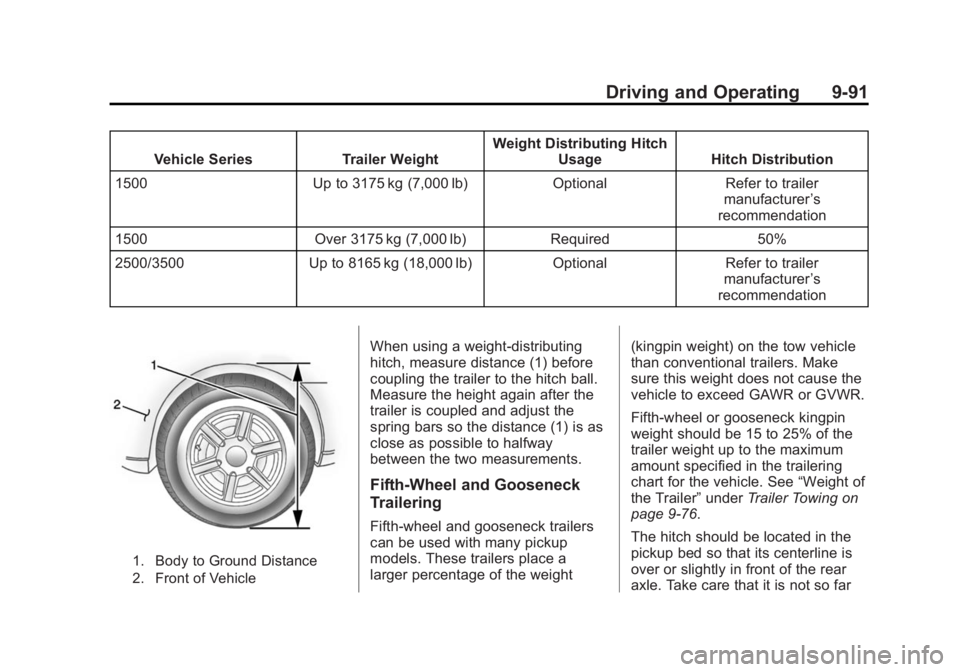
1. Body to Ground Distance
2. Front of Vehicle
When using a weight-distributing
hitch, measure distance (1) before
coupling the trailer to the hitch ball.
Measure the height again after the
trailer is coupled and adjust the
spring bars so the distance (1) is as
close as possible to halfway
between the two measurements.
Fifth-Wheel and Gooseneck
Trailering
Fifth-wheel and gooseneck trailers
can be used with many pickup
models. These trailers place a
larger percentage of the weight (kingpin weight) on the tow vehicle
than conventional trailers. Make
sure this weight does not cause the
vehicle to exceed GAWR or GVWR.
Fifth-wheel or gooseneck kingpin
weight should be 15 to 25% of the
trailer weight up to the maximum
amount specified in the trailering
chart for the vehicle. See
“Weight of
the Trailer” underTrailer Towing on
page 9-76.
The hitch should be located in the
pickup bed so that its centerline is
over or slightly in front of the rear
axle. Take care that it is not so far
Page 407 of 551
Black plate (30,1)Chevrolet 2015i Silverado Owner Manual (GMNA-Localizing-U.S./Canada/
Mexico-8425172) - 2015 - CRC - 6/20/14
10-30 Vehicle Care
Caution (Continued)
.When using concentrated
washer fluid, follow the
manufacturer instructions for
adding water.
.Fill the washer fluid tank only
three-quarters full when it is
very cold. This allows for fluid
expansion if freezing occurs,
which could damage the tank
if it is completely full.
Brakes
This vehicle has front and rear disc
brakes.
Disc brake pads have built-in wear
indicators that make a high-pitched
warning sound when the brake pads
are worn and new pads are needed.
The sound can come and go or be
heard all the time the vehicle is
moving, except when applying the
brake pedal firmly.
{Warning
The brake wear warning sound
means that soon the brakes will
not work well. That could lead to
a crash. When the brake wear
warning sound is heard, have the
vehicle serviced.
{Caution
Continuing to drive with worn-out
brake pads could result in costly
brake repair.
Some driving conditions or climates
can cause a brake squeal when the
brakes are first applied or lightly
applied. This does not mean
something is wrong with the brakes.
Properly torqued wheel nuts are
necessary to help prevent brake
pulsation. When tires are rotated,
inspect brake pads for wear and
evenly tighten wheel nuts in the proper sequence to torque
specifications in
Capacities and
Specifications on page 12-2.
Brake linings should always be
replaced as complete axle sets.
Brake Pedal Travel
See your dealer if the brake pedal
does not return to normal height,
or if there is a rapid increase in
pedal travel. This could be a sign
that brake service might be
required.
Brake Adjustment
Every time the brakes are applied,
with or without the vehicle moving,
the brakes adjust for wear.
Replacing Brake System Parts
The braking system on a vehicle is
complex. Its many parts have to be
of top quality and work well together
if the vehicle is to have really good
braking. The vehicle was designed
and tested with top-quality brake
parts. When parts of the braking
system are replaced, be sure to get