buttons CHEVROLET SILVERADO 1500 2022 Owners Manual
[x] Cancel search | Manufacturer: CHEVROLET, Model Year: 2022, Model line: SILVERADO 1500, Model: CHEVROLET SILVERADO 1500 2022Pages: 461, PDF Size: 11.09 MB
Page 52 of 461
Chevrolet Silverado 1500 Owner Manual (GMNA-Localizing-U.S./Canada/
Mexico/Paraguay-14632303) - 2021 - CRC - 11/9/20
Seats and Restraints 51
Save preferred memory feature positions to
both 1 and 2 if you are the only driver.
Manually Recalling Memory Positions
Press and hold 1, 2, or
Bto recall the
previously saved memory positions if you
are driver 1 or 2 identified in the DIC
welcome message.
To stop Manual Memory recall movement,
release 1, 2, or
Bor press any of the
following controls:
.Power seat
.Memory SET
.Power mirror, with the driver or
passenger side mirror selected
Manual Memory recall movement for 1, 2,
or
Bbuttons may be initiated and may
complete to the saved memory position if
the vehicle is in or out of P (Park).
Seat Entry Memory
The vehicle identifies the number of the
current driver’s RKE transmitter (1–8). See
Remote Keyless Entry (RKE) System
Operation (Key Access) 010 or
Remote Keyless Entry (RKE) System
Operation (Keyless Access) 013. If the RKE
transmitter is 1 or 2, and Seat Entry Memory
is enabled in vehicle personalization, the positions saved to the same memory button
number 1 or 2 are automatically recalled
when the vehicle is turned on, or turned
from off to ACC/ACCESSORY. RKE
transmitters 3–8 will not provide automatic
memory recalls.
To turn Seat Entry Memory on or off, see
“Vehicle Personalization Settings”
previously
in this section and Vehicle Personalization
0 131.
The shift lever must be in P (Park) to start
Seat Entry Memory. Seat Entry Memory
recall will complete if the vehicle is shifted
out of P (Park) prior to reaching the saved
memory position.
To stop Seat Entry Memory recall
movement, turn the vehicle off or press any
of the following controls:
.Power seat
.Memory SET, 1, 2, orB
.Power mirror, with the driver or
passenger side mirror selected
If the saved memory seat position does not
automatically recall or recalls to the wrong
positions, the driver’s RKE transmitter
number (1 or 2) may not match the memory
button number that positions were saved to. Try storing the position to the other
memory button or try the other RKE
transmitter.
Seat Exit Memory
Seat Exit Memory is not linked to an RKE
transmitter. The position saved to
Bis
used for all drivers. To turn Seat Exit
Memory on or off, see "Vehicle
Personalization Settings" previously in this
section and Vehicle Personalization 0131.
If turned on, the position saved to
Bis
automatically recalled when one of the
following occurs:
.The vehicle is turned off and the driver
door is opened within a short time.
.The vehicle is turned off with the driver
door open.
To stop Seat Exit Memory movement, press
any of the following memory controls:
.Power seat
.Memory SET, 1, 2, orB
.Power mirror, with the driver or
passenger side mirror selected
Page 53 of 461
Chevrolet Silverado 1500 Owner Manual (GMNA-Localizing-U.S./Canada/
Mexico/Paraguay-14632303) - 2021 - CRC - 11/9/20
52 Seats and Restraints
Obstructions
If something has blocked the driver seat
while recalling a memory position, the recall
may stop. Remove the obstruction and try
the recall again. If the memory position still
does not recall, see your dealer.
Heated and Ventilated Front
Seats
{Warning
If temperature change or pain to the skin
cannot be felt, the seat heater may cause
burns. To reduce the risk of burns, use
care when using the seat heater,
especially for long periods of time. Do
not place anything on the seat that
insulates against heat, such as a blanket,
cushion, cover, or similar item. This may
cause the seat heater to overheat. An
overheated seat heater may cause a burn
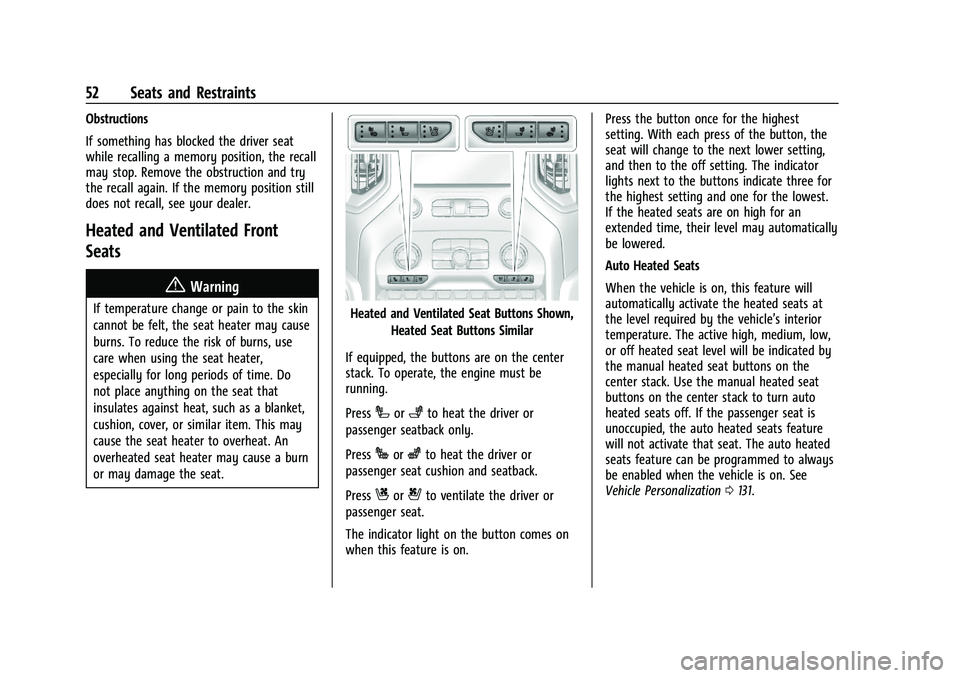
or may damage the seat.Heated and Ventilated Seat Buttons Shown,Heated Seat Buttons Similar
If equipped, the buttons are on the center
stack. To operate, the engine must be
running.
Press
Ior+to heat the driver or
passenger seatback only.
Press
Jorzto heat the driver or
passenger seat cushion and seatback.
Press
Cor{to ventilate the driver or
passenger seat.
The indicator light on the button comes on
when this feature is on. Press the button once for the highest
setting. With each press of the button, the
seat will change to the next lower setting,
and then to the off setting. The indicator
lights next to the buttons indicate three for
the highest setting and one for the lowest.
If the heated seats are on high for an
extended time, their level may automatically
be lowered.
Auto Heated Seats
When the vehicle is on, this feature will
automatically activate the heated seats at
the level required by the vehicle’s interior
temperature. The active high, medium, low,
or off heated seat level will be indicated by
the manual heated seat buttons on the
center stack. Use the manual heated seat
buttons on the center stack to turn auto
heated seats off. If the passenger seat is
unoccupied, the auto heated seats feature
will not activate that seat. The auto heated
seats feature can be programmed to always
be enabled when the vehicle is on. See
Vehicle Personalization
0131.
Page 55 of 461
Chevrolet Silverado 1500 Owner Manual (GMNA-Localizing-U.S./Canada/
Mexico/Paraguay-14632303) - 2021 - CRC - 11/9/20
54 Seats and Restraints
To return the seat to the normal seating
position, slowly pull the seat cushion down.
{Warning
A seat belt that is improperly routed, not
properly attached, or twisted will not
provide the protection needed in a crash.
The person wearing the belt could be
seriously injured. After raising the rear
seatback, always check to be sure that
the seat belts are properly routed and
attached, and are not twisted.
Heated Rear Seats
{Warning
If you cannot feel temperature change or
pain to the skin, the seat heater may
cause burns. See the Warning under
Heated and Ventilated Front Seats052.
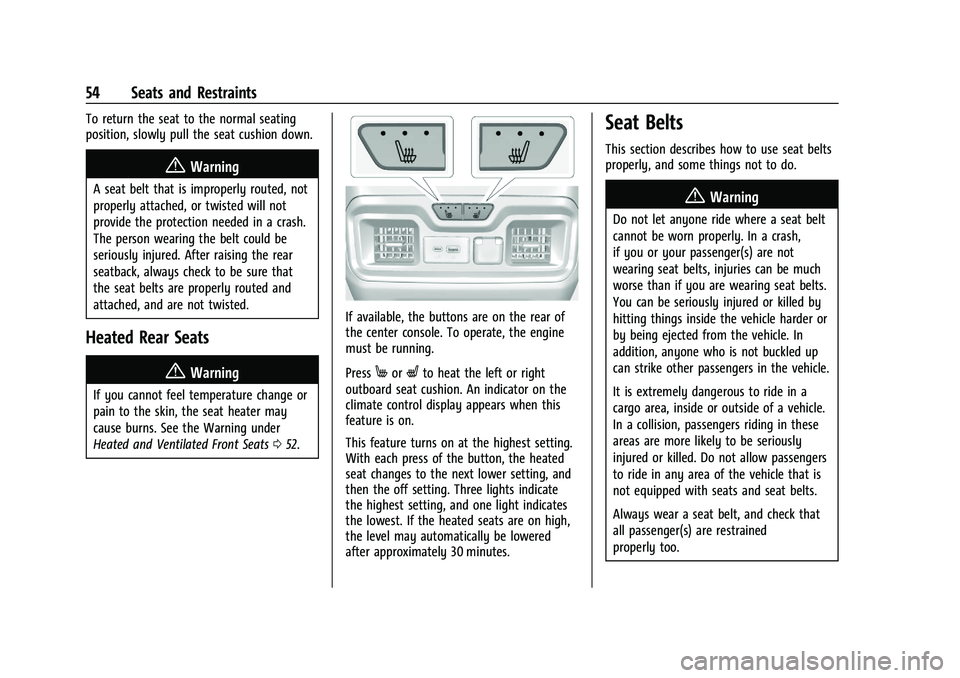
If available, the buttons are on the rear of
the center console. To operate, the engine
must be running.
Press
MorLto heat the left or right
outboard seat cushion. An indicator on the
climate control display appears when this
feature is on.
This feature turns on at the highest setting.
With each press of the button, the heated
seat changes to the next lower setting, and
then the off setting. Three lights indicate
the highest setting, and one light indicates
the lowest. If the heated seats are on high,
the level may automatically be lowered
after approximately 30 minutes.
Seat Belts
This section describes how to use seat belts
properly, and some things not to do.
{Warning
Do not let anyone ride where a seat belt
cannot be worn properly. In a crash,
if you or your passenger(s) are not
wearing seat belts, injuries can be much
worse than if you are wearing seat belts.
You can be seriously injured or killed by
hitting things inside the vehicle harder or
by being ejected from the vehicle. In
addition, anyone who is not buckled up
can strike other passengers in the vehicle.
It is extremely dangerous to ride in a
cargo area, inside or outside of a vehicle.
In a collision, passengers riding in these
areas are more likely to be seriously
injured or killed. Do not allow passengers
to ride in any area of the vehicle that is
not equipped with seats and seat belts.
Always wear a seat belt, and check that
all passenger(s) are restrained
properly too.
Page 88 of 461
Chevrolet Silverado 1500 Owner Manual (GMNA-Localizing-U.S./Canada/
Mexico/Paraguay-14632303) - 2021 - CRC - 11/9/20
Seats and Restraints 87
2.3. For a top tether in the rear centerposition:
2.3.1. Remove the driver side head restraint and center
headrest. See “Head
Restraint or Headrest
Removal and Reinstallation”
later in this section.
2.3.2. Route the top tether (1) through the center loop (2).
2.3.3. Attach the top tether (1) to the driver side top tether
metal anchor (3).
2.3.4. Make sure the child restraint top tether hook is
completely closed and
secured to the top tether
anchor.
3. Tighten the top tether per the child restraint manufacturer's instructions.
When the top tether is properly
tightened, the loop may bend. This is
normal and will not damage the vehicle. If child restraints are installed in both
outboard positions, both top tethers can
be attached to the center anchor. Top
tethers can be attached for child
restraints in all three rear seating
positions at the same time, following the
routing instructions above.
4. Before placing a child in the child restraint, make sure it is securely held in
place. To check, grasp the child restraint
at the LATCH path and attempt to move
it side to side and back and forth. There
should be no more than 2.5 cm (1 in) of
movement for proper installation.
Head Restraint or Headrest Removal and
Reinstallation
The second row outboard head restraints or
center headrest can be removed if they
interfere with the proper installation of the
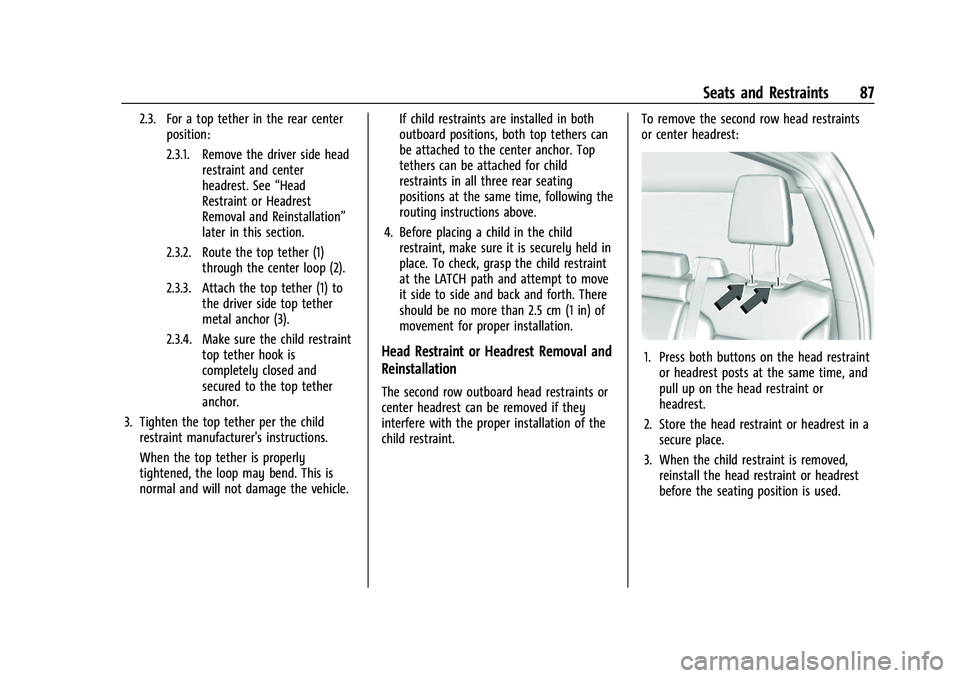
child restraint. To remove the second row head restraints
or center headrest:
1. Press both buttons on the head restraint
or headrest posts at the same time, and
pull up on the head restraint or
headrest.
2. Store the head restraint or headrest in a secure place.
3. When the child restraint is removed, reinstall the head restraint or headrest
before the seating position is used.
Page 137 of 461
Chevrolet Silverado 1500 Owner Manual (GMNA-Localizing-U.S./Canada/
Mexico/Paraguay-14632303) - 2021 - CRC - 11/9/20
136 Instruments and Controls
Bed View Camera Lighting
This feature specifies if the truck bed rail
lights are turned on when the Bed View
Camera is active. SeeAssistance Systems for
Parking or Backing 0266.
Touch Off or On.
Teen Driver
See “Teen Driver” underSettings 0186.
Valet Mode
This will lock the infotainment system and
steering wheel controls. It may also limit
access to vehicle storage locations,
if equipped.
To enable valet mode:
1. Enter a four-digit code on the keypad.
2. Select Enter to go to the confirmation screen.
3. Re-enter the four-digit code.
Touch Lock or Unlock to lock or unlock the
system. Touch Back to go back to the
previous menu.
Universal Remote System
See Radio Frequency Statement 0436.
Universal Remote System
Programming
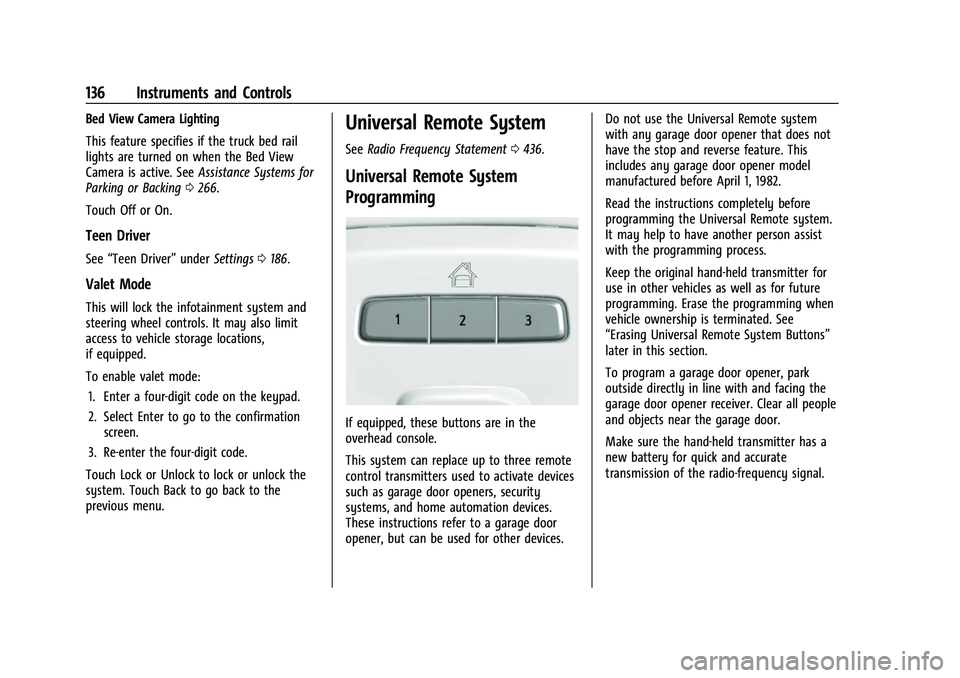
If equipped, these buttons are in the
overhead console.
This system can replace up to three remote
control transmitters used to activate devices
such as garage door openers, security
systems, and home automation devices.
These instructions refer to a garage door
opener, but can be used for other devices. Do not use the Universal Remote system
with any garage door opener that does not
have the stop and reverse feature. This
includes any garage door opener model
manufactured before April 1, 1982.
Read the instructions completely before
programming the Universal Remote system.
It may help to have another person assist
with the programming process.
Keep the original hand-held transmitter for
use in other vehicles as well as for future
programming. Erase the programming when
vehicle ownership is terminated. See
“Erasing Universal Remote System Buttons”
later in this section.
To program a garage door opener, park
outside directly in line with and facing the
garage door opener receiver. Clear all people
and objects near the garage door.
Make sure the hand-held transmitter has a
new battery for quick and accurate
transmission of the radio-frequency signal.
Page 138 of 461
Chevrolet Silverado 1500 Owner Manual (GMNA-Localizing-U.S./Canada/
Mexico/Paraguay-14632303) - 2021 - CRC - 11/9/20
Instruments and Controls 137
Programming the Universal Remote
System
For questions or programming help, see
www.homelink.com/gm or call
1-800-355-3515. For calls placed outside the
U.S., Canada, or Puerto Rico, international
rates will apply and may differ based on
landline or mobile phone.
Programming involves time-sensitive actions,
and may time out causing the procedure to
be repeated.
To program up to three devices:1. Hold the end of the hand-held transmitter about 3 to 8 cm (1 to 3 in)
away from the Universal Remote system
buttons with the indicator light in view.
The hand-held transmitter was supplied
by the manufacturer of the garage door
opener receiver.
2. Press and release one of the three Universal Remote system buttons to be
programmed. Press and hold the
hand-held transmitter button. Do not
release the hand-held transmitter button
until the indicator light changes from a
slow to a rapid flash or continuous light.
Then release the hand-held transmitter
button. Some garage door openers may require
substitution of Step 2 with the procedure
under
“Radio Signals for Some Gate
Operators” later in this section.
3. Press and hold the newly programmed Universal Remote system button for
five seconds while watching the indicator
light and garage door activation.
.If the indicator light stays on
continuously or the garage door
moves when the button is pressed,
then programming is complete. There
is no need to complete Steps 4–6.
.If the indicator light does not come
on or the garage door does not
move, a second button press may be
required. For a second time, press
and hold the newly programmed
button for five seconds. If the
indicator light is continuously lit,
or the garage door moves,
programming is complete.
.If the indicator light flashes rapidly
and the garage door does not move,
continue with programming
Steps 4–6.
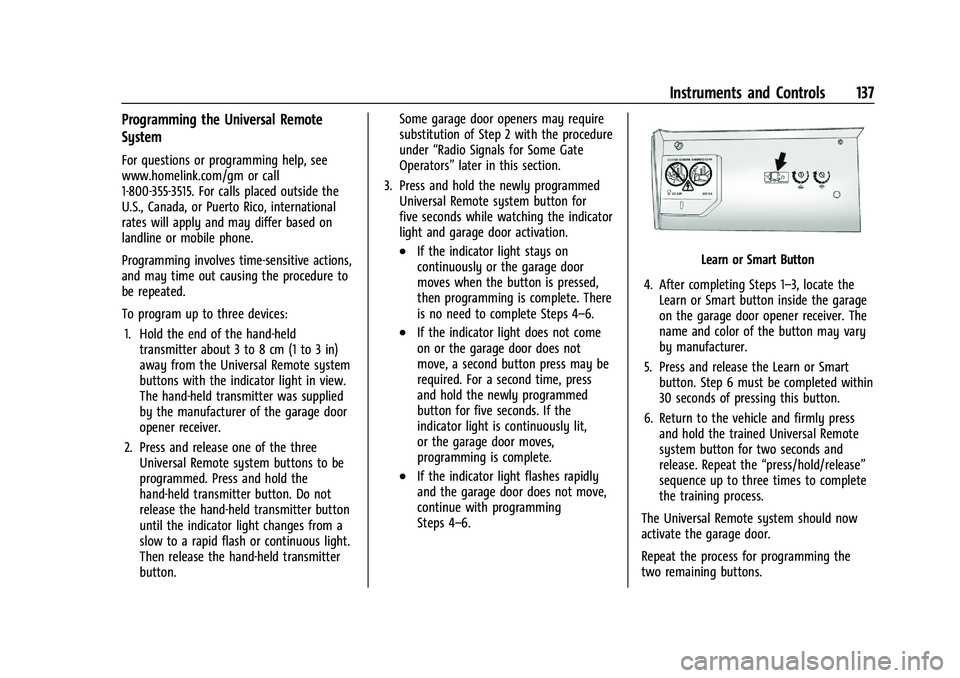
Learn or Smart Button
4. After completing Steps 1–3, locate the Learn or Smart button inside the garage
on the garage door opener receiver. The
name and color of the button may vary
by manufacturer.
5. Press and release the Learn or Smart button. Step 6 must be completed within
30 seconds of pressing this button.
6. Return to the vehicle and firmly press and hold the trained Universal Remote
system button for two seconds and
release. Repeat the “press/hold/release”
sequence up to three times to complete
the training process.
The Universal Remote system should now
activate the garage door.
Repeat the process for programming the
two remaining buttons.
Page 139 of 461
Chevrolet Silverado 1500 Owner Manual (GMNA-Localizing-U.S./Canada/
Mexico/Paraguay-14632303) - 2021 - CRC - 11/9/20
138 Instruments and Controls
Radio Signals for Some Gate Operators
For questions or programming help, see
www.homelink.com/gm or call
1-800-355-3515. For calls placed outside the
U.S., Canada, or Puerto Rico, international
rates will apply and may differ based on
landline or mobile phone.
Some radio–frequency laws and gate
operators require transmitter signals to time
out or quit after several seconds of
transmission. This may not be long enough
for the Universal Remote system to pick up
the signal during programming.
If the programming did not work, replace
Step 2 under“Programming the Universal
Remote System” with the following:
Press and hold the Universal Remote system
button while pressing and releasing the
hand-held transmitter button every
two seconds until the signal has been
successfully accepted by the Universal
Remote system. The Universal Remote
system indicator light will flash slowly at
first and then change to a rapid flash or
continuous solid-light. Proceed with Step 3
under “Programming the Universal Remote
System” to complete.
Universal Remote System
Operation
Using the Universal Remote System
Press and hold the appropriate Universal
Remote system button for at least one-half
second. The indicator light will come on
while the signal is being transmitted.
Erasing Universal Remote System
Buttons
Erase all programmed buttons when vehicle
ownership is terminated.
To erase:
1. Press and hold the two outside buttons until the indicator light begins to flash.
This should take about 10 seconds.
2. Release both buttons.
Reprogramming a Single Universal
Remote System Button
To reprogram any of the system buttons: 1. Press and hold any one of the buttons. Do not release the button.
2. The indicator light will begin to flash after 20 seconds. Without releasing the
button, proceed with Step 1 under
“Programming the Universal Remote
System.”
Page 146 of 461
Chevrolet Silverado 1500 Owner Manual (GMNA-Localizing-U.S./Canada/
Mexico/Paraguay-14632303) - 2021 - CRC - 11/9/20
Lighting 145
If the vehicle is in P (Park), R (Reverse),
or N (Neutral) the Cargo Lamp Switch causes
the lights to cycle through the following
states for each button press:
- Initial Press:
- CHMSL/Cargo Bed Lights - On
- Cargo Mirror Lights - On
- Cargo Switch Indicator (if equipped) - On
- Next Press: (if with in 5 seconds of the
previous button press):
- CHMSL/Cargo Bed Lights - On
- Cargo Mirror Lights - Off
- Cargo Switch Indicator (if equipped) - On
- Next Press:
- CHMSL/Cargo Bed Lights - Off
- Cargo Mirror Lights - Off
- Cargo Switch Indicator (if equipped) - Off
Become familiar with and follow all state
and local laws that apply to cargo lamp
operation.Interior Lighting
Instrument Panel Illumination
Control
This feature adjusts the brightness of all
illuminated controls. The instrument panel
illumination control is next to the exterior
lamp control.
D:PressD+ to brighten orD− to
dim the lights.
This feature is functional at night, or when
the headlamps or parking lamps are ON.
Dome Lamps
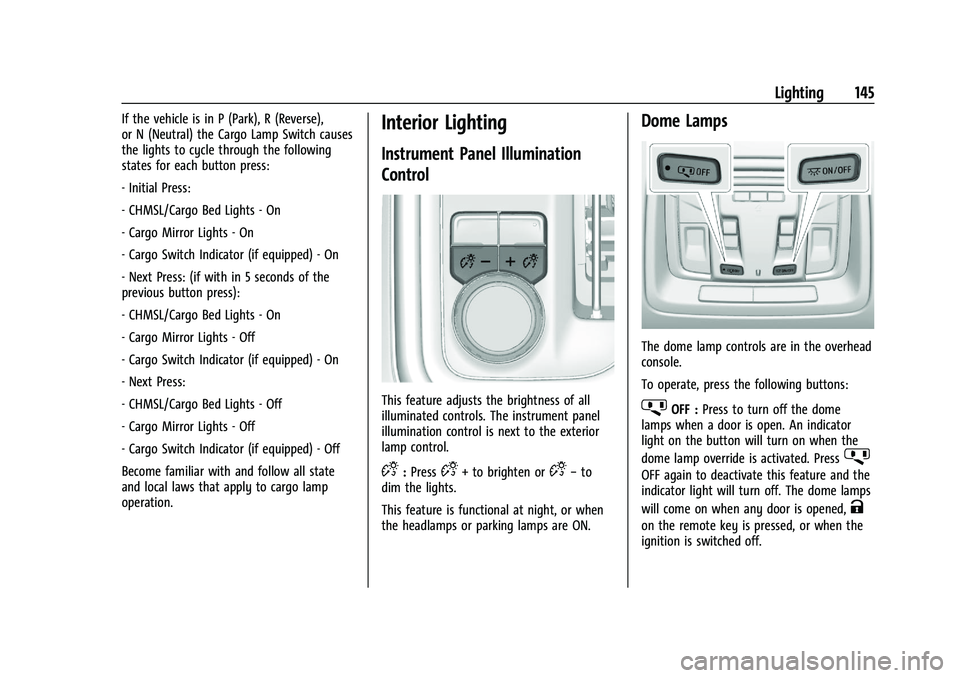
The dome lamp controls are in the overhead
console.
To operate, press the following buttons:
jOFF : Press to turn off the dome
lamps when a door is open. An indicator
light on the button will turn on when the
dome lamp override is activated. Press
j
OFF again to deactivate this feature and the
indicator light will turn off. The dome lamps
will come on when any door is opened,
K
on the remote key is pressed, or when the
ignition is switched off.
Page 164 of 461
Chevrolet Silverado 1500 Owner Manual (GMNA-Localizing-U.S./Canada/
Mexico/Paraguay-14632303) - 2021 - CRC - 11/9/20
Infotainment System 163
details, and system limitations. Service and
connectivity may vary by make, model,
year, carrier, availability, and conditions.
4G LTE service is available in select markets.
4G LTE performance is based on industry
averages and vehicle systems design. Some
services require a data plan.
The OnStar App
If equipped, the infotainment system has
OnStar controls in the embedded OnStar app
on the Home Page. Most OnStar functions
that can be performed with the buttons can
be done using the app. To open the app,
touch the OnStar icon on the Home Page.
App updates require a corresponding service
plan. Features vary by region and model.
Features are subject to change. For more
information, see my.chevrolet.com/learn or
press
Q.
Services
The Services tab displays the default view
for the app. Use this page to launch the
available OnStar services. Touch a service to
open its display. Touch Wi-Fi to launch the
connections manager. Turn-by-Turn and
Advisor Call are the other tiled options. Account
The Account tab displays a snapshot of the
account linked with the vehicle. If there is
no such account, this tab will show all
values as
——. The advisor call icon will be
active even if there is no active account.
Advisor Call
Selecting Advisor Call is the same as
pressing
Qor calling 1-888-4ONSTAR
(1-888-466-7827). The X option in the upper
right corner of the screen does not end the
call, but returns to the previous screen.
Turn-by-Turn Directions
With a connected plan, an OnStar Advisor
can download a destination to the vehicle or
its embedded navigation system,
if equipped. Select Turn-by-Turn Directions
from the Services tab of the OnStar app to
call an Advisor or select a recent or favorite
destination. Touch the navigation icons to
select home, address or place. A destination
transfer from OnStar will show the detail
view of the destination when it is
transferred from OnStar to the Navigation
application. See www.onstar.com for a
coverage map. Services vary by model. Map
coverage is available in the United States,
Puerto Rico, and Canada. Wi-Fi Hotspot
Touch to display the Settings page, which
shows the configurations for the vehicle
hotspot and allows them to be changed.
For more information, see www.onstar.com.
Navigation
Using the Navigation System
If equipped, launch the Nav application by
touching the Nav icon on the Home Page or
on the shortcut tray near the bottom of the
infotainment display.
When the Nav application is launched for
the first time, a product walkthrough is
available. Use of the feature requires the
Terms and Conditions and the Privacy
statement to be confirmed. If available and
signed into a profile, it is also suggested to
enable and confirm Predictive Navigation.
Predictive Navigation (If Equipped)
If Predictive Navigation is available and
confirmed, this feature learns preferences by
remembering where the vehicle has been.
It uses the locations and navigation history
to personalize routes and results.
Page 208 of 461
Chevrolet Silverado 1500 Owner Manual (GMNA-Localizing-U.S./Canada/
Mexico/Paraguay-14632303) - 2021 - CRC - 11/9/20
Climate Controls 207
The fan, air delivery mode, air conditioning,
driver and passenger temperatures, and Sync
settings can be controlled by touching
CLIMATE on the infotainment Home Page or
the climate button in the climate control
display application tray. A selection can then
be made on the front climate control page
displayed.
Climate Control Status Display
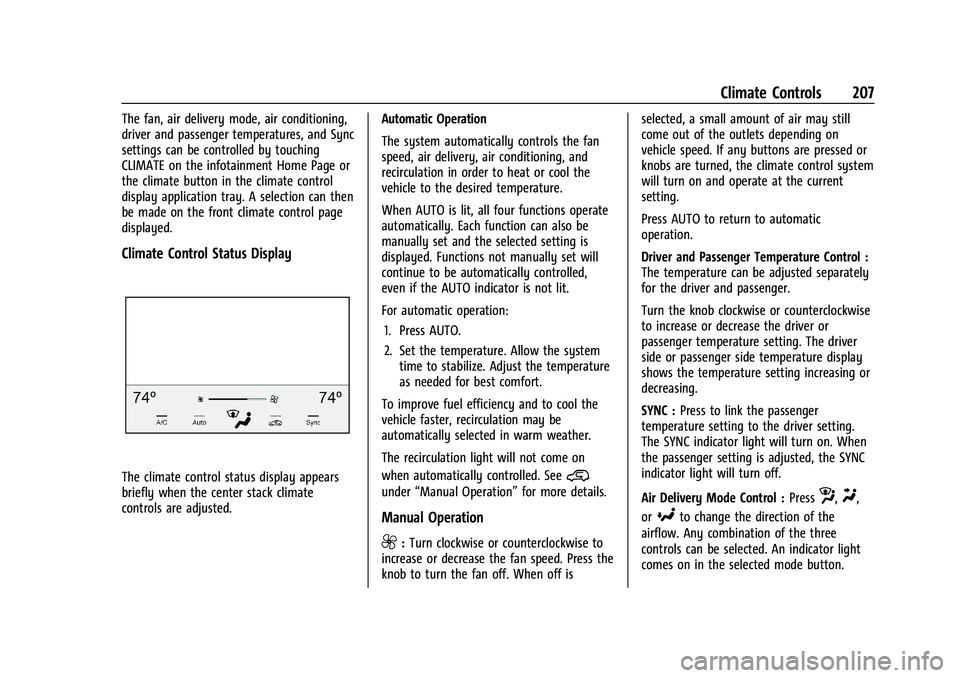
The climate control status display appears
briefly when the center stack climate
controls are adjusted.Automatic Operation
The system automatically controls the fan
speed, air delivery, air conditioning, and
recirculation in order to heat or cool the
vehicle to the desired temperature.
When AUTO is lit, all four functions operate
automatically. Each function can also be
manually set and the selected setting is
displayed. Functions not manually set will
continue to be automatically controlled,
even if the AUTO indicator is not lit.
For automatic operation:
1. Press AUTO.
2. Set the temperature. Allow the system time to stabilize. Adjust the temperature
as needed for best comfort.
To improve fuel efficiency and to cool the
vehicle faster, recirculation may be
automatically selected in warm weather.
The recirculation light will not come on
when automatically controlled. See@
under “Manual Operation” for more details.
Manual Operation
9:Turn clockwise or counterclockwise to
increase or decrease the fan speed. Press the
knob to turn the fan off. When off is selected, a small amount of air may still
come out of the outlets depending on
vehicle speed. If any buttons are pressed or
knobs are turned, the climate control system
will turn on and operate at the current
setting.
Press AUTO to return to automatic
operation.
Driver and Passenger Temperature Control :
The temperature can be adjusted separately
for the driver and passenger.
Turn the knob clockwise or counterclockwise
to increase or decrease the driver or
passenger temperature setting. The driver
side or passenger side temperature display
shows the temperature setting increasing or
decreasing.
SYNC :
Press to link the passenger
temperature setting to the driver setting.
The SYNC indicator light will turn on. When
the passenger setting is adjusted, the SYNC
indicator light will turn off.
Air Delivery Mode Control : Press
z,Y,
or
[to change the direction of the
airflow. Any combination of the three
controls can be selected. An indicator light
comes on in the selected mode button.