AUX CHEVROLET SILVERADO 2003 1.G Owners Manual
[x] Cancel search | Manufacturer: CHEVROLET, Model Year: 2003, Model line: SILVERADO, Model: CHEVROLET SILVERADO 2003 1.GPages: 556, PDF Size: 3.56 MB
Page 173 of 556
The fog lamps will be cancelled after the ignition is
turned off. If you still want to use the fog lamps after you
restart the vehicle, you will need to press the fog
lamp button again
Auxiliary Roof Mounted Lamp Switch
If your vehicle has this feature, this switch includes
wiring provisions for a dealer or a quali®ed service
center to install an auxiliary roof lamp.
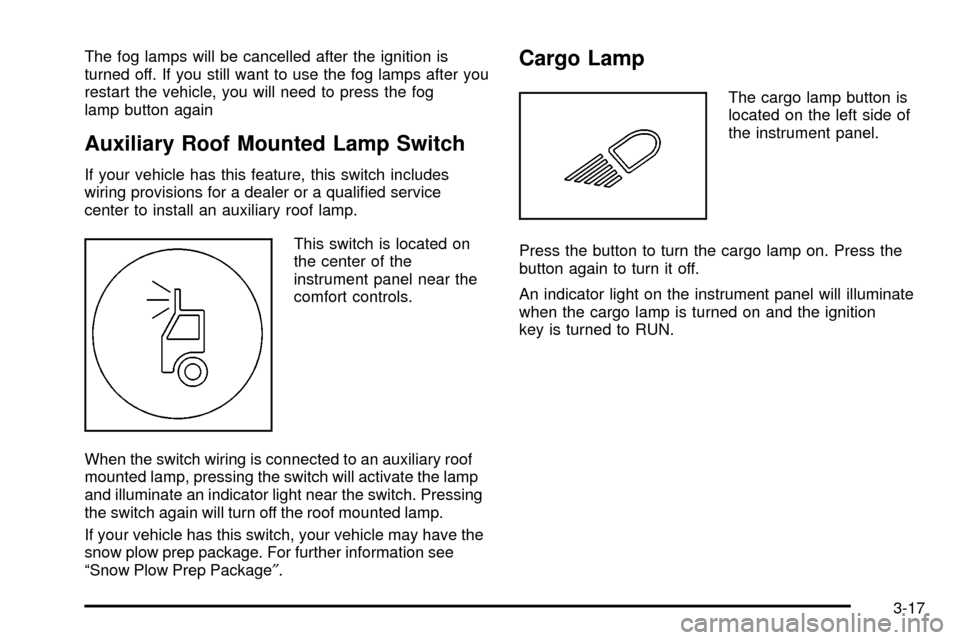
This switch is located on
the center of the
instrument panel near the
comfort controls.
When the switch wiring is connected to an auxiliary roof
mounted lamp, pressing the switch will activate the lamp
and illuminate an indicator light near the switch. Pressing
the switch again will turn off the roof mounted lamp.
If your vehicle has this switch, your vehicle may have the
snow plow prep package. For further information see
ªSnow Plow Prep Package².
Cargo Lamp
The cargo lamp button is
located on the left side of
the instrument panel.
Press the button to turn the cargo lamp on. Press the
button again to turn it off.
An indicator light on the instrument panel will illuminate
when the cargo lamp is turned on and the ignition
key is turned to RUN.
3-17
Page 175 of 556
E:You can use the dome override button, located
below the exterior lamps control, to set the dome lamps
to come on automatically when the doors are opened,
or remain off. To turn the lamps off, press the button into
the in position. With the button in this position, the
dome lamps will remain off when the doors are open.
To return the lamps to automatic operation, press
the button again and return it to the out position. With
the button in this position, the dome lamps will come on
when you open a door.
Battery Run-Down Protection
This feature shuts off the dome, and reading lamps. if
they are left on for more than 10 minutes when the
ignition is off. The cargo lamp will shut off after 20
minutes. This will keep your battery from running down.
Accessory Power Outlets
With accessory power outlets you can plug in auxiliary
electrical equipment such as a cellular telephone or
CB radio.
Your vehicle may have two accessory power outlets, or
may have one accessory power outlet located near
the cigarette lighter, if equipped. The cigarette lighter is
designed to ®t only in the receptacle to the right of
the accessory power outlet.To use the outlet, lift the cover. When not using it,
always close the cover.
Certain power accessory plugs may not be compatible
to the accessory power outlet and could result in
blown vehicle or adapter fuses. If you experience a
problem, see your dealer for additional information on
the accessory power plugs.
Notice:Adding some electrical equipment to your
vehicle can damage it or keep other things from
working as they should. This wouldn't be covered by
your warranty. Check with your dealer before
adding electrical equipment, and never use anything
that exceeds the amperage rating.
When adding electrical equipment, be sure to follow the
proper installation instructions included with the
equipment.
Notice:Power outlets are designed for accessory
plugs only. Do not hang any type of accessory
or accessory bracket from the plug. Improper use of
the power outlet can cause damage not covered
by your warranty.
3-19
Page 204 of 556
SeeDriver Information Center (DIC) on page 3-54for
further information.
If your vehicle has an Allison transmission, and the ¯uid
reaches temperatures of approximately 275ÉF (135ÉC)
or greater, the driver information center will display
a TRANS HOT IDLE ENGINE warning message and a
chime will sound until the temperature falls below
265ÉF (129ÉC) degrees. Pull the vehicle off the roadway
when it is safe to do so. Set the parking brake, place
the transmission in PARK (P) and allow the engine
to idle until the transmission temperature falls below
265ÉF (129ÉC). If the transmission continues to operate
above 265ÉF (130ÉC), contact your nearest dealer or
the GM Roadside Assistance Center. See
Roadside
Assistance Program on page 7-5.
Notice:If you keep driving your vehicle with the
transmission temperature gage above the normal
operating range, you can damage the transmission.
This could lead to costly repairs that may not be
covered under your warranty.The following situations can cause the transmission to
operate at higher temperatures:
·Towing a trailer
·Hot outside air temperatures
·Hauling a large or heavy load
·Low transmission ¯uid level
·High transmission ¯uid level
·Restricted air ¯ow to the radiator and the auxiliary
transmission oil cooler (if equipped).
A temporary solution to hotter transmission operating
temperatures may be to let the transmission cool down.
If the transmission is operated at higher temperatures
on a frequent basis, see
Scheduled Maintenance
on page 6-5for the proper transmission maintenance
intervals.
3-48
Page 226 of 556
TIGHTEN FUEL CAP
If the vehicle's fuel cap is not tightened properly thsi
message may appear along with the check engine light
on the instrument panel. See
Malfunction Indicator
Lamp on page 3-49. Fully reinstall the fuel cap.
SeeFilling Your Tank on page 5-6. The diagnostic
system can determine if the fuel cap has been left off or
improperly installed. A loose or missing fuel cap will
allow fuel to evaporate into the atmosphere. A few
driving trips with the cap properly installed should turn
the light and message off.
TRACTION ACTIVE
When the traction control system had detected that any
of the vehicle's wheels are slipping, the traction
control system will activate and this message will appear
on the DIC. For more information see ªTraction Assistº
in the Index.
TRANSMISSION HOT
If the transmission ¯uid temperature becomes high, the
message center will display this message.
When the transmission enters the protection mode, you
may notice a change in the transmission shifting
patterns. When the transmission ¯uid temperature
returns to normal, the display will turn off and the
transmission shifting patterns will return to normal.
Notice:If you keep driving your vehicle with the
transmission TRANS FLUID HOT message
displayed, you can damage the transmission. This
could lead to costly repairs that may not be covered
under your warranty.
The following situations can cause the transmission to
operate at higher temperatures:
·Towing a trailer
·Hot outside air temperatures
·Hauling a large or heavy load
·Low transmission ¯uid level
·High transmission ¯uid level
·Restricted air ¯ow to the radiator and the auxiliary
transmission oil cooler.
A temporary solution to hotter transmission operating
temperatures may be to let the transmission cool down.
If the transmission is operated at higher temperatures
on a frequent basis, see
Scheduled Maintenance
on page 6-5for the proper transmission maintenance
intervals.
3-70
Page 240 of 556
qSEEKr:Press the left arrow to go to the start of
the current or to the previous track. Press the right
arrow to go to the start of the next track. If either arrow
is held or pressed more than once, the player will
continue moving backward or forward through the CD.
qSCANr:To scan the disc, press and hold
either SCAN arrow for more than two seconds until
SCAN appears on the display and you hear a beep. Use
this feature to listen to 10 seconds of each track of
the disc. Press either SCAN arrow again, to stop
scanning.
DISP (Display):Press this knob to see how long the
current track has been playing. ET and the elapsed time
will appear on the display. To change the default on
the display (track or elapsed time), push the knob until
you see the display you want, then hold the knob
for two seconds. The radio will produce one beep and
selected display will now be the default.
BAND:Press this button to listen to the radio when a
CD is playing. The disc will stop but remain in the player.
CD AUX (Auxiliary):Press this button to play a CD
when listening to the radio.
Z(Eject):Press this button to stop a CD when it is
playing or to eject a CD when it is not playing. Eject
may be activated with either the ignition or radio off. CDs
may be loaded with the radio and ignition off if this
button is pressed ®rst.
Compact Disc Messages
If the disc comes out, it could be for one of the following
reasons:
·You're driving on a very rough road. When the road
becomes smoother, the disc should play.
·It's very hot. When the temperature returns to
normal, the disc should play.
·The disc is dirty, scratched, wet or upside down.
·The air is very humid. If so, wait about an hour and
try again.
·There may have been a problem while burning
the CD.
·The label may be caught in the CD player.
If the CD is not playing correctly, for any other reason,
try a known good CD.
If any error occurs repeatedly or if an error can't be
corrected, contact your dealer.
3-84
Page 263 of 556
Playing a Speci®c Loaded
Compact Disc
For every CD loaded, a number will appear on the radio
display. To play a speci®c CD, ®rst press the CD AUX
button to start playing a CD. Then press the numbered
pushbutton that corresponds to the CD you want to play.
A small bar will appear under the CD number that is
playing, and the track number will appear.
If an error appears on the radio display, see ªCompact
Disc Messagesº later in this section.
LOAD CD
Z(Eject):Pressing the CD eject side of
this button will eject a single disc or multiple discs. To
eject the disc that is currently playing, press and release
this button. To eject multiple discs, press and hold this
button for two seconds. You will hear a beep and the light
will ¯ash to let you know when a disc is being ejected.
REMOVE CD will be displayed. You can now remove the
disc. If the disc is not removed, after 25 seconds, the disc
will be automatically pulled back into the receiver. If you
try to push the disc back into the receiver, before the
25 second time period is complete, the receiver will sense
an error and will try to eject the disc several times before
stopping.
Do not repeatedly press the CD eject side of the
LOAD CD eject button to eject a disc after you have tried
to push it in manually. The receivers 25-second ejecttimer will reset at each press of eject, which will cause the
receiver to not eject the disc until the 25-second time
period has elapsed.
Once the player stops and the disc is ejected, remove the
disc. After removing the disc, press the PWR knob off and
then on again. This will clear the disc-sensing feature and
enable discs to be loaded into the player again.
{REV (Reverse):Press and hold this button to
reverse quickly within a track. You will hear sound at a
reduced volume. Release it to play the passage.
The display will show elapsed time.
FWD
|(Forward):Press and hold this button to
advance quickly within a track. You will hear sound at a
reduced volume. Release it to play the passage. The
display will show elapsed time.
RPT (Repeat):With repeat, you can repeat one track
or an entire disc. To use repeat, do the following:
·To repeat the track you are listening to, press and
release the RPT button. RPT will appear on the
display. Press RPT again to turn it off.
·To repeat the disc you are listening to, press and
hold the RPT button for two seconds. RPT will
appear on the display. Press RPT again to turn it off.
3-107
Page 266 of 556
To delete the entire song list, perform the following
steps:
1. Turn the disc player on.
2. Press the SONG LIST button to turn song list on.
S-LIST will appear on the display.
3. Press and hold the SONG LIST button for more
than four seconds. A beep will be heard, followed
by two beeps after two seconds and a ®nal beep will
be heard after four seconds. S-LIST EMPTY will
appear on the display indicating that the song
list has been deleted.
If a disc is ejected, and the song list contains saved
tracks from that disc, those tracks are automatically
deleted from the song list. Any tracks saved to the song
list again are added to the bottom of the list.
To end song list mode, press the SONG LIST button.
One beep will be heard and S-LIST will be removed from
the display.
Compact Disc Messages
CHECK CD:If this message appears on the radio
display, it could be due to one of the following reasons:
·You're driving on a very rough road. When the
road becomes smoother, the disc should play.
·The disc is dirty, scratched, wet or upside down.
·The air is very humid. If so, wait about an hour and
try again.
·There may have been a problem while burning
the CD.
·The label may be caught in the CD player.
If the CD is not playing correctly, for any other reason,
try a known good CD.
If any error occurs repeatedly or if an error can't be
corrected, contact your dealer. If your radio displays an
error message, write it down and provide it to your
dealer when reporting the problem.
Listening to a DVD
If your vehicle has Rear Seat Entertainment (RSE)
system and a DVD is playing, the DVD symbol
will appear on the radio display indicating that the DVD
is available and can be listened to through your
vehicles speakers. To listen to the DVD, press the CD
AUX button until RSE appears on the radio display. The
current radio source will stop and the DVD sound will
come through the speakers. To stop listening to
the DVD, press the CD AUX button, if a CD is loaded,
or press the BAND button to select a different source.
When the RSE system is turned off, the DVD symbol will
go off of the radio display and the radio will display
RSE OFF. The radio will return to the last radio source
that you were listening to.
3-110
Page 267 of 556
Rear Seat Entertainment System
Your vehicle may have the optional Digital Versatile Disc
(DVD) Rear Seat Entertainment (RSE) system. The RSE
system includes a DVD player, a video display screen,
two sets of wireless headphones, and a remote control.
Before You Drive
The RSE system is for rear seat passengers. The driver
cannot safely view the video screen while driving and
should not try to do so.
DVD Player
The DVD player is located in the overhead console. The
DVD player can be controlled by the buttons on the DVD
player and by the buttons on the remote control. See
ªRemote Controlº later in this section for more
information.
The DVD player power may be turned on when the
ignition is in RUN, ACCESSORY, or when Retained
Accessory Power (RAP) is active.
The RSE system DVD player is only compatible with
DVDs of the appropriate DVD region code for the
country that the vehicle was sold in. The DVD region
code is printed on the jacket of most DVDs.
The DVD player will also play audio CDs. Home
recorded CDs (CD-R or CD-RW formats) will not play in
this DVD player.If an error message appears on the video screen, see
ªDVD Messagesº later in this section.
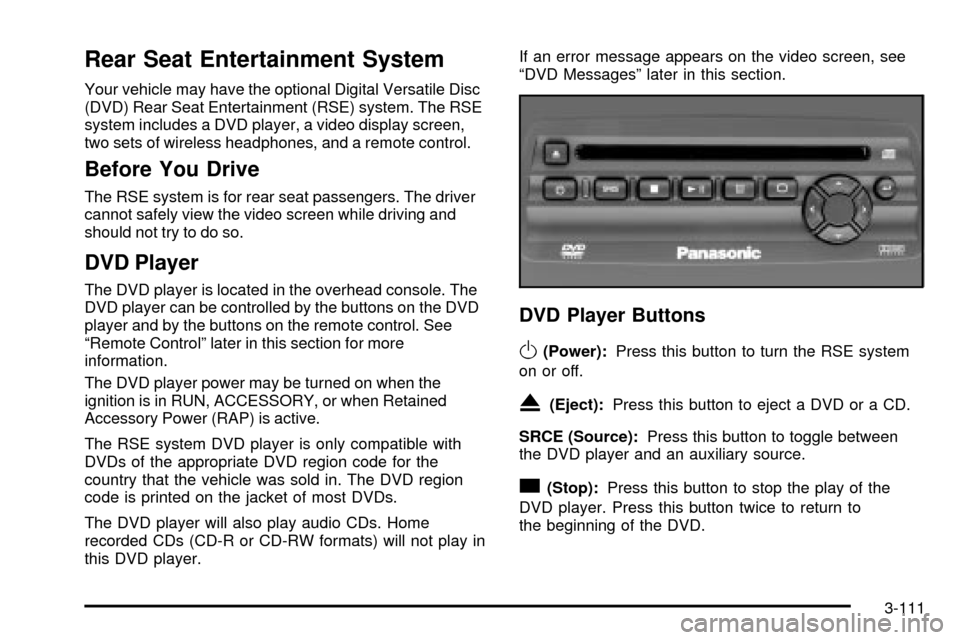
DVD Player Buttons
O(Power):Press this button to turn the RSE system
on or off.
X(Eject):Press this button to eject a DVD or a CD.
SRCE (Source):Press this button to toggle between
the DVD player and an auxiliary source.
c(Stop):Press this button to stop the play of the
DVD player. Press this button twice to return to
the beginning of the DVD.
3-111
Page 270 of 556
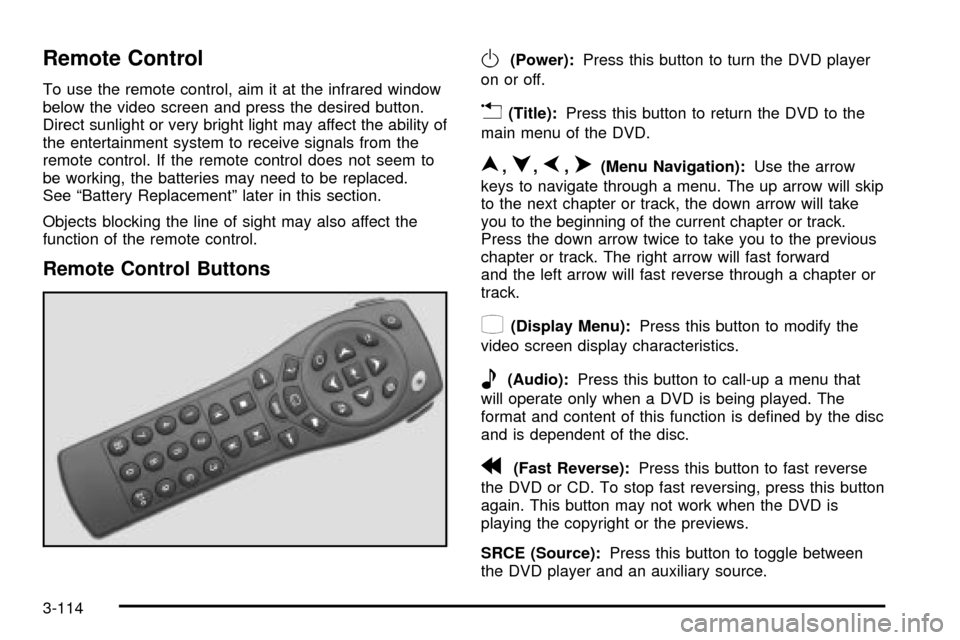
Remote Control
To use the remote control, aim it at the infrared window
below the video screen and press the desired button.
Direct sunlight or very bright light may affect the ability of
the entertainment system to receive signals from the
remote control. If the remote control does not seem to
be working, the batteries may need to be replaced.
See ªBattery Replacementº later in this section.
Objects blocking the line of sight may also affect the
function of the remote control.
Remote Control Buttons
O(Power):Press this button to turn the DVD player
on or off.
v(Title):Press this button to return the DVD to the
main menu of the DVD.
n,q,p,o(Menu Navigation):Use the arrow
keys to navigate through a menu. The up arrow will skip
to the next chapter or track, the down arrow will take
you to the beginning of the current chapter or track.
Press the down arrow twice to take you to the previous
chapter or track. The right arrow will fast forward
and the left arrow will fast reverse through a chapter or
track.
z(Display Menu):Press this button to modify the
video screen display characteristics.
e(Audio):Press this button to call-up a menu that
will operate only when a DVD is being played. The
format and content of this function is de®ned by the disc
and is dependent of the disc.
r(Fast Reverse):Press this button to fast reverse
the DVD or CD. To stop fast reversing, press this button
again. This button may not work when the DVD is
playing the copyright or the previews.
SRCE (Source):Press this button to toggle between
the DVD player and an auxiliary source.
3-114
Page 273 of 556
Notice:Do not store the headphones in heat or
direct sunlight. This could damage the headphones
and repairs would not be covered by your warranty.
Keep the headphones stored in a cool, dry place.
If the headphones are to be stored for a long period of
time, remove the batteries and keep them in a cool,
dry place.
Stereo RCA Jacks
The RCA jacks are located behind the video screen on
the front of the DVD console. The RCA jacks allow you to
connect audio and video from an auxiliary device such as
a camcorder or a video game unit to your RSE system
just as you would to a standard television. Standard RCA
cables are needed to connect the auxiliary device to the
RCA jacks. The yellow connector inputs video and the
red and white connectors input right and left stereo audio.
Refer to the manufacturer's instructions for proper
connection of your auxiliary device.
To use the auxiliary inputs on the RSE system, connect
an external auxiliary device to the color-coded RCA
jacks and turn both the auxiliary device and the
RSE system power on. If the RSE system had been
previously in the DVD player mode, you will need
to press the SRCE button on the faceplate or the remote
control to change to the auxiliary mode. Pressing the
SRCE button will toggle the RSE system between
the auxiliary device and the DVD player.
How to Change the Video Format when in
the Auxiliary Mode
The auxiliary input video format is preset to NTSC. In
some countries, the video format may be in PAL system.
To change the video format, perform the following:
1. Press the display menu button.
2. Press the navigation down arrow key to scroll down
to Video Format.
3. Press the enter button to select Video Format.
4. Press the navigation key to select the PAL video
format.
5. Press the enter button to accept the change.
Audio Output
Audio from the DVD player or auxiliary inputs may be
heard through the following possible sources:
·Wireless Headphones
·Vehicle Speakers
·Vehicle wired headphone jacks on the Rear Seat
Audio system (if equipped)
The RSE system will always transmit the audio signal
by infrared to the wireless headphones, if there is audio
available. See ªHeadphonesº previously for more
information.
3-117