low beam CHEVROLET SILVERADO 2003 1.G Owners Manual
[x] Cancel search | Manufacturer: CHEVROLET, Model Year: 2003, Model line: SILVERADO, Model: CHEVROLET SILVERADO 2003 1.GPages: 556, PDF Size: 3.56 MB
Page 163 of 556
Horn
To sound the horn, press the center pad on the steering
wheel.
Tilt Wheel
If your vehicle is equipped with a tilt wheel, it will allow
you to adjust the steering wheel before you drive.
You can raise it to the highest level to give your legs
more room when you exit and enter your vehicle.
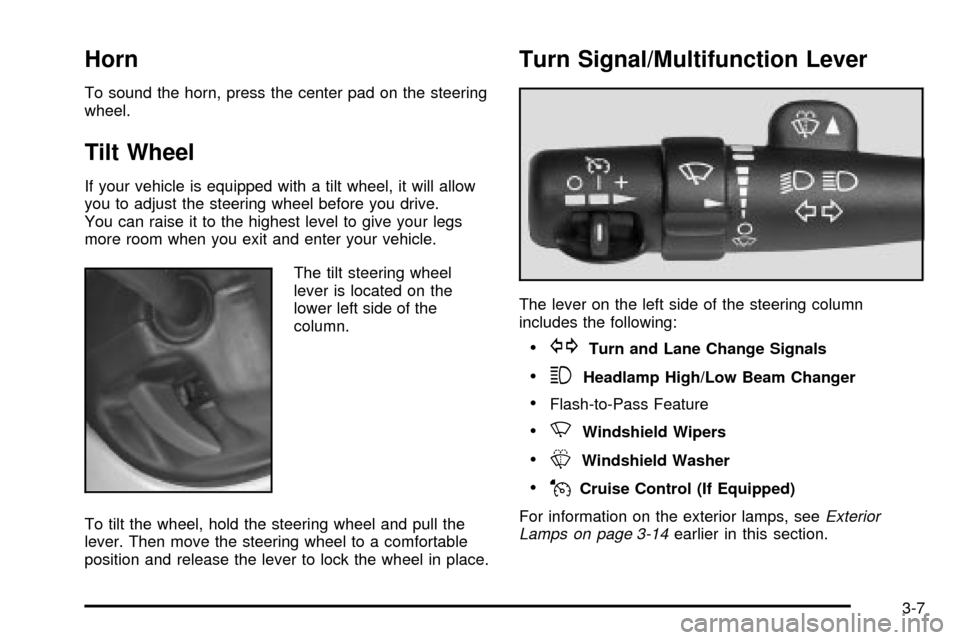
The tilt steering wheel
lever is located on the
lower left side of the
column.
To tilt the wheel, hold the steering wheel and pull the
lever. Then move the steering wheel to a comfortable
position and release the lever to lock the wheel in place.
Turn Signal/Multifunction Lever
The lever on the left side of the steering column
includes the following:
·GTurn and Lane Change Signals
·3Headlamp High/Low Beam Changer
·Flash-to-Pass Feature
·NWindshield Wipers
·LWindshield Washer
·JCruise Control (If Equipped)
For information on the exterior lamps, see
Exterior
Lamps on page 3-14earlier in this section.
3-7
Page 165 of 556

Headlamp High/Low Beam Changer
To change the headlamps from low to high beam, push
the lever toward the instrument panel. To return the
low-beam headlamps, pull the multifunction lever toward
you. Then release it.
When the high beams are
on, this light on the
instrument panel cluster
also will be on.
Flash-To-Pass Feature
This feature allows you to use your high-beam
headlamps to signal a driver in front of you that you
want to pass. It works even if your headlamps are off.
To use it, pull the turn signal lever toward you.
If your headlamps are off or on low-beam, your
high-beam headlamps will turn on. They'll stay on as long
as you hold the lever toward you and the high-beam
indicator on the instrument panel will come on. Release
the lever to turn the high-beam headlamps off.
3-9
Page 170 of 556
Exterior Lamps
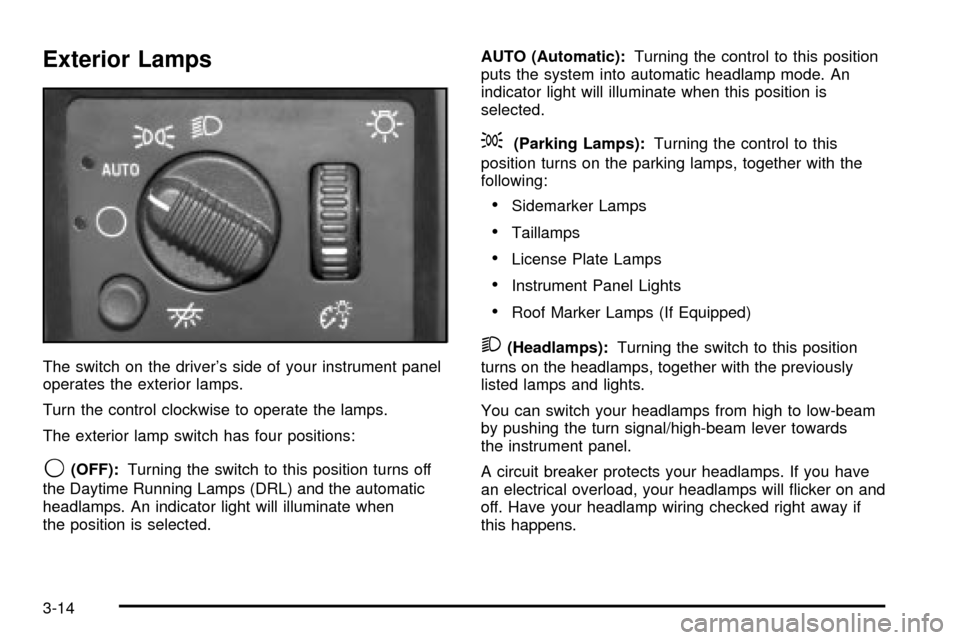
The switch on the driver's side of your instrument panel
operates the exterior lamps.
Turn the control clockwise to operate the lamps.
The exterior lamp switch has four positions:
9(OFF):Turning the switch to this position turns off
the Daytime Running Lamps (DRL) and the automatic
headlamps. An indicator light will illuminate when
the position is selected.AUTO (Automatic):Turning the control to this position
puts the system into automatic headlamp mode. An
indicator light will illuminate when this position is
selected.
;(Parking Lamps):Turning the control to this
position turns on the parking lamps, together with the
following:
·Sidemarker Lamps
·Taillamps
·License Plate Lamps
·Instrument Panel Lights
·Roof Marker Lamps (If Equipped)
2(Headlamps):Turning the switch to this position
turns on the headlamps, together with the previously
listed lamps and lights.
You can switch your headlamps from high to low-beam
by pushing the turn signal/high-beam lever towards
the instrument panel.
A circuit breaker protects your headlamps. If you have
an electrical overload, your headlamps will ¯icker on and
off. Have your headlamp wiring checked right away if
this happens.
3-14
Page 172 of 556
The DRL system will come on when the following
conditions are met:
·the ignition is on,
·the exterior lamps control is in AUTO,
·the automatic transmission is not in PARK (P), and
·the light sensor determines it is daytime.
When the DRL are on, only your DRL lamps will be on.
The taillamps, sidemarker and other lamps won't be
on. The instrument panel won't be lit up either.
When it begins to get dark, the automatic headlamp
system will switch from DRL to the headlamps or the last
chosen headlamp setting that was used.
When you turn the headlamp switch off, the headlamps
will go off, and your DRL lamps will illuminate,
provided it is not dark outside.
To idle an automatic transmission equipped vehicle with
the DRL off, set the parking brake. Shifting the
transmission into PARK (P) will also allow you to idle
the vehicle with the DRL off. The DRL will stay off until
you release the parking brake or shift the transmission
out of PARK (P).
To idle a manual transmission equipped vehicle with the
DRL off, set the parking brake. The DRL will stay off
until you release the parking brake.
Fog Lamps
If your vehicle has fog lamps, use them for better vision
in foggy or misty conditions.
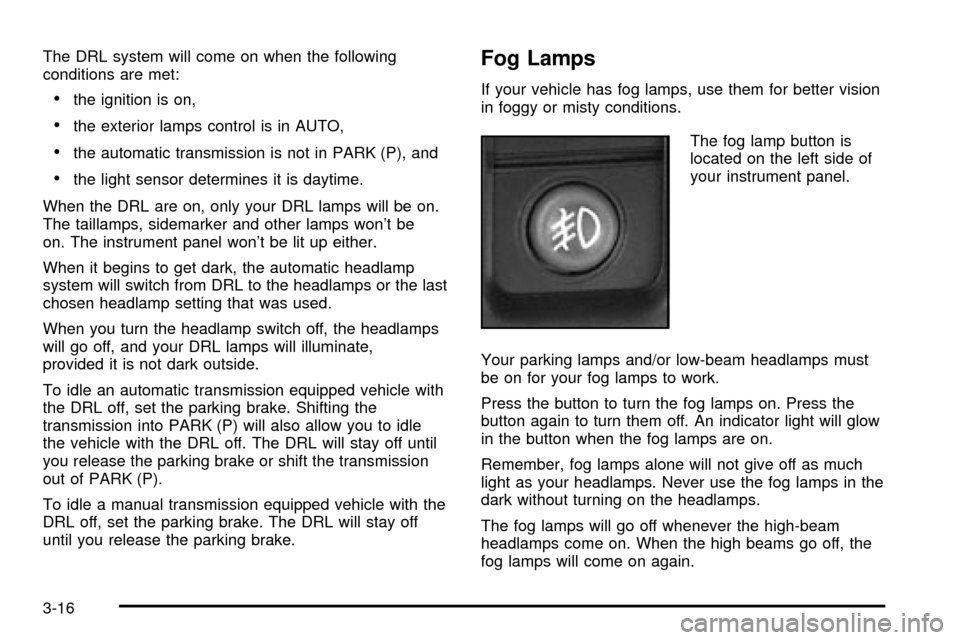
The fog lamp button is
located on the left side of
your instrument panel.
Your parking lamps and/or low-beam headlamps must
be on for your fog lamps to work.
Press the button to turn the fog lamps on. Press the
button again to turn them off. An indicator light will glow
in the button when the fog lamps are on.
Remember, fog lamps alone will not give off as much
light as your headlamps. Never use the fog lamps in the
dark without turning on the headlamps.
The fog lamps will go off whenever the high-beam
headlamps come on. When the high beams go off, the
fog lamps will come on again.
3-16
Page 321 of 556

You can be temporarily blinded by approaching
headlamps. It can take a second or two, or even several
seconds, for your eyes to re-adjust to the dark. When
you are faced with severe glare (as from a driver
who doesn't lower the high beams, or a vehicle with
misaimed headlamps), slow down a little. Avoid staring
directly into the approaching headlamps.
Keep your windshield and all the glass on your vehicle
clean Ð inside and out. Glare at night is made much
worse by dirt on the glass. Even the inside of the glass
can build up a ®lm caused by dust. Dirty glass makes
lights dazzle and ¯ash more than clean glass would,
making the pupils of your eyes contract repeatedly.
Remember that your headlamps light up far less of a
roadway when you are in a turn or curve. Keep
your eyes moving; that way, it's easier to pick out dimly
lighted objects. Just as your headlamps should be
checked regularly for proper aim, so should your eyes
be examined regularly. Some drivers suffer from
night blindness Ð the inability to see in dim light Ð and
aren't even aware of it.Driving in Rain and on Wet Roads
Rain and wet roads can mean driving trouble. On a wet
road, you can't stop, accelerate or turn as well
because your tire-to-road traction isn't as good as on
dry roads. And, if your tires don't have much tread left,
you'll get even less traction. It's always wise to go
slower and be cautious if rain starts to fall while you are
driving. The surface may get wet suddenly when your
re¯exes are tuned for driving on dry pavement.
4-39
Page 324 of 556
Some Other Rainy Weather Tips
·Turn on your low-beam headlamps ± not just your
parking lamps ± to help make you more visible to
others.
·Besides slowing down, allow some extra following
distance. And be especially careful when you
pass another vehicle. Allow yourself more clear
room ahead, and be prepared to have your
view restricted by road spray.
·Have good tires with proper tread depth. SeeTires
on page 5-69
.
City Driving
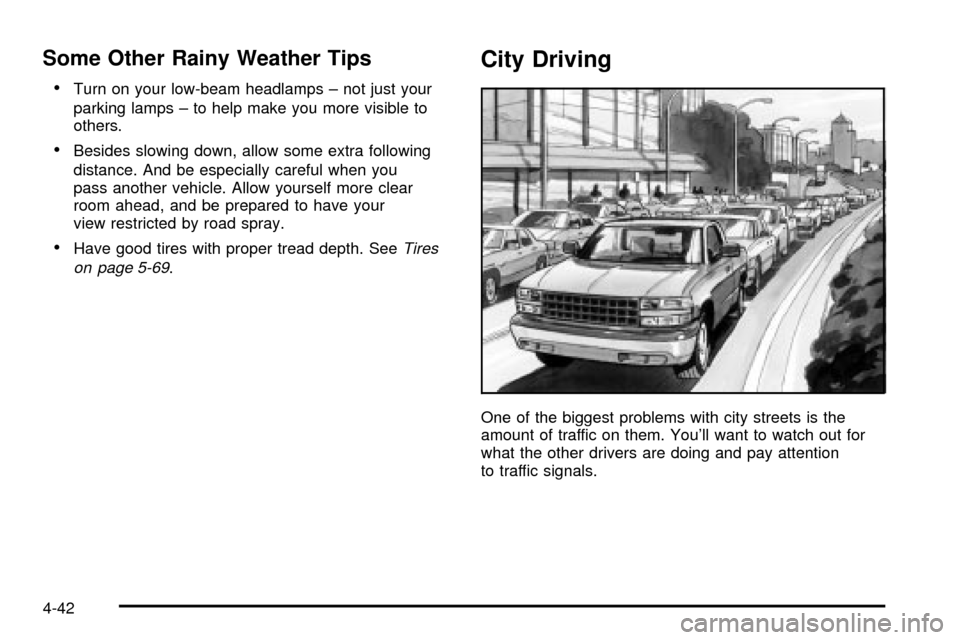
One of the biggest problems with city streets is the
amount of traffic on them. You'll want to watch out for
what the other drivers are doing and pay attention
to traffic signals.
4-42
Page 440 of 556
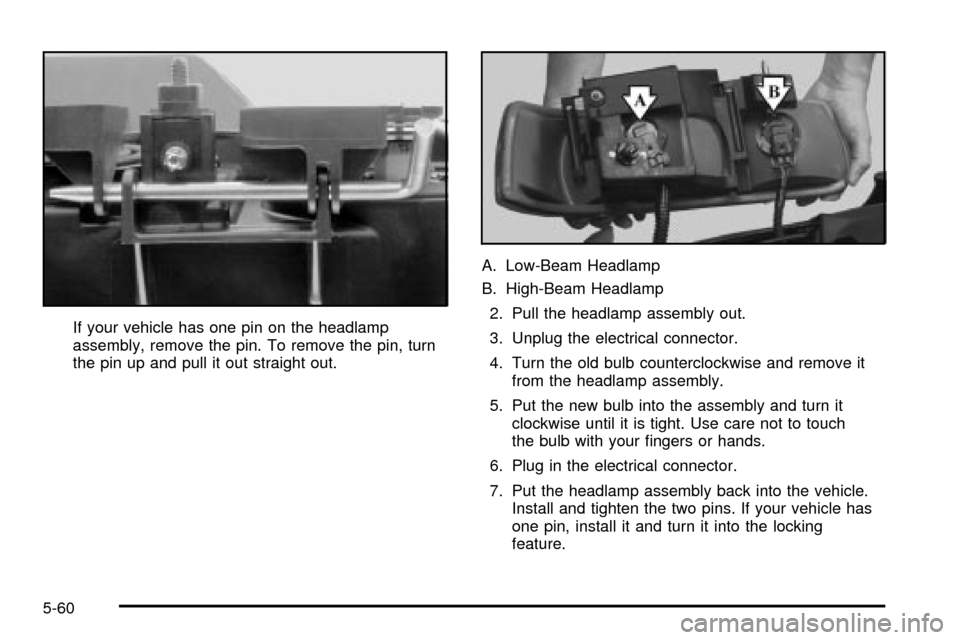
If your vehicle has one pin on the headlamp
assembly, remove the pin. To remove the pin, turn
the pin up and pull it out straight out.A. Low-Beam Headlamp
B. High-Beam Headlamp
2. Pull the headlamp assembly out.
3. Unplug the electrical connector.
4. Turn the old bulb counterclockwise and remove it
from the headlamp assembly.
5. Put the new bulb into the assembly and turn it
clockwise until it is tight. Use care not to touch
the bulb with your ®ngers or hands.
6. Plug in the electrical connector.
7. Put the headlamp assembly back into the vehicle.
Install and tighten the two pins. If your vehicle has
one pin, install it and turn it into the locking
feature.
5-60
Page 447 of 556
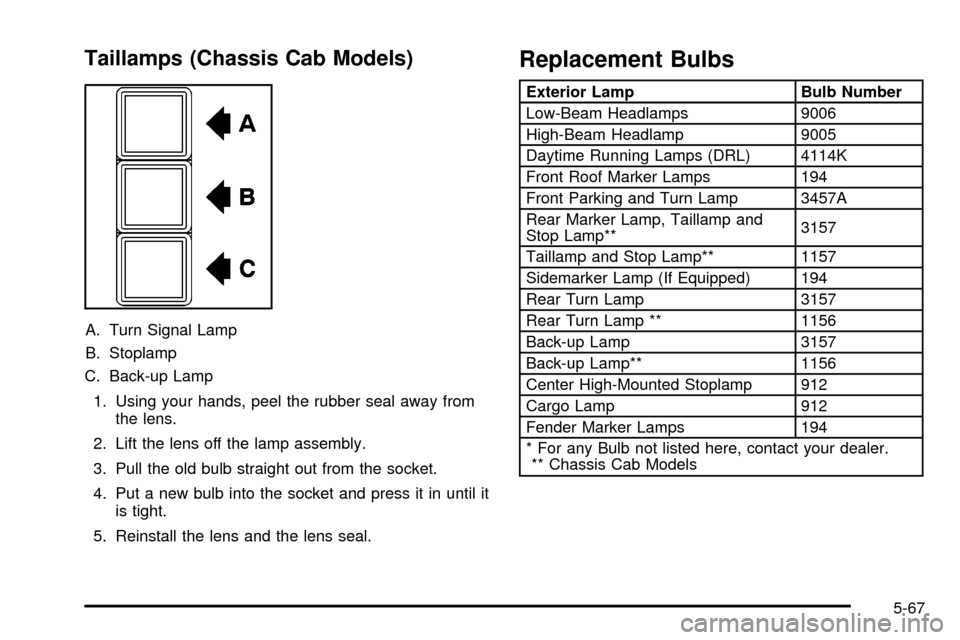
Taillamps (Chassis Cab Models)
A. Turn Signal Lamp
B. Stoplamp
C. Back-up Lamp
1. Using your hands, peel the rubber seal away from
the lens.
2. Lift the lens off the lamp assembly.
3. Pull the old bulb straight out from the socket.
4. Put a new bulb into the socket and press it in until it
is tight.
5. Reinstall the lens and the lens seal.
Replacement Bulbs
Exterior Lamp Bulb Number
Low-Beam Headlamps 9006
High-Beam Headlamp 9005
Daytime Running Lamps (DRL) 4114K
Front Roof Marker Lamps 194
Front Parking and Turn Lamp 3457A
Rear Marker Lamp, Taillamp and
Stop Lamp**3157
Taillamp and Stop Lamp** 1157
Sidemarker Lamp (If Equipped) 194
Rear Turn Lamp 3157
Rear Turn Lamp ** 1156
Back-up Lamp 3157
Back-up Lamp** 1156
Center High-Mounted Stoplamp 912
Cargo Lamp 912
Fender Marker Lamps 194
* For any Bulb not listed here, contact your dealer.
** Chassis Cab Models
5-67
Page 496 of 556
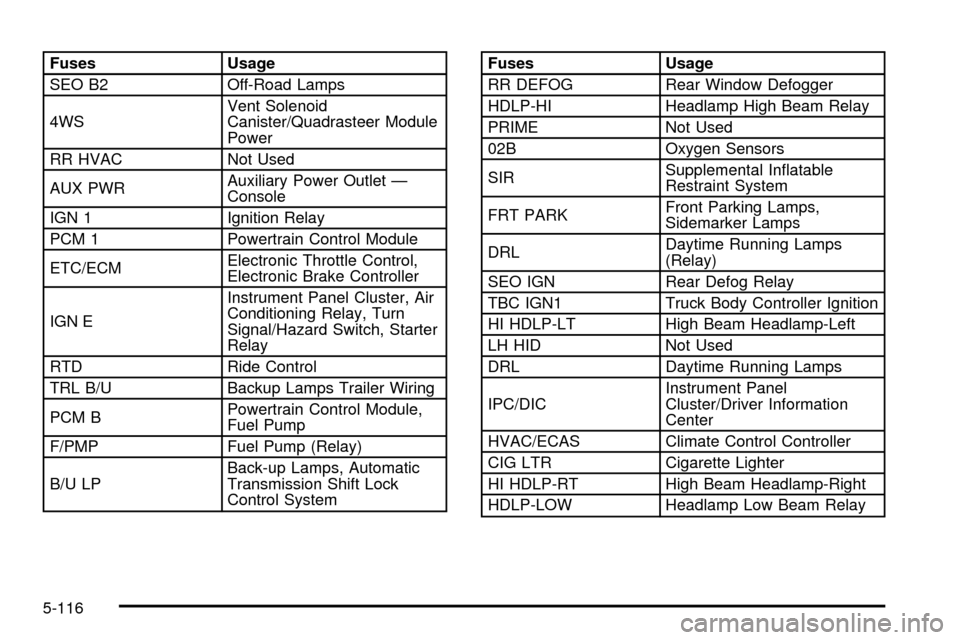
Fuses Usage
SEO B2 Off-Road Lamps
4WSVent Solenoid
Canister/Quadrasteer Module
Power
RR HVAC Not Used
AUX PWRAuxiliary Power Outlet Ð
Console
IGN 1 Ignition Relay
PCM 1 Powertrain Control Module
ETC/ECMElectronic Throttle Control,
Electronic Brake Controller
IGN EInstrument Panel Cluster, Air
Conditioning Relay, Turn
Signal/Hazard Switch, Starter
Relay
RTD Ride Control
TRL B/U Backup Lamps Trailer Wiring
PCM BPowertrain Control Module,
Fuel Pump
F/PMP Fuel Pump (Relay)
B/U LPBack-up Lamps, Automatic
Transmission Shift Lock
Control SystemFuses Usage
RR DEFOG Rear Window Defogger
HDLP-HI Headlamp High Beam Relay
PRIME Not Used
02B Oxygen Sensors
SIRSupplemental In¯atable
Restraint System
FRT PARKFront Parking Lamps,
Sidemarker Lamps
DRLDaytime Running Lamps
(Relay)
SEO IGN Rear Defog Relay
TBC IGN1 Truck Body Controller Ignition
HI HDLP-LT High Beam Headlamp-Left
LH HID Not Used
DRL Daytime Running Lamps
IPC/DICInstrument Panel
Cluster/Driver Information
Center
HVAC/ECAS Climate Control Controller
CIG LTR Cigarette Lighter
HI HDLP-RT High Beam Headlamp-Right
HDLP-LOW Headlamp Low Beam Relay
5-116
Page 497 of 556
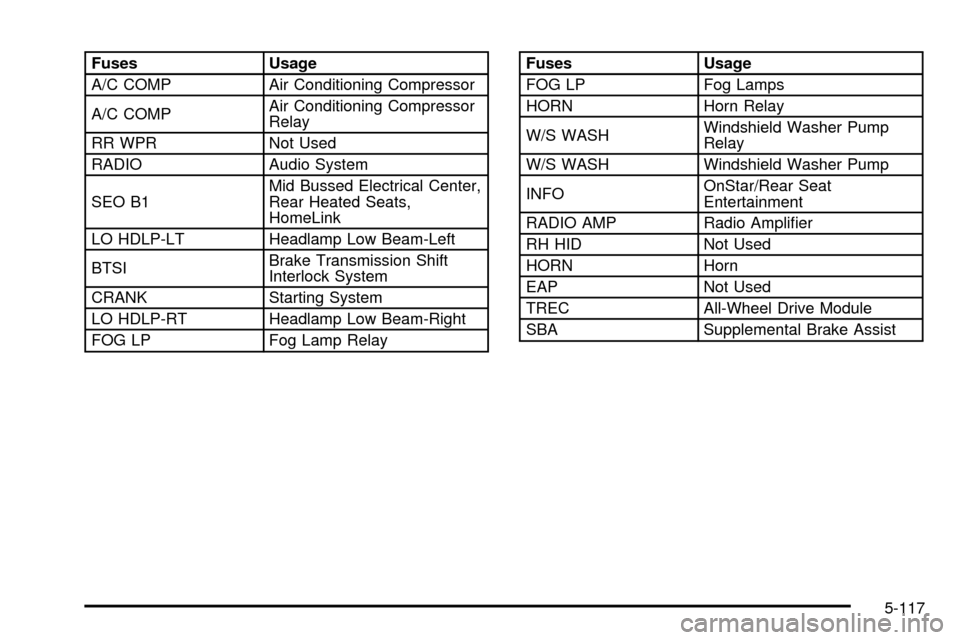
Fuses Usage
A/C COMP Air Conditioning Compressor
A/C COMPAir Conditioning Compressor
Relay
RR WPR Not Used
RADIO Audio System
SEO B1Mid Bussed Electrical Center,
Rear Heated Seats,
HomeLink
LO HDLP-LT Headlamp Low Beam-Left
BTSIBrake Transmission Shift
Interlock System
CRANK Starting System
LO HDLP-RT Headlamp Low Beam-Right
FOG LP Fog Lamp RelayFuses Usage
FOG LP Fog Lamps
HORN Horn Relay
W/S WASHWindshield Washer Pump
Relay
W/S WASH Windshield Washer Pump
INFOOnStar/Rear Seat
Entertainment
RADIO AMP Radio Ampli®er
RH HID Not Used
HORN Horn
EAP Not Used
TREC All-Wheel Drive Module
SBA Supplemental Brake Assist
5-117