roof CHEVROLET SILVERADO 2005 1.G Owners Manual
[x] Cancel search | Manufacturer: CHEVROLET, Model Year: 2005, Model line: SILVERADO, Model: CHEVROLET SILVERADO 2005 1.GPages: 580, PDF Size: 3.44 MB
Page 1 of 580
Seats and Restraint Systems........................... 1-1
Front Seats
............................................... 1-3
Rear Seats
............................................... 1-8
Safety Belts
.............................................1-10
Child Restraints
.......................................1-30
Airbag System
.........................................1-63
Restraint System Check
............................1-79
Features and Controls..................................... 2-1
Keys
........................................................ 2-3
Doors and Locks
....................................... 2-8
Windows
.................................................2-16
Theft-Deterrent Systems
............................2-19
Starting and Operating Your Vehicle
...........2-21
Mirrors
....................................................2-58
OnStar
®System
......................................2-68
HomeLink®Wireless Control System
...........2-70
Storage Areas
.........................................2-75
Sunroof
..................................................2-78
Vehicle Personalization
.............................2-79
Instrument Panel............................................. 3-1
Instrument Panel Overview
.......................... 3-4
Climate Controls
......................................3-20
Warning Lights, Gages, and Indicators
........3-31
Driver Information Center (DIC)
..................3-50
Audio System(s)
.......................................3-69Driving Your Vehicle....................................... 4-1
Your Driving, the Road, and Your Vehicle
..... 4-2
Towing
...................................................4-63
Service and Appearance Care.......................... 5-1
Service
..................................................... 5-4
Fuel
......................................................... 5-5
Checking Things Under the Hood
...............5-12
All-Wheel Drive
........................................5-57
Rear Axle
...............................................5-58
Four-Wheel Drive
.....................................5-59
Front Axle
...............................................5-60
Noise Control System
...............................5-61
Bulb Replacement
....................................5-62
Windshield Wiper Blade Replacement
.........5-72
Tires
......................................................5-73
Appearance Care
...................................5-112
Vehicle Identi�cation
...............................5-122
Electrical System
....................................5-123
Capacities and Speci�cations
...................5-133
Maintenance Schedule..................................... 6-1
Maintenance Schedule
................................ 6-2
Customer Assistance and Information.............. 7-1
Customer Assistance and Information
........... 7-2
Reporting Safety Defects
...........................7-10
Index................................................................ 1
2005 Chevrolet Silverado Owner ManualM
Page 88 of 580
Mirrors...........................................................2-58
Manual Rearview Mirror.................................2-58
Automatic Dimming Rearview Mirror with
OnStar
®, Compass and Temperature
Display....................................................2-58
Automatic Dimming Rearview Mirror with
Compass and Temperature Display..............2-60
Outside Manual Mirrors..................................2-63
Outside Camper-Type Mirrors.........................2-64
Outside West Coast-Type Mirrors....................2-65
Outside Power Mirrors...................................2-65
Outside Power Camper-Type Mirror.................2-66
Outside Power Foldaway Mirrors.....................2-66
Outside Automatic Dimming Mirror..................2-67
Outside Curb View Assist Mirrors....................2-67
Outside Convex Mirror...................................2-68
Outside Heated Mirrors..................................2-68OnStar
®System.............................................2-68
HomeLink®Wireless Control System...............2-70
HomeLink®Wireless Control System
Operation.................................................2-71
Storage Areas................................................2-75
Glove Box...................................................2-75
Cupholder(s)................................................2-75
Coinholder(s)................................................2-75
Front Storage Area.......................................2-75
Center Console Storage Area.........................2-75
Tonneau Cover............................................2-76
Sunroof.........................................................2-78
Vehicle Personalization...................................2-79
Memory Seat...............................................2-79
Section 2 Features and Controls
2-2
Page 164 of 580
Sunroof
The vehicle may be equipped with a power sliding
sunroof. To open or close your sunroof, the ignition must
be on or Retained Accessory Power (RAP) must be
active. SeeRetained Accessory Power (RAP) on
page 2-23for more information.
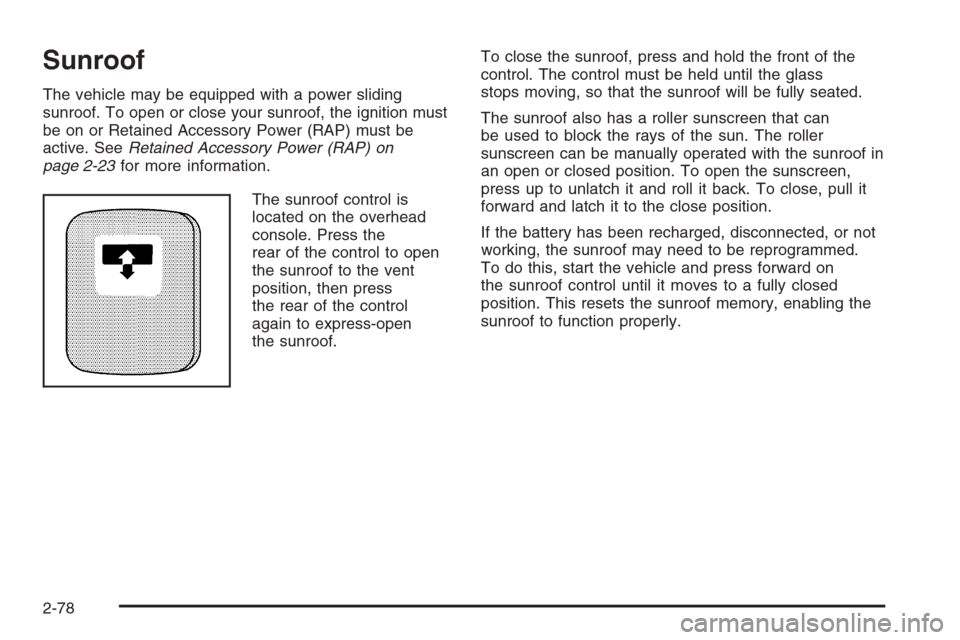
The sunroof control is
located on the overhead
console. Press the
rear of the control to open
the sunroof to the vent
position, then press
the rear of the control
again to express-open
the sunroof.To close the sunroof, press and hold the front of the
control. The control must be held until the glass
stops moving, so that the sunroof will be fully seated.
The sunroof also has a roller sunscreen that can
be used to block the rays of the sun. The roller
sunscreen can be manually operated with the sunroof in
an open or closed position. To open the sunscreen,
press up to unlatch it and roll it back. To close, pull it
forward and latch it to the close position.
If the battery has been recharged, disconnected, or not
working, the sunroof may need to be reprogrammed.
To do this, start the vehicle and press forward on
the sunroof control until it moves to a fully closed
position. This resets the sunroof memory, enabling the
sunroof to function properly.
2-78
Page 167 of 580
Instrument Panel Overview...............................3-4
Hazard Warning Flashers................................3-6
Other Warning Devices...................................3-6
Horn .............................................................3-6
Tilt Wheel.....................................................3-6
Turn Signal/Multifunction Lever.........................3-7
Turn and Lane-Change Signals........................3-7
Headlamp High/Low-Beam Changer..................3-8
Flash-to-Pass.................................................3-9
Windshield Wipers..........................................3-9
Windshield Washer.......................................3-10
Cruise Control..............................................3-10
Headlamps..................................................3-13
Headlamps on Reminder................................3-14
Daytime Running Lamps (DRL).......................3-14
Automatic Headlamp System..........................3-15
Fog Lamps ..................................................3-16
Auxiliary Roof Mounted Lamp.........................3-17
Instrument Panel Brightness...........................3-17
Dome Lamps ...............................................3-17
Dome Lamp Override....................................3-18
Entry Lighting...............................................3-18
Exit Lighting.................................................3-18Front Reading Lamps....................................3-18
Cargo Lamp.................................................3-19
Accessory Power Outlet(s).............................3-19
Ashtray(s) and Cigarette Lighter......................3-20
Climate Controls............................................3-20
Climate Control System.................................3-20
Dual Climate Control System..........................3-22
Dual Automatic Climate Control System...........3-24
Outlet Adjustment.........................................3-30
Warning Lights, Gages, and Indicators............3-31
Instrument Panel Cluster................................3-32
Speedometer and Odometer...........................3-33
Trip Odometer..............................................3-33
Tachometer.................................................3-33
Safety Belt Reminder Light.............................3-33
Airbag Readiness Light..................................3-34
Airbag Off Light............................................3-34
Passenger Airbag Status Indicator...................3-36
Battery Warning Light....................................3-38
Voltmeter Gage............................................3-39
Up-Shift Light (Manual Transmission)...............3-39
Brake System Warning Light..........................3-40
Section 3 Instrument Panel
3-1
Page 171 of 580
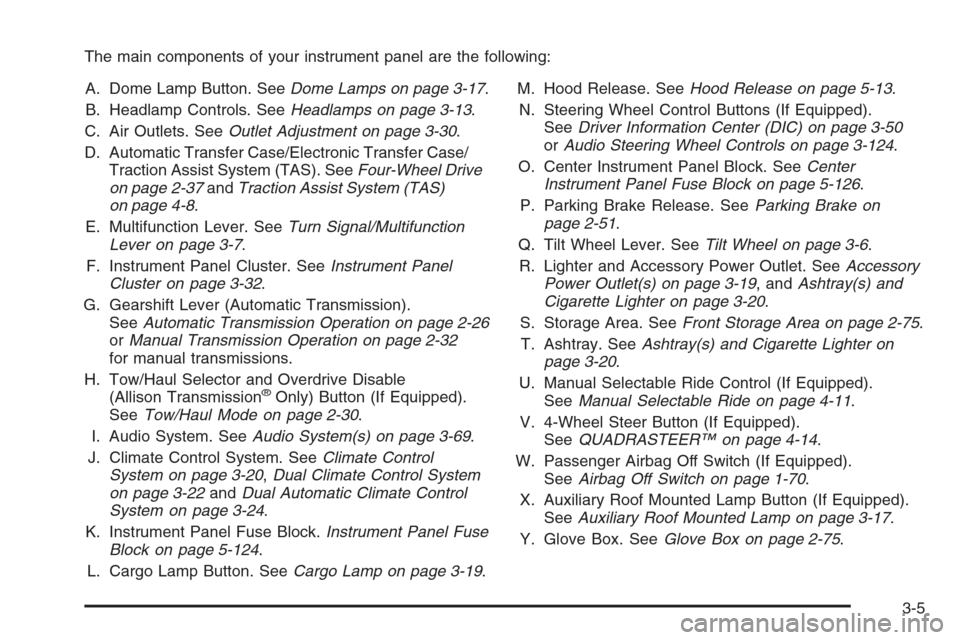
The main components of your instrument panel are the following:
A. Dome Lamp Button. SeeDome Lamps on page 3-17.
B. Headlamp Controls. SeeHeadlamps on page 3-13.
C. Air Outlets. SeeOutlet Adjustment on page 3-30.
D. Automatic Transfer Case/Electronic Transfer Case/
Traction Assist System (TAS). SeeFour-Wheel Drive
on page 2-37andTraction Assist System (TAS)
on page 4-8.
E. Multifunction Lever. SeeTurn Signal/Multifunction
Lever on page 3-7.
F. Instrument Panel Cluster. SeeInstrument Panel
Cluster on page 3-32.
G. Gearshift Lever (Automatic Transmission).
SeeAutomatic Transmission Operation on page 2-26
orManual Transmission Operation on page 2-32
for manual transmissions.
H. Tow/Haul Selector and Overdrive Disable
(Allison Transmission
®Only) Button (If Equipped).
SeeTow/Haul Mode on page 2-30.
I. Audio System. SeeAudio System(s) on page 3-69.
J. Climate Control System. SeeClimate Control
System on page 3-20,Dual Climate Control System
on page 3-22andDual Automatic Climate Control
System on page 3-24.
K. Instrument Panel Fuse Block.Instrument Panel Fuse
Block on page 5-124.
L. Cargo Lamp Button. SeeCargo Lamp on page 3-19.M. Hood Release. SeeHood Release on page 5-13.
N. Steering Wheel Control Buttons (If Equipped).
SeeDriver Information Center (DIC) on page 3-50
orAudio Steering Wheel Controls on page 3-124.
O. Center Instrument Panel Block. SeeCenter
Instrument Panel Fuse Block on page 5-126.
P. Parking Brake Release. SeeParking Brake on
page 2-51.
Q. Tilt Wheel Lever. SeeTilt Wheel on page 3-6.
R. Lighter and Accessory Power Outlet. SeeAccessory
Power Outlet(s) on page 3-19, andAshtray(s) and
Cigarette Lighter on page 3-20.
S. Storage Area. SeeFront Storage Area on page 2-75.
T. Ashtray. SeeAshtray(s) and Cigarette Lighter on
page 3-20.
U. Manual Selectable Ride Control (If Equipped).
SeeManual Selectable Ride on page 4-11.
V. 4-Wheel Steer Button (If Equipped).
SeeQUADRASTEER™ on page 4-14.
W. Passenger Airbag Off Switch (If Equipped).
SeeAirbag Off Switch on page 1-70.
X. Auxiliary Roof Mounted Lamp Button (If Equipped).
SeeAuxiliary Roof Mounted Lamp on page 3-17.
Y. Glove Box. SeeGlove Box on page 2-75.
3-5
Page 180 of 580
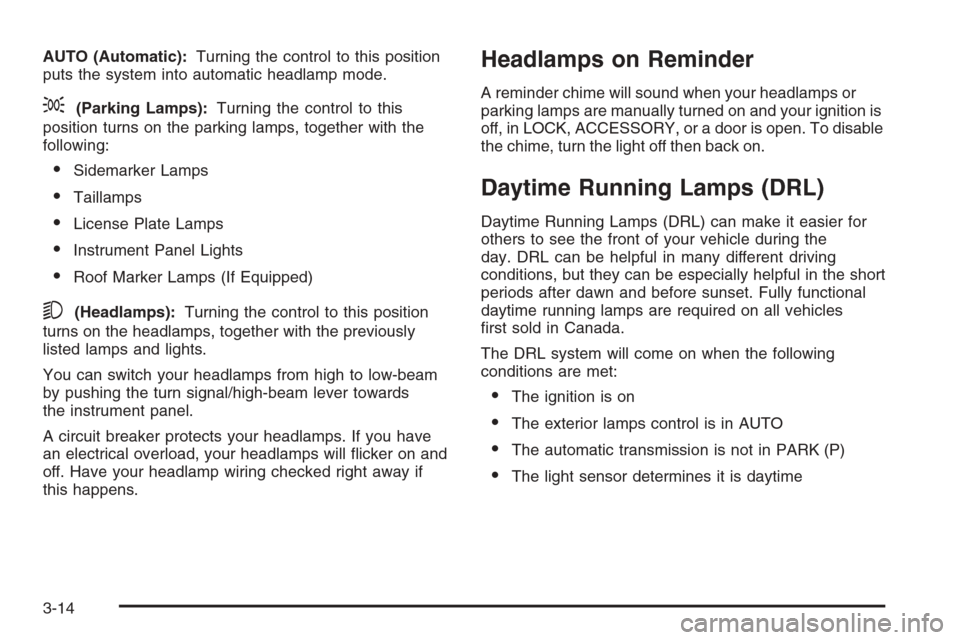
AUTO (Automatic):Turning the control to this position
puts the system into automatic headlamp mode.
;(Parking Lamps):Turning the control to this
position turns on the parking lamps, together with the
following:
Sidemarker Lamps
Taillamps
License Plate Lamps
Instrument Panel Lights
Roof Marker Lamps (If Equipped)
5(Headlamps):Turning the control to this position
turns on the headlamps, together with the previously
listed lamps and lights.
You can switch your headlamps from high to low-beam
by pushing the turn signal/high-beam lever towards
the instrument panel.
A circuit breaker protects your headlamps. If you have
an electrical overload, your headlamps will �icker on and
off. Have your headlamp wiring checked right away if
this happens.
Headlamps on Reminder
A reminder chime will sound when your headlamps or
parking lamps are manually turned on and your ignition is
off, in LOCK, ACCESSORY, or a door is open. To disable
the chime, turn the light off then back on.
Daytime Running Lamps (DRL)
Daytime Running Lamps (DRL) can make it easier for
others to see the front of your vehicle during the
day. DRL can be helpful in many different driving
conditions, but they can be especially helpful in the short
periods after dawn and before sunset. Fully functional
daytime running lamps are required on all vehicles
�rst sold in Canada.
The DRL system will come on when the following
conditions are met:
The ignition is on
The exterior lamps control is in AUTO
The automatic transmission is not in PARK (P)
The light sensor determines it is daytime
3-14
Page 183 of 580
The fog lamps will be cancelled after the ignition is
turned off. If you still want to use the fog lamps after
you restart the vehicle, you will need to press the
fog lamp button again.
Some localities have laws that require the headlamps
to be on along with the fog lamps.
Auxiliary Roof Mounted Lamp
If your vehicle has this feature, this button includes
wiring provisions for a dealer or a quali�ed service
center to install an auxiliary roof lamp.
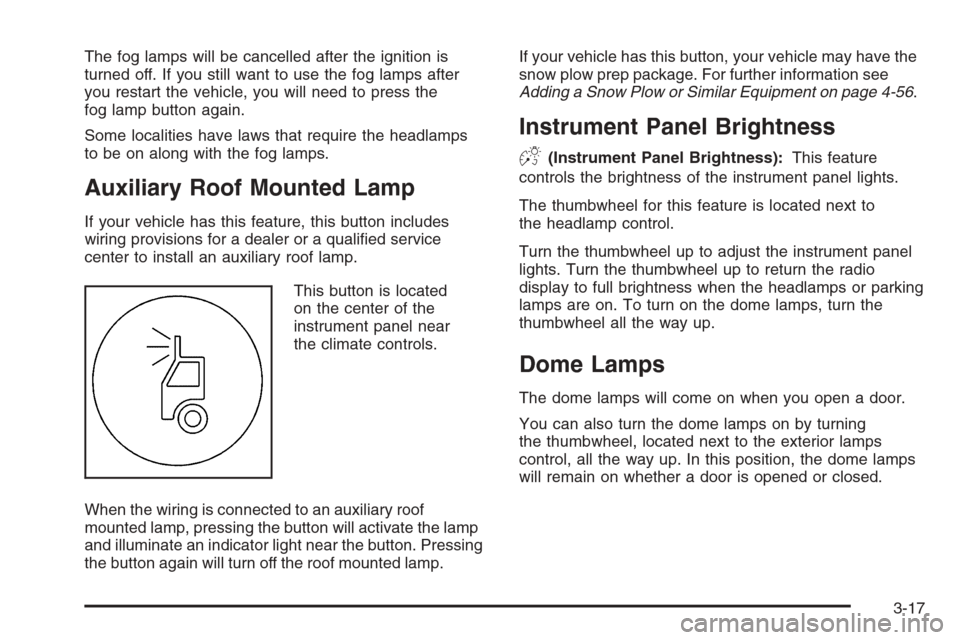
This button is located
on the center of the
instrument panel near
the climate controls.
When the wiring is connected to an auxiliary roof
mounted lamp, pressing the button will activate the lamp
and illuminate an indicator light near the button. Pressing
the button again will turn off the roof mounted lamp.If your vehicle has this button, your vehicle may have the
snow plow prep package. For further information see
Adding a Snow Plow or Similar Equipment on page 4-56.
Instrument Panel Brightness
D(Instrument Panel Brightness):This feature
controls the brightness of the instrument panel lights.
The thumbwheel for this feature is located next to
the headlamp control.
Turn the thumbwheel up to adjust the instrument panel
lights. Turn the thumbwheel up to return the radio
display to full brightness when the headlamps or parking
lamps are on. To turn on the dome lamps, turn the
thumbwheel all the way up.
Dome Lamps
The dome lamps will come on when you open a door.
You can also turn the dome lamps on by turning
the thumbwheel, located next to the exterior lamps
control, all the way up. In this position, the dome lamps
will remain on whether a door is opened or closed.
3-17
Page 293 of 580
Care of the CD and DVD Player
The use of CD lens cleaners for CDs is not advised,
due to the risk of contaminating the lens of the CD optics
with lubricants internal to the CD mechanism.
Fixed Mast Antenna
The �xed mast antenna can withstand most car washes
without being damaged. If the mast should ever
become slightly bent, straighten it out by hand. If the
mast is badly bent, replace it.
Check occasionally to make sure the mast is still
tightened to the cowl. If tightening is required,
tighten by hand, then with a wrench one quarter turn.
XM™ Satellite Radio Antenna System
The XM™ Satellite Radio antenna is located on the roof
of your vehicle. Keep this antenna clear of snow and
ice build up for clear radio reception.
The performance of the XM™ system may be affected if
the sunroof is open.
Loading items onto the roof of your vehicle can interfere
with the performance of the XM™ system. Make sure
that the XM™ satellite antenna is not obstructed.
Chime Level Adjustment
The radio is the vehicle chime producer. To change the
volume level, press and hold pushbutton 6 with the
ignition on and the radio power off. The chime volume
level will change from the normal level to loud, and
LOUD will appear on the radio display. To change back
to the default or normal setting, press and hold
pushbutton 6 again. The chime level will change from
the loud level to normal, and NORMAL will appear
on the radio display. Each time the chime volume is
changed, three chimes will sound as an example of the
new volume selected. Removing the radio and not
replacing it with a factory radio or chime module will
disable vehicle chimes.
3-127
Page 317 of 580
{CAUTION:
Cargo on the load �oor piled higher than
the seatbacks can be thrown forward
during a sudden stop. You or your
passengers could be injured. Keep cargo
below the top of the seatbacks.
Unsecured cargo on the load �oor can be
tossed about when driving over rough
terrain. You or your passengers can be
struck by �ying objects. Secure the cargo
properly.
Heavy loads on the roof raise the vehicle’s
center of gravity, making it more likely to
roll over. You can be seriously or fatally
injured if the vehicle rolls over. Put heavy
loads inside the cargo area, not on the
roof. Keep cargo in the cargo area as far
forward and low as possible.
You will �nd other important information in this manual.
SeeLoading Your Vehicle on page 4-50andTires
on page 5-73.
Environmental Concerns
Off-road driving can provide wholesome and satisfying
recreation. However, it also raises environmental
concerns. We recognize these concerns and urge every
off-roader to follow these basic rules for protecting
the environment:
Always use established trails, roads and areas that
have been specially set aside for public off-road
recreational driving; obey all posted regulations.
Avoid any driving practice that could damage
the environment — shrubs, �owers, trees,
grasses — or disturb wildlife (this includes
wheel-spinning, breaking down trees or
unnecessary driving through streams or over soft
ground).
Always carry a litter bag — make sure all refuse is
removed from any campsite before leaving.
Take extreme care with open �res (where
permitted), camp stoves and lanterns.
Never park your vehicle over dry grass or other
combustible materials that could catch �re from
the heat of the vehicle’s exhaust system.
4-23
Page 354 of 580
Q:What is total vehicle reserve capacity?
A:This is the difference between your GVWR and the
weight of your truck with full fuel and passengers.
It is the amount of weight you can add to your
vehicle before reaching your GVWR. Keep in mind
that reserve capacity numbers are intended as
a guide when selecting the amount of equipment or
cargo your truck can carry. If you are unsure of
your vehicle’s front, rear, or total weight, go
to a weigh station and weigh your vehicle.
Your dealer can also help you with this.
The total vehicle reserve capacity for your vehicle
can be found in the lower right corner of the
Certi�cation/Tire label as shown previously.
See your dealer for additional advice and information
about using a snow plow on your vehicle. Also,
seeLoading Your Vehicle on page 4-50.
Emergency Roof Lamp Provisions
Vehicles with the RPO VYU snow plow prep package
also have an emergency roof lamp provision package,
RPO TRW. Wiring for the emergency roof lamp is
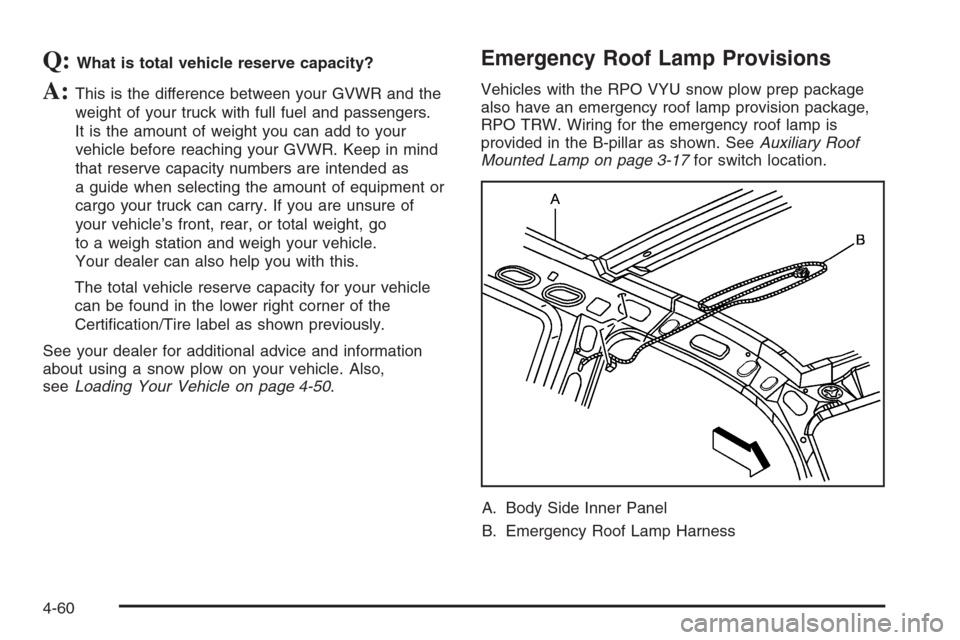
provided in the B-pillar as shown. SeeAuxiliary Roof
Mounted Lamp on page 3-17for switch location.
A. Body Side Inner Panel
B. Emergency Roof Lamp Harness
4-60