remove seats CHEVROLET SILVERADO 2006 1.G Owners Manual
[x] Cancel search | Manufacturer: CHEVROLET, Model Year: 2006, Model line: SILVERADO, Model: CHEVROLET SILVERADO 2006 1.GPages: 594, PDF Size: 3.41 MB
Page 36 of 594
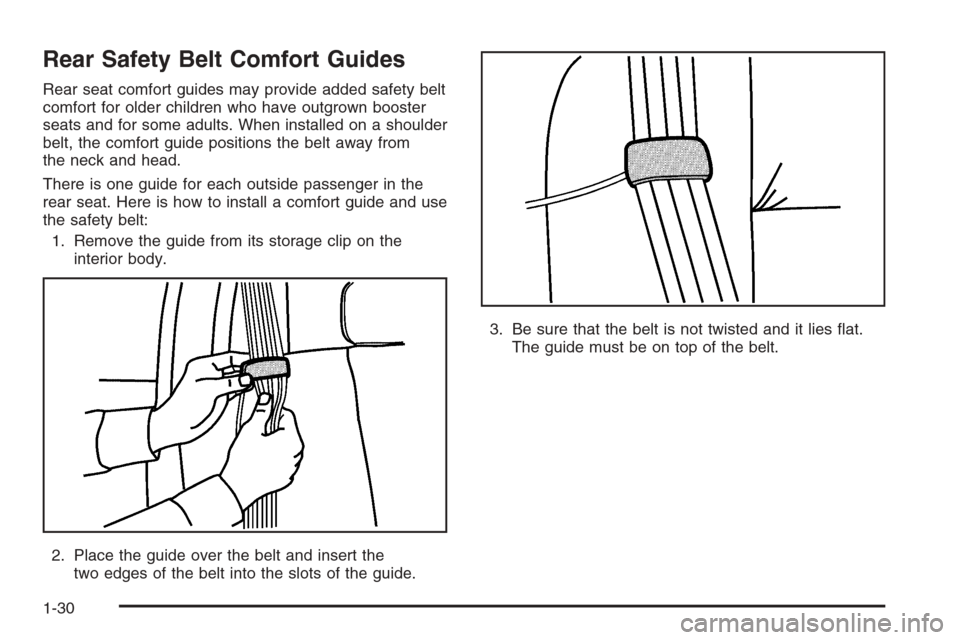
Rear Safety Belt Comfort Guides
Rear seat comfort guides may provide added safety belt
comfort for older children who have outgrown booster
seats and for some adults. When installed on a shoulder
belt, the comfort guide positions the belt away from
the neck and head.
There is one guide for each outside passenger in the
rear seat. Here is how to install a comfort guide and use
the safety belt:
1. Remove the guide from its storage clip on the
interior body.
2. Place the guide over the belt and insert the
two edges of the belt into the slots of the guide.3. Be sure that the belt is not twisted and it lies �at.
The guide must be on top of the belt.
1-30
Page 37 of 594
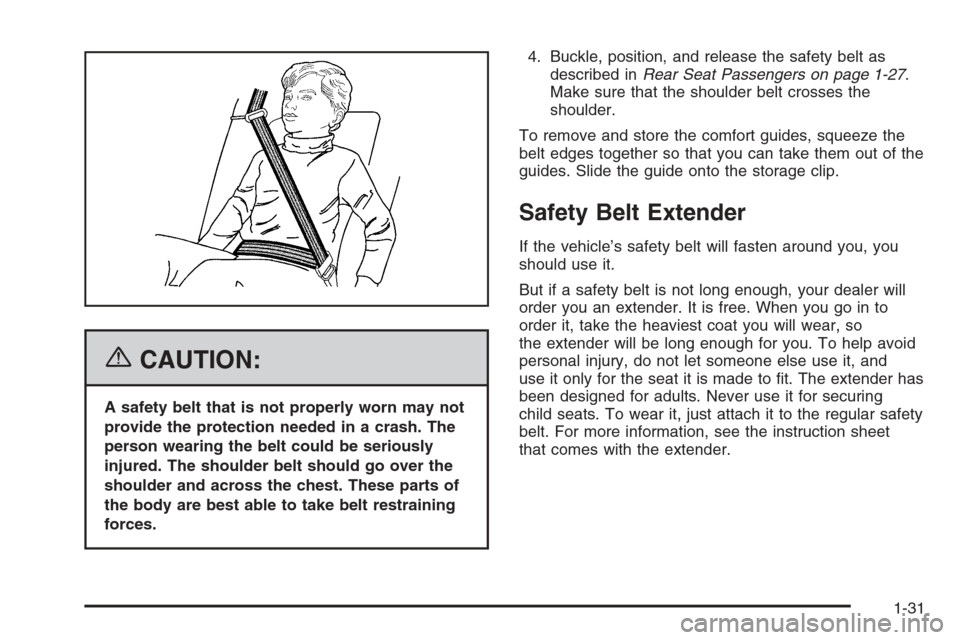
{CAUTION:
A safety belt that is not properly worn may not
provide the protection needed in a crash. The
person wearing the belt could be seriously
injured. The shoulder belt should go over the
shoulder and across the chest. These parts of
the body are best able to take belt restraining
forces.4. Buckle, position, and release the safety belt as
described inRear Seat Passengers on page 1-27.
Make sure that the shoulder belt crosses the
shoulder.
To remove and store the comfort guides, squeeze the
belt edges together so that you can take them out of the
guides. Slide the guide onto the storage clip.
Safety Belt Extender
If the vehicle’s safety belt will fasten around you, you
should use it.
But if a safety belt is not long enough, your dealer will
order you an extender. It is free. When you go in to
order it, take the heaviest coat you will wear, so
the extender will be long enough for you. To help avoid
personal injury, do not let someone else use it, and
use it only for the seat it is made to �t. The extender has
been designed for adults. Never use it for securing
child seats. To wear it, just attach it to the regular safety
belt. For more information, see the instruction sheet
that comes with the extender.
1-31
Page 53 of 594
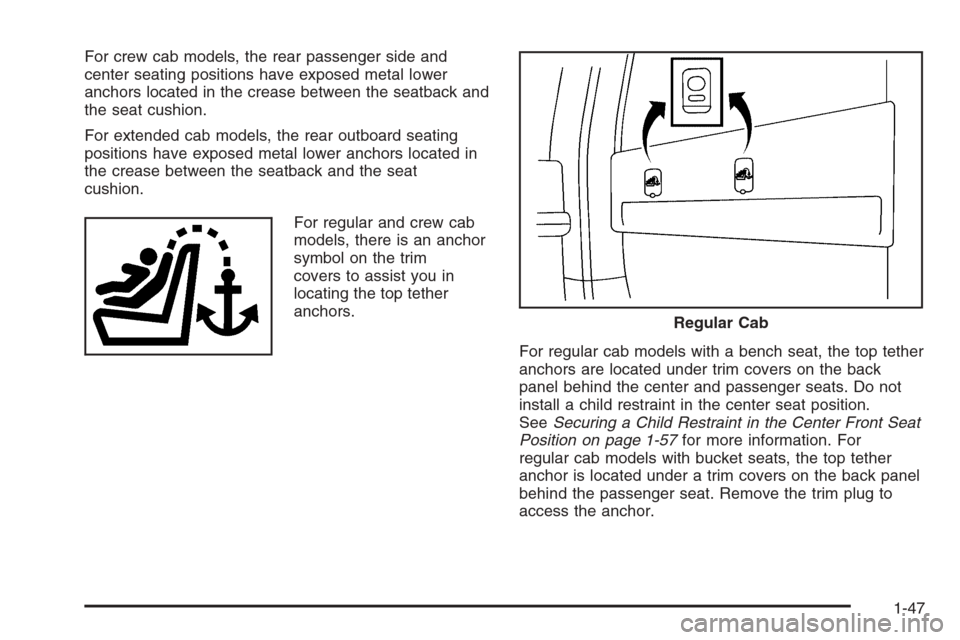
For crew cab models, the rear passenger side and
center seating positions have exposed metal lower
anchors located in the crease between the seatback and
the seat cushion.
For extended cab models, the rear outboard seating
positions have exposed metal lower anchors located in
the crease between the seatback and the seat
cushion.
For regular and crew cab
models, there is an anchor
symbol on the trim
covers to assist you in
locating the top tether
anchors.
For regular cab models with a bench seat, the top tether
anchors are located under trim covers on the back
panel behind the center and passenger seats. Do not
install a child restraint in the center seat position.
SeeSecuring a Child Restraint in the Center Front Seat
Position on page 1-57for more information. For
regular cab models with bucket seats, the top tether
anchor is located under a trim covers on the back panel
behind the passenger seat. Remove the trim plug to
access the anchor.
Regular Cab
1-47
Page 54 of 594
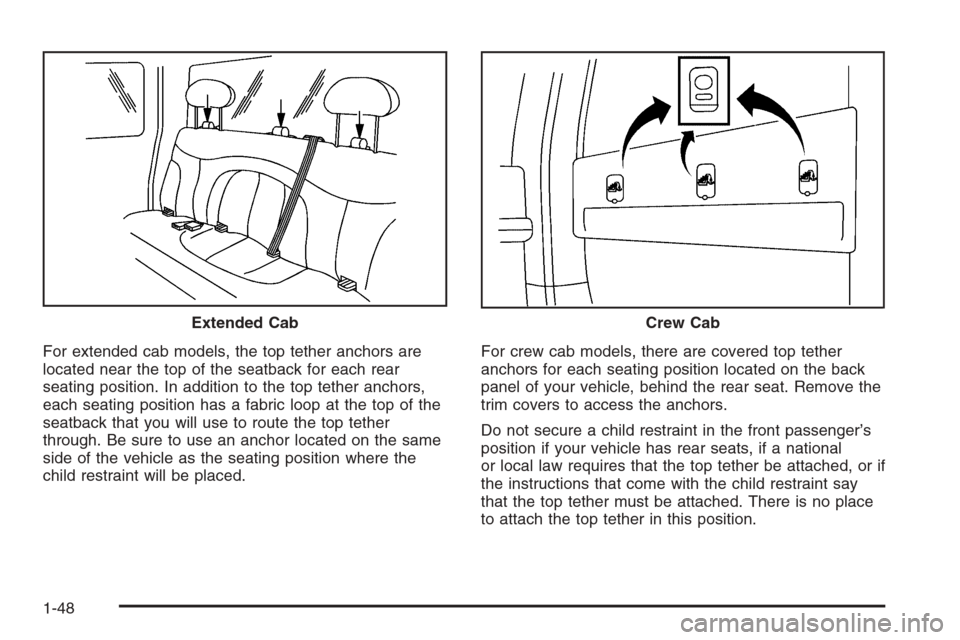
For extended cab models, the top tether anchors are
located near the top of the seatback for each rear
seating position. In addition to the top tether anchors,
each seating position has a fabric loop at the top of the
seatback that you will use to route the top tether
through. Be sure to use an anchor located on the same
side of the vehicle as the seating position where the
child restraint will be placed.For crew cab models, there are covered top tether
anchors for each seating position located on the back
panel of your vehicle, behind the rear seat. Remove the
trim covers to access the anchors.
Do not secure a child restraint in the front passenger’s
position if your vehicle has rear seats, if a national
or local law requires that the top tether be attached, or if
the instructions that come with the child restraint say
that the top tether must be attached. There is no place
to attach the top tether in this position. Extended Cab
Crew Cab
1-48
Page 172 of 594
Front Storage Area
Your vehicle may have a center armrest storage
compartment in the front bench seat.
To open it, fold down the armrest and press the latch
handle located at the front of the armrest. Then, let the
lid pop up and swing open.
The storage compartment may have a cassette/compact
disc holder.
Center Console Storage Area
Your vehicle may be equipped with a console
compartment between the bucket seats.
To open it, press the button located on the right side of
the front of the lid and swing the lid open.
Your vehicle may have a compact disc holder in the
console.
Your console may have a cupholder that swings down
for the rear seat passengers to use. The front cupholder
pulls out and swivels 180° to provide clearance
between tall beverage containers and the manual
transmission shift lever (if equipped).
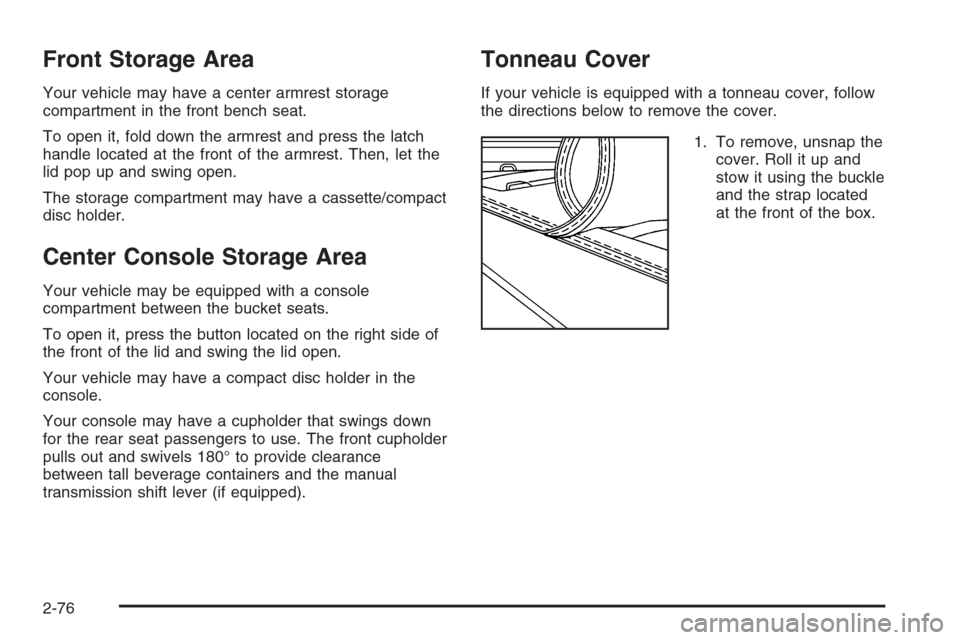
Tonneau Cover
If your vehicle is equipped with a tonneau cover, follow
the directions below to remove the cover.
1. To remove, unsnap the
cover. Roll it up and
stow it using the buckle
and the strap located
at the front of the box.
2-76
Page 501 of 594
For regular cab models, the equipment you will need is
behind the passenger’s seat. For extended and crew
cab models, the equipment is on the shelf behind
the passenger’s side second row seat.
1. If there is a cover, move the seats forward and turn
the wing nut on the cover counterclockwise to
remove it. For crew cab models, pull up the
second row seat with the loop at the base of the
seat cushion to access the tools.
2. Turn the knob on the jack counterclockwise to lower
the jack head to release the jack from its holder.
3. Remove the wheel blocks and the wheel block
retainer by turning the wing nut counterclockwise.
4. Remove the wing nut used to retain the storage
bag and tools by turning it counterclockwise.
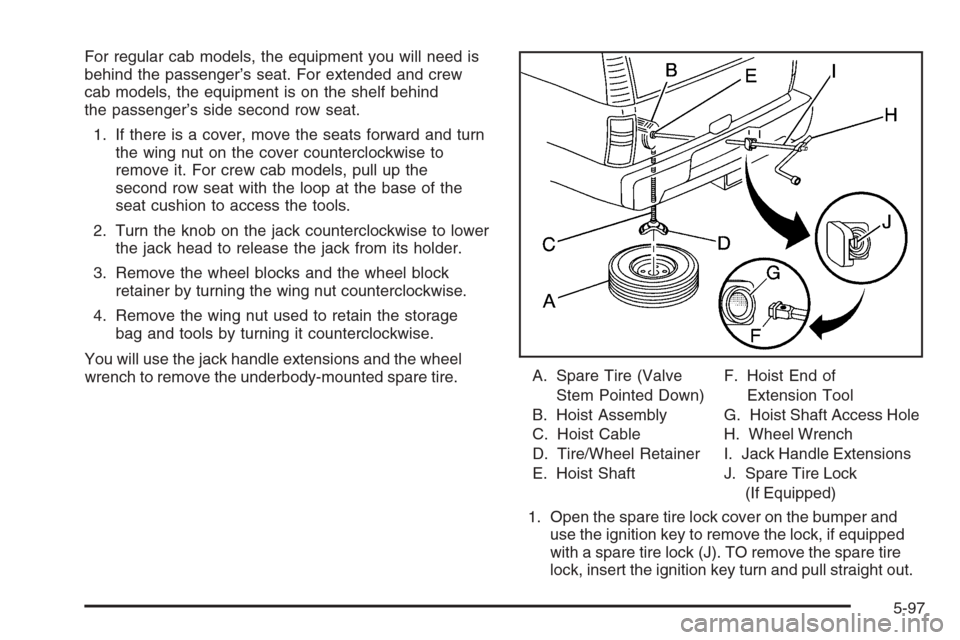
You will use the jack handle extensions and the wheel
wrench to remove the underbody-mounted spare tire.A. Spare Tire (Valve
Stem Pointed Down)
B. Hoist Assembly
C. Hoist Cable
D. Tire/Wheel Retainer
E. Hoist ShaftF. Hoist End of
Extension Tool
G. Hoist Shaft Access Hole
H. Wheel Wrench
I. Jack Handle Extensions
J. Spare Tire Lock
(If Equipped)
1. Open the spare tire lock cover on the bumper and
use the ignition key to remove the lock, if equipped
with a spare tire lock (J). TO remove the spare tire
lock, insert the ignition key turn and pull straight out.
5-97