start CHEVROLET SILVERADO 2006 1.G Owners Manual
[x] Cancel search | Manufacturer: CHEVROLET, Model Year: 2006, Model line: SILVERADO, Model: CHEVROLET SILVERADO 2006 1.GPages: 594, PDF Size: 3.41 MB
Page 1 of 594
Seats and Restraint Systems........................... 1-1
Front Seats
............................................... 1-3
Rear Seats
..............................................1-10
Safety Belts
.............................................1-13
Child Restraints
.......................................1-32
Airbag System
.........................................1-71
Restraint System Check
............................1-88
Features and Controls..................................... 2-1
Keys
........................................................ 2-3
Doors and Locks
....................................... 2-8
Windows
.................................................2-15
Theft-Deterrent Systems
............................2-18
Starting and Operating Your Vehicle
...........2-20
Mirrors
....................................................2-56
OnStar
®System
......................................2-69
Universal Home Remote System
................2-71
Storage Areas
.........................................2-75
Sunroof
..................................................2-78
Vehicle Personalization
.............................2-79
Instrument Panel............................................. 3-1
Instrument Panel Overview
.......................... 3-4
Climate Controls
......................................3-20
Warning Lights, Gages, and Indicators
........3-30
Driver Information Center (DIC)
..................3-51
Audio System(s)
.......................................3-70Driving Your Vehicle....................................... 4-1
Your Driving, the Road, and Your Vehicle
..... 4-2
Towing
...................................................4-61
Service and Appearance Care.......................... 5-1
Service
..................................................... 5-4
Fuel
......................................................... 5-6
Checking Things Under the Hood
...............5-12
Rear Axle
...............................................5-56
Four-Wheel Drive
.....................................5-58
Front Axle
...............................................5-60
Noise Control System
...............................5-61
Bulb Replacement
....................................5-62
Windshield Wiper Blade Replacement
.........5-73
Tires
......................................................5-74
Appearance Care
...................................5-116
Vehicle Identication
...............................5-124
Electrical System
....................................5-125
Capacities and Specications
...................5-134
Maintenance Schedule..................................... 6-1
Maintenance Schedule
................................ 6-2
Customer Assistance and Information.............. 7-1
Customer Assistance and Information
........... 7-2
Reporting Safety Defects
...........................7-13
Index................................................................ 1
2006 Chevrolet Silverado Owner ManualM
Page 9 of 594
Front Seats
Manual Seats
{CAUTION:
You can lose control of the vehicle if you try to
adjust a manual driver’s seat while the vehicle
is moving. The sudden movement could startle
and confuse you, or make you push a pedal
when you do not want to. Adjust the driver’s
seat only when the vehicle is not moving.
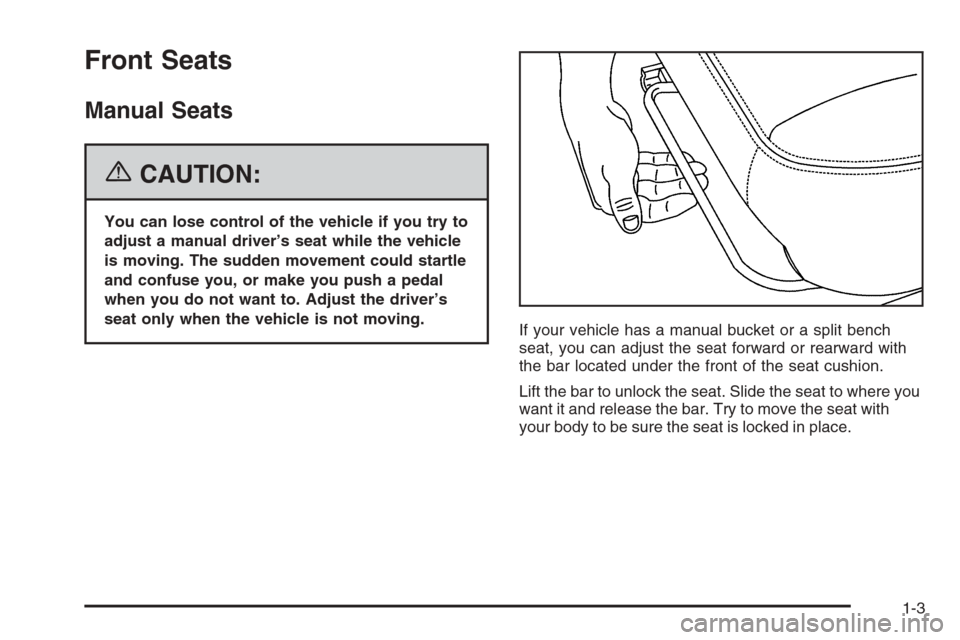
If your vehicle has a manual bucket or a split bench
seat, you can adjust the seat forward or rearward with
the bar located under the front of the seat cushion.
Lift the bar to unlock the seat. Slide the seat to where you
want it and release the bar. Try to move the seat with
your body to be sure the seat is locked in place.
1-3
Page 11 of 594
Heated Seats
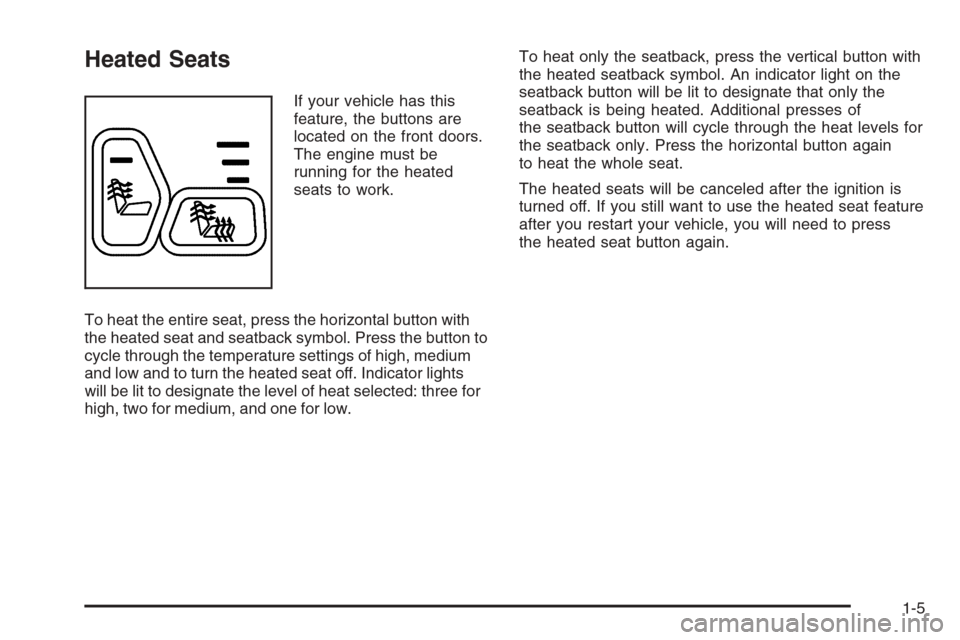
If your vehicle has this
feature, the buttons are
located on the front doors.
The engine must be
running for the heated
seats to work.
To heat the entire seat, press the horizontal button with
the heated seat and seatback symbol. Press the button to
cycle through the temperature settings of high, medium
and low and to turn the heated seat off. Indicator lights
will be lit to designate the level of heat selected: three for
high, two for medium, and one for low.To heat only the seatback, press the vertical button with
the heated seatback symbol. An indicator light on the
seatback button will be lit to designate that only the
seatback is being heated. Additional presses of
the seatback button will cycle through the heat levels for
the seatback only. Press the horizontal button again
to heat the whole seat.
The heated seats will be canceled after the ignition is
turned off. If you still want to use the heated seat feature
after you restart your vehicle, you will need to press
the heated seat button again.
1-5
Page 12 of 594
Reclining Seatbacks
Manual Reclining Seatbacks
{CAUTION:
You can lose control of the vehicle if you try to
adjust a manual driver’s seat while the vehicle
is moving. The sudden movement could startle
and confuse you, or make you push a pedal
when you do not want to. Adjust the driver’s
seat only when the vehicle is not moving.
{CAUTION:
If the seatback is not locked, it could move
forward in a sudden stop or crash. That could
cause injury to the person sitting there. Always
push and pull on the seatback to be sure it is
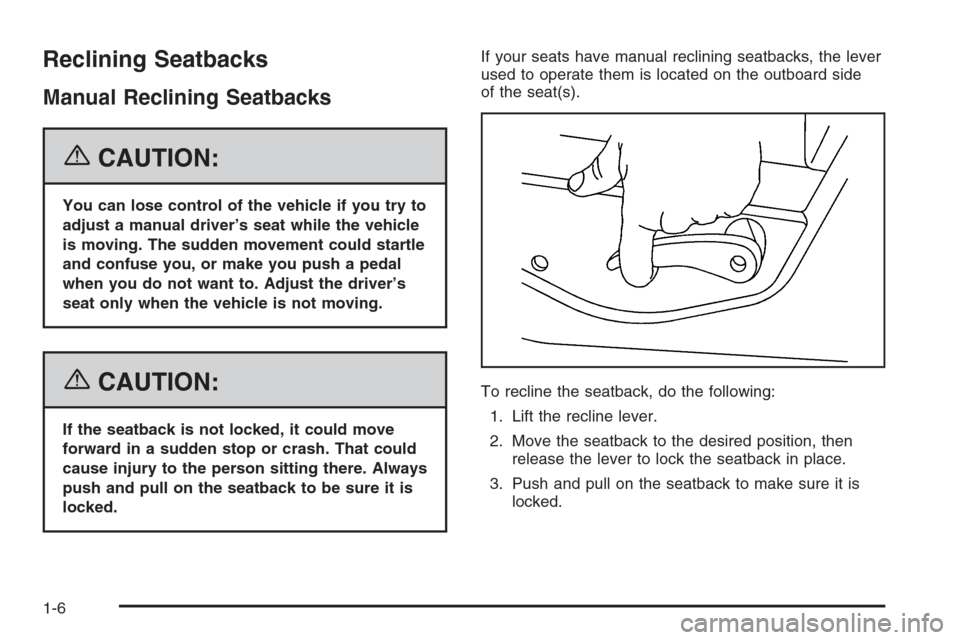
locked.If your seats have manual reclining seatbacks, the lever
used to operate them is located on the outboard side
of the seat(s).
To recline the seatback, do the following:
1. Lift the recline lever.
2. Move the seatback to the desired position, then
release the lever to lock the seatback in place.
3. Push and pull on the seatback to make sure it is
locked.
1-6
Page 24 of 594
Q:If I am a good driver, and I never drive far from
home, why should I wear safety belts?
A:You may be an excellent driver, but if you are in an
accident — even one that is not your fault — you
and your passengers can be hurt. Being a good
driver does not protect you from things beyond your
control, such as bad drivers.
Most accidents occur within 25 miles (40 km)
of home. And the greatest number of serious
injuries and deaths occur at speeds of less
than 40 mph (65 km/h).
Safety belts are for everyone.
How to Wear Safety Belts Properly
This part is only for people of adult size.
Be aware that there are special things to know about
safety belts and children. And there are different
rules for smaller children and babies. If a child will be
riding in your vehicle, seeOlder Children on page 1-32
orInfants and Young Children on page 1-34. Follow
those rules for everyone’s protection.
First, you will want to know which restraint systems your
vehicle has.
We will start with the driver position.
Driver Position
Lap-Shoulder Belt
The driver has a lap-shoulder belt. Here is how to
wear it properly.
1. Close and lock the door.
2. Adjust the seat so you can sit up straight.
To see how, see “Seats” in the Index.
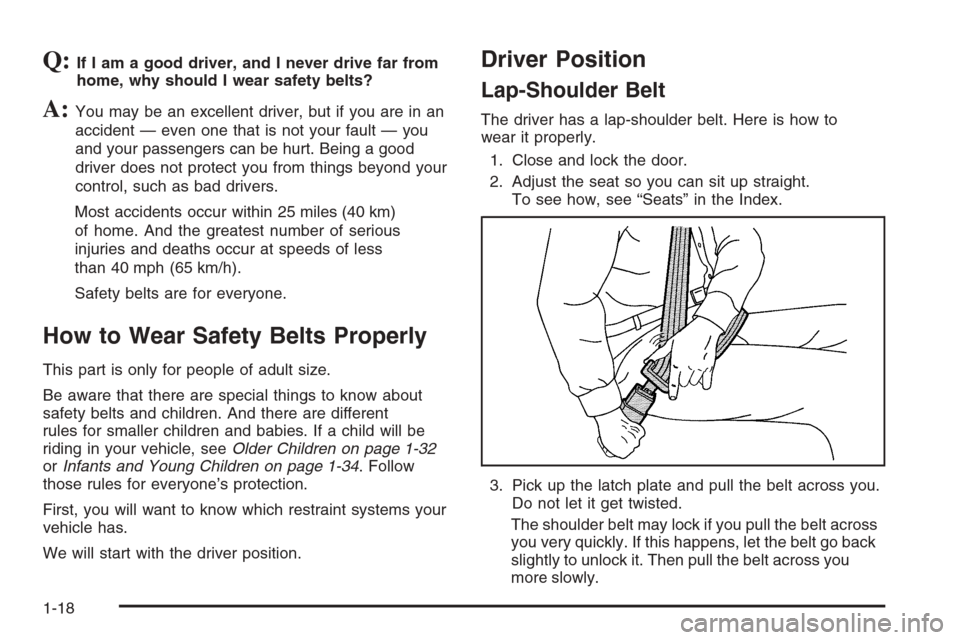
3. Pick up the latch plate and pull the belt across you.
Do not let it get twisted.
The shoulder belt may lock if you pull the belt across
you very quickly. If this happens, let the belt go back
slightly to unlock it. Then pull the belt across you
more slowly.
1-18
Page 32 of 594
Right Front Passenger Position
To learn how to wear the right front passenger’s safety
belt properly, seeDriver Position on page 1-18.
The right front passenger’s safety belt works the same
way as the driver’s safety belt — except for one
thing. If you ever pull the shoulder portion of the belt out
all the way, you will engage the child restraint locking
feature which may turn off the passenger’s frontal
airbag. If this happens, just let the belt go back all the
way and start again.
Center Front Passenger Position
Lap Belt
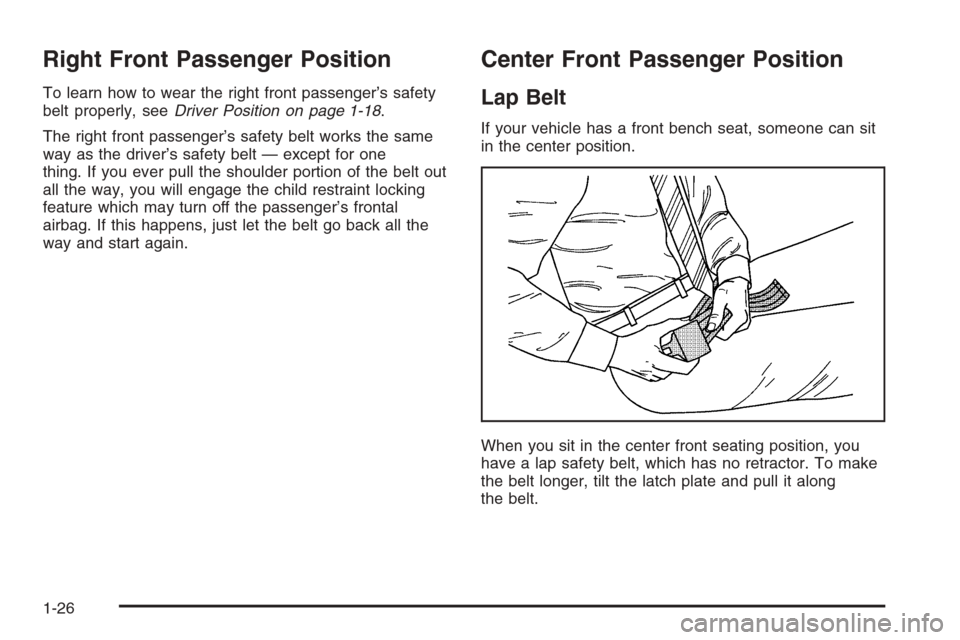
If your vehicle has a front bench seat, someone can sit
in the center position.
When you sit in the center front seating position, you
have a lap safety belt, which has no retractor. To make
the belt longer, tilt the latch plate and pull it along
the belt.
1-26
Page 34 of 594
Lap-Shoulder Belt
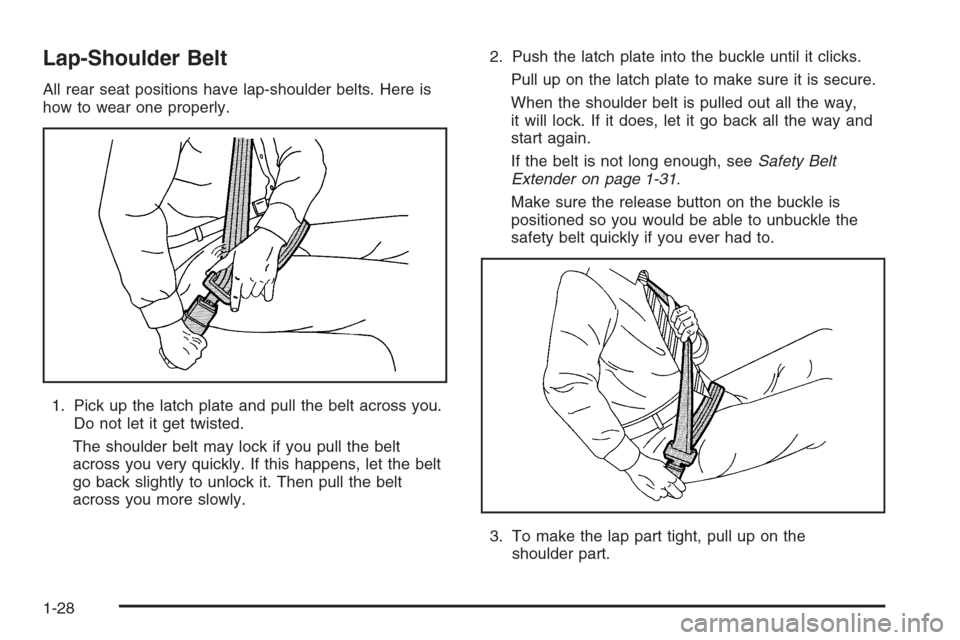
All rear seat positions have lap-shoulder belts. Here is
how to wear one properly.
1. Pick up the latch plate and pull the belt across you.
Do not let it get twisted.
The shoulder belt may lock if you pull the belt
across you very quickly. If this happens, let the belt
go back slightly to unlock it. Then pull the belt
across you more slowly.2. Push the latch plate into the buckle until it clicks.
Pull up on the latch plate to make sure it is secure.
When the shoulder belt is pulled out all the way,
it will lock. If it does, let it go back all the way and
start again.
If the belt is not long enough, seeSafety Belt
Extender on page 1-31.
Make sure the release button on the buckle is
positioned so you would be able to unbuckle the
safety belt quickly if you ever had to.
3. To make the lap part tight, pull up on the
shoulder part.
1-28
Page 69 of 594
If your vehicle has a rear seat, there is no top tether
anchor at the right front seating position. Do not secure
a child seat in this position if a national or local law
requires that the top tether be anchored or if the
instructions that come with the child restraint say that
the top tether must be anchored. SeeLower Anchors
and Tethers for Children (LATCH) on page 1-44if
the child restraint has a top tether.
You will be using the lap-shoulder belt to secure the
child restraint in this position. Be sure to follow the
instructions that came with the child restraint. Secure
the child in the child restraint when and as the
instructions say.
1. Your vehicle has a right front passenger’s frontal
airbag. SeeAirbag Off Switch on page 1-78.If
your child restraint is forward-facing, move the seat
as far back as it will go before securing the
restraint in this seat. SeeManual Seats on page 1-3
orPower Seats on page 1-4. If you need to use a
rear-facing child restraint in this seat, make sure the
airbag is off once the child restraint has been
installed.
When the airbag off switch has turned off the right
front passenger’s frontal airbag, the off indicator
in the airbag off light should light and stay lit when
you turn the ignition to RUN or START. See
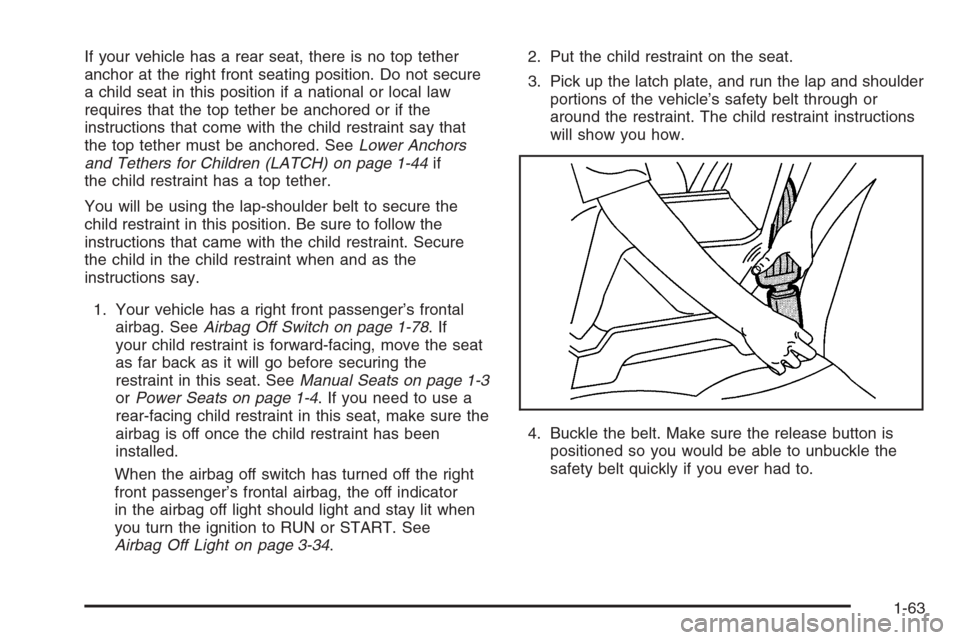
Airbag Off Light on page 3-34.2. Put the child restraint on the seat.
3. Pick up the latch plate, and run the lap and shoulder
portions of the vehicle’s safety belt through or
around the restraint. The child restraint instructions
will show you how.
4. Buckle the belt. Make sure the release button is
positioned so you would be able to unbuckle the
safety belt quickly if you ever had to.
1-63
Page 74 of 594
If you need to secure a forward-facing child restraint in
the right front seat position, move the seat as far
back as it will go before securing the forward-facing
child restraint. SeePower Seats on page 1-4orManual
Seats on page 1-3.
If your child restraint is equipped with the LATCH
system, seeLower Anchors and Tethers for Children
(LATCH) on page 1-44.
If your vehicle has a rear seat, there is no top tether
anchor at the right front seating position. Do not secure
a child seat in this position if a national or local law
requires that the top tether be anchored or if the
instructions that come with the child restraint say that
the top tether must be anchored. SeeLower Anchors
and Tethers for Children (LATCH) on page 1-44if
the child restraint has a top tether.You will be using the lap-shoulder belt to secure the
child restraint in this position. Be sure to follow the
instructions that came with the child restraint. Secure
the child in the child restraint when and as the
instructions say.
1. Your vehicle has a right front passenger’s frontal
airbag. SeePassenger Sensing System on
page 1-80. General Motors recommends that
rear-facing child restraints be secured in a rear seat,
even if the airbag is off. If your child restraint is
forward-facing, move the seat as far back as it will
go before securing the child restraint in this
seat. SeePower Seats on page 1-4orManual
Seats on page 1-3.
When the passenger sensing system has turned off
the right front passenger’s frontal airbag, the off
indicator in the passenger airbag status indicator
should light and stay lit when you turn the ignition to
RUN or START. SeePassenger Airbag Status
Indicator on page 3-36.
2. Put the child restraint on the seat.
3. Pick up the latch plate, and run the lap and shoulder
portions of the vehicle’s safety belt through or
around the restraint. The child restraint instructions
will show you how.
1-68
Page 76 of 594
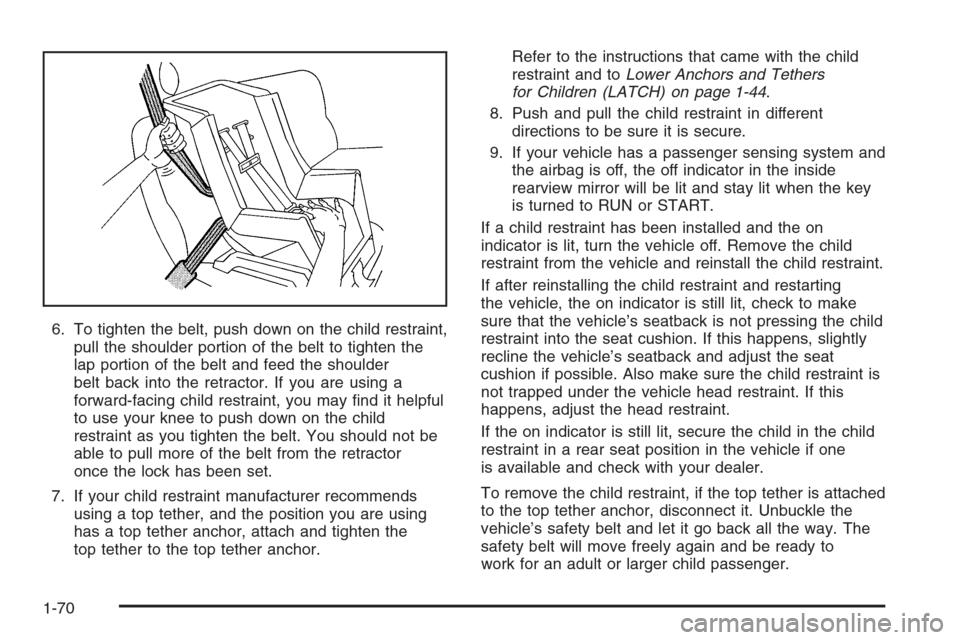
6. To tighten the belt, push down on the child restraint,
pull the shoulder portion of the belt to tighten the
lap portion of the belt and feed the shoulder
belt back into the retractor. If you are using a
forward-facing child restraint, you may nd it helpful
to use your knee to push down on the child
restraint as you tighten the belt. You should not be
able to pull more of the belt from the retractor
once the lock has been set.
7. If your child restraint manufacturer recommends
using a top tether, and the position you are using
has a top tether anchor, attach and tighten the
top tether to the top tether anchor.Refer to the instructions that came with the child
restraint and toLower Anchors and Tethers
for Children (LATCH) on page 1-44.
8. Push and pull the child restraint in different
directions to be sure it is secure.
9. If your vehicle has a passenger sensing system and
the airbag is off, the off indicator in the inside
rearview mirror will be lit and stay lit when the key
is turned to RUN or START.
If a child restraint has been installed and the on
indicator is lit, turn the vehicle off. Remove the child
restraint from the vehicle and reinstall the child restraint.
If after reinstalling the child restraint and restarting
the vehicle, the on indicator is still lit, check to make
sure that the vehicle’s seatback is not pressing the child
restraint into the seat cushion. If this happens, slightly
recline the vehicle’s seatback and adjust the seat
cushion if possible. Also make sure the child restraint is
not trapped under the vehicle head restraint. If this
happens, adjust the head restraint.
If the on indicator is still lit, secure the child in the child
restraint in a rear seat position in the vehicle if one
is available and check with your dealer.
To remove the child restraint, if the top tether is attached
to the top tether anchor, disconnect it. Unbuckle the
vehicle’s safety belt and let it go back all the way. The
safety belt will move freely again and be ready to
work for an adult or larger child passenger.
1-70