trailer CHEVROLET SILVERADO 2009 2.G User Guide
[x] Cancel search | Manufacturer: CHEVROLET, Model Year: 2009, Model line: SILVERADO, Model: CHEVROLET SILVERADO 2009 2.GPages: 600, PDF Size: 3.24 MB
Page 157 of 600
{CAUTION:
Four-wheel drive vehicles with the transfer
case in N (Neutral) will allow the vehicle to roll,
even if the automatic transmission shift lever is in
P (Park). So, be sure the transfer case is in a
drive gear — not in N (Neutral). Always set the
parking brake.
Follow the proper steps to be sure the vehicle will not
move. SeeShifting Into Park on page 2-52.
If pulling a trailer, seeTowing a Trailer on page 4-51.
Mirrors
Manual Rearview Mirror
Hold the inside rearview mirror in the center to move it
for a clearer view behind your vehicle. Adjust the
mirror to avoid glare from the headlamps behind you.
Push the tab forward for daytime use and pull it for
nighttime use.
Automatic Dimming Rearview Mirror
The vehicle may have an automatic dimming inside
rearview mirror.
Vehicles with OnStar
®have three additional control
buttons for the OnStar®system. See your dealer/retailer
for more information about OnStar®and how to
subscribe to it. SeeOnStar®System on page 2-71for
more information about the services OnStar®provides.
O(On/Off):Press to turn the dimming feature on
or off.
The vehicle may also have a Rear Vision Camera
(RVC). SeeRear Vision Camera (RVC) on page 2-65
for more information.
If the vehicle has RVC, the
O(On/Off) button for
turning the automatic dimming feature on or off will not
be available.
Automatic Dimming Mirror Operation
Automatic dimming reduces the glare from the
headlamps of the vehicle behind you. The dimming
feature comes on and the indicator light illuminates each
time the ignition is turned to start.
2-57
Page 158 of 600
Cleaning the Mirror
Do not spray glass cleaner directly on the mirror. Use a
soft towel dampened with water.
Outside Manual Mirrors
Adjust the outside mirrors to see the side of the vehicle
and have a clear view of objects behind you.
Manually fold the mirrors inward to prevent damage
when going through an automatic car wash. To
fold, push the mirror toward the vehicle. Push the mirror
outward, to return to its original position.
Using hood-mounted air de�ectors and add-on convex
mirror attachments could decrease mirror performance.
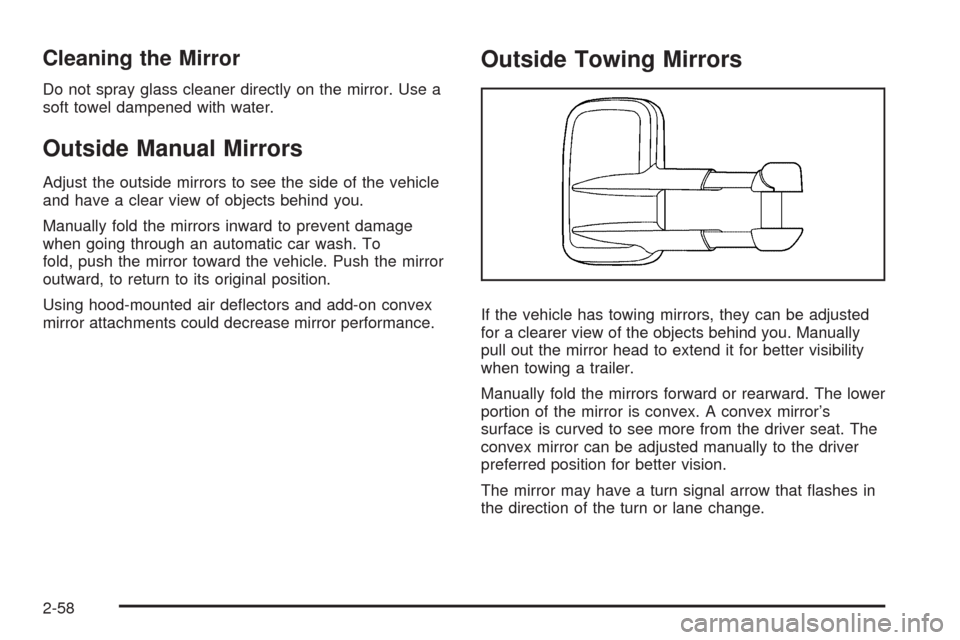
Outside Towing Mirrors
If the vehicle has towing mirrors, they can be adjusted
for a clearer view of the objects behind you. Manually
pull out the mirror head to extend it for better visibility
when towing a trailer.
Manually fold the mirrors forward or rearward. The lower
portion of the mirror is convex. A convex mirror’s
surface is curved to see more from the driver seat. The
convex mirror can be adjusted manually to the driver
preferred position for better vision.
The mirror may have a turn signal arrow that �ashes in
the direction of the turn or lane change.
2-58
Page 164 of 600
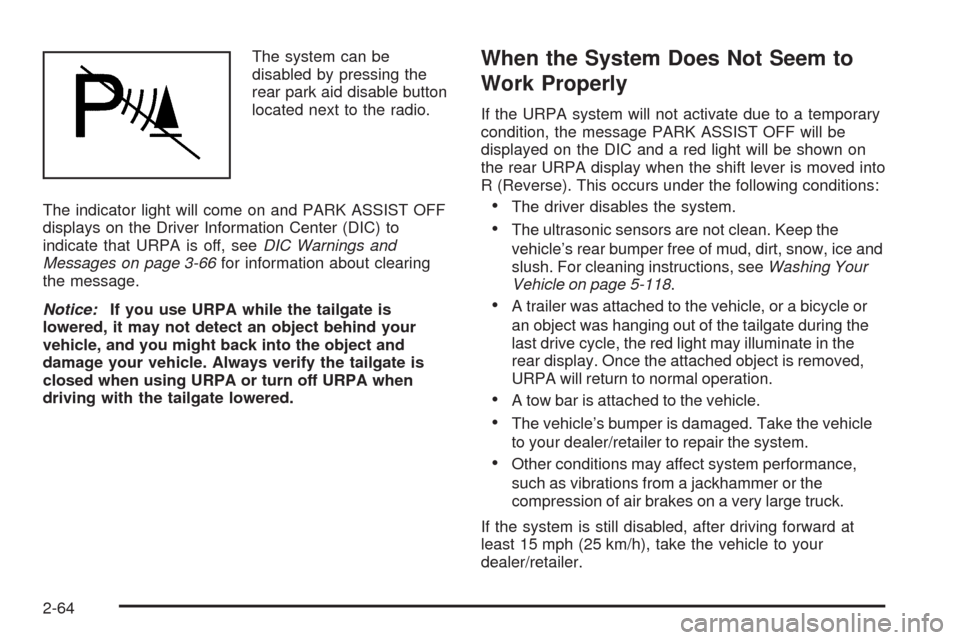
The system can be
disabled by pressing the
rear park aid disable button
located next to the radio.
The indicator light will come on and PARK ASSIST OFF
displays on the Driver Information Center (DIC) to
indicate that URPA is off, seeDIC Warnings and
Messages on page 3-66for information about clearing
the message.
Notice:If you use URPA while the tailgate is
lowered, it may not detect an object behind your
vehicle, and you might back into the object and
damage your vehicle. Always verify the tailgate is
closed when using URPA or turn off URPA when
driving with the tailgate lowered.When the System Does Not Seem to
Work Properly
If the URPA system will not activate due to a temporary
condition, the message PARK ASSIST OFF will be
displayed on the DIC and a red light will be shown on
the rear URPA display when the shift lever is moved into
R (Reverse). This occurs under the following conditions:
The driver disables the system.
The ultrasonic sensors are not clean. Keep the
vehicle’s rear bumper free of mud, dirt, snow, ice and
slush. For cleaning instructions, seeWashing Your
Vehicle on page 5-118.
A trailer was attached to the vehicle, or a bicycle or
an object was hanging out of the tailgate during the
last drive cycle, the red light may illuminate in the
rear display. Once the attached object is removed,
URPA will return to normal operation.
A tow bar is attached to the vehicle.
The vehicle’s bumper is damaged. Take the vehicle
to your dealer/retailer to repair the system.
Other conditions may affect system performance,
such as vibrations from a jackhammer or the
compression of air brakes on a very large truck.
If the system is still disabled, after driving forward at
least 15 mph (25 km/h), take the vehicle to your
dealer/retailer.
2-64
Page 191 of 600
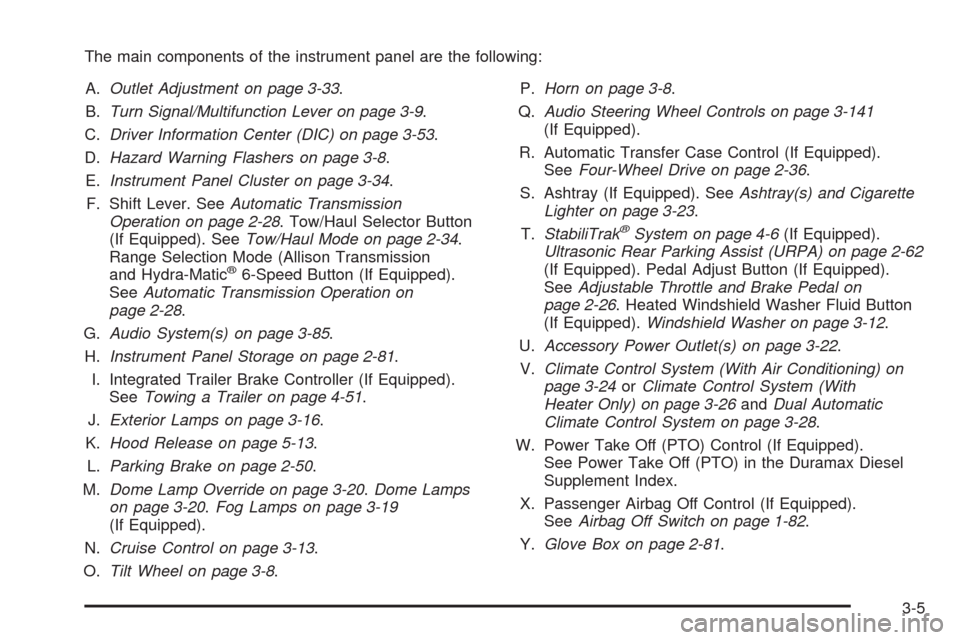
The main components of the instrument panel are the following:
A.Outlet Adjustment on page 3-33.
B.Turn Signal/Multifunction Lever on page 3-9.
C.Driver Information Center (DIC) on page 3-53.
D.Hazard Warning Flashers on page 3-8.
E.Instrument Panel Cluster on page 3-34.
F. Shift Lever. SeeAutomatic Transmission
Operation on page 2-28. Tow/Haul Selector Button
(If Equipped). SeeTow/Haul Mode on page 2-34.
Range Selection Mode (Allison Transmission
and Hydra-Matic
®6-Speed Button (If Equipped).
SeeAutomatic Transmission Operation on
page 2-28.
G.Audio System(s) on page 3-85.
H.Instrument Panel Storage on page 2-81.
I. Integrated Trailer Brake Controller (If Equipped).
SeeTowing a Trailer on page 4-51.
J.Exterior Lamps on page 3-16.
K.Hood Release on page 5-13.
L.Parking Brake on page 2-50.
M.Dome Lamp Override on page 3-20.Dome Lamps
on page 3-20.Fog Lamps on page 3-19
(If Equipped).
N.Cruise Control on page 3-13.
O.Tilt Wheel on page 3-8.P.Horn on page 3-8.
Q.Audio Steering Wheel Controls on page 3-141
(If Equipped).
R. Automatic Transfer Case Control (If Equipped).
SeeFour-Wheel Drive on page 2-36.
S. Ashtray (If Equipped). SeeAshtray(s) and Cigarette
Lighter on page 3-23.
T.StabiliTrak
®System on page 4-6(If Equipped).
Ultrasonic Rear Parking Assist (URPA) on page 2-62
(If Equipped). Pedal Adjust Button (If Equipped).
SeeAdjustable Throttle and Brake Pedal on
page 2-26. Heated Windshield Washer Fluid Button
(If Equipped).Windshield Washer on page 3-12.
U.Accessory Power Outlet(s) on page 3-22.
V.Climate Control System (With Air Conditioning) on
page 3-24orClimate Control System (With
Heater Only) on page 3-26andDual Automatic
Climate Control System on page 3-28.
W. Power Take Off (PTO) Control (If Equipped).
See Power Take Off (PTO) in the Duramax Diesel
Supplement Index.
X. Passenger Airbag Off Control (If Equipped).
SeeAirbag Off Switch on page 1-82.
Y.Glove Box on page 2-81.
3-5
Page 193 of 600
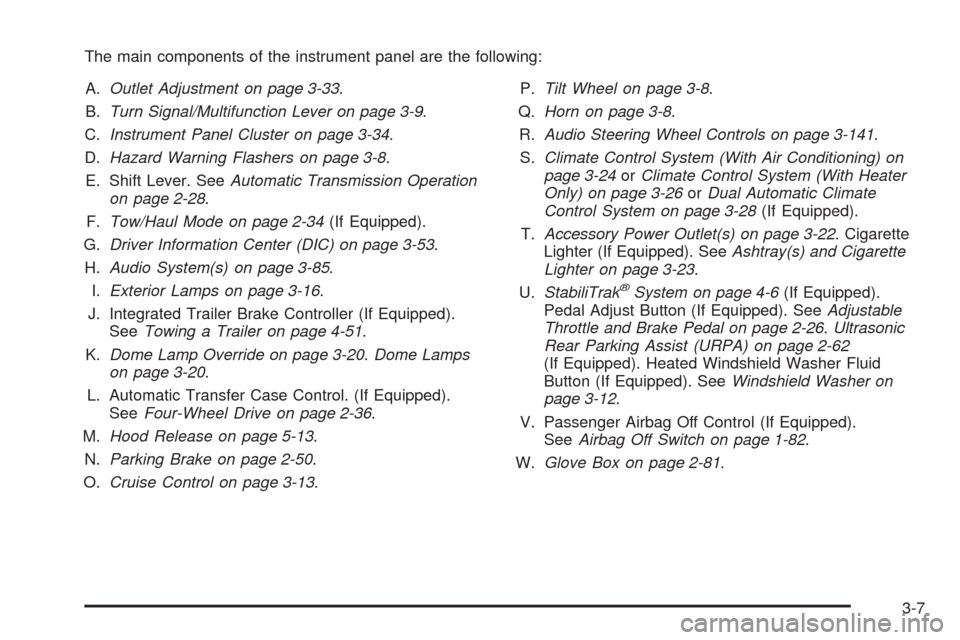
The main components of the instrument panel are the following:
A.Outlet Adjustment on page 3-33.
B.Turn Signal/Multifunction Lever on page 3-9.
C.Instrument Panel Cluster on page 3-34.
D.Hazard Warning Flashers on page 3-8.
E. Shift Lever. SeeAutomatic Transmission Operation
on page 2-28.
F.Tow/Haul Mode on page 2-34(If Equipped).
G.Driver Information Center (DIC) on page 3-53.
H.Audio System(s) on page 3-85.
I.Exterior Lamps on page 3-16.
J. Integrated Trailer Brake Controller (If Equipped).
SeeTowing a Trailer on page 4-51.
K.Dome Lamp Override on page 3-20.Dome Lamps
on page 3-20.
L. Automatic Transfer Case Control. (If Equipped).
SeeFour-Wheel Drive on page 2-36.
M.Hood Release on page 5-13.
N.Parking Brake on page 2-50.
O.Cruise Control on page 3-13.P.Tilt Wheel on page 3-8.
Q.Horn on page 3-8.
R.Audio Steering Wheel Controls on page 3-141.
S.Climate Control System (With Air Conditioning) on
page 3-24orClimate Control System (With Heater
Only) on page 3-26orDual Automatic Climate
Control System on page 3-28(If Equipped).
T.Accessory Power Outlet(s) on page 3-22. Cigarette
Lighter (If Equipped). SeeAshtray(s) and Cigarette
Lighter on page 3-23.
U.StabiliTrak
®System on page 4-6(If Equipped).
Pedal Adjust Button (If Equipped). SeeAdjustable
Throttle and Brake Pedal on page 2-26.Ultrasonic
Rear Parking Assist (URPA) on page 2-62
(If Equipped). Heated Windshield Washer Fluid
Button (If Equipped). SeeWindshield Washer on
page 3-12.
V. Passenger Airbag Off Control (If Equipped).
SeeAirbag Off Switch on page 1-82.
W.Glove Box on page 2-81.
3-7
Page 207 of 600
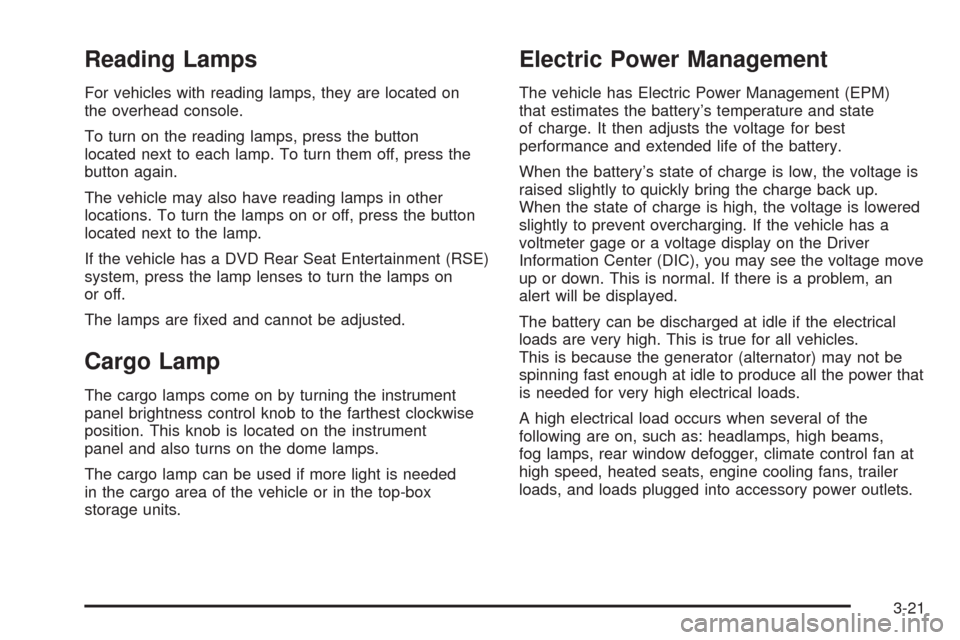
Reading Lamps
For vehicles with reading lamps, they are located on
the overhead console.
To turn on the reading lamps, press the button
located next to each lamp. To turn them off, press the
button again.
The vehicle may also have reading lamps in other
locations. To turn the lamps on or off, press the button
located next to the lamp.
If the vehicle has a DVD Rear Seat Entertainment (RSE)
system, press the lamp lenses to turn the lamps on
or off.
The lamps are �xed and cannot be adjusted.
Cargo Lamp
The cargo lamps come on by turning the instrument
panel brightness control knob to the farthest clockwise
position. This knob is located on the instrument
panel and also turns on the dome lamps.
The cargo lamp can be used if more light is needed
in the cargo area of the vehicle or in the top-box
storage units.
Electric Power Management
The vehicle has Electric Power Management (EPM)
that estimates the battery’s temperature and state
of charge. It then adjusts the voltage for best
performance and extended life of the battery.
When the battery’s state of charge is low, the voltage is
raised slightly to quickly bring the charge back up.
When the state of charge is high, the voltage is lowered
slightly to prevent overcharging. If the vehicle has a
voltmeter gage or a voltage display on the Driver
Information Center (DIC), you may see the voltage move
up or down. This is normal. If there is a problem, an
alert will be displayed.
The battery can be discharged at idle if the electrical
loads are very high. This is true for all vehicles.
This is because the generator (alternator) may not be
spinning fast enough at idle to produce all the power that
is needed for very high electrical loads.
A high electrical load occurs when several of the
following are on, such as: headlamps, high beams,
fog lamps, rear window defogger, climate control fan at
high speed, heated seats, engine cooling fans, trailer
loads, and loads plugged into accessory power outlets.
3-21
Page 232 of 600
If the check engine light comes on and stays on, while
the engine is running, this indicates that there is an
OBD II problem and service is required.
Malfunctions often are indicated by the system before
any problem is apparent. Being aware of the light
can prevent more serious damage to the vehicle.
This system assists the service technician in correctly
diagnosing any malfunction.
Notice:If the vehicle is continually driven with
this light on, after a while, the emission controls
might not work as well, the vehicle’s fuel economy
might not be as good, and the engine might not
run as smoothly. This could lead to costly repairs
that might not be covered by the vehicle warranty.
Notice:Modi�cations made to the engine,
transmission, exhaust, intake, or fuel system of
the vehicle or the replacement of the original tires
with other than those of the same Tire Performance
Criteria (TPC) can affect the vehicle’s emission
controls and can cause this light to come on.
Modi�cations to these systems could lead to
costly repairs not covered by the vehicle warranty.
This could also result in a failure to pass a
required Emission Inspection/Maintenance test.
SeeAccessories and Modifications on page 5-4.This light comes on during a malfunction in one of
two ways:
Light Flashing:A mis�re condition has been detected.
A mis�re increases vehicle emissions and could
damage the emission control system on the vehicle.
Diagnosis and service might be required.
To prevent more serious damage to the vehicle:
Reduce vehicle speed.
Avoid hard accelerations.
Avoid steep uphill grades.
If towing a trailer, reduce the amount of cargo being
hauled as soon as it is possible.
If the light continues to �ash, when it is safe to do so,
stop the vehicle. Find a safe place to park the vehicle.
Turn the key off, wait at least 10 seconds, and restart
the engine. If the light is still �ashing, follow the previous
steps and see your dealer/retailer for service as soon
as possible.
3-46
Page 240 of 600
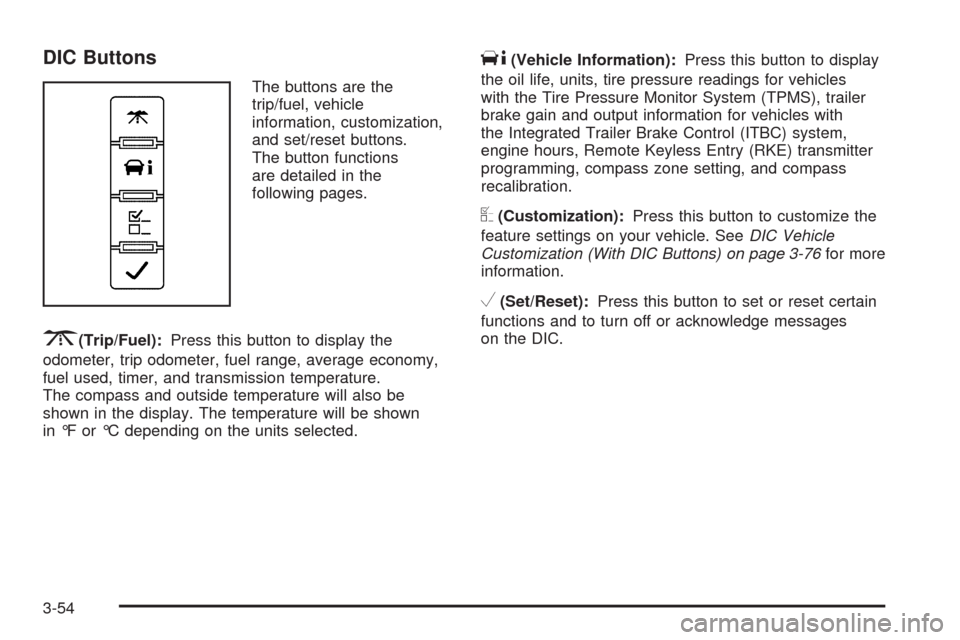
DIC Buttons
The buttons are the
trip/fuel, vehicle
information, customization,
and set/reset buttons.
The button functions
are detailed in the
following pages.
3(Trip/Fuel):Press this button to display the
odometer, trip odometer, fuel range, average economy,
fuel used, timer, and transmission temperature.
The compass and outside temperature will also be
shown in the display. The temperature will be shown
in °F or °C depending on the units selected.
T(Vehicle Information):Press this button to display
the oil life, units, tire pressure readings for vehicles
with the Tire Pressure Monitor System (TPMS), trailer
brake gain and output information for vehicles with
the Integrated Trailer Brake Control (ITBC) system,
engine hours, Remote Keyless Entry (RKE) transmitter
programming, compass zone setting, and compass
recalibration.
U(Customization):Press this button to customize the
feature settings on your vehicle. SeeDIC Vehicle
Customization (With DIC Buttons) on page 3-76for more
information.
V(Set/Reset):Press this button to set or reset certain
functions and to turn off or acknowledge messages
on the DIC.
3-54
Page 244 of 600
Tire Pressure
If your vehicle has the Tire Pressure Monitor System
(TPMS), the pressure for each tire can be viewed in the
DIC. The tire pressure will be shown in either pounds
per square inch (psi) or kilopascals (kPa). Press the
vehicle information button until the DIC displays FRONT
TIRES PSI (kPa) LEFT ## RIGHT ##. Press the
vehicle information button again until the DIC displays
REAR TIRES PSI (kPa) LEFT ## RIGHT ##.
If a low or high tire pressure condition is detected by the
system while driving, a message advising you to
check the pressure in a speci�c tire will appear in the
display. SeeInflation - Tire Pressure on page 5-73and
DIC Warnings and Messages on page 3-66for more
information.
If the tire pressure display shows dashes instead of a
value, there may be a problem with your vehicle. If this
consistently occurs, see your dealer/retailer for service.
Trailer Gain and Output
On vehicles with the Integrated Trailer Brake Control
(ITBC) system, the trailer brake display appears in
the DIC. Press the vehicle information button until
TRAILER GAIN and OUTPUT display.TRAILER GAIN shows the trailer gain setting. This
setting can be adjusted from 0.0 to 10.0 with either a
trailer connected or disconnected. To adjust this setting,
see “Integrated Trailer Brake Control System” under
Towing a Trailer on page 4-51for more information.
OUTPUT shows the power output to the trailer anytime
a trailer with electric brakes is connected. Output is
displayed in 0 to 10 bars. Dashes may appear in
the OUTPUT display. See “Integrated Trailer Brake
Control System” underTowing a Trailer on page 4-51
for more information.
Engine Hours
Press the vehicle information button until ENGINE
HOURS displays. This display shows the total number
of hours the engine has run.
Relearn Remote Key
This display allows you to match Remote Keyless
Entry (RKE) transmitters to your vehicle. To match an
RKE transmitter to your vehicle:
1. Press the vehicle information button until PRESS
V
TO RELEARN REMOTE KEY displays.
2. Press the set/reset button until REMOTE KEY
LEARNING ACTIVE is displayed.
3-58
Page 245 of 600
3. Press and hold the lock and unlock buttons on
the �rst transmitter at the same time for about
15 seconds.
On vehicles with memory recall seats, the �rst
transmitter learned will match driver 1 and
the second will match driver 2.
A chime will sound indicating that the transmitter
is matched.
4. To match additional transmitters at this time,
repeat Step 3.
Each vehicle can have a maximum of
eight transmitters matched to it.
5. To exit the programming mode, you must cycle
the key to LOCK/OFF.
Compass Zone Setting
This display allows for setting the compass zone.
SeeDIC Compass on page 3-63for more information.
Compass Recalibration
This display allows for calibrating the compass.
SeeDIC Compass on page 3-63for more information.
Blank Display
This display shows no information.
DIC Operation and Displays
(Without DIC Buttons)
If your vehicle does not have DIC buttons, the
information below explains the operation of this system.
The DIC has different displays which can be accessed
by pressing the trip odometer reset stem located on
the instrument panel cluster. Pressing the trip
odometer reset stem will also turn off, or acknowledge,
DIC messages.
The DIC displays trip and vehicle system information,
and warning messages if a system problem is detected.
If your vehicle does not have DIC buttons, you can
use the trip odometer reset stem to view the following
displays: odometer, engine hours, trip odometer,
transmission temperature, trailer brake gain and output
information for vehicles with the Integrated Trailer
Brake Control (ITBC) system, compass zone setting,
compass recalibration, oil life, Tire Pressure Monitor
System (TPMS) programming for vehicles with the
TPMS, Remote Keyless Entry (RKE) transmitter
programming, and display language.
If your vehicle has DIC buttons, you can use the trip
odometer reset stem to view the following displays:
odometer, engine hours, trip odometer, and display
language.
3-59