engine CHEVROLET SILVERADO 2010 2.G Owners Manual
[x] Cancel search | Manufacturer: CHEVROLET, Model Year: 2010, Model line: SILVERADO, Model: CHEVROLET SILVERADO 2010 2.GPages: 626, PDF Size: 4.8 MB
Page 3 of 626
GENERAL MOTORS, GM, the GM Emblem,
CHEVROLET, the CHEVROLET Emblem, and the
names SILVERADO and Z71 are registered trademarks
of General Motors.
This manual describes features that may or may not be
on your specific vehicle either because they are options
that you did not purchase or due to changes
subsequent to the printing of this owner manual. Please
refer to the purchase documentation relating to your
specific vehicle to confirm each of the features found on
your vehicle. For vehicles first sold in Canada,
substitute the name“General Motors of Canada
Limited” for Chevrolet Motor Division wherever it
appears in this manual.
If the vehicle has the DURAMAX
®Diesel engine, refer
to the DURAMAX®Diesel supplement for additional and
specific information on this engine.
Keep this manual in the vehicle for quick reference.
Canadian Owners
Propriétaires Canadiens
A French language copy of this manual can be obtained
from your dealer or from:
On peut obtenir un exemplaire de ce guide en français
auprès du concessionnaire ou à l'adresse suivante:
Helm, Incorporated
P.O. Box 07130
Detroit, MI 48207
1-800-551-4123
Numéro de poste 6438 de langue française www.helminc.com
Index
To quickly locate information about the vehicle, use the
index in the back of the manual. It is an alphabetical list
of what is in the manual and the page number where it
can be found.
iii
Litho in U.S.A.
Part No. 25854757 B Second Printing©2009 General Motors. All Rights Reserved.
Page 5 of 626
Vehicle Symbol Chart
Here are some additional symbols that may be found on
the vehicle and what they mean. For more information
on the symbol, refer to the index.
0:Adjustable Pedals
9:Airbag Readiness Light
#:Air Conditioning
!:Antilock Brake System (ABS)
g:Audio Steering Wheel Controls or OnStar®
$:Brake System Warning Light
":Charging System
I:Cruise Control
B: Engine Coolant Temperature
O:Exterior Lamps
#:Fog Lamps
.: Fuel Gauge
+:Fuses
i: Headlamp High/Low-Beam Changer
j:LATCH System Child Restraints
*: Malfunction Indicator Lamp
::Oil Pressure
g:Outside Power Foldaway Mirrors
}:Power
/:Remote Vehicle Start
>:Safety Belt Reminders
7:Tire Pressure Monitor
_: Tow/Haul Mode
F:Traction Control
M:Windshield Washer Fluid
v
Page 7 of 626
Section 1 In Brief
Instrument Panel. . . . . . . . . . . . . . . . . . . . . . . . . . . . . . . . . . . 1-2
Instrument Panel (Base/Uplevel Version) . . . . . . . . 1-2
Instrument Panel (Premium Version) . . . . . . . . . . . . 1-4
Initial Drive Information . . . . . . . . . . . . . . . . . . . . . . . . . . . 1-6
Remote Keyless Entry (RKE) System . . . . . . . . . . . 1-6
Remote Vehicle Start . . . . . . . . . . . . . . . . . . . . . . . . . . . 1-6
Door Locks . . . . . . . . . . . . . . . . . . . . . . . . . . . . . . . . . . . . . 1-7
Windows . . . . . . . . . . . . . . . . . . . . . . . . . . . . . . . . . . . . . . . . 1-7
Seat Adjustment . . . . . . . . . . . . . . . . . . . . . . . . . . . . . . . . 1-9
Heated Seats . . . . . . . . . . . . . . . . . . . . . . . . . . . . . . . . . . 1-12
Head Restraint Adjustment . . . . . . . . . . . . . . . . . . . . 1-12
Safety Belt . . . . . . . . . . . . . . . . . . . . . . . . . . . . . . . . . . . . . 1-13
Sensing System for Passenger Airbag . . . . . . . . . 1-13
Mirror Adjustment . . . . . . . . . . . . . . . . . . . . . . . . . . . . . . 1-14
Steering Wheel Adjustment . . . . . . . . . . . . . . . . . . . . 1-16
Throttle and Brake Pedal Adjustment . . . . . . . . . . 1-16
Interior Lighting . . . . . . . . . . . . . . . . . . . . . . . . . . . . . . . . 1-17
Exterior Lighting . . . . . . . . . . . . . . . . . . . . . . . . . . . . . . . 1-18
Windshield Wiper/Washer . . . . . . . . . . . . . . . . . . . . . . 1-18
Climate Controls . . . . . . . . . . . . . . . . . . . . . . . . . . . . . . . 1-19
Transmission . . . . . . . . . . . . . . . . . . . . . . . . . . . . . . . . . . 1-21
Four-Wheel Drive . . . . . . . . . . . . . . . . . . . . . . . . . . . . . . 1-21 Vehicle Features
. . . . . . . . . . . . . . . . . . . . . . . . . . . . . . . . . . 1-24
Radio(s) . . . . . . . . . . . . . . . . . . . . . . . . . . . . . . . . . . . . . . . 1-24
Satellite Radio . . . . . . . . . . . . . . . . . . . . . . . . . . . . . . . . . 1-25
Portable Audio Devices . . . . . . . . . . . . . . . . . . . . . . . . 1-25
Steering Wheel Controls . . . . . . . . . . . . . . . . . . . . . . . 1-26
Bluetooth
®. . . . . . . . . . . . . . . . . . . . . . . . . . . . . . . . . . . . . 1-26
Navigation System . . . . . . . . . . . . . . . . . . . . . . . . . . . . . 1-26
Driver Information Center (DIC) . . . . . . . . . . . . . . . . 1-27
Cruise Control . . . . . . . . . . . . . . . . . . . . . . . . . . . . . . . . . 1-28
Rear Vision Camera (RVC) . . . . . . . . . . . . . . . . . . . . 1-28
Ultrasonic Parking Assist . . . . . . . . . . . . . . . . . . . . . . 1-28
Power Outlets . . . . . . . . . . . . . . . . . . . . . . . . . . . . . . . . . 1-29
Universal Remote System . . . . . . . . . . . . . . . . . . . . . 1-29
Sunroof . . . . . . . . . . . . . . . . . . . . . . . . . . . . . . . . . . . . . . . . 1-30
Performance and Maintenance . . . . . . . . . . . . . . . . . .1-31
StabiliTrak
®. . . . . . . . . . . . . . . . . . . . . . . . . . . . . . . . . . . . 1-31
Tire Pressure Monitor . . . . . . . . . . . . . . . . . . . . . . . . . . 1-32
Engine Oil Life System . . . . . . . . . . . . . . . . . . . . . . . . 1-32
Fuel E85 (85% Ethanol) . . . . . . . . . . . . . . . . . . . . . . . 1-33
Driving for Better Fuel Economy . . . . . . . . . . . . . . . 1-33
Roadside Assistance Program . . . . . . . . . . . . . . . . . 1-34
OnStar
®. . . . . . . . . . . . . . . . . . . . . . . . . . . . . . . . . . . . . . . 1-34
1-1
Page 12 of 626
Initial Drive Information
This section provides a brief overview about some of
the important features that may or may not be on your
specific vehicle.
For more detailed information, refer to each of the
features which can be found later in this owner manual.
Remote Keyless Entry (RKE) System
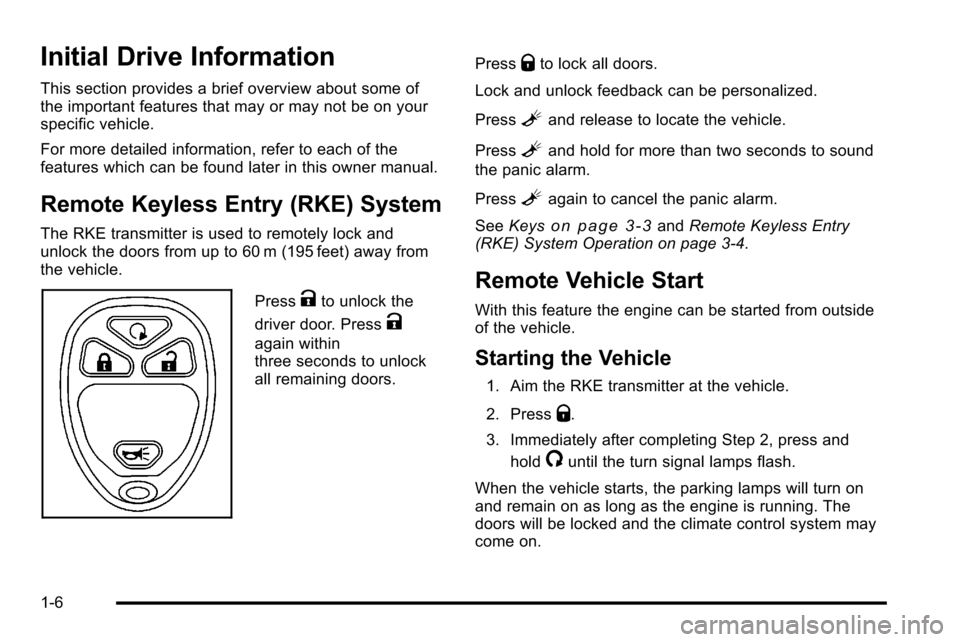
The RKE transmitter is used to remotely lock and
unlock the doors from up to 60 m (195 feet) away from
the vehicle.
PressKto unlock the
driver door. Press
K
again within
three seconds to unlock
all remaining doors. Press
Qto lock all doors.
Lock and unlock feedback can be personalized.
Press
Land release to locate the vehicle.
Press
Land hold for more than two seconds to sound
the panic alarm.
Press
Lagain to cancel the panic alarm.
See Keys
on page 3‑3andRemote Keyless Entry
(RKE) System Operation on page 3‑4.
Remote Vehicle Start
With this feature the engine can be started from outside
of the vehicle.
Starting the Vehicle
1. Aim the RKE transmitter at the vehicle.
2. Press
Q.
3. Immediately after completing Step 2, press and hold
/until the turn signal lamps flash.
When the vehicle starts, the parking lamps will turn on
and remain on as long as the engine is running. The
doors will be locked and the climate control system may
come on.
1-6
Page 13 of 626
The engine will continue to run for 10 minutes. Repeat
the steps for a 10-minute time extension. Remote start
can be extended only once.
Canceling a Remote Start
To cancel a remote start:
.Aim the RKE transmitter at the vehicle and press
and hold
/until the parking lamps turn off.
.Turn on the hazard warning flashers.
.Turn the ignition on and then back off.
See Remote Vehicle Start on page 3‑7.
Door Locks
There are several ways to lock and unlock the vehicle.
From outside, use the Remote Keyless Entry (RKE)
transmitter or the key in the driver door. From inside,
use the power door locks or the manual door locks. To
lock or unlock the door with the manual locks, push
down or pull up on the manual lock knob.
Power Door Locks
If available, these switches are located on the front
doors.
K:Press to unlock the doors.
Q:Remove the key from the ignition and press to lock
the doors.
For more information, see:
.Programmable Automatic Door Lockson
page 3‑10.
.Rear Door Security Locks on page 3‑10.
Windows
Turn the hand crank on each door to manually raise or
lower the manual windows.
1-7
Page 27 of 626
Transmission
Range Selection Mode
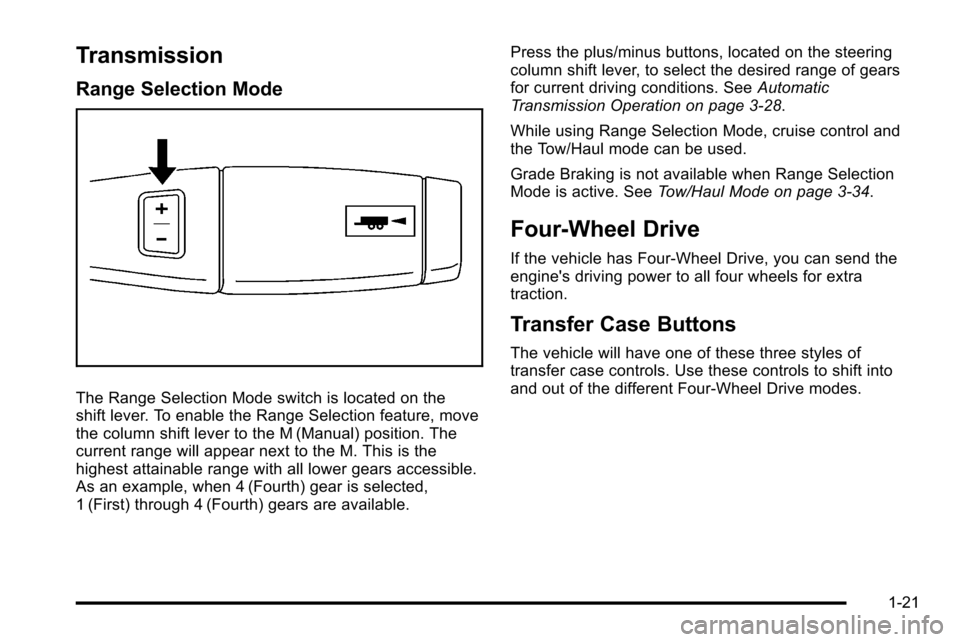
The Range Selection Mode switch is located on the
shift lever. To enable the Range Selection feature, move
the column shift lever to the M (Manual) position. The
current range will appear next to the M. This is the
highest attainable range with all lower gears accessible.
As an example, when 4 (Fourth) gear is selected,
1 (First) through 4 (Fourth) gears are available.Press the plus/minus buttons, located on the steering
column shift lever, to select the desired range of gears
for current driving conditions. See
Automatic
Transmission Operation on page 3‑28.
While using Range Selection Mode, cruise control and
the Tow/Haul mode can be used.
Grade Braking is not available when Range Selection
Mode is active. See Tow/Haul Mode on page 3‑34.
Four-Wheel Drive
If the vehicle has Four-Wheel Drive, you can send the
engine's driving power to all four wheels for extra
traction.
Transfer Case Buttons
The vehicle will have one of these three styles of
transfer case controls. Use these controls to shift into
and out of the different Four-Wheel Drive modes.
1-21
Page 33 of 626
Driver Information Center (DIC)
The DIC display is located at the bottom of the
instrument panel cluster. It shows the status of many
vehicle systems and enables access to the
personalization menu.
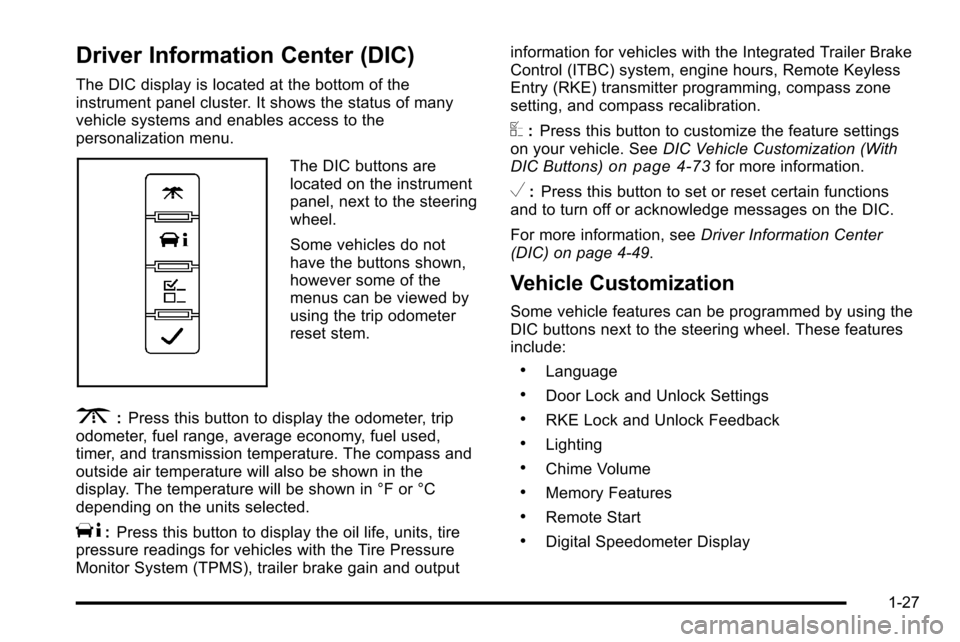
The DIC buttons are
located on the instrument
panel, next to the steering
wheel.
Some vehicles do not
have the buttons shown,
however some of the
menus can be viewed by
using the trip odometer
reset stem.
3:Press this button to display the odometer, trip
odometer, fuel range, average economy, fuel used,
timer, and transmission temperature. The compass and
outside air temperature will also be shown in the
display. The temperature will be shown in °F or °C
depending on the units selected.
T: Press this button to display the oil life, units, tire
pressure readings for vehicles with the Tire Pressure
Monitor System (TPMS), trailer brake gain and output information for vehicles with the Integrated Trailer Brake
Control (ITBC) system, engine hours, Remote Keyless
Entry (RKE) transmitter programming, compass zone
setting, and compass recalibration.
U:
Press this button to customize the feature settings
on your vehicle. See DIC Vehicle Customization (With
DIC Buttons)
on page 4‑73for more information.
V: Press this button to set or reset certain functions
and to turn off or acknowledge messages on the DIC.
For more information, see Driver Information Center
(DIC) on page 4‑49.
Vehicle Customization
Some vehicle features can be programmed by using the
DIC buttons next to the steering wheel. These features
include:
.Language
.Door Lock and Unlock Settings
.RKE Lock and Unlock Feedback
.Lighting
.Chime Volume
.Memory Features
.Remote Start
.Digital Speedometer Display
1-27
Page 38 of 626
Tire Pressure Monitor
This vehicle may have a Tire Pressure Monitor
System (TPMS).
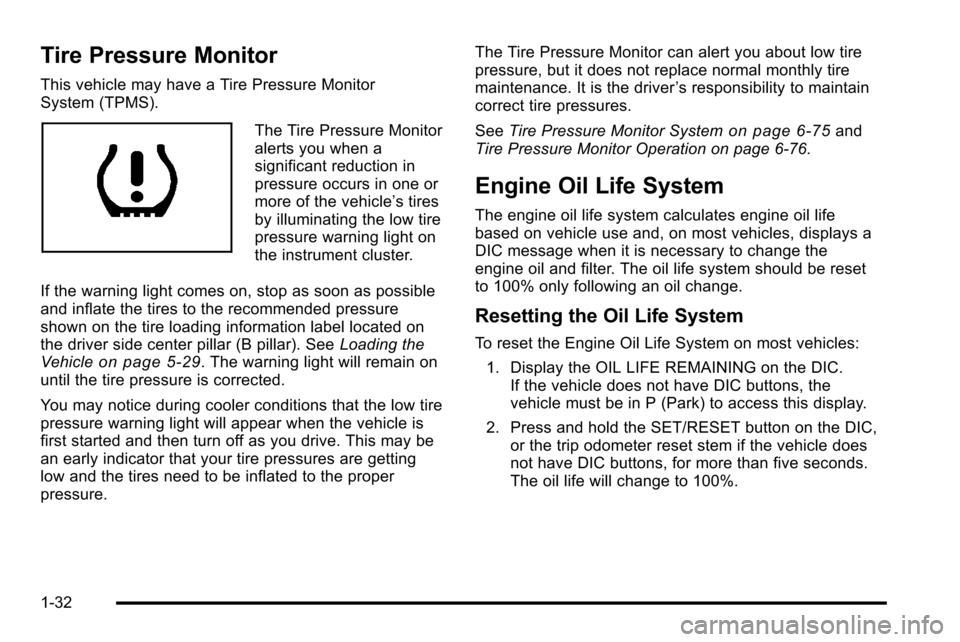
The Tire Pressure Monitor
alerts you when a
significant reduction in
pressure occurs in one or
more of the vehicle’s tires
by illuminating the low tire
pressure warning light on
the instrument cluster.
If the warning light comes on, stop as soon as possible
and inflate the tires to the recommended pressure
shown on the tire loading information label located on
the driver side center pillar (B pillar). See Loading the
Vehicle
on page 5‑29. The warning light will remain on
until the tire pressure is corrected.
You may notice during cooler conditions that the low tire
pressure warning light will appear when the vehicle is
first started and then turn off as you drive. This may be
an early indicator that your tire pressures are getting
low and the tires need to be inflated to the proper
pressure. The Tire Pressure Monitor can alert you about low tire
pressure, but it does not replace normal monthly tire
maintenance. It is the driver
’s responsibility to maintain
correct tire pressures.
See Tire Pressure Monitor System
on page 6‑75and
Tire Pressure Monitor Operation on page 6‑76.
Engine Oil Life System
The engine oil life system calculates engine oil life
based on vehicle use and, on most vehicles, displays a
DIC message when it is necessary to change the
engine oil and filter. The oil life system should be reset
to 100% only following an oil change.
Resetting the Oil Life System
To reset the Engine Oil Life System on most vehicles:
1. Display the OIL LIFE REMAINING on the DIC. If the vehicle does not have DIC buttons, the
vehicle must be in P (Park) to access this display.
2. Press and hold the SET/RESET button on the DIC, or the trip odometer reset stem if the vehicle does
not have DIC buttons, for more than five seconds.
The oil life will change to 100%.
1-32
Page 39 of 626
On all vehicles, the Engine Oil Life System can be reset
as follows:1. Turn the ignition to ON/RUN with the engine off
2. Fully press the accelerator pedal slowly three times within five seconds.
3. Display the OIL LIFE REMAINING on the DIC. If the display shows 100%, the system is reset.
See Engine Oil Life System on page 6‑20.
Fuel E85 (85% Ethanol)
Vehicles that have the 5.3L V8 engine (VIN Code 0), the
5.3L V8 engine (VIN Code 3), the 6.0L V8 engine (VIN
Code J), or the 6.2L V8 engine (VIN Code 2) have a
yellow fuel cap and can use either unleaded gasoline or
ethanol fuel containing up to 85% ethanol (E85). See
Gasoline Octane
on page 6‑7andFuel E85 (85%
Ethanol) on page 6‑9.
Driving for Better Fuel Economy
Driving habits can affect fuel mileage. Here are some
driving tips to get the best fuel economy possible.
.Avoid fast starts and accelerate smoothly.
.Brake gradually and avoid abrupt stops.
.Avoid idling the engine for long periods of time.
.When road and weather conditions are
appropriate, use cruise control, if equipped.
.Always follow posted speed limits or drive more
slowly when conditions require.
.Keep vehicle tires properly inflated.
.Combine several trips into a single trip.
.Replace the vehicle's tires with the same TPC
Spec number molded into the tire's sidewall near
the size.
.Follow recommended scheduled maintenance.
1-33
Page 123 of 626
{WARNING:
When an airbag inflates, there may be dust in the
air. This dust could cause breathing problems for
people with a history of asthma or other breathing
trouble. To avoid this, everyone in the vehicle
should get out as soon as it is safe to do so.
If you have breathing problems but cannot get out
of the vehicle after an airbag inflates, then get
fresh air by opening a window or a door. If you
experience breathing problems following an airbag
deployment, you should seek medical attention.
The vehicle has a feature that may automatically unlock
the doors, turn on the interior lamps and hazard warning
flashers, and shut off the fuel system after the airbags
inflate. You can lock the doors, turn off the interior
lamps and hazard warning flashers by using the
controls for those features.
{WARNING:
A crash severe enough to inflate the airbags may
have also damaged important functions in the
vehicle, such as the fuel system, brake and
steering systems, etc. Even if the vehicle appears
to be drivable after a moderate crash, there may
be concealed damage that could make it difficult
to safely operate the vehicle.
Use caution if you should attempt to restart the
engine after a crash has occurred.
In many crashes severe enough to inflate the airbag,
windshields are broken by vehicle deformation.
Additional windshield breakage may also occur from the
right front passenger airbag.
.Airbags are designed to inflate only once. After an
airbag inflates, you will need some new parts for
the airbag system. If you do not get them, the
airbag system will not be there to help protect you
in another crash. A new system will include airbag
modules and possibly other parts. The service
manual for your vehicle covers the need to replace
other parts.
2-81