transmission oil CHEVROLET SILVERADO 2011 2.G Owners Manual
[x] Cancel search | Manufacturer: CHEVROLET, Model Year: 2011, Model line: SILVERADO, Model: CHEVROLET SILVERADO 2011 2.GPages: 588, PDF Size: 7.99 MB
Page 7 of 588
Black plate (1,1)Chevrolet Silverado Owner Manual - 2011
In Brief 1-1
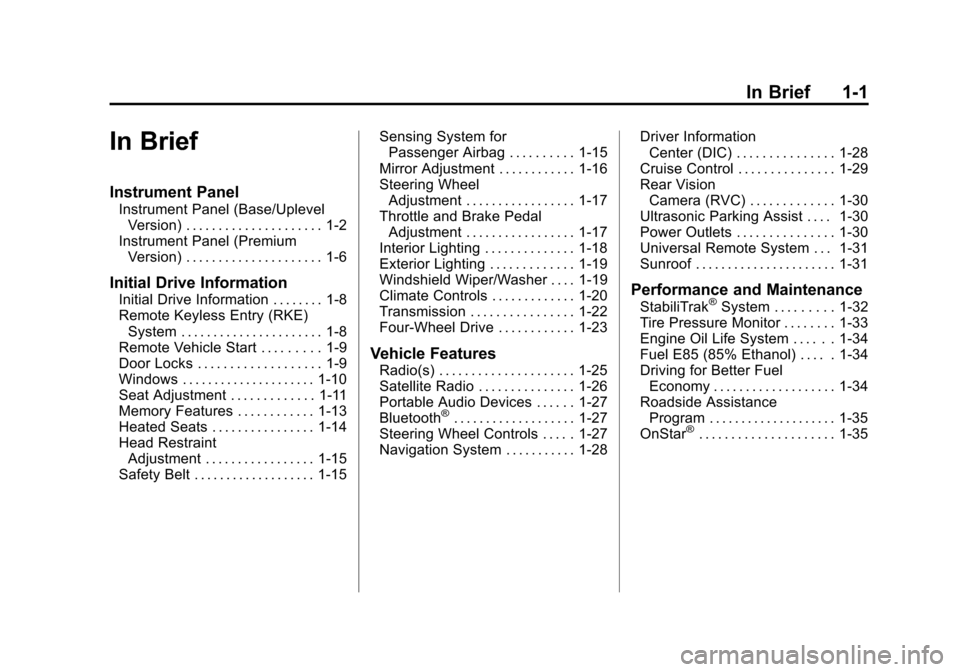
In Brief
Instrument Panel
Instrument Panel (Base/UplevelVersion) . . . . . . . . . . . . . . . . . . . . . 1-2
Instrument Panel (Premium Version) . . . . . . . . . . . . . . . . . . . . . 1-6
Initial Drive Information
Initial Drive Information . . . . . . . . 1-8
Remote Keyless Entry (RKE)System . . . . . . . . . . . . . . . . . . . . . . 1-8
Remote Vehicle Start . . . . . . . . . 1-9
Door Locks . . . . . . . . . . . . . . . . . . . 1-9
Windows . . . . . . . . . . . . . . . . . . . . . 1-10
Seat Adjustment . . . . . . . . . . . . . 1-11
Memory Features . . . . . . . . . . . . 1-13
Heated Seats . . . . . . . . . . . . . . . . 1-14
Head Restraint Adjustment . . . . . . . . . . . . . . . . . 1-15
Safety Belt . . . . . . . . . . . . . . . . . . . 1-15 Sensing System for
Passenger Airbag . . . . . . . . . . 1-15
Mirror Adjustment . . . . . . . . . . . . 1-16
Steering Wheel Adjustment . . . . . . . . . . . . . . . . . 1-17
Throttle and Brake Pedal Adjustment . . . . . . . . . . . . . . . . . 1-17
Interior Lighting . . . . . . . . . . . . . . 1-18
Exterior Lighting . . . . . . . . . . . . . 1-19
Windshield Wiper/Washer . . . . 1-19
Climate Controls . . . . . . . . . . . . . 1-20
Transmission . . . . . . . . . . . . . . . . 1-22
Four-Wheel Drive . . . . . . . . . . . . 1-23
Vehicle Features
Radio(s) . . . . . . . . . . . . . . . . . . . . . 1-25
Satellite Radio . . . . . . . . . . . . . . . 1-26
Portable Audio Devices . . . . . . 1-27
Bluetooth
®. . . . . . . . . . . . . . . . . . . 1-27
Steering Wheel Controls . . . . . 1-27
Navigation System . . . . . . . . . . . 1-28 Driver Information
Center (DIC) . . . . . . . . . . . . . . . 1-28
Cruise Control . . . . . . . . . . . . . . . 1-29
Rear Vision Camera (RVC) . . . . . . . . . . . . . 1-30
Ultrasonic Parking Assist . . . . 1-30
Power Outlets . . . . . . . . . . . . . . . 1-30
Universal Remote System . . . 1-31
Sunroof . . . . . . . . . . . . . . . . . . . . . . 1-31
Performance and Maintenance
StabiliTrak®System . . . . . . . . . 1-32
Tire Pressure Monitor . . . . . . . . 1-33
Engine Oil Life System . . . . . . 1-34
Fuel E85 (85% Ethanol) . . . . . 1-34
Driving for Better Fuel Economy . . . . . . . . . . . . . . . . . . . 1-34
Roadside Assistance Program . . . . . . . . . . . . . . . . . . . . 1-35
OnStar
®. . . . . . . . . . . . . . . . . . . . . 1-35
Page 34 of 588
Black plate (28,1)Chevrolet Silverado Owner Manual - 2011
1-28 In Brief
Navigation System
The vehicle's navigation system
(if equipped) provides detailed maps
of most major freeways and roads
throughout the United States and
Canada. After a destination has
been set, the system provides
turn-by-turn instructions for reaching
the destination. In addition, the
system can help locate a variety
of points of interest (POI), such
as banks, airports, restaurants,
and more.
See the Navigation System manual
for more information.
Driver Information
Center (DIC)
The DIC display is located at the
bottom of the instrument panel
cluster. It shows the status of
many vehicle systems and enables
access to the personalization menu.
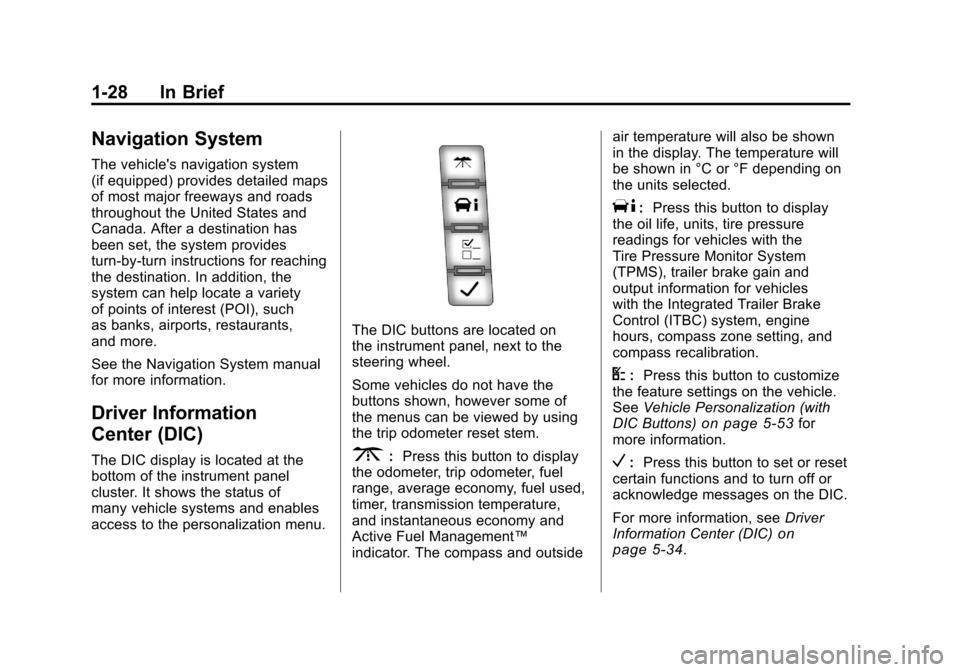
The DIC buttons are located on
the instrument panel, next to the
steering wheel.
Some vehicles do not have the
buttons shown, however some of
the menus can be viewed by using
the trip odometer reset stem.
3:Press this button to display
the odometer, trip odometer, fuel
range, average economy, fuel used,
timer, transmission temperature,
and instantaneous economy and
Active Fuel Management™
indicator. The compass and outside air temperature will also be shown
in the display. The temperature will
be shown in °C or °F depending on
the units selected.
T:
Press this button to display
the oil life, units, tire pressure
readings for vehicles with the
Tire Pressure Monitor System
(TPMS), trailer brake gain and
output information for vehicles
with the Integrated Trailer Brake
Control (ITBC) system, engine
hours, compass zone setting, and
compass recalibration.
U: Press this button to customize
the feature settings on the vehicle.
See Vehicle Personalization (with
DIC Buttons)
on page 5‑53for
more information.
V: Press this button to set or reset
certain functions and to turn off or
acknowledge messages on the DIC.
For more information, see Driver
Information Center (DIC)
on
page 5‑34.
Page 151 of 588
Black plate (1,1)Chevrolet Silverado Owner Manual - 2011
Instruments and Controls 5-1
Instruments and
Controls
Controls
Steering Wheel Adjustment . . . 5-2
Steering Wheel Controls . . . . . . 5-3
Horn . . . . . . . . . . . . . . . . . . . . . . . . . . 5-5
Windshield Wiper/Washer . . . . . 5-5
Compass . . . . . . . . . . . . . . . . . . . . . 5-6
Clock . . . . . . . . . . . . . . . . . . . . . . . . . 5-8
Power Outlets . . . . . . . . . . . . . . . 5-10
Cigarette Lighter . . . . . . . . . . . . . 5-11
Ashtrays . . . . . . . . . . . . . . . . . . . . . 5-12
Warning Lights, Gauges, and
Indicators
Warning Lights, Gauges, andIndicators . . . . . . . . . . . . . . . . . . 5-12
Instrument Cluster . . . . . . . . . . . 5-13
Speedometer . . . . . . . . . . . . . . . . 5-16
Odometer . . . . . . . . . . . . . . . . . . . . 5-16
Trip Odometer . . . . . . . . . . . . . . . 5-16
Tachometer . . . . . . . . . . . . . . . . . . 5-17
Fuel Gauge . . . . . . . . . . . . . . . . . . 5-17
Engine Oil Pressure Gauge . . . . . . . . . . . . . . . . . . . . . . 5-18 Engine Coolant Temperature
Gauge . . . . . . . . . . . . . . . . . . . . . . 5-19
Voltmeter Gauge . . . . . . . . . . . . . 5-20
Safety Belt Reminders . . . . . . . 5-21
Airbag Readiness Light . . . . . . 5-22
Airbag On-Off Light . . . . . . . . . . 5-23
Passenger Airbag Status Indicator . . . . . . . . . . . . . . . . . . . . 5-25
Charging System Light . . . . . . 5-26
Malfunction Indicator Lamp . . . . . . . . . . . . . 5-27
Brake System Warning Light . . . . . . . . . . . . . . . . . . . . . . . 5-29
Antilock Brake System (ABS) Warning Light . . . . . . . . . . . . . . 5-30
Four-Wheel-Drive Light . . . . . . 5-31
Tow/Haul Mode Light . . . . . . . . 5-31
StabiliTrak
®Indicator Light . . . 5-31
Tire Pressure Light . . . . . . . . . . 5-32
Engine Oil Pressure Light . . . . 5-32
Low Fuel Warning Light . . . . . . 5-33
Security Light . . . . . . . . . . . . . . . . 5-33
High-Beam on Light . . . . . . . . . 5-33
Front Fog Lamp Light . . . . . . . . 5-33
Cruise Control Light . . . . . . . . . 5-34
Information Displays
Driver Information Center (DIC) . . . . . . . . . . . . . . . 5-34
Vehicle Messages
Vehicle Messages . . . . . . . . . . . 5-43
Battery Voltage and ChargingMessages . . . . . . . . . . . . . . . . . . 5-43
Brake System Messages . . . . 5-44
Door Ajar Messages . . . . . . . . . 5-45
Engine Cooling System Messages . . . . . . . . . . . . . . . . . . 5-46
Engine Oil Messages . . . . . . . . 5-47
Engine Power Messages . . . . 5-47
Fuel System Messages . . . . . . 5-48
Key and Lock Messages . . . . . 5-48
Lamp Messages . . . . . . . . . . . . . 5-48
Object Detection System Messages . . . . . . . . . . . . . . . . . . 5-48
Ride Control System Messages . . . . . . . . . . . . . . . . . . 5-49
Airbag System Messages . . . . 5-50
Anti-Theft Alarm System Messages . . . . . . . . . . . . . . . . . . 5-50
Starting the Vehicle Messages . . . . . . . . . . . . . . . . . . 5-50
Tire Messages . . . . . . . . . . . . . . . 5-51
Transmission Messages . . . . . 5-52
Vehicle Reminder Messages . . . . . . . . . . . . . . . . . . 5-52
Washer Fluid Messages . . . . . 5-53
Page 185 of 588
Black plate (35,1)Chevrolet Silverado Owner Manual - 2011
Instruments and Controls 5-35
DIC Buttons
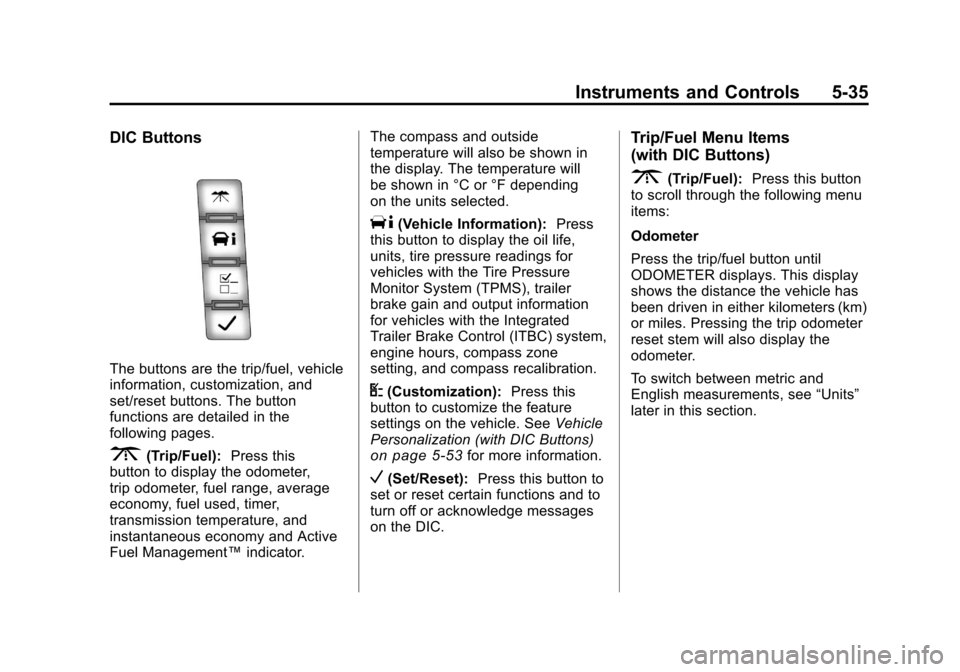
The buttons are the trip/fuel, vehicle
information, customization, and
set/reset buttons. The button
functions are detailed in the
following pages.
3(Trip/Fuel):Press this
button to display the odometer,
trip odometer, fuel range, average
economy, fuel used, timer,
transmission temperature, and
instantaneous economy and Active
Fuel Management™ indicator.The compass and outside
temperature will also be shown in
the display. The temperature will
be shown in °C or °F depending
on the units selected.
T(Vehicle Information):
Press
this button to display the oil life,
units, tire pressure readings for
vehicles with the Tire Pressure
Monitor System (TPMS), trailer
brake gain and output information
for vehicles with the Integrated
Trailer Brake Control (ITBC) system,
engine hours, compass zone
setting, and compass recalibration.
U(Customization): Press this
button to customize the feature
settings on the vehicle. See Vehicle
Personalization (with DIC Buttons)
on page 5‑53for more information.
V(Set/Reset): Press this button to
set or reset certain functions and to
turn off or acknowledge messages
on the DIC.
Trip/Fuel Menu Items
(with DIC Buttons)
3(Trip/Fuel): Press this button
to scroll through the following menu
items:
Odometer
Press the trip/fuel button until
ODOMETER displays. This display
shows the distance the vehicle has
been driven in either kilometers (km)
or miles. Pressing the trip odometer
reset stem will also display the
odometer.
To switch between metric and
English measurements, see “Units”
later in this section.
Page 192 of 588
Black plate (42,1)Chevrolet Silverado Owner Manual - 2011
5-42 Instruments and Controls
The trip odometer has a feature
called the retro-active reset. This
can be used to set the trip odometer
to the number of miles (kilometers)
driven since the ignition was last
turned on. This can be used if the
trip odometer is not reset at the
beginning of the trip.
To use the retro-active reset feature,
press and hold the trip odometer
reset stem for at least four seconds.
The trip odometer will display
the number of kilometers (km)
or miles (mi) driven since the
ignition was last turned on and
the vehicle was moving. Once
the vehicle begins moving, the trip
odometer will accumulate mileage.
For example, if the vehicle was
driven 8 km (5 miles) before it
is started again, and then the
retro-active reset feature is
activated, the display will show
8 km (5 miles). As the vehicle
begins moving, the display will
then increase to 8.2 km (5.1 miles),
8.4 km (5.2 miles), etc.Transmission Temperature
Press the trip odometer reset
stem until TRANS TEMP displays.
This display shows the temperature
of the automatic transmission fluid
in either degrees Celsius (°C) or
degrees Fahrenheit (°F) .
Trailer Gain and Output
On vehicles with the Integrated
Trailer Brake Control (ITBC) system,
the trailer brake display appears in
the DIC. Press the trip odometer
reset stem until TRAILER GAIN
and OUTPUT display.
TRAILER GAIN shows the trailer
gain setting. This setting can be
adjusted from 0.0 to 10.0 with either
a trailer connected or disconnected.
OUTPUT shows the power output
to the trailer any time a trailer with
electric brakes is connected. Output
is displayed in 0 to 10 bars. Dashes
may appear in the OUTPUT display.
To adjust trailer gain see
“Integrated
Trailer Brake Control System” under
Towing Equipment
on page 9‑111for
more information.
Compass Zone Setting
This display allows for setting the
compass zone. See Compass
on
page 5‑6for more information.
Compass Recalibration
This display allows for calibrating
the compass. See Compass
on
page 5‑6for more information.
Oil Life
To access this display, the vehicle
must be in P (Park). Press the trip
odometer reset stem until OIL LIFE
REMAINING displays. This display
shows an estimate of the oil's
remaining useful life. If you see
99% OIL LIFE REMAINING on the
display, that means 99% of the
current oil life remains. The engine
oil life system will alert you to
change the oil on a schedule
consistent with your driving
conditions.
Page 330 of 588
Black plate (36,1)Chevrolet Silverado Owner Manual - 2011
9-36 Driving and Operating
Starting Procedure
1. With your foot off the acceleratorpedal, turn the ignition key to
START. When the engine starts,
let go of the key. The idle speed
will go down as your engine gets
warm. Do not race the engine
immediately after starting it.
Operate the engine and
transmission gently to allow
the oil to warm up and lubricate
all moving parts.
The vehicle has a
Computer-Controlled Cranking
System. This feature assists in
starting the engine and protects
components. If the ignition key
is turned to the START position,
and then released when the
engine begins cranking, the
engine will continue cranking
for a few seconds or until the
vehicle starts. If the engine does
not start and the key is held
in START for many seconds,
cranking will be stopped after
15 seconds to prevent cranking
motor damage. To prevent gear damage, this system also
prevents cranking if the engine
is already running. Engine
cranking can be stopped by
turning the ignition switch to
the ACC/ACCESSORY or
LOCK/OFF position.
When the Low Fuel warning
lamp is on and the FUEL LEVEL
LOW message is displayed in
the Driver Information Center
(DIC), the Computer‐Controlled
Cranking System is disabled
to prevent possible vehicle
component damage. When
this happens, hold the ignition
switch in the START position
to continue engine cranking.
Notice: Cranking the engine for
long periods of time, by returning
the key to the START position
immediately after cranking has
ended, can overheat and damage
the cranking motor, and drain the
battery. Wait at least 15 seconds
between each try, to let the
cranking motor cool down. 2. If the engine does not start
after 5‐10 seconds, especially
in very cold weather (below
−18°C or 0°F), it could be
flooded with too much gasoline.
Try pushing the accelerator
pedal all the way to the floor
and holding it there as you hold
the key in START for up to
15 seconds. Wait at least
15 seconds between each try, to
allow the cranking motor to cool
down. When the engine starts,
let go of the key and accelerator.
If the vehicle starts briefly but
then stops again, do the same
thing. This clears the extra
gasoline from the engine. Do not
race the engine immediately
after starting it. Operate the
engine and transmission gently
until the oil warms up and
lubricates all moving parts.
Page 386 of 588
Black plate (92,1)Chevrolet Silverado Owner Manual - 2011
9-92 Driving and Operating
Passing
More passing distance is
needed when towing a trailer.
The combination will not accelerate
as quickly and is longer so it is
necessary to go much farther
beyond the passed vehicle
before returning to the lane.
Backing Up
Hold the bottom of the steering
wheel with one hand. To move
the trailer to the left, move that
hand to the left. To move the trailer
to the right, move your hand to
the right. Always back up slowly
and, if possible, have someone
guide you.
Making Turns
Notice:Making very sharp turns
while trailering could cause the
trailer to come in contact with
the vehicle. The vehicle could be
damaged. Avoid making very
sharp turns while trailering.
When turning with a trailer, make
wider turns than normal. Do this
so the trailer will not strike soft
shoulders, curbs, road signs, trees,
or other objects. Avoid jerky or
sudden maneuvers. Signal well
in advance.
If the trailer turn signal bulbs burn
out, the arrows on the instrument
panel will still flash for turns. It is
important to check occasionally to
be sure the trailer bulbs are still
working.
Driving on Grades
Reduce speed and shift to a
lower gear beforestarting down
a long or steep downgrade. If the
transmission is not shifted down,
the brakes might get hot and no
longer work well.
Vehicles can tow in D (Drive). Shift
the transmission to a lower gear if
the transmission shifts too often
under heavy loads and/or hilly
conditions.
The Tow/Haul Mode may be used
if the transmission shifts too often.
See Tow/Haul Mode on page 9‑49.
When towing at high altitude on
steep uphill grades, consider the
following: Engine coolant will boil
at a lower temperature than at
normal altitudes. If the engine is
turned off immediately after towing
at high altitude on steep uphill
grades, the vehicle may show
signs similar to engine overheating.
Page 388 of 588
Black plate (94,1)Chevrolet Silverado Owner Manual - 2011
9-94 Driving and Operating
Leaving After Parking on a Hill
1. Apply and hold the brake pedal.
2. Start the engine.
3. Shift into a gear.
4. Release the parking brake.
5. Let up on the brake pedal.
6. Drive slowly until the trailer isclear of the chocks.
7. Stop and have someone pick up and store the chocks.
Maintenance when Trailer
Towing
The vehicle needs service more
often when pulling a trailer. See this
manual's Maintenance Schedule or
Index for more information. Things
that are especially important in
trailer operation are automatic
transmission fluid, engine oil, axle
lubricant, belts, cooling system, and
brake system. It is a good idea to
inspect these before and during
the trip.
Check periodically to see that all
hitch nuts and bolts are tight.
Trailer Towing
If the vehicle has a diesel engine,
see the Duramax diesel supplement
for more information.
If the vehicle is a hybrid, see
the hybrid supplement for more
information. Do not tow a trailer during break‐in.
See
New Vehicle Break-In
on
page 9‑32for more information.
{WARNING
The driver can lose control when
pulling a trailer if the correct
equipment is not used or the
vehicle is not driven properly.
For example, if the trailer is too
heavy, the brakes may not work
well or even at all. The driver and
passengers could be seriously
injured. The vehicle may also be
damaged; the resulting repairs
would not be covered by the
vehicle warranty. Pull a trailer
only if all the steps in this section
have been followed. Ask your
dealer for advice and information
about towing a trailer with the
vehicle.
Page 423 of 588
Black plate (1,1)Chevrolet Silverado Owner Manual - 2011
Vehicle Care 10-1
Vehicle Care
General Information
General Information . . . . . . . . . . 10-3
California Proposition65 Warning . . . . . . . . . . . . . . . . . 10-3
California Perchlorate Materials Requirements . . . . 10-3
Accessories and Modifications . . . . . . . . . . . . . . . 10-3
Vehicle Checks
Doing Your OwnService Work . . . . . . . . . . . . . . . 10-4
Hood . . . . . . . . . . . . . . . . . . . . . . . . 10-5
Engine Compartment Overview . . . . . . . . . . . . . . . . . . . 10-6
Engine Oil . . . . . . . . . . . . . . . . . . . 10-7
Engine Oil Life System . . . . . . 10-9
Automatic Transmission Fluid (4-Speed Transmission) . . . 10-11
Automatic Transmission Fluid (6-Speed
Transmission) . . . . . . . . . . . . . 10-14 Manual Transmission
Fluid . . . . . . . . . . . . . . . . . . . . . . 10-17
Hydraulic Clutch . . . . . . . . . . . . 10-17
Engine Air Cleaner/Filter . . . . 10-18
Cooling System . . . . . . . . . . . . 10-19
Engine Coolant . . . . . . . . . . . . . 10-20
Engine Overheating . . . . . . . . 10-24
Overheated Engine Protection
Operating Mode . . . . . . . . . . . 10-26
Engine Fan . . . . . . . . . . . . . . . . . 10-26
Power Steering Fluid . . . . . . . 10-27
Washer Fluid . . . . . . . . . . . . . . . 10-28
Brakes . . . . . . . . . . . . . . . . . . . . . 10-29
Brake Fluid . . . . . . . . . . . . . . . . . 10-30
Battery . . . . . . . . . . . . . . . . . . . . . 10-32
Four-Wheel Drive . . . . . . . . . . . 10-32
Front Axle . . . . . . . . . . . . . . . . . . 10-34
Rear Axle . . . . . . . . . . . . . . . . . . 10-35
Noise Control System . . . . . . 10-36
Starter Switch Check . . . . . . . 10-37
Automatic Transmission Shift Lock Control Function
Check . . . . . . . . . . . . . . . . . . . . . 10-38
Ignition Transmission Lock Check . . . . . . . . . . . . . . . . . . . . . 10-38 Park Brake and P (Park)
Mechanism Check . . . . . . . . 10-39
Wiper Blade Replacement . . . . . . . . . . . . . . 10-39
Glass Replacement . . . . . . . . 10-40
Headlamp Aiming
Headlamp Aiming . . . . . . . . . . 10-40
Bulb Replacement
Bulb Replacement . . . . . . . . . . 10-43
Halogen Bulbs . . . . . . . . . . . . . . 10-43
Headlamps (Silverado) . . . . . 10-43
Pick-Up Box Identification
and Fender Marker
Lamps . . . . . . . . . . . . . . . . . . . . 10-44
Taillamps (Chassis Cab Models) . . . . . . . . . . . . . . . . . . . 10-44
Taillamps, Turn Signal, Stoplamps, and Back-Up
Lamps . . . . . . . . . . . . . . . . . . . . 10-45
Center High-Mounted Stoplamp (CHMSL) and
Cargo Lamp . . . . . . . . . . . . . . 10-45
License Plate Lamp . . . . . . . . 10-46
Replacement Bulbs . . . . . . . . . 10-46
Page 429 of 588
Black plate (7,1)Chevrolet Silverado Owner Manual - 2011
Vehicle Care 10-7
A.Engine Air Cleaner/Filteron
page 10‑18.
B. Coolant Surge Tank and Pressure Cap. See Cooling
System on page 10‑19.
C. Positive (+) Terminal. See Jump
Starting on page 10‑96.
D. Battery on page 10‑32.
E. Remote Negative (−) Terminal (Out of View). See Jump
Starting on page 10‑96.
F. Automatic Transmission Dipstick (Out of View). See
“Checking the Fluid Level”
under Automatic Transmission
Fluid (4-Speed Transmission)
on page 10‑11or Automatic
Transmission Fluid (6-Speed
Transmission) on page 10‑14.
G. Engine Oil Fill Cap. See “When
to Add Engine Oil” under
Scheduled Maintenance
on
page 11‑2. H. Engine Oil Dipstick (Out of
View). See “Checking Engine
Oil” under Scheduled
Maintenance on page 11‑2.
I. Engine Cooling Fan. See Cooling System on page 10‑19.
J. Power Steering Fluid Reservoir. See Power Steering Fluid
on
page 10‑27.
K. Brake Master Cylinder Reservoir. See Brake Fluid
on
page 10‑30.
L. Engine Compartment Fuse
Block on page 10‑48.
M. Windshield Washer Fluid Reservoir. See “Adding Washer
Fluid” under Washer Fluid
on
page 10‑28.
If the vehicle has a diesel engine
and/or an Allison Transmission, see
the Duramax
®Diesel Supplement.
Engine Oil
Checking Engine Oil
For diesel engine vehicles, see
“Engine Oil” in the Duramax Diesel
Supplement.
It is a good idea to check the engine
oil level at each fuel fill. In order to
get an accurate reading, the oil
must be warm and the vehicle
must be on level ground.
The engine oil dipstick handle
is a yellow loop. See Engine
Compartment Overview
on
page 10‑6for the location
of the engine oil dipstick.
1. Turn off the engine and give the oil several minutes to drain back
into the oil pan. If this is not
done, the oil dipstick might
not show the actual level.
2. Pull out the dipstick and clean it with a paper towel or cloth,
then push it back in all the way.
Remove it again, keeping the tip
down, and check the level.